Follow:
    Design Team Projects

    “I Miss You” Mini Slimline Card

    Hey Crafty Peeps! Priscilla here from Nubble Light Designs.Today I am sharing a card I made using the just released Reversed Scalloped Mini Slimline with Hello die set from Kat Scrappiness.


    To make this card, I created a cool ink blend with 3 Distress Oxide inks through a DIY cardstock stencil created using a rainbow slimline die. Sounds confusing? Keep reading to see how I did this.


    Card Details:

    1. Created a white cardstock mini slimline card base (6″ x 7″, scored at 3.5″)and set it aside.
    2. Die cut the top layer using the new Reversed Scalloped Mini Slimline with Hello die set and secured the scalloped frame to the middle portion using tape on the back.
    3. Made a DIY stencil by die cutting a rainbow shape opening in white cardstock using the Slimline Rainbow Die,laid it over my card front, and blended “Black Soot,” “Seedless Preserves,” and “Carved Pumpkin” Distress Oxide inks through it.

    4. Used the same ink blend over the “Hello” die cut and backed it with 2 more die cut layers in black to give it more dimension.
    5. Die cut one of the clouds from the same Slimline Rainbow Die collection, and stamped “I miss you” from the Quokka’n Up stamp set, adding 2 more die cut layers in black.
    6. Adhered both die cut sentiments above and below the ink blended opening and then adhered this finished layer onto the mini slimline card base.

    Thank you so much for stopping by! Don’t forget to check out what’s NEW in Kat’s Shop, and follow my blog and Instagram for more “Kat Scrappiness Amazingness”!

    Stay Safe . . .

    Priscilla 🌈

    The supplies I used are listed and linked below. I would be so grateful if you use these affiliate links  to grab your Kat Scrappiness Goodies! No extra cost to you!

    Design Team Projects

    So Proud of You!

    Good Morning All of My Card Making Friends!

    This is Kathy from Expressive Paper.  I have been busy making cards for fall and Halloween.  Then I remembered December is not too far in the future and I need a graduation card!  This card is pretty simple and perfect for your graduate.

    Card Details

    •  I cut 6 of the “Proud of You” pieces and one of the shadows with a layering card stock
    • I used the 5 X 7 Stitched Rectangle Dies.  This is a 6 piece rectangular die set that is perfect for larger cards. Select the largest frame and the frame two sizes smaller. (your die cut word should fit into the rectangle)
    • Use whatever ink you use for ink blending and blend the shadow die piece. I used the colors of the school the student is graduating from. I also used the Mini Ink Blending Brushes
    • I next took a pearlescent spray and used it on the shadow and the card pieces.
    • Cut, fold and score your 5 x 7 card base
    • Adhere 5 of your “Proud of You” to the smaller stitched rectangle. I centered the dies but you could stagger them, add more whatever you want!
    • Adhere the 6th die cut on top of the shadow and place it in the bottom third of your card.
    • I added foam tape to the back of the main panel for dimension.
    • Adhere some Grey Opal Pearls to your card panel and you are done.

    Thank you so much for visiting the blog.  I would appreciate it if you would follow my blog I would love for you to join me on Instagram too! Currently, Kat Scrappiness is having a sale on all things in the Halloween and  Thanksgiving categories.  The sale goes on until October 25th so please take advantage of it! Click on the photo below for more details. The savings code is SPOOKYSAVINGS.  Have a great day!

    Design Team Projects

    Halloween Sparkle Mini Slimline Card

    Hi everyone, it’s Tina here. Today I have a Halloween sparkle Mini Slimline card to share with you using the Creepy Crawly dies, Boo-gy Ghosts dies, Crafter Essentials Fall dies, Crafter Essentials Halloween dies and the Happy Halloween w/Shadow dies. Below you will find the steps to create your own card.

    Step 1 – Trim White Cardstock to 7”x 6”, score at 3 1/2” and fold in half for a vertical side fold card. (Mini Slimeline)

    Step 2 – Trim Black Cardstock to 3 1/2” x 6”. Diecut Never Ending Circles using a Masking Sheet. Place the negative on the Black Cardstock in the upper right corner. Apply Distress Oxide Pumice Stone using a Blender Brush. Sprinkle some water. Remove the masking sheet. Add Distress Oxide Black Soot and Pumice Stone on a Craft Mat. Spray it with water and using an acetate sheet add it to the background. Sprinkle Shimmer Spritz and let dry.

    Step 3 – Diecut Mini Slimline Double Stitched using the Background created from Step 2. Adhere to card using Bearly Art Precision Glue.

    Step 4 – Diecut Creepy Crawly using Glitter Cardstock for the web and Black Cardstock for the spider. Adhere to card using Bearly Art Precision Glue.

    Step 5 – Diecut Crafter Essentials Fall using Black Cardstock for the tree. Adhere to card using Bearly Art Precision Glue. I used only placed the glue on the tree trunk so the branches are loose.

    Step 6 – Diecut Boo-gy Ghost using White Cardstock and adhere to card using Bearly Art Precision Glue.

    Step 7 – Diecut Crafter Essentials Halloween using Black Cardstock for the bats. Adhere to card using Bearly Art Precision Glue.

    Step 8 – Diecut Happy Halloween using Metallic Cardstock and adhere to card using Bearly Art Precision Glue.

    Step 9 – For added interest and sparkle randomly adhere Royal Purple Rhinestones using Bearly Art Precision Glue.

    The photos don’t do the sparkle justice so I added a short video below.

    02EB3DA6-D06A-4D8B-B374-A89F5CD5A541

    Below is a link to all the products used. Thank you for stopping by and Happy Crafting!

    Products Used:  

    https://linkdeli.com/widget.js?id=f5e8378456858c916708

    Giveaways, New Releases, News

    NEW PRODUCT RELEASE OCTOBER 2021


    Hello friends and welcome to the Kat Scrappiness October Product Release!

    Today we are introducing some new Design Blog and Video Team Members and wow, do we have a lot in store for you.

    We also have a GIVEAWAY so make sure you read all the way to the end of this post to see how you can WIN a $25 KatScrappiness Brand Gift Card!!! 


    Thank you to our new video team members* for the introduction video’s:

    INTRODUCTION VIDEO BY NEW VIDEO TEAM MEMBER- AMANDA BARTHOLOMEW

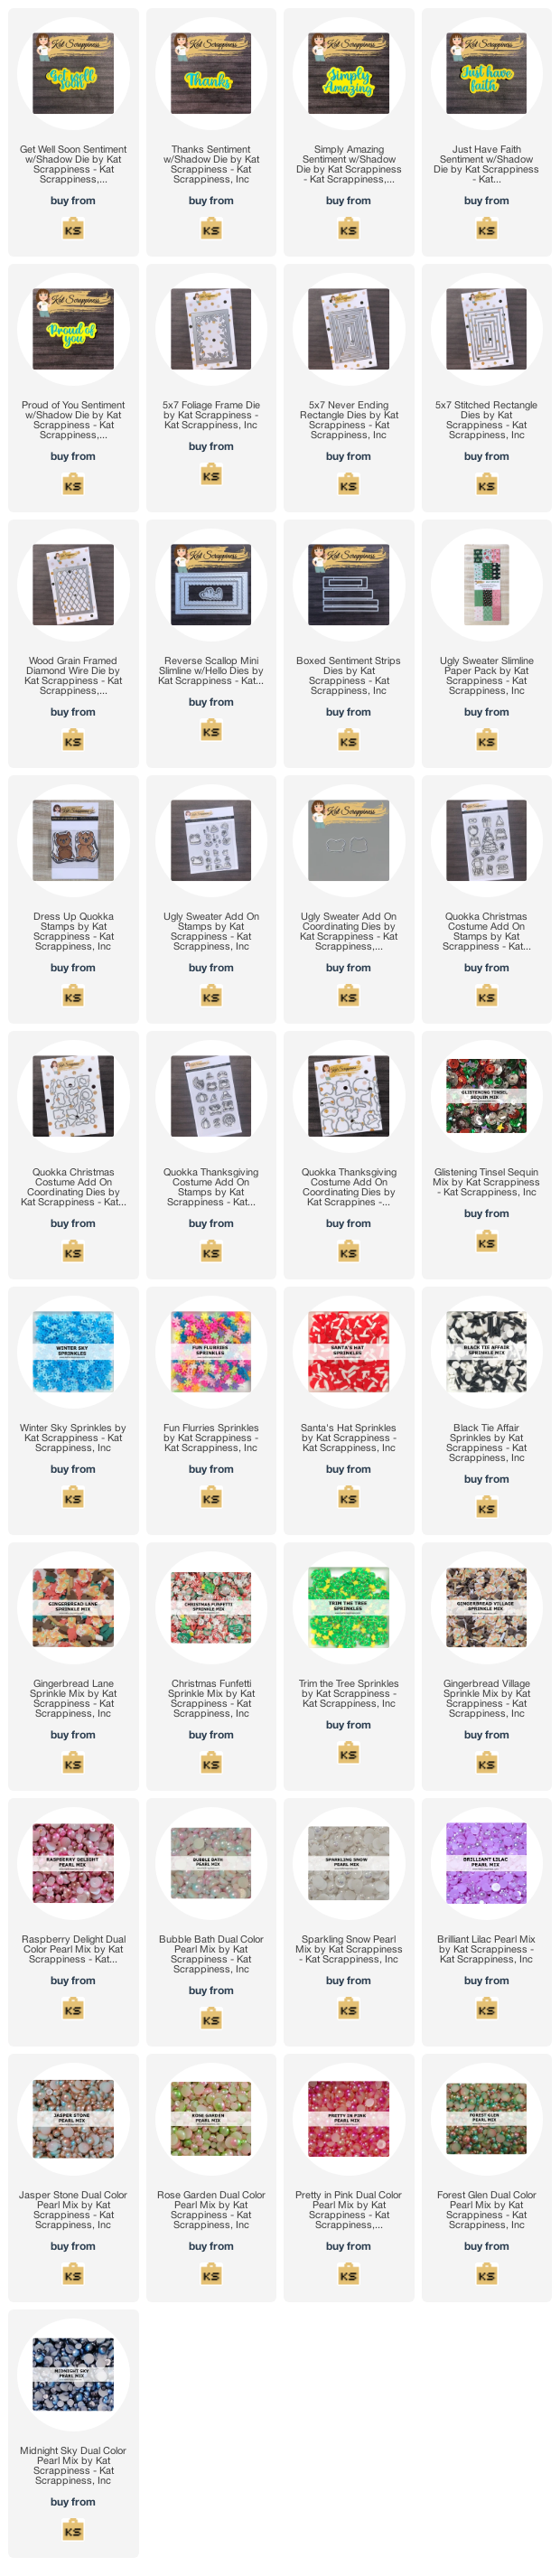
    Sentiment Dies with Shadow:

    Today we have 5 sentiment dies with Shadow being released. We are so happy to be adding more and more of these to the product line. Let us know in the comments what you would like to see as a sentiment/shadow set and it may just become a reality.

    Get Well Soon:

    This sentiment die has a 1/4″ shadow.  You can use the sentiment with or without the shadow.  This die measures approximately 3 5/8″ x 1 3/4″.

    Just Have Faith with Shadow:

    This sentiment die has a 1/4″ shadow.  You can use the sentiment with or without the shadow.  This die measures approximately 3 3/4″ x 2″.

    Proud of you with Shadow:

    This sentiment die has a 1/4″ shadow.  You can use the sentiment with or without the shadow.  This die measures approximately 3 1/2″ x 1 7/8″ .

    This sentiment die has a 1/4″ shadow.  You can use the sentiment with or without the shadow.  This die measures approximately 3 5/8″ x 2 1/8″.


    This sentiment die has a 1/4″ shadow.  You can use the sentiment with or without the shadow.  This die measures approximately 3 1/2″ x 1 3/8″.


    INTRODUCTION VIDEO’s BY NEW VIDEO TEAM MEMBER- CRAFTY AL

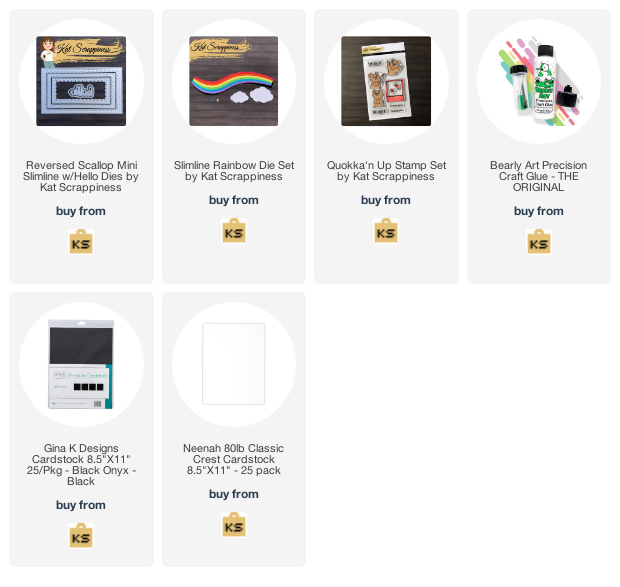
    Reversed Scalloped Mini Slimline with Hello:

    Included in this set are three nesting reverse scallop dies and a “hello” sentiment die with shadow layer.  The reverse scallop creates a perfect border/layer in three sizes for your mini slimline cards.

    Approximate Measurements:

    • Large: 3 1/4” x 5 3/4”
    • Medium: 2 1/2” x 4 7/8”
    • Small: 1 7/8” x 4 1/4”
    • “Hello” w/Shadow: 1 3/4” x 1”

    5″ x 7″ Foliage Frame Die:

    This die is very similar to our Original Foliage Frame Die (designed by Tina Dornbaum) but designed especially to fit 5×7 cards!

    This die measures approximately 4 7/8″ x 6 7/8″ which will leave a uniform and perfect border around the die cut.  The open area inside measures approximately 2 1/4” x 4” and the outside frame measures 1/2”.

    5″ x 7″ Never-ending Rectangle Die Set:

    Our 5×7 Never Ending Rectangle Dies includes 14 nesting dies ranges in size from 3/8” x 2 3/8“ up to 4 7/8” x 6 7/8” – perfect layers for your 5×7 cards!

    5″ x 7″ Diamond Wire Wood Grain Frame Die:

    This die is very similar to our Original Wood Grain Framed Diamond Wire Die, but designed especially to 5×7 cards! 

    This die measures approximately 4 7/8″ x 6 7/8″ which will leave a uniform and perfect border around the die cut. The wood grain frame measures approximately 3/8”.

    5″ x 7″ Stitched Rectangle Dies:

     This die set includes six (6) stitched rectangle dies that measure approximately:

    • 4 7/8” x 6 7/8”
    • 4” x 5 7/8”
    • 3 1/8” x 5”
    • 2 1/4” x 4”
    • 1 3/8” x 3”
    • 1/2” x 2”


    Boxed Sentiment Strips:

    The Stitched Sentiment Strips Dies include 5 dies which are created in different sizes to match all of your favorite sentiment stamps.  The dies measure approximately:

    • 3” x 1/2”
    • 4” x 1”
    • 4 1/2” x 3/4”
    • 5” x 1/2”
    • 5” x 3/8”


    INTRODUCTION VIDEO BY NEW VIDEO’s TEAM MEMBER- BRIDGET CASEY

    Ugly Sweater Paper Pad:

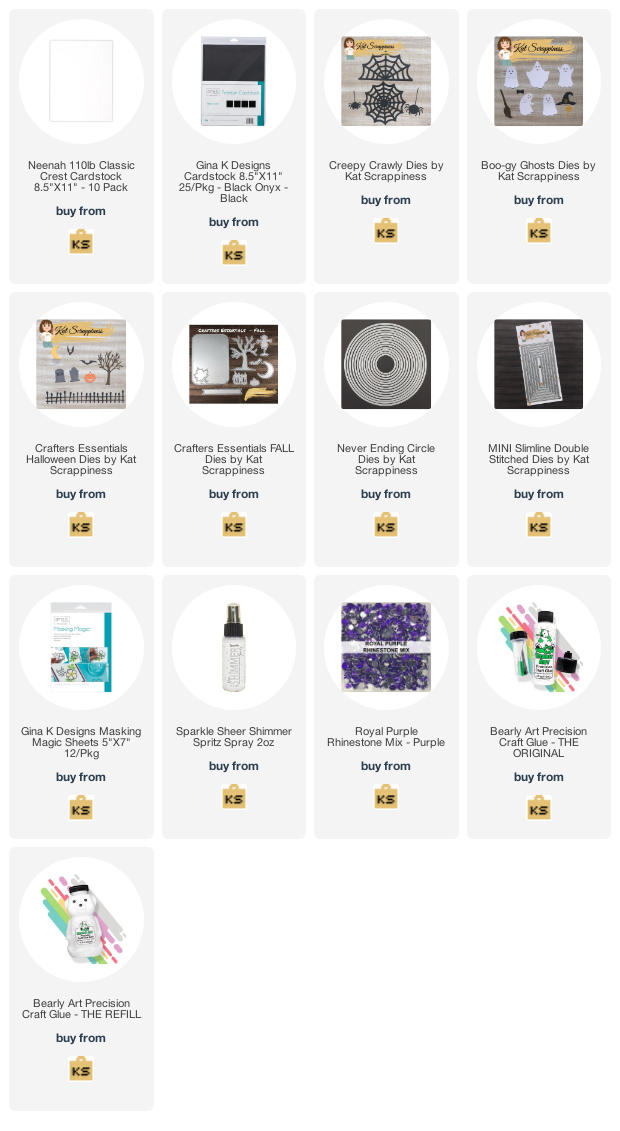
    Despite the name, it doesn’t have to be ugly! This adorable Ugly Sweater Paper Pack will make any holiday card fun and easy to design.


    Dress Up Quokka Add On Coordinating Dies:

    Thanksgiving

    Christmas


    INTRODUCTION VIDEO BY NEW VIDEO TEAM MEMBER- NICKI BAXLEY


    *TASHA RJ AND KIMBERLY SKINNER WILL BEGIN WITH THEIR VIDEO’S LATER THIS MONTH!!! 

    Grab a glass of Sweet Tea (or any beverage you have in mind) while browsing through all of the beautiful projects prepared by the design team! 

     Are you ready to get inspired?


    Thank you to our new and veteran blog team members for your awesome projects!!!

    BLOG TEAM MEMBER- CAREN BARTHOLOMEW

    Caren did such a great job on these cards, for the first one that watercolor background was perfect to highlight the “Proud of you” sentiment with the shadow. I just love this card. 5×7 Stitched Rectangle dies, Proud of You with Shadow die, Gray Opal pearls

    Shakers are my passion so this one really hit home with me. Caren used the Boxed Sentiment dies, Reversed Scalloped Mini SL dies, Ugly Sweater SL paper, Glistening Tinsel sequin mix, Quokka Christmas Costume Add on stamp/dies, Ugly Sweater Add on stamp/dies, Dress Up Quokka stamp/dies


    BLOG TEAM MEMBER – DONNA GREEN-IDLET

    Thanksgiving is just around the corner and this card is just a great one to send to that special friend. Here is the list of products Donna used: KS Thanks w/Shadow Die, KS Foliage 5×7 Frame, KS Never Ending Rectangles 5×7, KS Box Sentiment, KS Quokka Thanksgiving Costume Add on and coordinating dies

    Now look at this adorable Gingerbread man, Donna did a great job with this shaker; and here is the list of products she used

    KS Ugly Sweater Paper Pad,  KS Mini Slimline Reversed Scalloped w/hello dies , KS Christmas Gingerbread Village Sprinkle Mix


    BLOG TEAM MEMBER – DONNA WALLS

    This shaker card that Donna makes me want to have a Happy Christmas, and I am sure the recipient will think so as well. Donna used the following products:            Ugly Sweater SL Paper, Quokka with Ugly Sweater Costume Add-on, Reversed Scalloped Mini Slimline Nesting Dies, Boxed Sentiment Dies, Fun Flurries Sprinkles

    With the ink blended background and the shimmer cardstock, this card from Donna is just a WOW:

    5×7 Stitched Rectangle Nesting Dies, Just have Faith Die with Shadow, Raspberry Delight Pearl Mix, Midnight Fandango Pearl Mix,


    NEW BLOG TEAM MEMBER – KATHY PISUPATI

    New to our team Kathy knocked it out of the park with this cute shaker

    Mini Slimline Reversed Scalloped Edge Mini Slimline Dies Ugly Sweater Paper Pack  Glistening Tinsel Sequins

    Ok, this card is so cute, it would certainly make me feel better should I have the pleasure of receiving it.

    Quokka Stamp & Die Get Well Soon Die Ugly Sweater Paper Pack Wood Grain 5 x 7 Die Cover plate Glistening Tinsel Sequins


    BLOG TEAM MEMBER – MARIA RUSSELL

    Maria’s ink blended background just makes this card POP!!!

    Another shaker in the lineup, and this one is so pretty and clean looking.


    NEW BLOG TEAM MEMBER – NORA NOLL

    Great job with this card Nora, and that mirrored cardstock with the shiny starts makes this shaker amazing.

    Is it time to start decorating yet, because this adorable Quokka’s are ready for Christmas. Shhhh don’t tell them Halloween isn’t here yet.
    KS Ugly Sweater Paper, KS Christmas FunFetti Sprinkle Mix (decorations on the Xmas Tree), KS Glistening Tinsel Sequin Mix, KS Dressed Up Quokkas Stamps and Dies


    BLOG TEAM MEMBER – PRISCILLA JOSEPH


    While it might be cold where this adorable Quokka’s are, their Ugly Sweaters are simply adorable.

    I’m proud of Pricilla, this card is amazing, and wow, she even used leaves from her yard to embellish it.

    NEW BLOG TEAM MEMBER- SAMMI OFFIELD

    Just like the sentiment used… this card is Simply Amazing.


    Even though these are Quokka’s not Chipmunks, they make me think of Alvin, Simon and Theodore, or maybe Brittany.


    BLOG TEAM MEMBER – SHERI GILSON

    Not just one shaker, but two… ok this is awesome.

    KS Christmas Funfetti Sprinkle Mix


    Now this is a Fall colored Thanks-Shaker card and it is awesome.

    BLOG TEAM MEMBER -TINA DORNBAUM

    Another set of Cold Quokka’s awesome job Tina.

    Reversed Scalloped Mini Slimline die, Ugly Sweater Patterned Paper, Dress Up Quokkas stamps and dies, Ugly Sweater Add On Stamps and dies, Boxed Sentiment strips dies, Forest Glen Pearl mix

    Great combination with the Thanks, Foliage frame and a Shaker Card


    BLOG TEAM MEMBER – WALESKA GALINDO

    This mini slimline is just screaming pretty.

    This little quokka is thinking of someone special that must be Simply Amazing.


    So there you have it for our October Release!  The girls created some AMAZING SAMPLES, don’t you think?!   We are so very lucky to have these talented girls on the design team!

    Giveaway!

    *Would you like to WIN a $25 gift card for Kat Scrappiness Branded Products?  We will pick ONE very lucky winner! (*U.S. residents only but if international winner is chosen, winner will have to pay for shipping).

    Here’s how to win:

    Comment on this blog post and tell us who inspired you today and what products you loved the most.  You have until Sunday, October 24th to comment  — winner will be announced on Monday, October 25th.

    Grab your favorites now before they sell out!!   They are listed and linked below.  Thanks for stopping by and HAPPY SHOPPING!


    Coupons & Sales, Design Team Projects

    Creepy Crawly Coffin

    Hello Friends and Happy Friday!  It’s Donna W. here today and I’m sharing this Halloween project that’s sure to make your skin crawl…..unless you don’t have Arachnophobia!

    But before I get to the project, I would like to remind everyone of the Spooky Sale-A-Bration at the Kat Scrappiness Shop.  The Sale allows you to save 15% on products on the Halloween and Thanksgiving categories.

    I’ve created a Coffin Shaped Treat Box and decorated it using cuts from the Kat Scrappiness Creepy Crawly Die Set  and papers from the Boo To You Slimline Paper Pack.

    This Treat Coffin measures 5″ long x 2.75″ at the widest point x 1.25″ in height.  It is a free SVG cut file from Bird’s Cards and I cut it using my Cricut Explore Air.

    I’ve added googly eyes to the large spider and colored in the smaller spider’s eyes using Gelly Roll Pens.  For the finishing touches, I’ve added Silver Rhinestones and Dark Purple Amethyst Rhinestones; both from Kat Scrappiness along with a purple polka dot ribbon from my stash.
    Thanks for stopping by today and until next time, Happy Halloween Crafting!
    Donna W.


    Design Team Projects

    Lift Your Spirits

    Hello everyone!

    It’s Donna Idlet here sharing a mini slimline Halloween card using products from the NEWLY released products. I am using the Kat Scrappiness Lift Your Spirits die with shadow, Boo-Gy Ghosts Dies, and the Crafters Essentials Halloween Dies.

    Before I get started I wanted to let you know Kat Scrappiness has a Spooky Sale-A-Bration on all Halloween and Thanksgiving category is 15% off until October 25, use Code “SPOOKYSAVINGS” at checkout.

    Here is how I created my card:
    • Cut the white Slimline Card Base: 6″ x 3 1/2″ (6″ x 7″, scored at 3 1/2″).
    • Die cut the top layer using KS Mini Slimline Embossed Edged dies.
    • Inked blended the background with distress inks.
    • Die cut the Lift Your Spirits die with shadow, Boo-Gy Ghosts Dies, and the Crafters Essentials Halloween Dies.
    • Assembled the card and finished off with adding Googly Eyes to the ghost and KS Yellow Star Sprinkles.

    I created a matching envelop using the KS Snail Mail – Mini Slimline Envelope Dies.  This is the front view.

    This is the back view of the KS Snail Mail – Mini Slimline Envelope Dies.

    Thank you so much for stopping by, please come back again soon!

    Here is a list of supplies I used on my card, Affiliate Links used at no additional cost. Thank you for your support.

    Design Team Projects

    R.I.P. – Spooky Cemetery Halloween Card

    Hey Crafty Peeps! Priscilla here from Nubble Light Designs.Today I am sharing a spooky slimline Halloween card using the Crafters Essential Halloween Dies from Kat Scrappiness.


    This collection, which will work with A2, Slimline, Mini Slimline cards, and more, includes 8 individually designed dies that you can mix and match to create a multitude of scenes.


    Card Details:

    1. Created a black cardstock slimline card base (8.5″ x 7″, scored at 3.5″) and adhered a honey colored cardstock layer over it.
    2. Using Distress Oxide inks, created an eerie sky background, added gold spatter, and then die cut it out using one of the Kat Scrappiness Distressed Edge Nesting Slimline Dies before adhering it to the honey cardstock layer.
    3. Die cut the spooky tree, pumpkin, headstones, fence, bat, and moon (ALL included in the collection!) and adhered them to the front of the card to create a cemetery scene.

    4. Die cut the sentiment “Happy Halloween” 3 times out of gold cardstock for greater dimension and adhered them to the front of the card.

    5. For an even eerier effect, I added “cobwebs” to the tree and headstones.


    Thank you so much for stopping by! Don’t forget to check out what’s NEW in Kat’s Shop, and follow my blog and Instagram for more “Kat Scrappiness Amazingness”!

    Stay Safe . . .

    Priscilla 🎃

    The supplies I used are listed and linked below. I would be so grateful if you use these affiliate links  to grab your Kat Scrappiness Goodies! No extra cost to you!