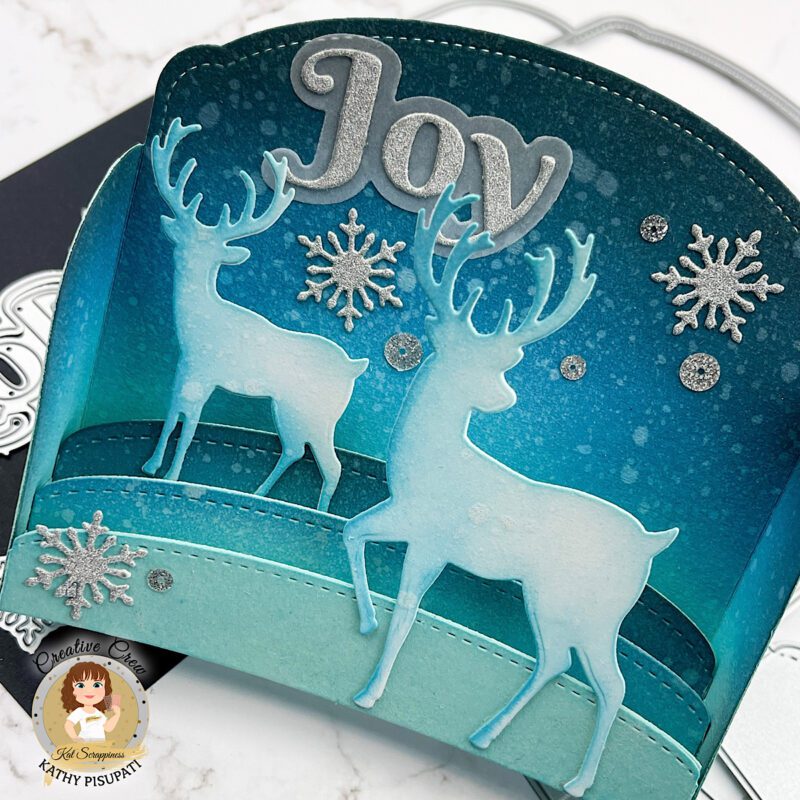
Good morning! Kathy here today with a 3D pop-up card for you. Christmas may be over but it is still snowing and the perfect time for a winter scene! Today’s card features the new Reindeer Duo Dies, the 3D Pop-Up Box Die with the Stitched Hills Add On and a few snowflakes from the Night Before Christmas Window Scenedie set. This 3D Box is easy to make. I suggest you head over to our YouTube channel and see the tutorial for this box HERE. Today I will explain how I created this scene.
First you will cut the 3D-Box pieces. I started by cutting them from a pale blue card stock. Then I ink-blended the front side of the box die-cut and the hill pieces using Distress Oxides. The colors I used were Uncharted Marina, Prize Ribbon and Broken China. I also used some Black Soot at the top of the box panel. Use the same combo for the hill add-ons in the same order. I then splattered the panels with water and let them dry.
Next, die-cut your reindeer twice. I used white card stock and then lightly brushed on some Uncharted Marina mostly on the left side of one set of deer. Glue the other die-cut to the back. This provides a bit more stability to the deer.
Now using the snowflakes from the Night Before Christmas die-cut from some silver glitter card stock. I have 3 on this card. For the sentiment I used the Joy Word/Shadow Die. the shadow was cut in vellum and the word in the same glitter card stock as the snowflakes.
Assemble your box. It is easy, score all of the pieces and the main thing to remember is to start with the largest hill. Add strong adhesive to the left tab, align the edge of the tab to the left fold of the main panel. Make sue it is straight. Fold the left side on to the hill die piece. Repeat this for the right side. The smaller hills will be done the same just align the bottom of each piece with the bottom edge of the last hill. OR watch the tutorial HERE.

Add your bits and pieces. I started with the front piece and worked backwards. Just make sure you continually open the box to make sure pieces are where you want them. (TIP: Use temporary tape on pieces for placement). Everything was then added with liquid glue. I also added some of the new Silver Glitter Sequins.
These pop-up cards are really easy and so much fun. The best part is they fit into an A2 envelope! Thanks for stopping by the blog today. I truly appreciate it. Make sure you check out all of the new collection in the Kat Scrappiness Store. Have a fabulous day!