
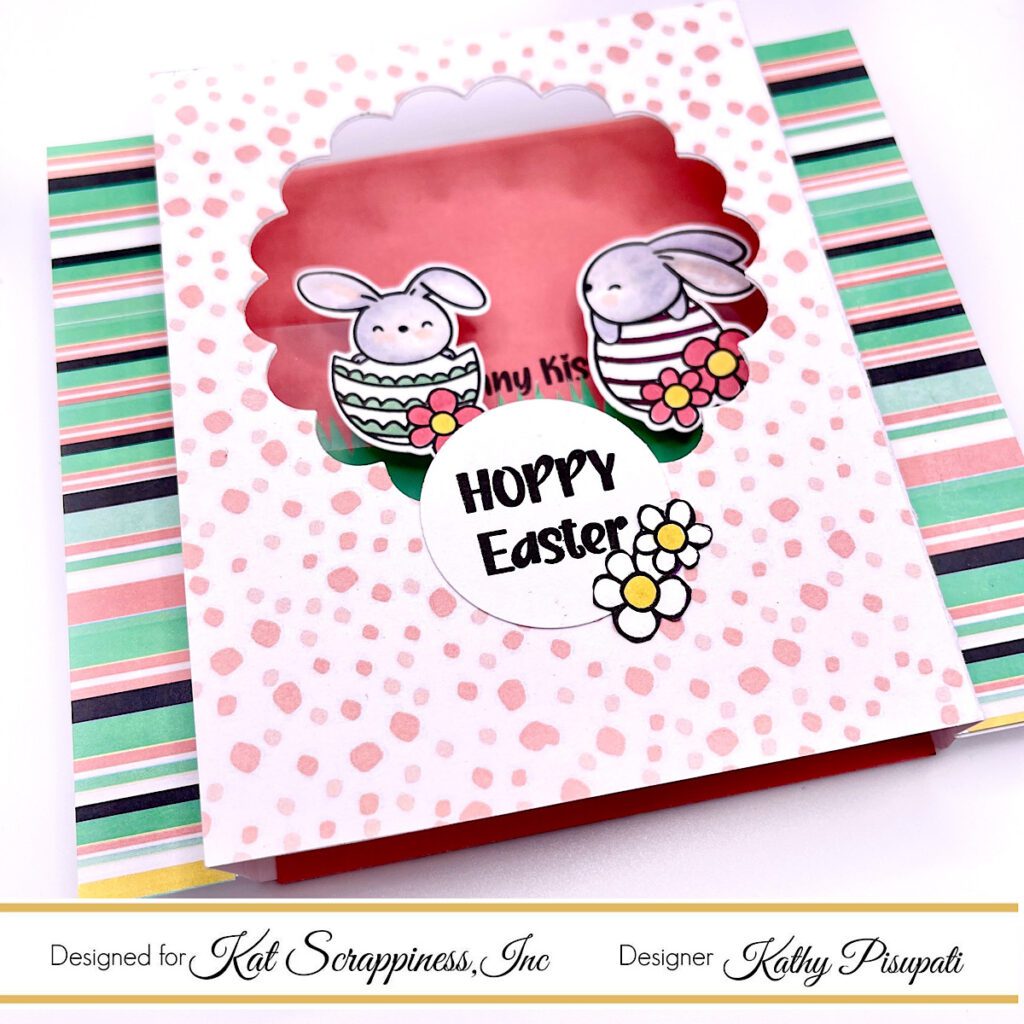
Good Morning, it’s Kathy from the Design Team! It’s time for some more inspiration on the Kat Scrappiness blog today. While Easter is over I had to share my last Easter wish of the season with you. This is a cute interactive shadow box with the adorable Hippity Hoppity Stamp Set and Hippity Hoppity Sentiment Stamps. I also used the Spring Fling paper pack from Kat Scrappiness. The colors are amazing, the paper is double-sided and the pack also includes solid colors. This card was inspired by Funn University and Mary Gunn. I will link to the video below so you can get measurements for a card that measures 4.25″ x 4.25″ Mine is larger and I fumbled a bit with it so do as I say not as I do, check out the video!

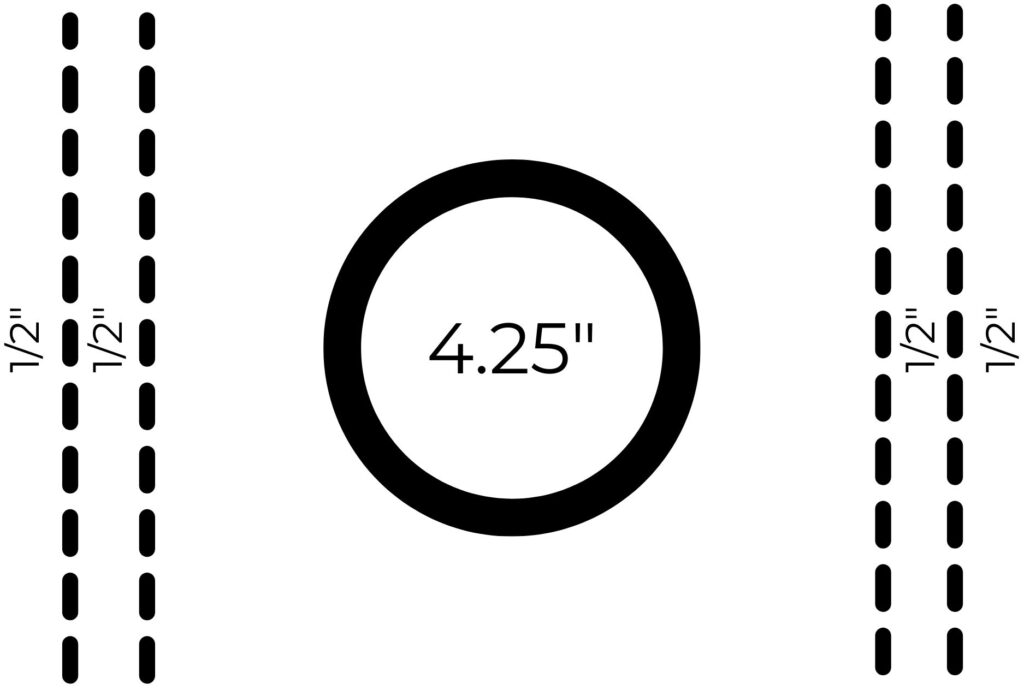
As I mentioned I am giving you the dimensions for a card that measures 4.25″ x 4.25″. Here is a tip for making this card – DON’T use 110 lb card stock. This card will stand on its own with 80 lb card stock. I have included a graphic below to show you the measurements and score lines.
Card Supplies
- Kat Scrappiness Spring Fling Paper Pack
- Kat Scrappiness Hippity Hoppity Bunny Stamp Set
- Kat Scrappiness Hippity Hoppity Sentiment Stamps
- 80 lb Neenah Classic Crest Solar White
- Scissors
- Sturdy acetate 8.25″ x 1″ strip
- Circle Die
- Double-sided adhesive (Tip: You need the strength of this adhesive- ask me how I know!)
- Paper Cutter
- Bone Folder
- Scoring Tool
- Alcohol Markers
Card Details
I am not going to go into too many details because it is better to watch the video. You can make your card any size you want so remember that whatever the size of your center panel you need to add 1″ to get the correct envelope size. So for a 4,25″ center your final card inserted into an envelope will be 5.25″. So if you use the template above your card will fit into a standard A2 envelope.
Here are the rough details for the card I made. (Again, I am not going to give you my measurements. Follow the template for a more normal-sized card.)
- Cut 2 pieces of card stock to the measurements in the graphic above.
- Score at 1/2″ and 1″ on both ends using your Kat Scrappiness bone folder.
- Fold and crease at all score lines.
- Select the coordinating papers you want to use from the Spring Fling Paper Pack.
- You will need a A2 pieces at 4.25″ x 4.25″. I used the dot pattern on the front and a beautiful coral solid for the inside.
- You will need 2 OR 4 pieces cut 1/2″ x 4.25″. I only decorated one of the 1/2″ areas on both sides.
- Cut a center out of the front panel area. Use a die you have in your stash.
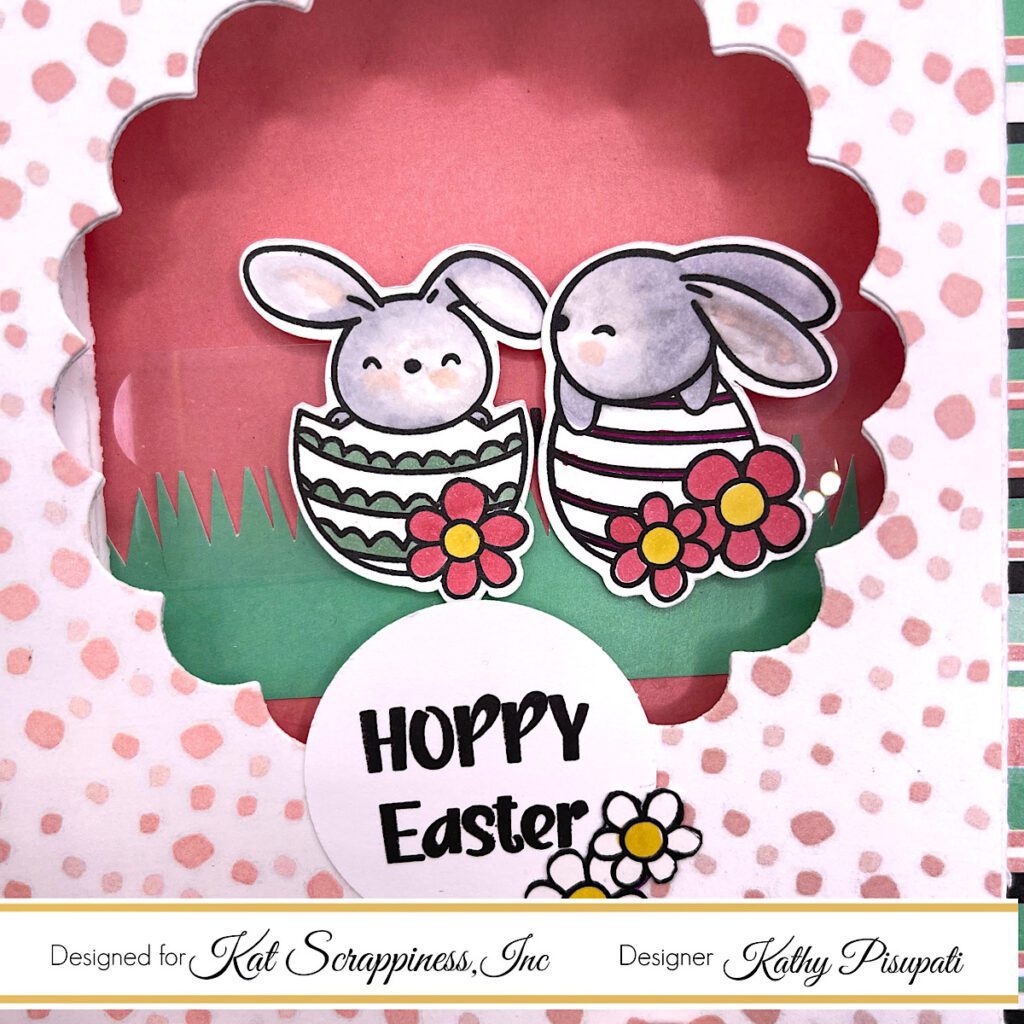
- Stamp and color your two images. These images will cover a small sentiment so test them out. There were many perfect sentiments for me to use in the Kat Scrappiness Hippity Hoppity Sentiment set.
- Stamp another sentiment for the front of your card. I stamped Hoppy Easter on a small circle die. The flowers were part of the Hippity Hoppity Bunny set and I just cut them off one of the stamped bunny images.
- I didn’t have a die to create grass so I used my handy scissors. Hey….it works!
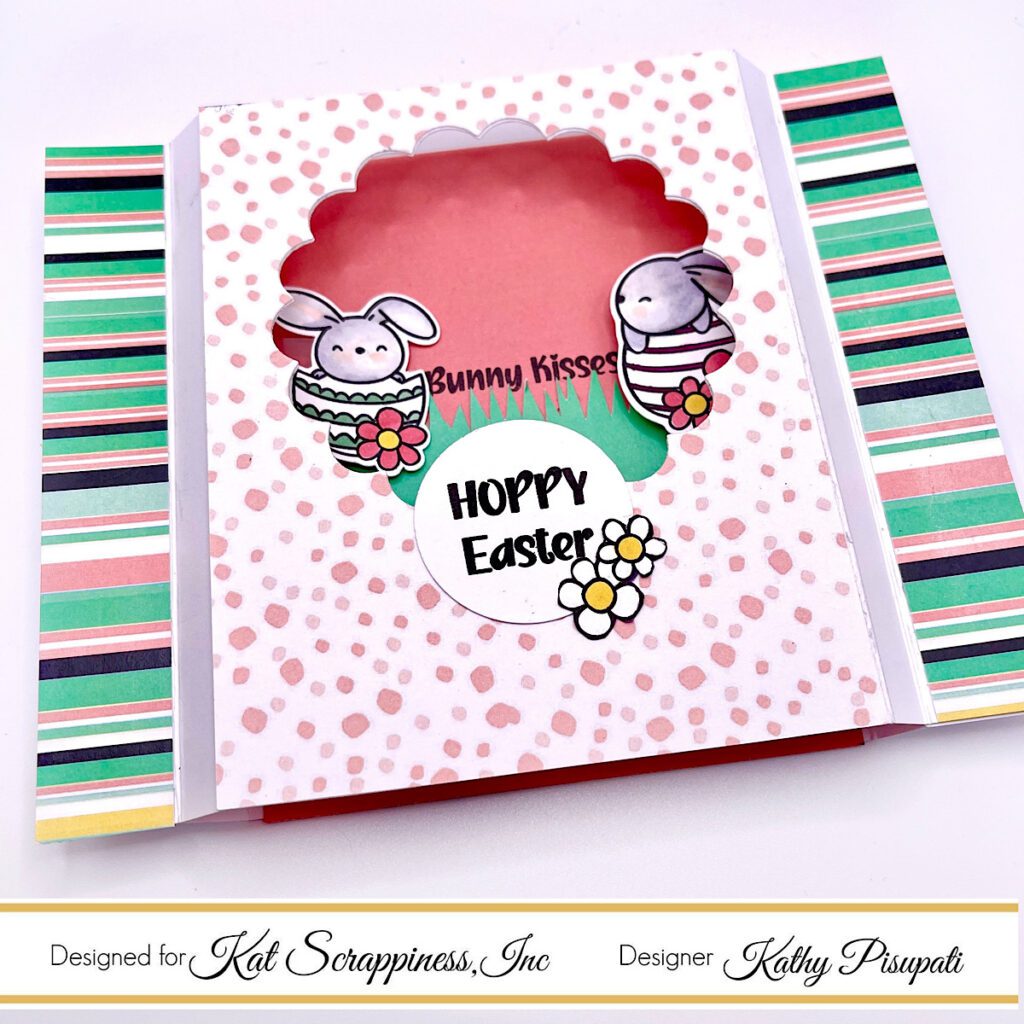
- Work out the placement of your stamped images. You can have them meet in the middle or stack on top of each other. Watch this video for the mechanics.
- Once I had all the mechanics worked out (well, I didn’t because I don’t follow instructions very well!) Use double-sided adhesive to adhere all of your elements. TIP: I add a bit of liquid glue to the top of the double-sided adhesive which allows me some wriggle room.
These stamps and sentiments from Kat Scrappiness are perfect for this type of card. I encourage you to hop over to the shop to see all of the other critters you could use like our Quokkas! Check them out as well. As always, thank you for stopping by I appreciate everyone of you. Have a fabulous day!
No Comments