New Blog: https://www.katscrappiness.com/blogs/kat-scrappiness-blog/
Archived Blog: https://katscrappinessblog.com

New Blog: https://www.katscrappiness.com/blogs/kat-scrappiness-blog/
Archived Blog: https://katscrappinessblog.com
Hi crafty friends!
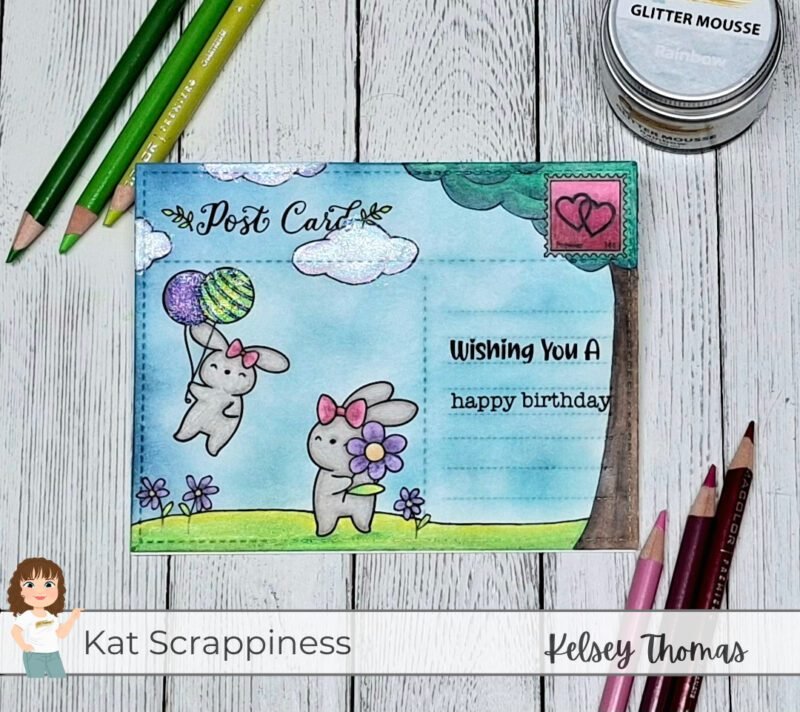
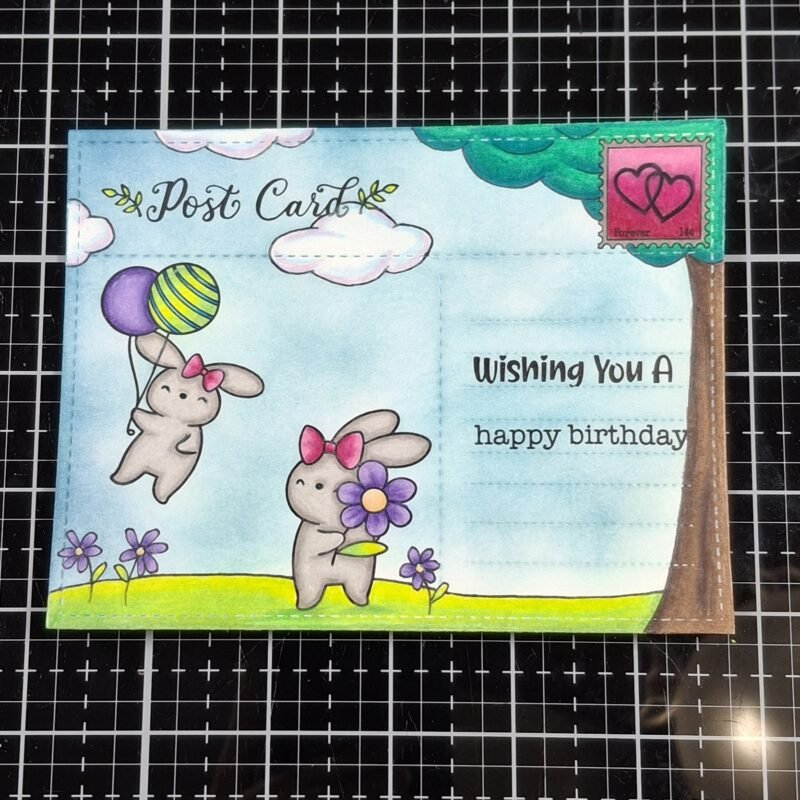
I am back with another Sketchy Sunday, this time using the Hippity Hoppity Bunnies stamp set from Kat Scrappiness as the focal point for my scene.
 Card Details:
Step-by-Step Tutorial:
Step 1:
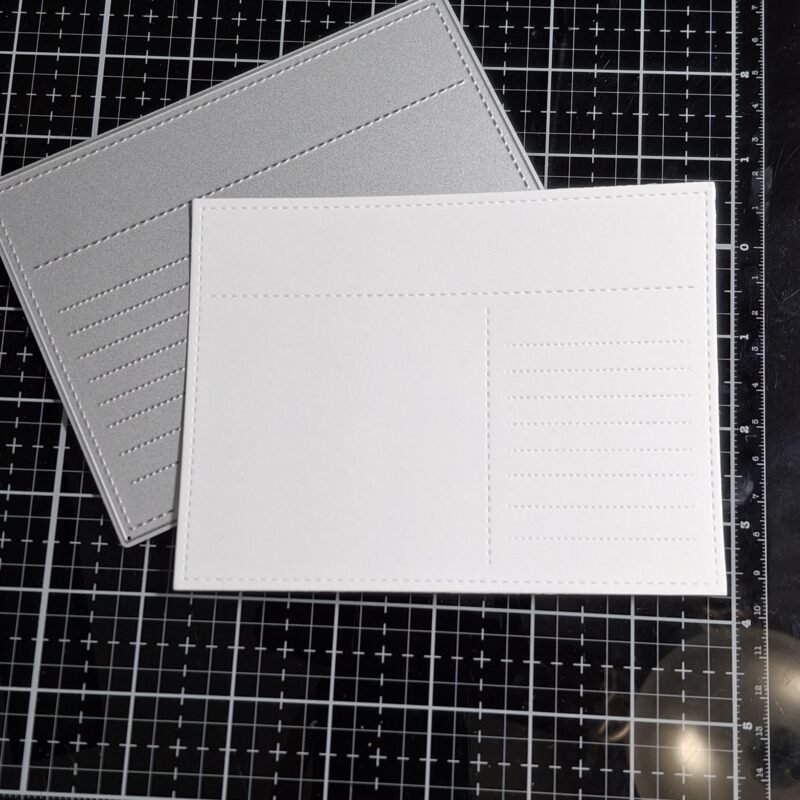
I started by die cutting a piece of white cardstock using the A2 Postcard Die.
Step 2:
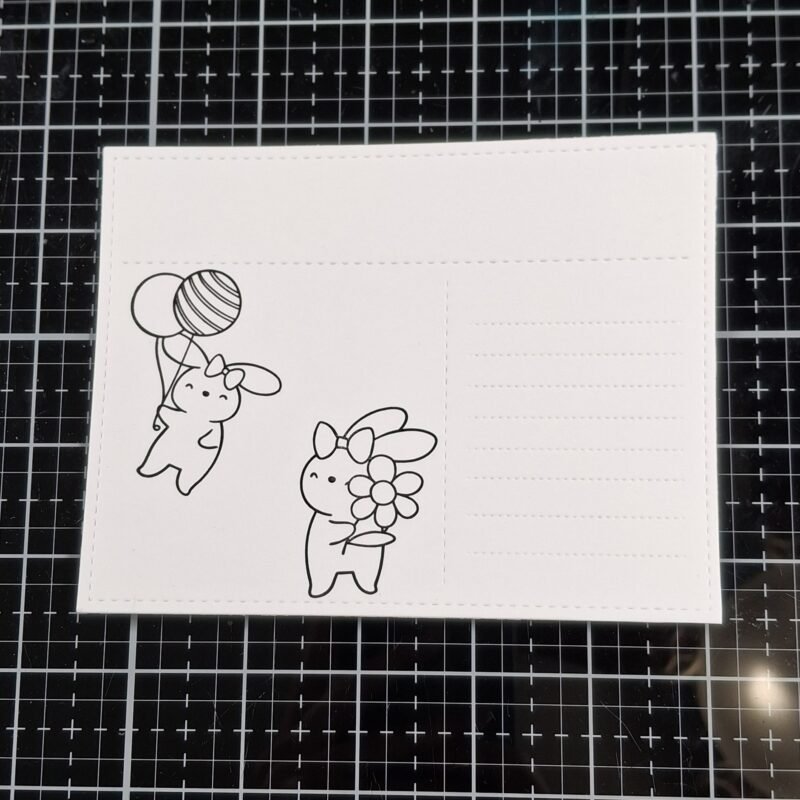
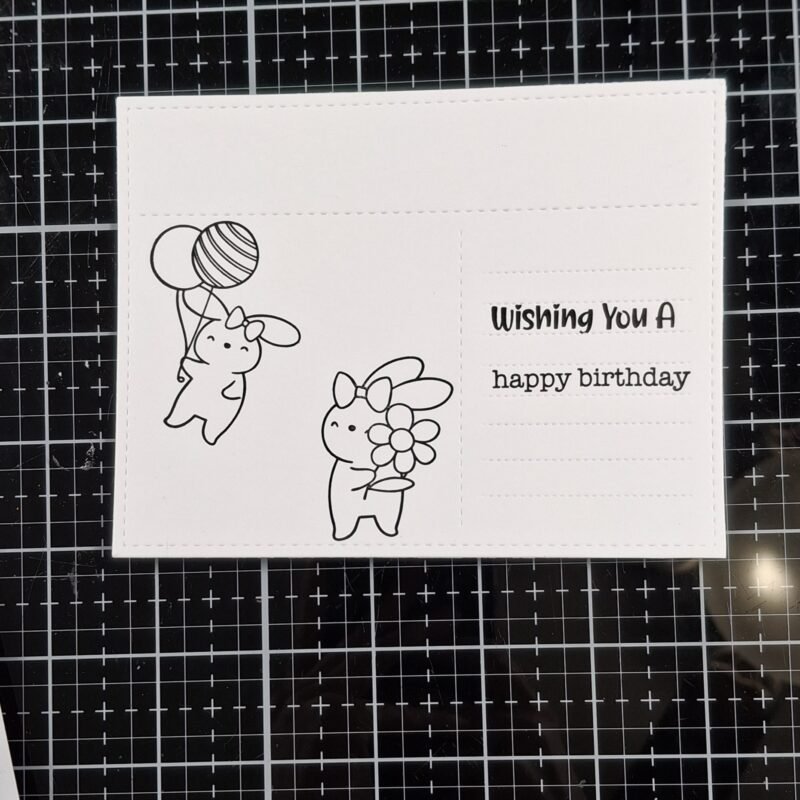
Next, I stamped two of the bunnies from the Hippity Hoppity Bunnies stamp set on the panel using black ink. I chose the one with the flower and stamped it on the ground. I also chose the one with the balloons and stamped it so that it looked like the balloons were lifting the bunny into the air.
Step 3:
Next, I stamped a sentiment to the right side of the card where the stitched lines are placed. I used the Hippity Hoppity Sentiments stamp set and stamped “Wishing you a” for the top line of my sentiment. I then used the Everyday Brushstrokes set to stamp “happy birthday” underneath. I love mixing and matching my stamp sets to create my own sentiments and stretch my supplies.
Step 4:
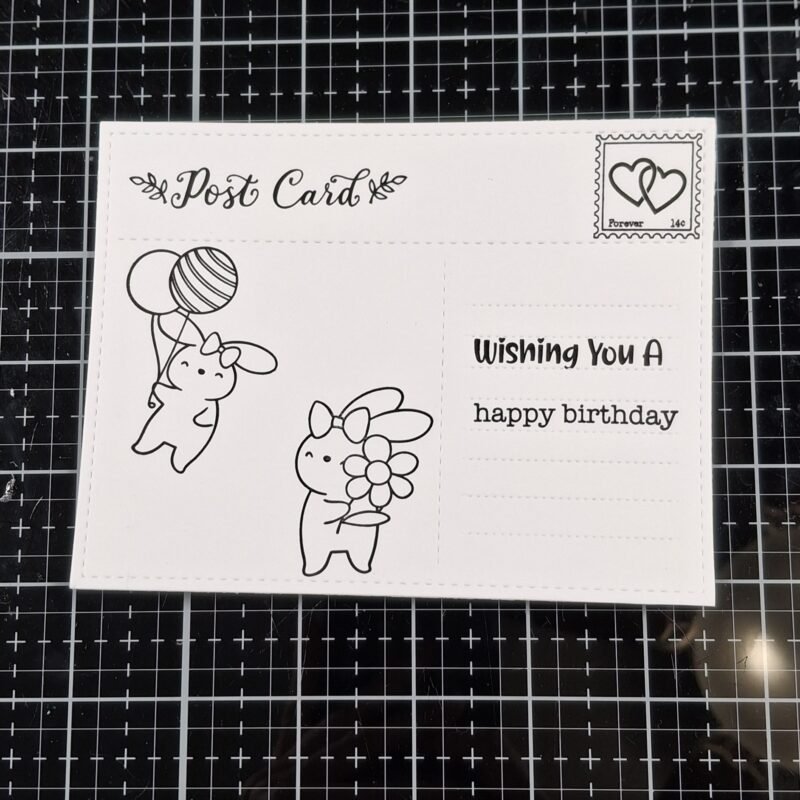
Next, I stamped supporting elements to finish giving the scene a post card look. I used the Be My Valentine stamp set and stamped the word “post card” across the top as well as a stamp in the upper right corner.
Step 5:
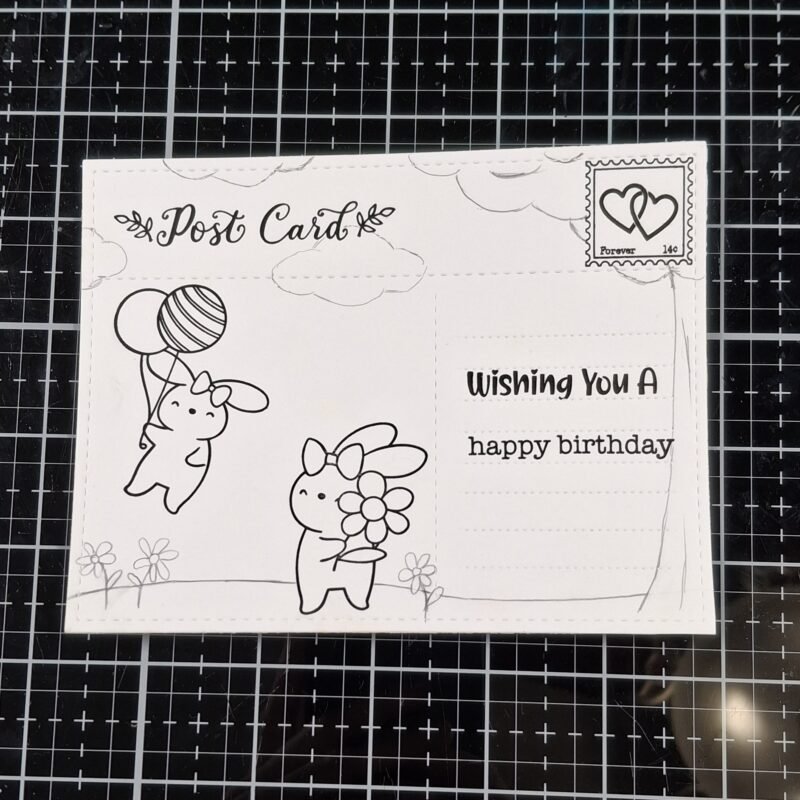
Next, I used a pencil to sketch in my scene for the card. I added some clouds, a tree to the right of the panel, a grassy hill, and some flowers. I like to take an element that is already in the stamped image and add it to the scene to really tie everything together. When I was satisfied with my sketched scene, I traced over the pencil lines using a black fine line marker and erased the pencil lines.
Step 6:
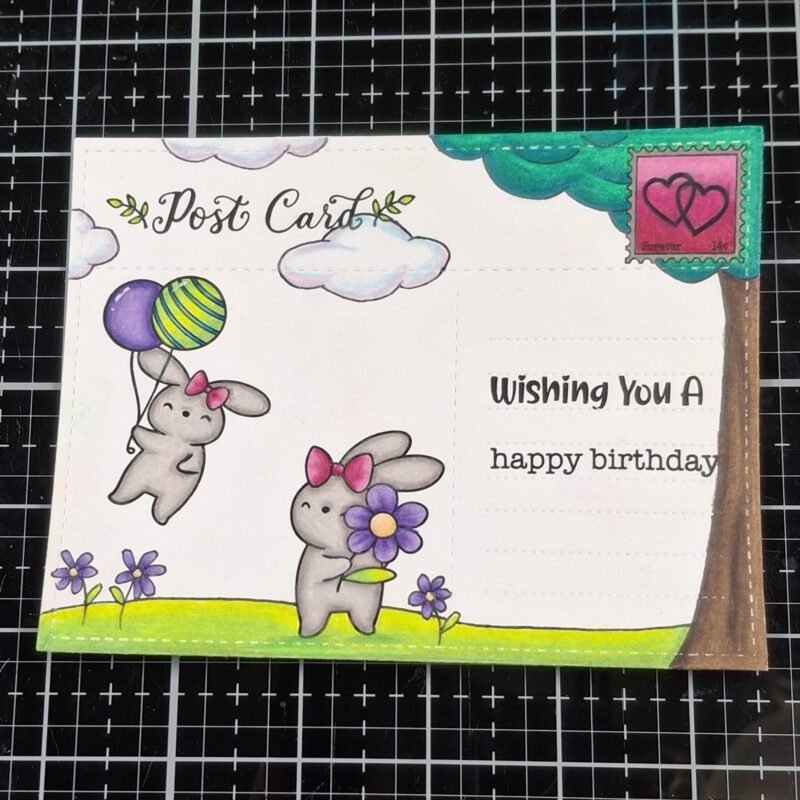
Now it is time to color the scene. I used Prismacolor colored pencils. Specific colors are listed below:
I also used a white gel pen on the balloons.
Step 7:
I then used a blending brush and Tumbled Glass Distress Ink to add blue for my sky. I forgot to clean my brush before ink blending, so there are darker blue spots, but I think it worked out well and added more character to the sky. I blended right over the top of some of the colored images and had no problem with the ink blending interfering with my coloring. If you are worried about messing up your coloring, you can try masking your scene or coming in with a very small brush to get up close to the images.
Step 8:
To finish the card, I glued the colored panel to a white A2 card base and then used my finger to add some Rainbow Glitter Mousse to the balloons and clouds for some fun sparkle.
Kat Scrappiness Products Used:
I hope you enjoyed this card process and feel inspired to try your hand at sketching your own elements into your card scenes.
Thank you so much for stopping by, and don’t forget to check out What’s New at Kat Scrappiness for even more crafty inspiration!
Please subscribe to the Kat Scrappiness newsletter! Each Friday there is a Secret Subscriber Special in the newsletter that you don’t want to miss!

See you next Sunday!
Kelsey
Hello, my sweet crafty friends!
Today I’m sharing a fun two-for-one card idea using the Oopsie Daisy 6×6 Layering Stencils from Kat Scrappiness. I always love finding ways to stretch one background into multiple projects, and this technique is perfect for that.
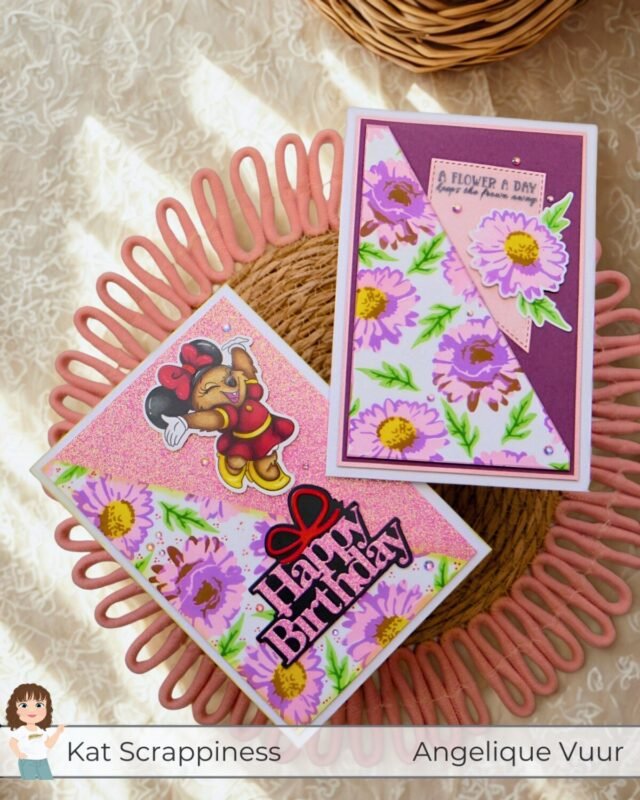
By creating one stenciled floral background and cutting it diagonally, you can easily make two completely different handmade cards. For one card I focused on a soft floral design, and for the second card I added a playful touch with the adorable Quokkas ephemera.
It’s a simple technique that gives you two cards with the same base, but each with its own personality.
Have you used the Oopsie Daisy Layering Stencils more often? I love to hear.
Let’s make some cards!
Card Base: 5 x 7 inch
Pink Pearl Mat: 4.75 x 6.75 inch
Purple Mat: 4.50 x 6.50 inch
Background Panel: 4.75 x 6.75 inch (cut diagonally)
Card Base: 5 x 7 inch
Pink Glitter Mat: 4.75 x 6.75 inch
Background Panel: second half of the stenciled background
Both cards start with a 5 x 7 inch white card base.
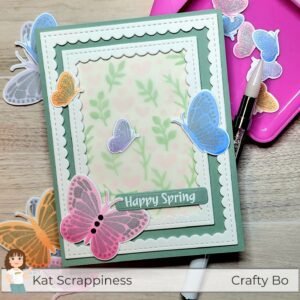
For Card 1, I layered a pink pearl mat (4.75 x 6.75 inch) and a purple mat (4.50 x 6.50 inch).
For Card 2, I used a pink glitter mat (4.75 x 6.75 inch) to give the card a more playful look.
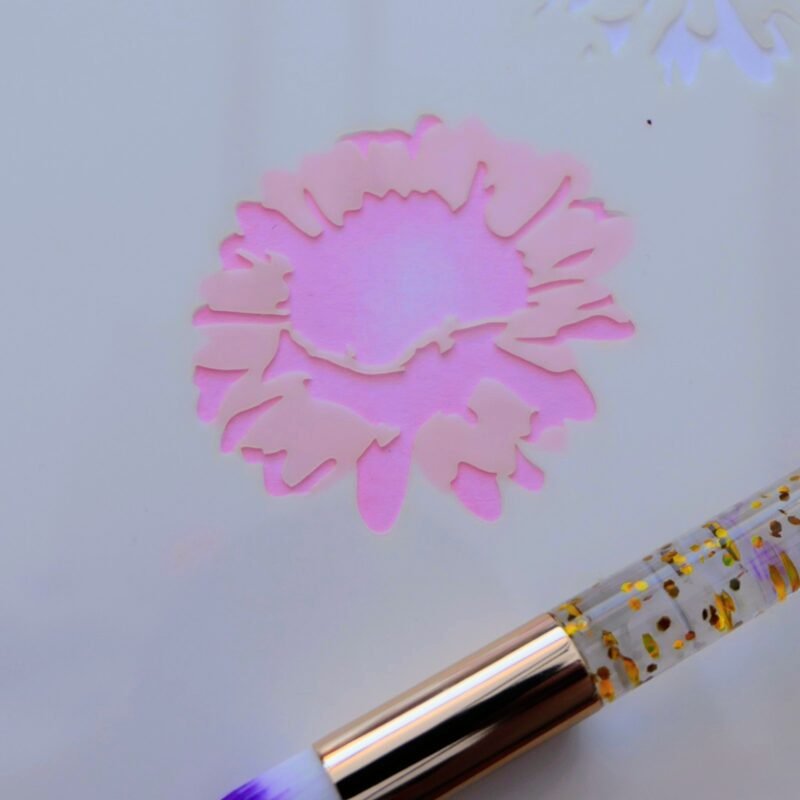
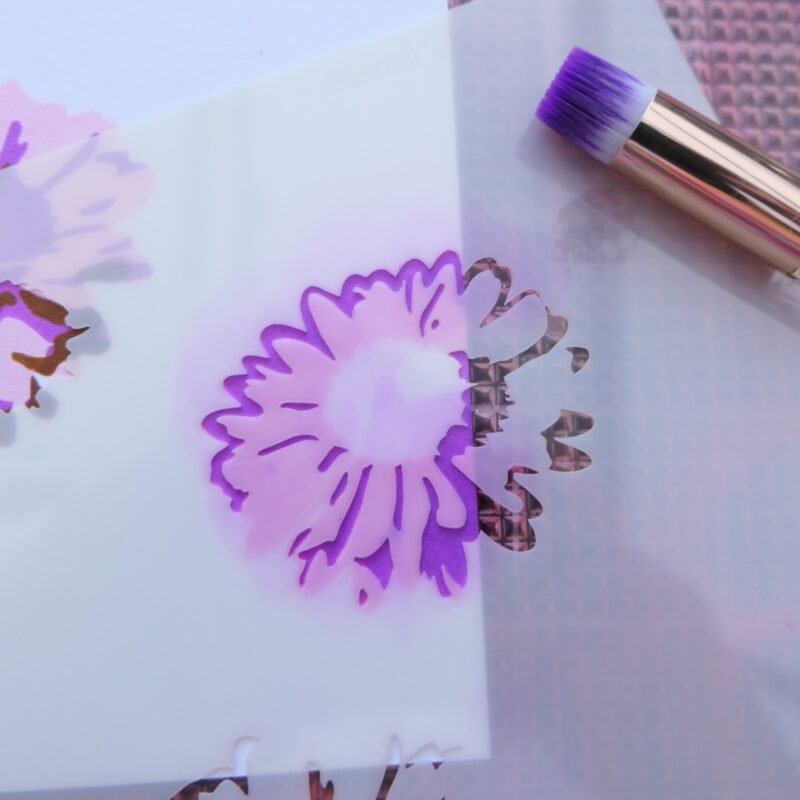
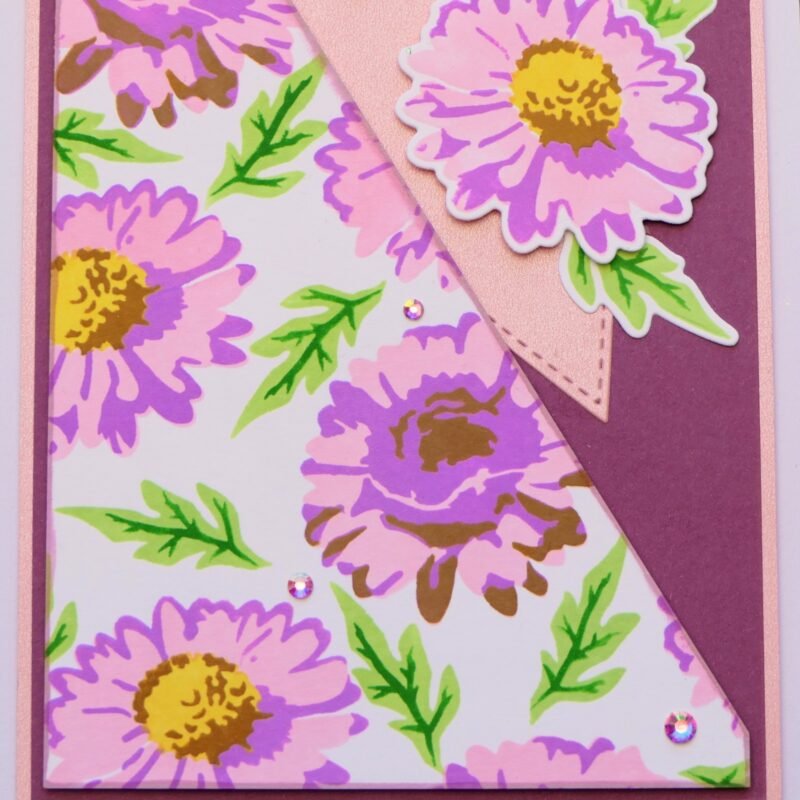
Using the Oopsie Daisy Layering Stencils, I blended the flowers onto a piece of white cardstock.
I started with the first flower slightly below the center (see picture 1) so the design wouldn’t feel too static. I also blended several flowers partially off the edge of the cardstock (see picture 3), which helps create a more natural and dynamic background.
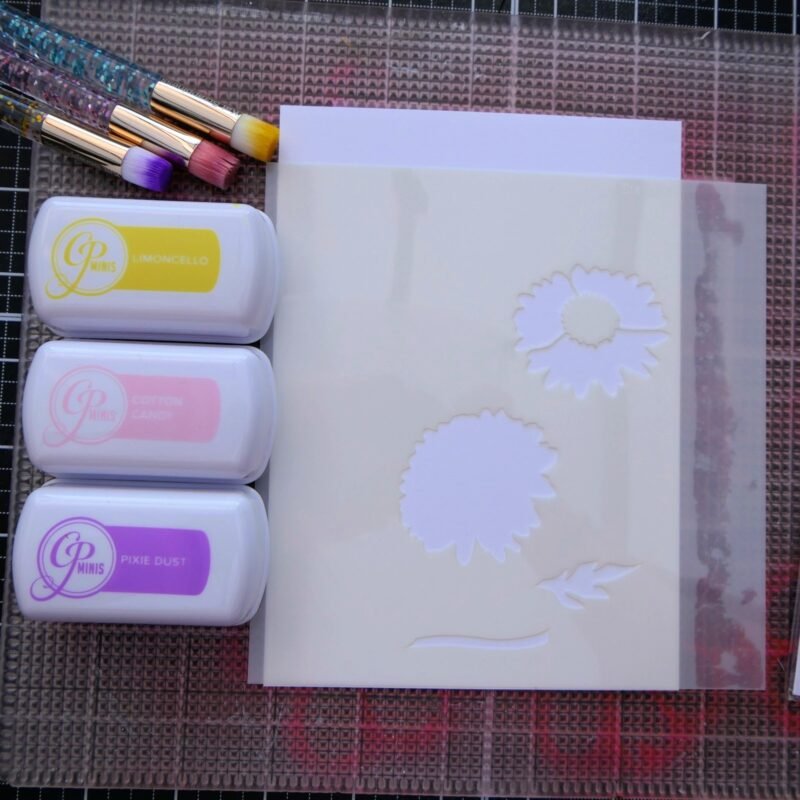
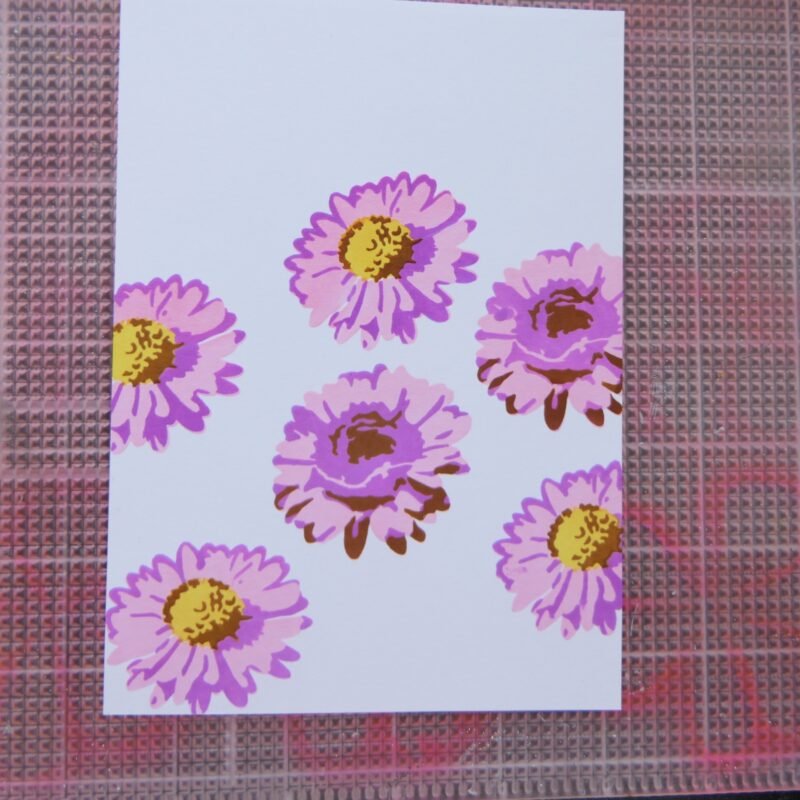
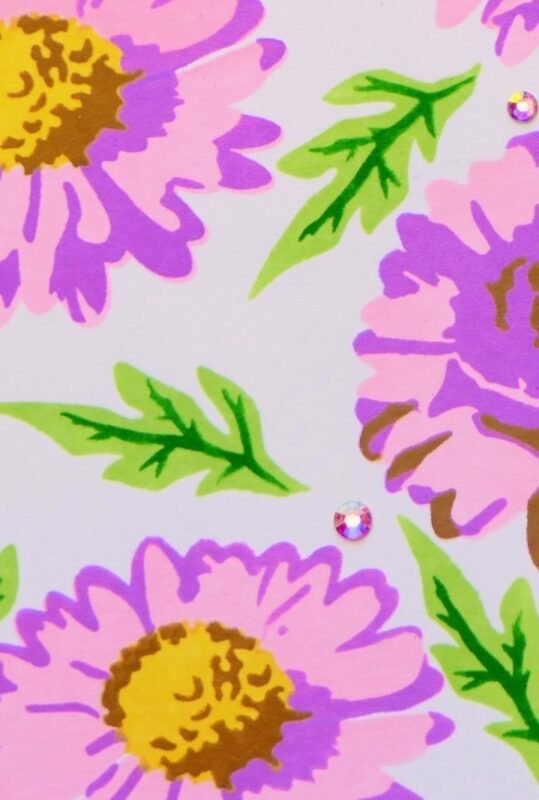
After completing the flowers, I blended the leaves from the stencil set in between the flowers to fill the background nicely.
On a separate piece of white cardstock, I ink blended two additional flowers and four leaves and die cut them using the Oopsie Daisy Coordinating Dies. These pieces will add extra dimension later on.
Finally, I cut the finished background diagonally, slightly next to the center, creating two panels that will be used for both cards.
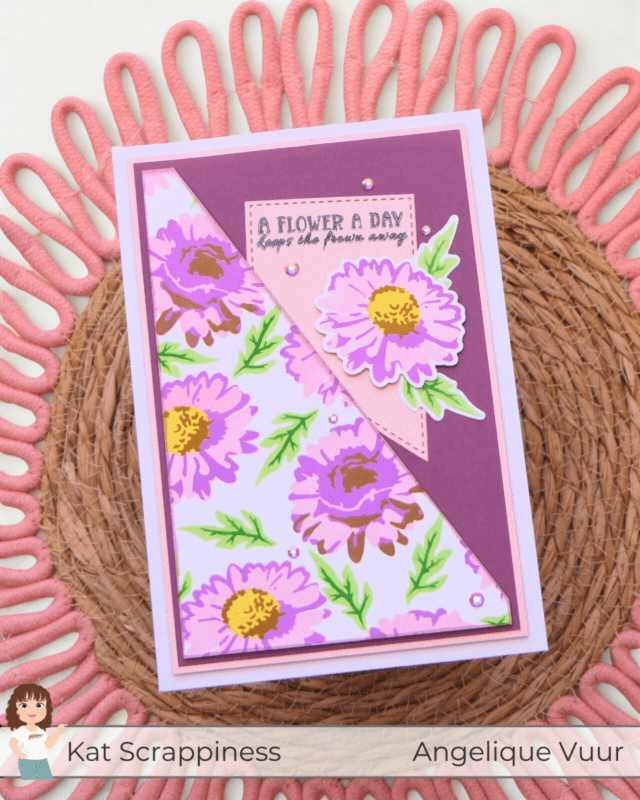
For the first card I wanted to keep the focus on the flowers.
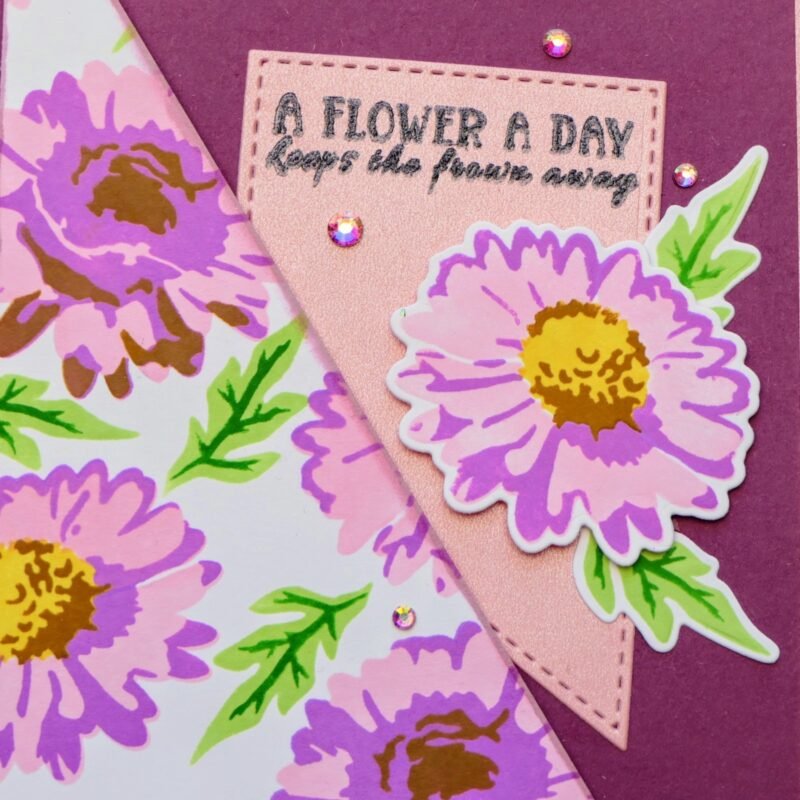
I cut a fishtail banner from the pink pearl cardstock using the Nesting Fishtail Banner Dies. From small to big I used the second die. On this banner I stamped the sentiment from the Quokka Flowers Stamp Set using Stazon ink so it would adhere well to the smooth pearl surface.
The edges of the floral panel were softly ink blended with a slightly darker pink ink to frame the design.
Before attaching the diagonal panel with foam tape, I first positioned and glued the sentiment banner to make sure everything aligned nicely.
Next, I adhered the diagonal background panel onto the purple mat, leaving a small border around the edges.
To finish the card, I added the die cut flowers and leaves for dimension. One flower is popped up with foam tape on the right of the banner, under the sentiment. The second flower is adhered flat in the lower right corner on the inside of the card.
Finally, I added a few Crystal AB Rhinestones for some sparkle.
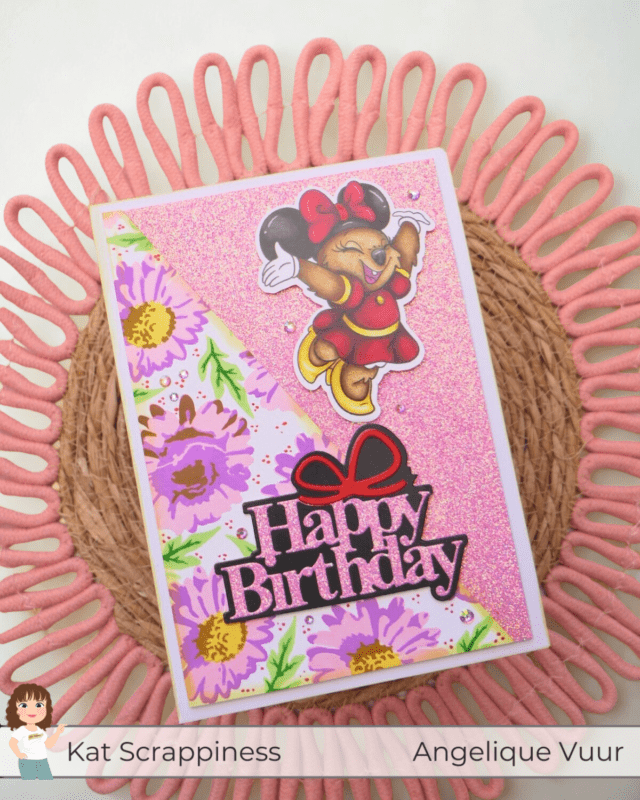
For the second card I wanted a different look, even though it uses the same background.
I added small red dots across the floral panel, mostly in clusters of three, which gives the card a fun and playful feel.
The edges of the panel were softly ink blended with a yellow-green ink to create a fresh look.
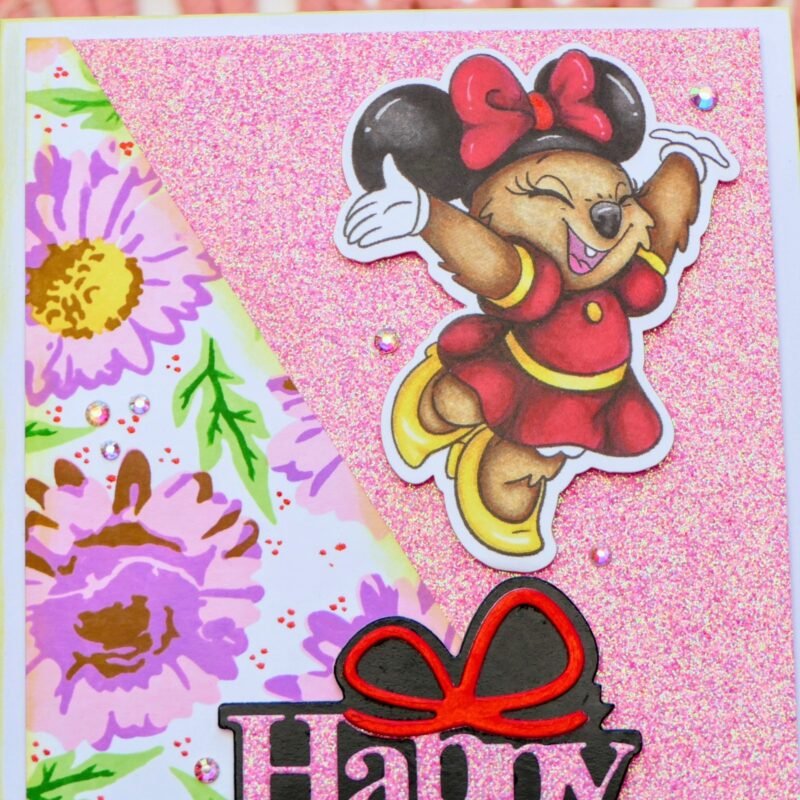
For the focal point I chose one of the adorable characters from the Meet the Quouses Ephemera Pack, and I also added a round quokka image inside the card.
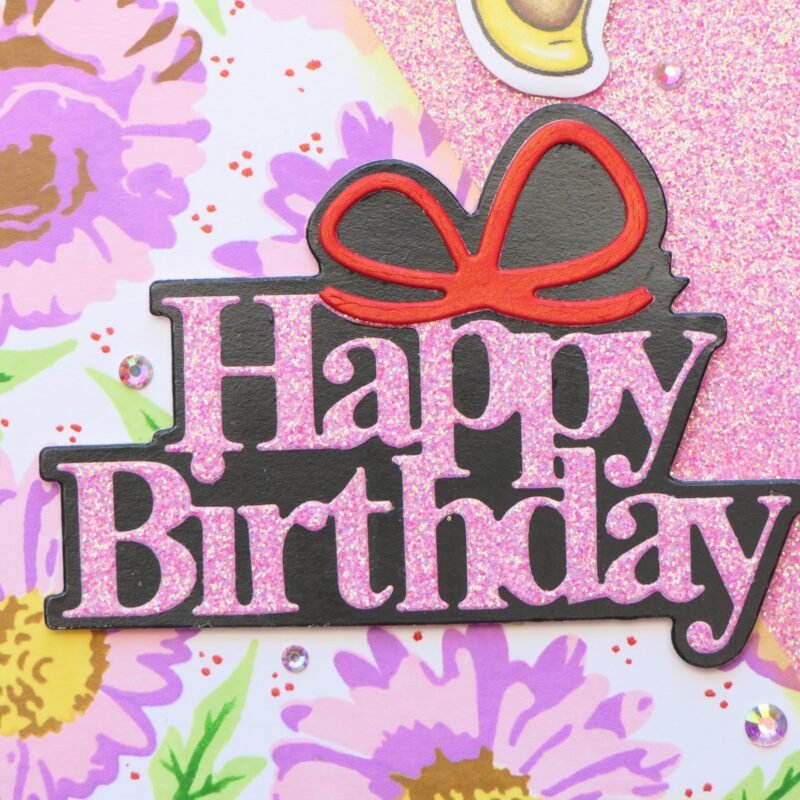
For the sentiment I used the Bow-tiful Happy Birthday Shadow Sentiment Craft Dies.
The shadow layer was cut from black cardstock, the words from pink glitter cardstock, and the small bow from red cardstock.
Both the sentiment and the quokka were adhered with thin foam tape for dimension.
To finish the card, I added a few Crystal AB Rhinestones for extra sparkle. Yes, the glitter cardstock wasn’t sparkly enough. 😁
Creating these cards reminded me how fun it is to stretch one background into multiple projects. With just a few different elements, you can easily create two different cards from the same starting point.
I hope this inspires you to try a two-for-one background technique with one of your own stencils!
Thank you so much for stopping by, and don’t forget to check out What’s New at Kat Scrappiness for even more crafty inspiration!
Until next time and happy crafting!
Hugs,
Angelique 💮
Hi crafty friends!
I hope you enjoyed my first Sketchy Sundays post last week and are excited for another card today. I used several Kat Scrappiness products for this card, using the Easter Quokkas stamp set as my focal point.
Card Details:
Step-by-Step Tutorial:
Step 1:
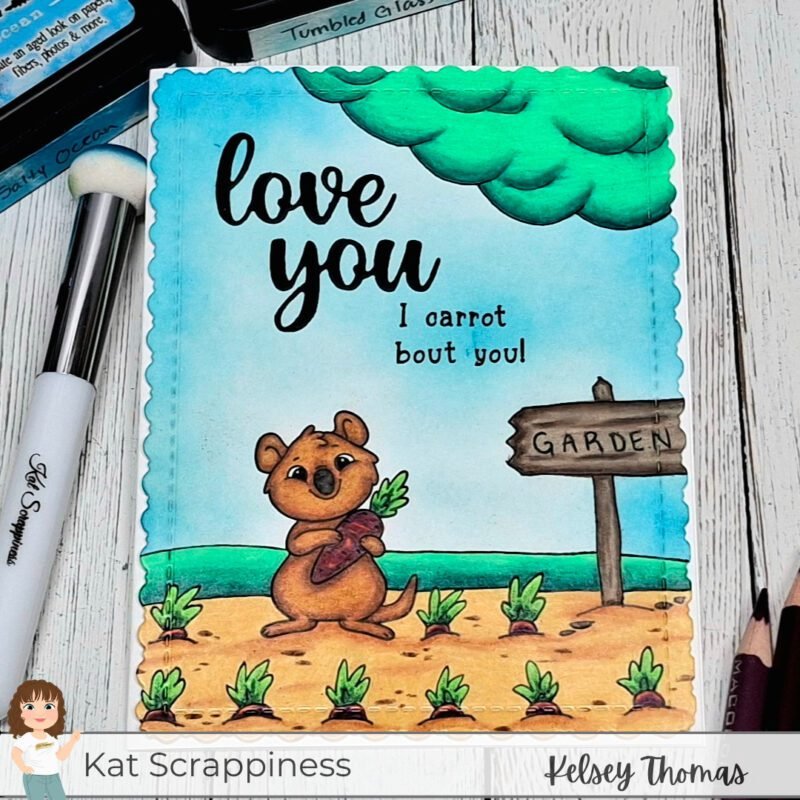
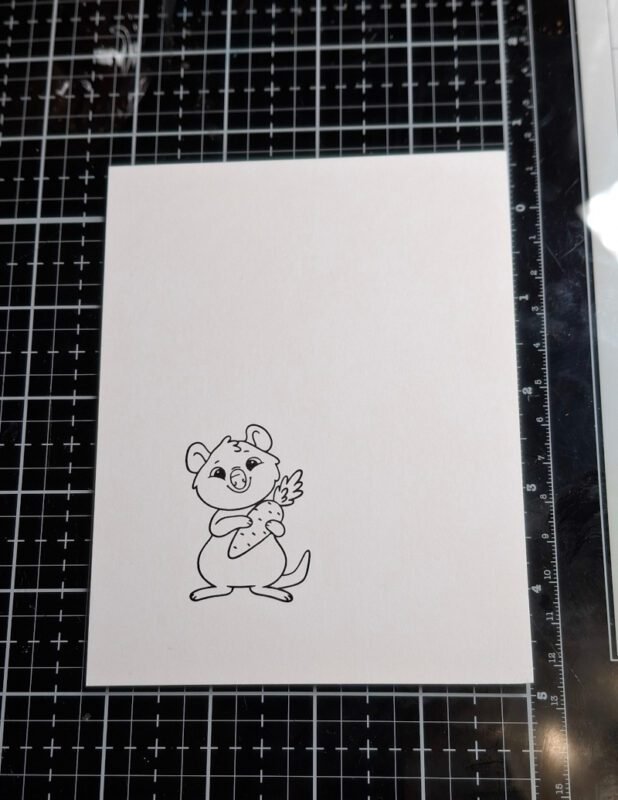
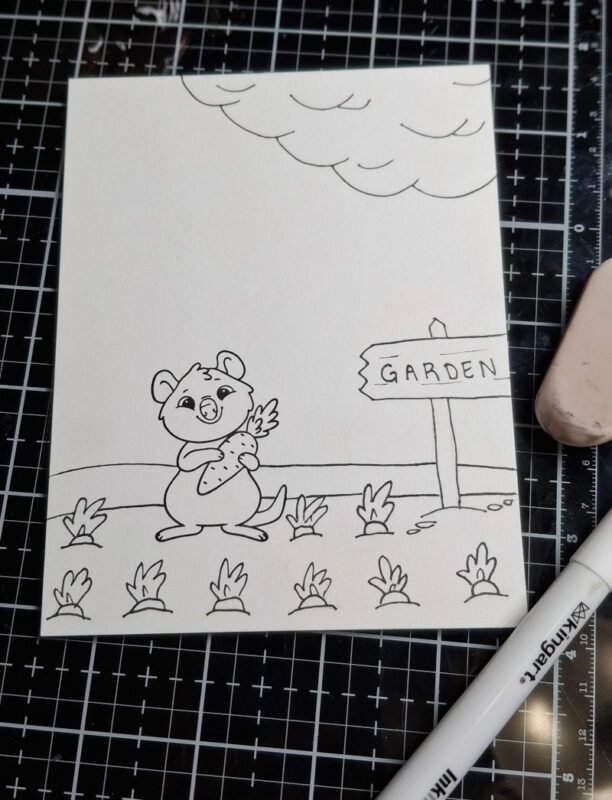
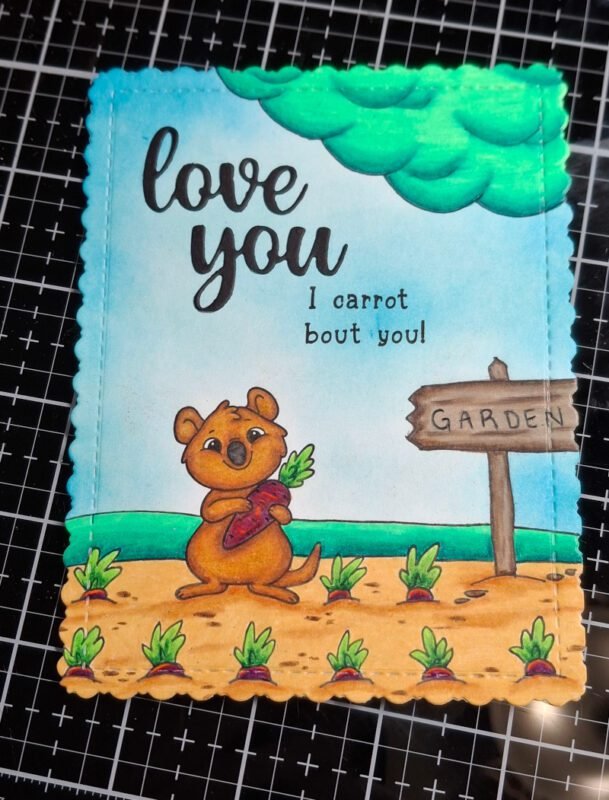
I stared by trimming a piece of white cardstock to 4.25″ x 5.5″ in size. I then stamped the quokka holding the carrot from the Easter Quokkas stamp set down toward the bottom left of the panel using black ink.
Step 2:
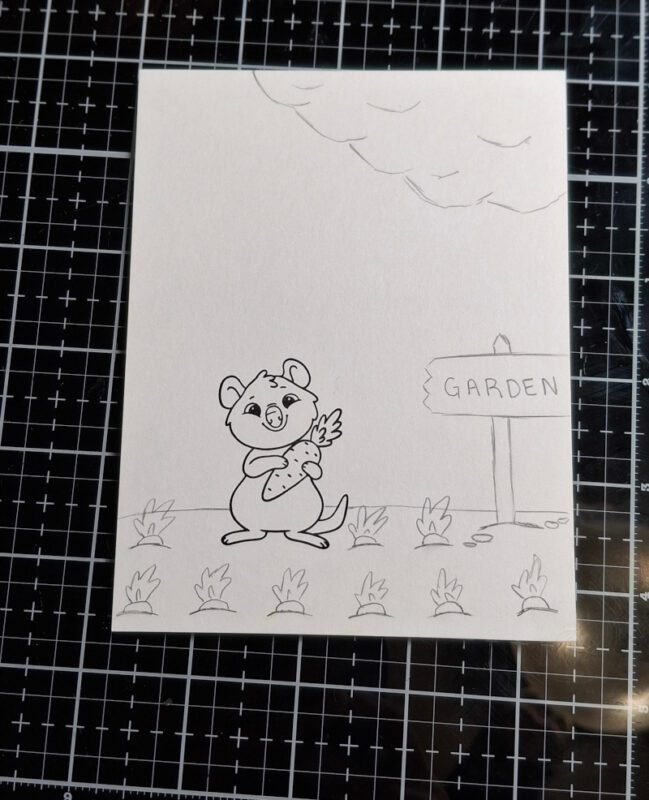
Next, I sketched in my garden scene using a pencil. I added a ground layer and roughly sketched in some carrots sticking up out of the ground. I also added in a sign that says “garden” and placed some leaves in the upper right corner to look like a tree branch was sticking into the scene.
Step 3:
When I was satisfied with my sketched scene, I traced over the lines using a black fine line marker and erased the pencil lines. I also decided to add a hill behind my garden to add some grass to the scene.
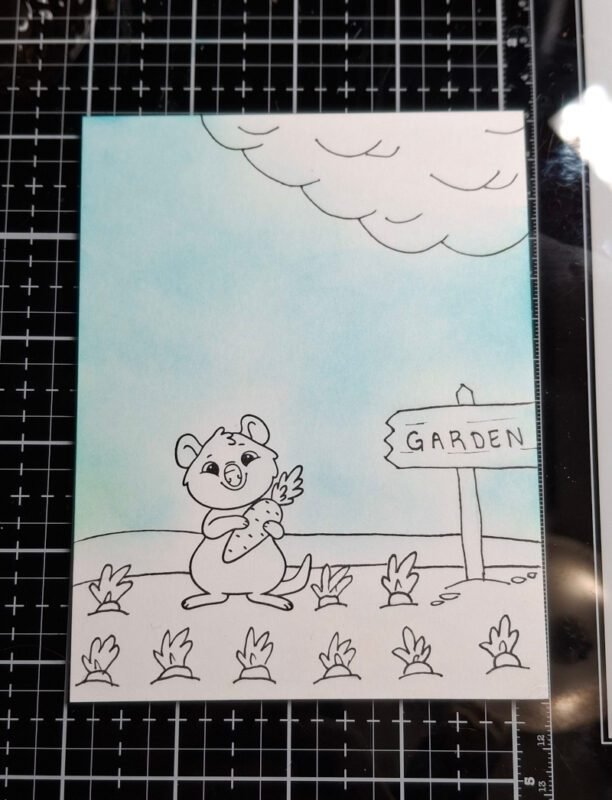
Step 4:
To add some color to the sky, I used a blending brush and Tumbled Glass Distress Ink to add some light blue to the panel. I wasn’t worried about overlapping the stamped/sketched images since the color was so light and I was going to be coloring over it.
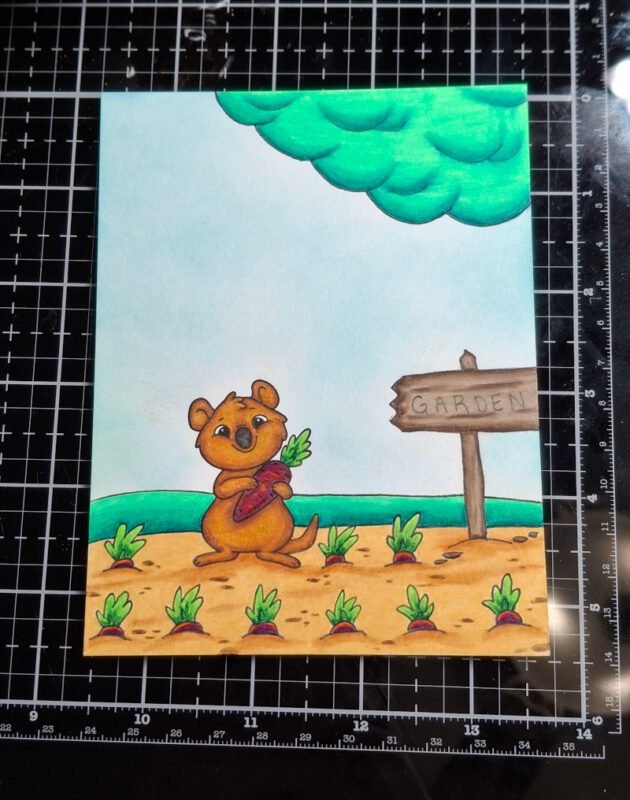
Step 5:
It is now time to color our scene. I used Prismacolor colored pencils for my coloring and will list the specific colors below.
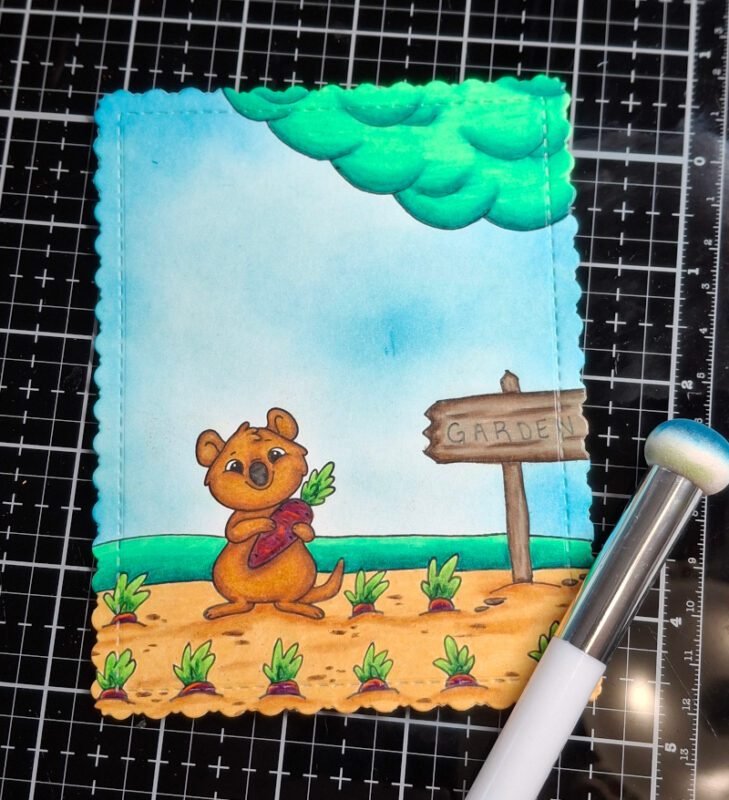
Step 6:
I then die cut my panel using the Kat Scrappiness Stitched Fancy Scalloped Rectangle dies (currently out of stock). I used the largest die in the set. To add some more interest to my sky, I came in with Salty Ocean Distress Ink and a Kat’s Crafty Dabber to darken the edges and add some darker patches in the sky.
Step 7:
To create the sentiment, I stamped “I carrot bout you” from the Easter Quokkas stamp set directly on the card base using black ink. I then die cut the words “love you” using the Love You Shadow Sentiment craft dies and glued them to the card.
I then glued the whole panel to a white A2 card base to finish off the card.
Kat Scrappiness Products Used:
I hope you enjoyed this card process and feel inspired to try your hand at sketching your own elements into your card scenes.
Thank you so much for stopping by, and don’t forget to check out What’s New at Kat Scrappiness for even more crafty inspiration!
Please subscribe to the Kat Scrappiness newsletter! Each Friday there is a Secret Subscriber Special in the newsletter that you don’t want to miss!
See you next Sunday!
Kelsey
Ok, who’s ready for Spring? I’m pretty sure everyone is by now!
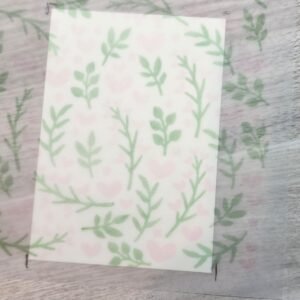
In today’s card, I’m showing you a way to use your frame dies and stenciling on vellum paper. This layout is very easy to put together with a few supplies and very versatile for any occasion. If you stay to the end, I have another card I created using the same products.
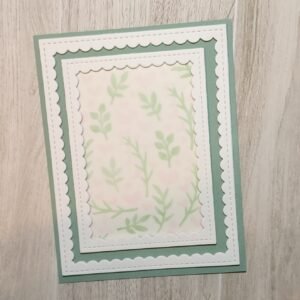
Here is the card I will be discussing in detail below:
To create this card you will need the following products from Kat Scrappiness:
In addition to the above, you will need the following supplies:
-in light colors (light pink, light green for the stencil);
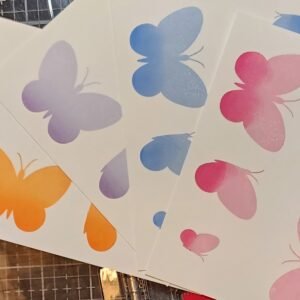
-other colors for the bottom layer of the butterflies (I used three shades of each – pink, purple, blue, and orange to get the blended look on the butterflies)
-silver ink (or gray or black depending on which you prefer for the top part of the butterflies)
Now that you have all the supplies, let’s get started!
Step #1 – Card panel
Take a colored cardstock, like the sage color I used in the example, and cut it to an A2 size (5 ½” x 4 ¼“) and set it aside for later.
Step #2 – Frames
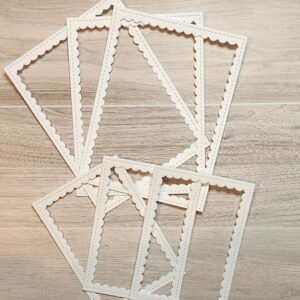
Using the A2 Reverse Scallop Dies, die cut the largest die 3 times using white cardstock. Do the same with the next largest die from the set and set all of them aside for later.
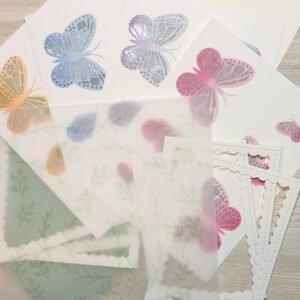
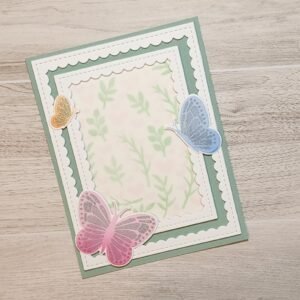
Step #3 – Butterflies (three parts)
Part 1
Line up the three solid butterfly stamps from the Fluttering By Stamps set in your stamping platform. Take the lightest of three of your ink pads and ink the top third of each stamp only. Next, take the medium color of your ink pads and ink the middle of each stamp only. Finally, take the darkest ink pad and ink only bottom part. Now, take the makeup sponge (or clean dabber), and gently blend where the inks meet so any harsh lines will be blended for a nice even blend.
I repeated this process twice to get good color gradation and blending.
Repeat this process for each color butterflies you want to create. Helpful Hint: If you don’t have a stamp positioner, you can die cut each of the butterflies and use the negative as a stencil to do the ink blending instead.
Part 2
Line up the 2nd layer of each of the butterflies and stamp them with silver ink (or gray or black) to apply the detailed layer of the butterflies. I used a silver ink for my card.

Part 3
Using the Fluttering By Coordinating Craft Dies, die cut each of the butterflies out and set them aside.
Step #5 – Stencil
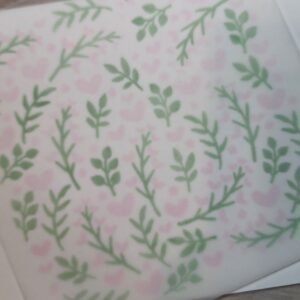
Cut a piece of vellum paper 6×6” inches and adhere it to your work surface with low tack tape in a couple spots so it doesn’t move. Next, take the first stencil (the stems) and line this up with your cardstock and adhere this to your work surface with low tack tape.
Using Kats Crafty Dabbers and green ink pad of your choice (I used a light green as I wanted a soft look to the panel), apply ink onto the stencil and remove the stencil when finished.
Line up the second stencil and repeat the process with a new dabber and a light shade of pink (or color of your choice) and apply ink onto the stencil and remove the stencil when finished.
Set this aside to let the ink dry for a few minutes.
Now that you have all the steps covered, let’s create the card!
Step #6 – Adhere the frames
Take the two sets of frames and adhere the small ones together and then adhere the large ones together and set them aside so the glue can dry.
Step #7 – Background
Trim a piece of ivory cardstock the same size as the small frame. Do the same with the vellum piece that was stenciled. Helpful tip: I took the vellum and laid it over the cut piece of ivory cardstock and moved the vellum around until I found the area that I wanted as the background. I then took a pencil and put little marks on top of the vellum where the corners were. I then cut the vellum down using those marks as a guide.
To adhere the vellum, I applied a small thin line of liquid adhesive around the edges of the ivory cardstock, laid the vellum onto it, put a paperweight on top, and left it alone so the glue can adhere fully.
Step #8 – Small Frame w/Stencil Background
Take the small frame that has the stencil background and ivory cardstock and add some liquid glue to the back and adhere it onto the middle of the sage panel.
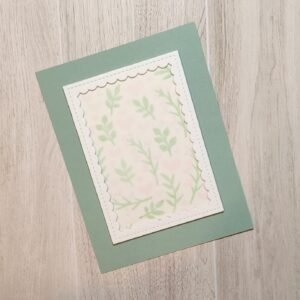
Step #9 – Large Frame
Take the large frame and adhere that to the sage card panel with liquid adhesive. I placed a paperweight on top and let that the glue dry for a few moments.
Step #10 – Adding Butterflies
Select which butterflies you would like to use for your card and lay them onto the card panel. Once you have decided where you want them placed, adhere them to the card base.
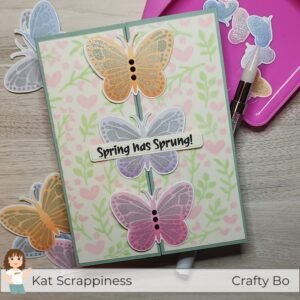
Step #11 – Sentiment
I chose to use Happy Spring from the Hippity Hoppity Sentiments Clear Stamps and heat embossed it using the VersaMark embossing ink and white embossing powder onto the same sage cardstock as the card panel. After die cutting that out, I moved the sentiment around onto the card until I liked the final position and adhered that to the card.
Step #12 – Embellishments
Add your embellishments onto the large butterfly body and/or around the card as well.
Step #13 – Finishing
Adhere this panel onto either a side-folding or top-folding A2 sized card base. And that completes the card!
Die cutting the frames several times adds great dimension to the card but of course you can use one of each if you prefer. I chose to stencil onto vellum instead of directly onto the ivory cardstock cause I felt the vellum gave it a very soft look and it’s a different texture than cardstock.
There’s many options to change this card to suit your needs or skill level. It’s a great basic design to keep in memory for use in a future card.
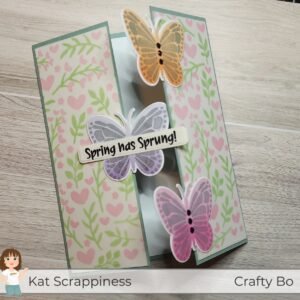
Bonus card:
As promised, here is my second card that I created using the same stencil on vellum paper (adhered to ivory cardstock) and the butterflies but I created it into a gatefold card.
I hope you enjoyed these cards and I also hope you try making a version of them yourself. We would love to see what you create using Kat Scrappiness products. If you haven’t already, please join us over at Kat Scrappiness Facebook page as well as Kat Scrappiness Insiders Facebook page to see everyone’s incredible creations! There’s also Instagram too, Kat Scrappiness, where you will not only find inspiration but fun hops as well!
Also, don’t forget to check out What’s New at Kat Scrappiness for even more crafty inspiration and please subscribe to the Kat Scrappiness newsletter.
Leave a comment to let me know which card do you like better?
Thank you for stopping by and happy crafting!
Crafty Bo
Hi crafty friends!
My name is Kelsey Thomas and I am so excited for my very first DT blog post with Kat Scrappiness! Every Sunday, I will be sharing a project where I create a card using Kat Scrappiness products and sketching in my own background and supporting elements for the card.
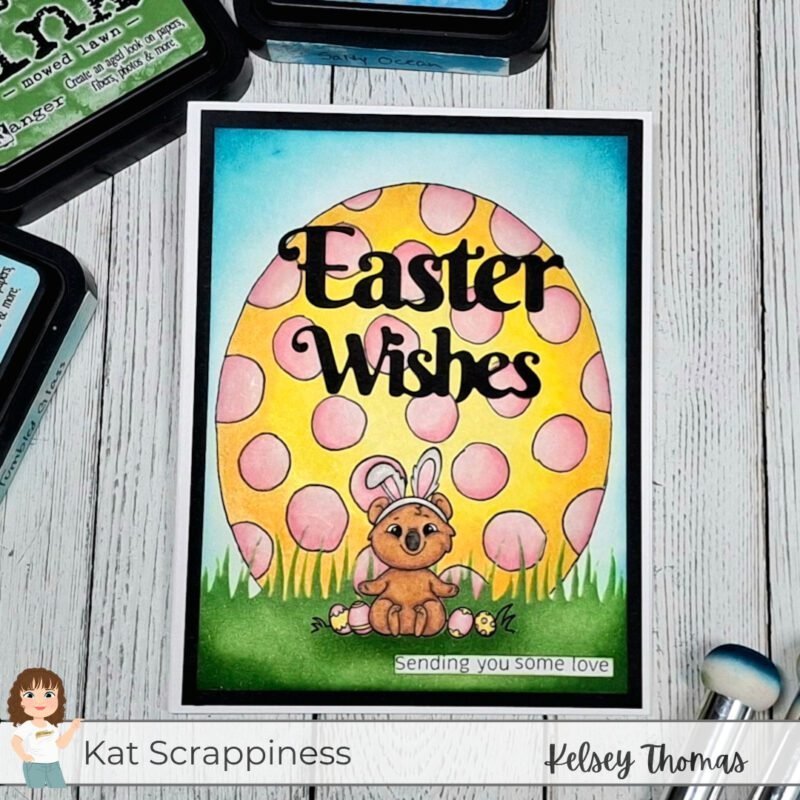
For today’s project, I created a card using the Easter Quokkas stamp set as my focal point for my scene.
Card details:
Step-by-Step Tutorial:
Step 1:
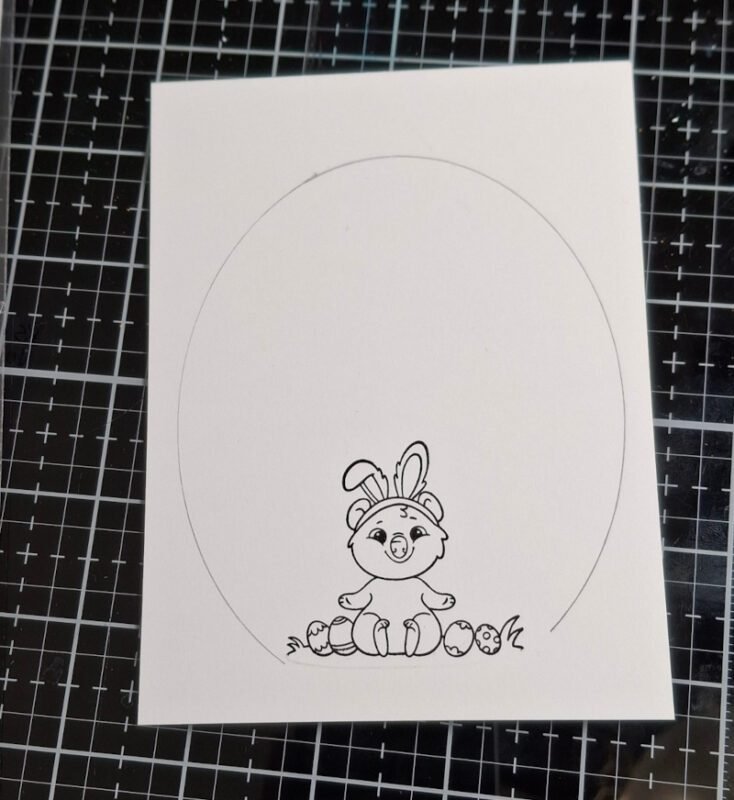
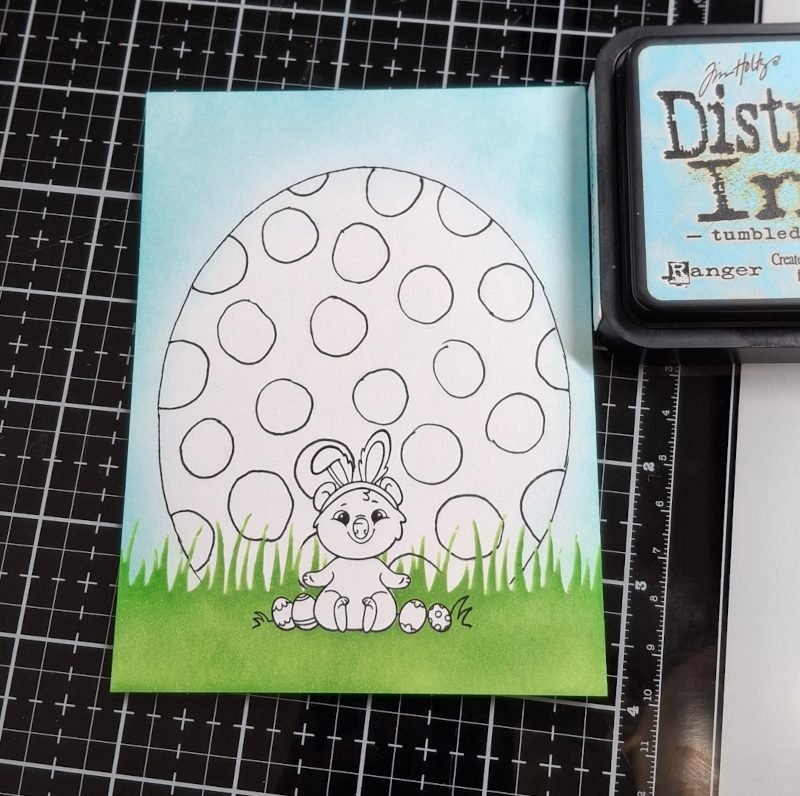
I started by trimming down a panel of white cardstock to 4″ x 5.25″ in size (I end up trimming this down later). I then used a stamp positioner and black ink to stamp the quokka sitting in the grass with some Easter eggs from the Easter Quokkas stamp set. I made sure to wipe the ink off of the bottom of the stamp before stamping so that the grass the quokka is sitting on would blend in nicely with my scene.
Next, I used an oval die to trace an oval shape behind my quokka lightly with a pencil. Any oval die or oval-shaped object will work for this – just choose one that will take up most of the card panel, as in the picture below. This will be used as the outline for the large Easter egg we are creating.
Step 2:
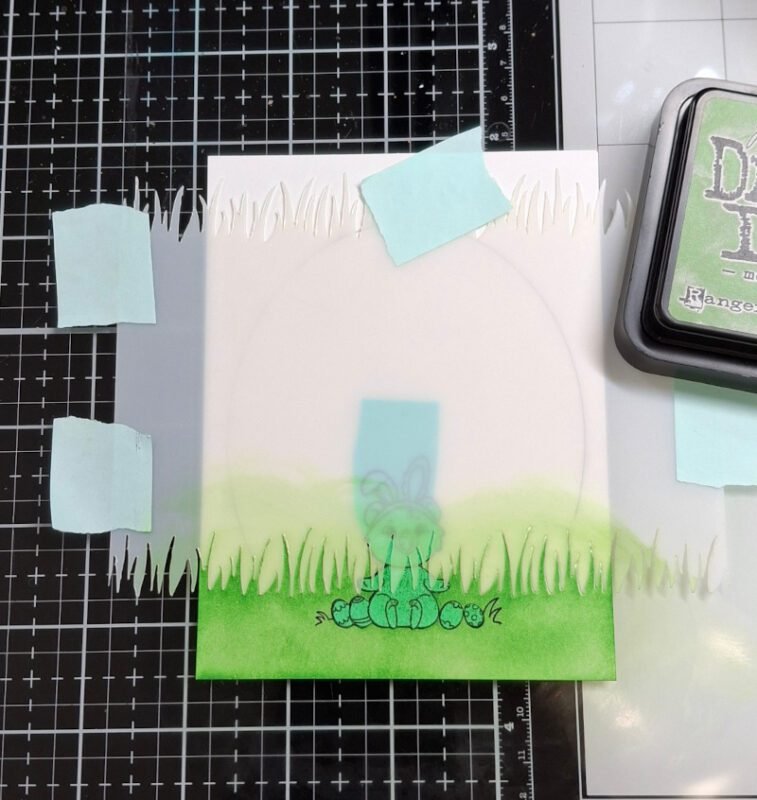
Next, I created a mask for my quokka and placed it over my image. I typically just stamp on a post it note, cut out the image, and use a repositionable adhesive on the back, but feel free to mask the image using your favorite method. I used repositionable adhesive to stick my panel to my work surface so it would stay in place to do stenciling. I positioned the grass stencil from the Clouds and Grass 6×6 Layering Stencils set over my panel and held it in place with some low tack tape. I then used a blending brush and Mowed Lawn Distress Ink to add some grass.
Step 3:
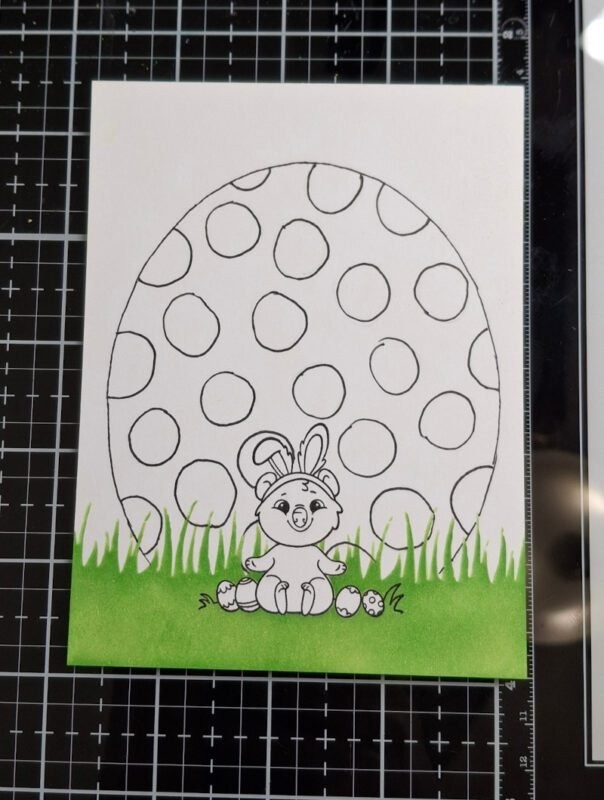
After removing the stencil/mask and cleaning my work surface, I then roughly sketched in some spots on the egg with my pencil. When I was satisfied with how it looked, I used a black fine line marker to trace over the pencil lines and then erased them.
Step 4:
Next, I needed to create a sky. I used a blending brush and Tumbled Glass Distress Ink to carefully add blue ink around the egg/grass for my sky. I went up close to the egg with the brush, not being too worried about getting some ink on the egg since it is such a light color of blue, but if you are worried about how this will affect coloring, you can always mask off the egg by tracing the same oval shape on masking paper and covering up the egg.
Step 5:
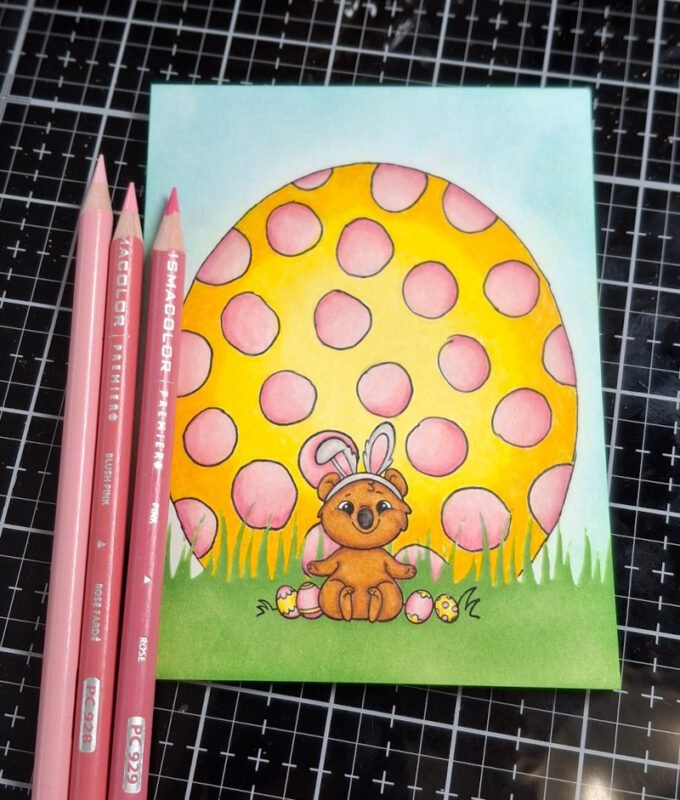
We are now ready to color the scene. For this, I used Prismacolor colored pencils. I will list the specific colors below in case you want to re-create my color scheme, but feel free to use any coloring medium that you prefer.
Step 6:
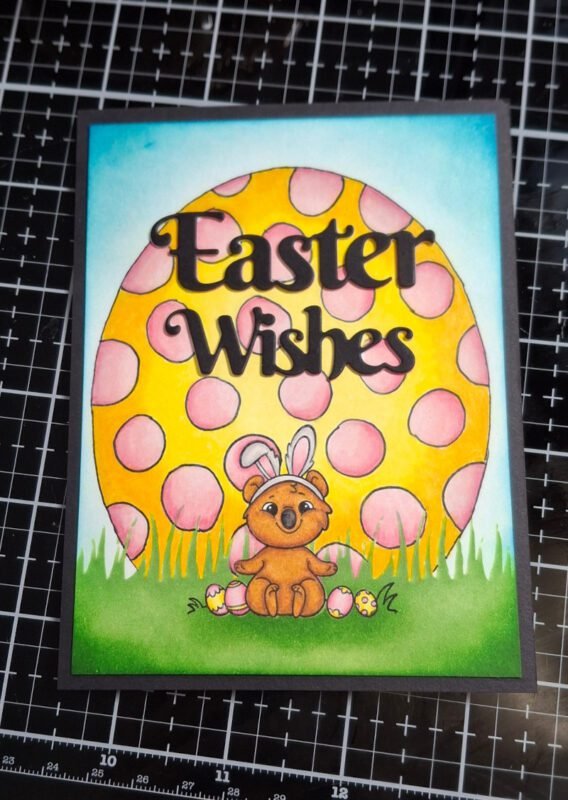
At this point, I decided that I wanted to matte my panel on black cardstock, so I trimmed it down to 3.75″ x 5″ in size. I then used Kat’s Crafty Dabbers to do some more inking. I replaced my quokka mask and used the Mowed Lawn Distress Ink to add a shadow under the quokka and eggs to ground him in my scene. I also darkened up the corners of the panel. For the sky, I brought in some Salty Ocean Distress Ink to darken the corners and really bring the scene to life.
I also die cut “Easter Wishes” using the Easter Wishes and a Bushel of Bunnies dies from black cardstock. I cut it out three times and glued them together for dimension. I stamped a sub-sentiment from my stash onto a white strip. I glued “Easter Wishes” across the large egg, centered on the panel and placed the sub-sentiment in the bottom right corner.
I then trimmed a piece of black cardstock to 4″ x 5.25″ and glued the colored panel to it. To finish off the card, I glued everything to a white A2 card base.
Kat Scrappiness Products Used:
I hope you enjoyed this card process and feel inspired to try your hand at sketching your own elements into your card scenes.
Thank you so much for stopping by, and don’t forget to check out What’s New at Kat Scrappiness for even more crafty inspiration!
Please subscribe to the Kat Scrappiness newsletter! Each Friday there is a Secret Subscriber Special in the newsletter that you don’t want to miss!
See you next Sunday!
Kelsey
Hello my crafty friends!
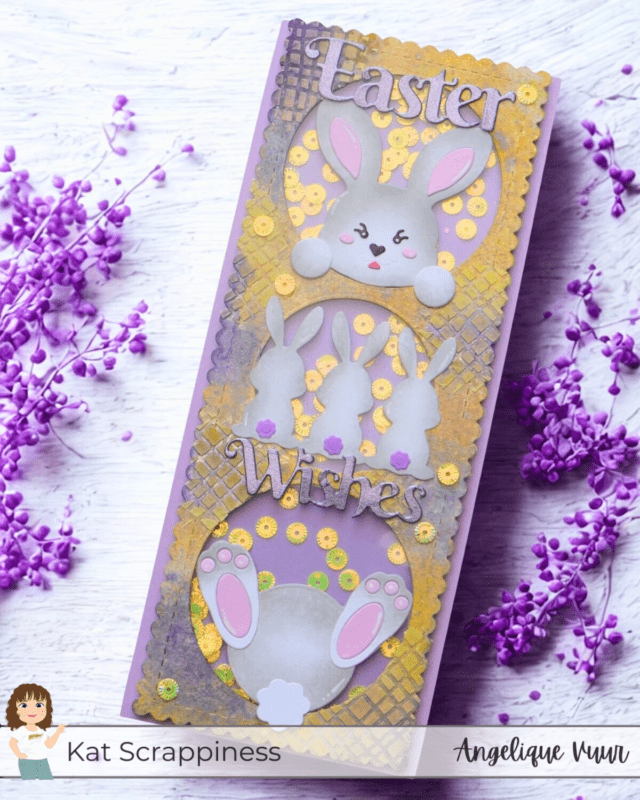
Angelique here with a new handmade card tutorial. Today I’m excited to share my first Easter card, a playful slimline shaker card created with the beautiful products from Kat Scrappiness. This Easter card combines die cutting, ink blending, mixed media texture, and of course… lots of shaker sparkle!
This card measures 3.5 x 8.5 inches, making it the perfect slimline size for building a fun vertical scene.
So let’s hop on!
Card size: 3,5 by 8,5 inch
White card base
Lilac mat: 3,5 by 8,5 inch
White background panel watercolor paper: 3 1/4 by 8 1/4 inch scalloped
I started with a white card base sized 3.5 x 8.5 inches.
From lilac cardstock, I cut another panel in the same size to serve as the back of the shaker.
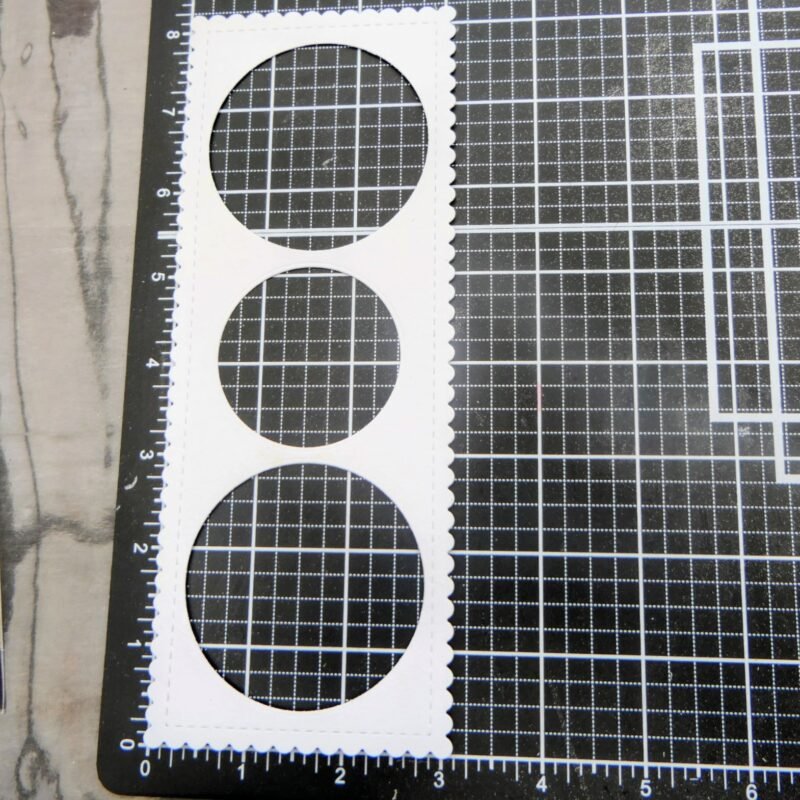
Using watercolor paper, I die cut the largest Stitched Scalloped Slimline Dies for the front panel.
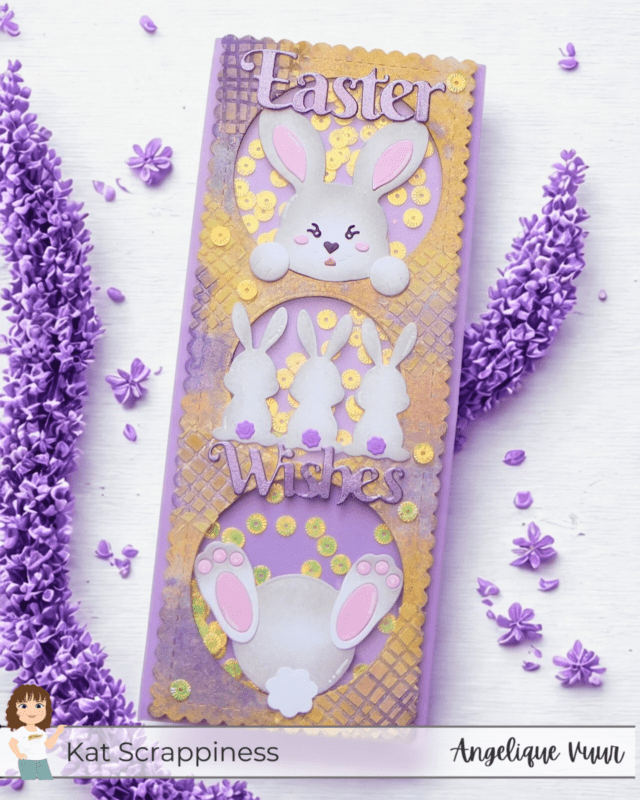
Next, I used the Never Ending Circle Craft Dies to create three shaker windows — one at the top, one at the bottom, and a slightly smaller circle in the center. This layout gives the design a playful stacked look.
I also die cut acetate using the same slimline die to fit perfectly behind the front panel.
Now for the fun part!
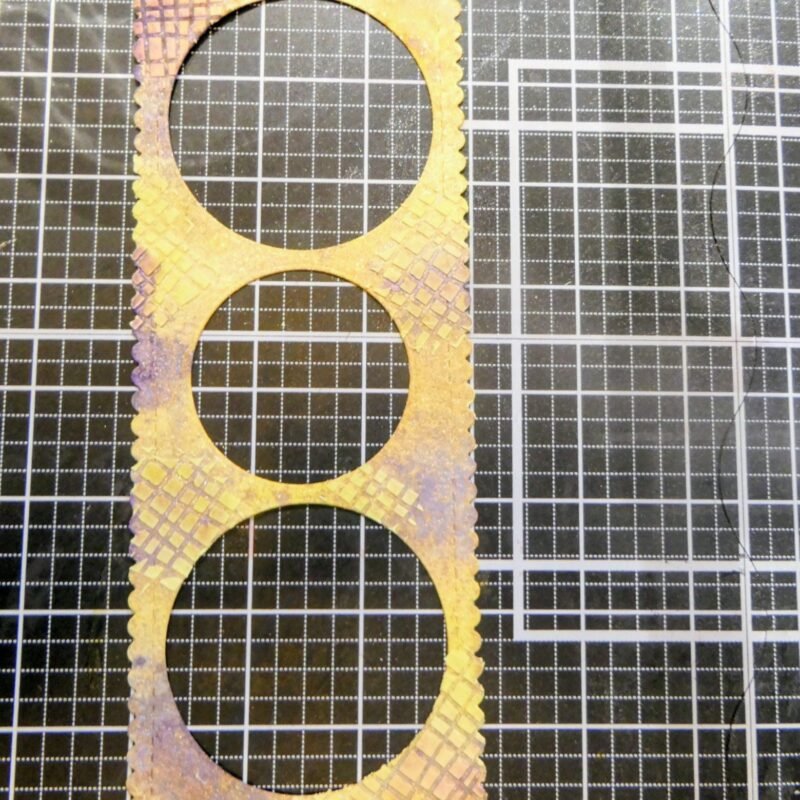
I lightly sprayed the watercolor panel with water and added spray colors in layers:
Yellow first
Light purple
Darker purple
Make sure to dry in between layers to avoid muddy colors.
When I was satisfied, I added beautiful shimmer using Tim Holtz Distress Spritz in Squeezed Lemonade.
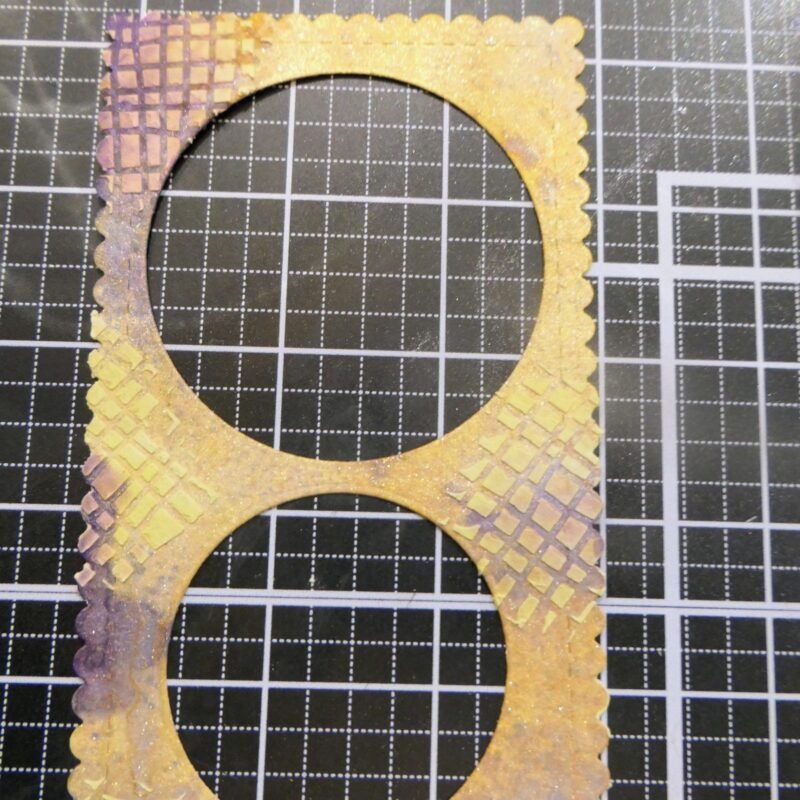
To add texture, I mixed a small amount of white paste with some yellow ink to create a soft yellow tone. Using the Burlap Background 6×6 Stencil, I applied the paste in several areas for extra dimension and interest.
This step gives the card a subtle mixed media look while keeping it soft and spring-like.
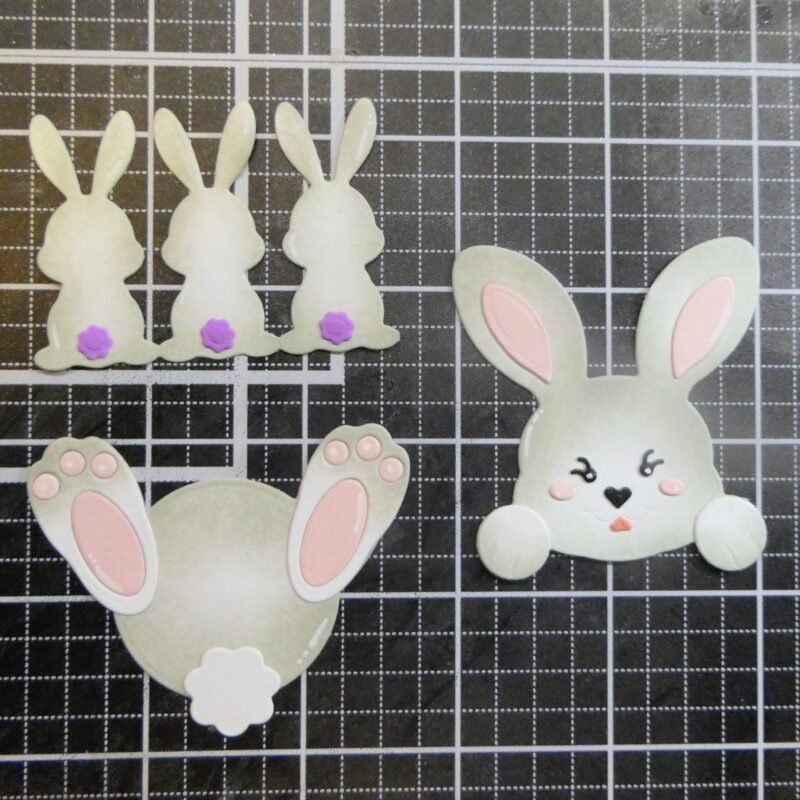
I die cut all elements from the Peeking Bunny & Bunny Butt Craft Dies from white cardstock.
The eyes and nose were die cut from black cardstock.
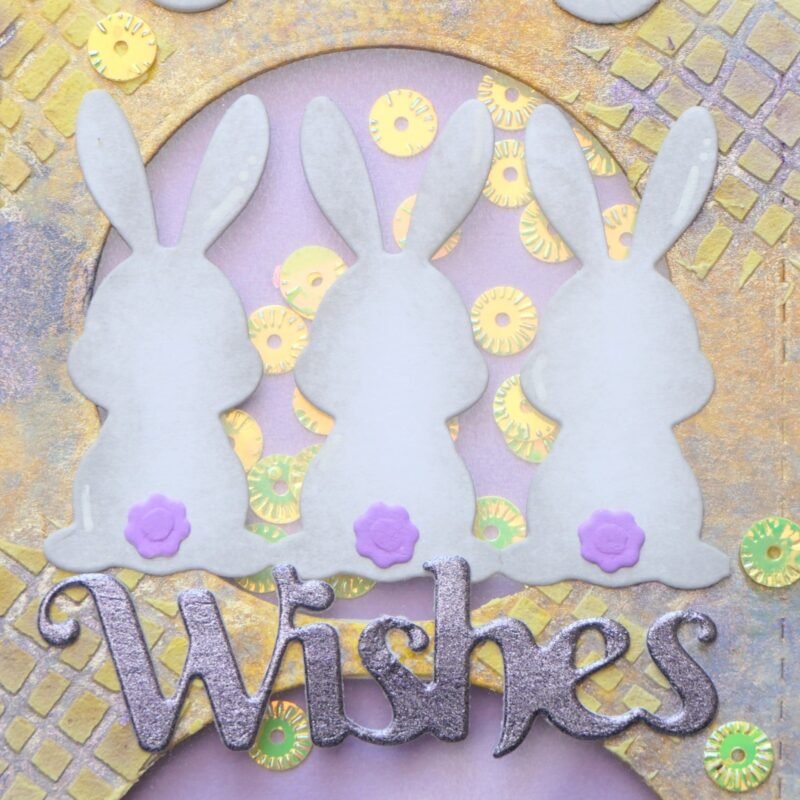
For the trio of bunnies in the center, I used the row of bunnies from the Easter Wishes and a Bushel of Bunnies Craft Dies.
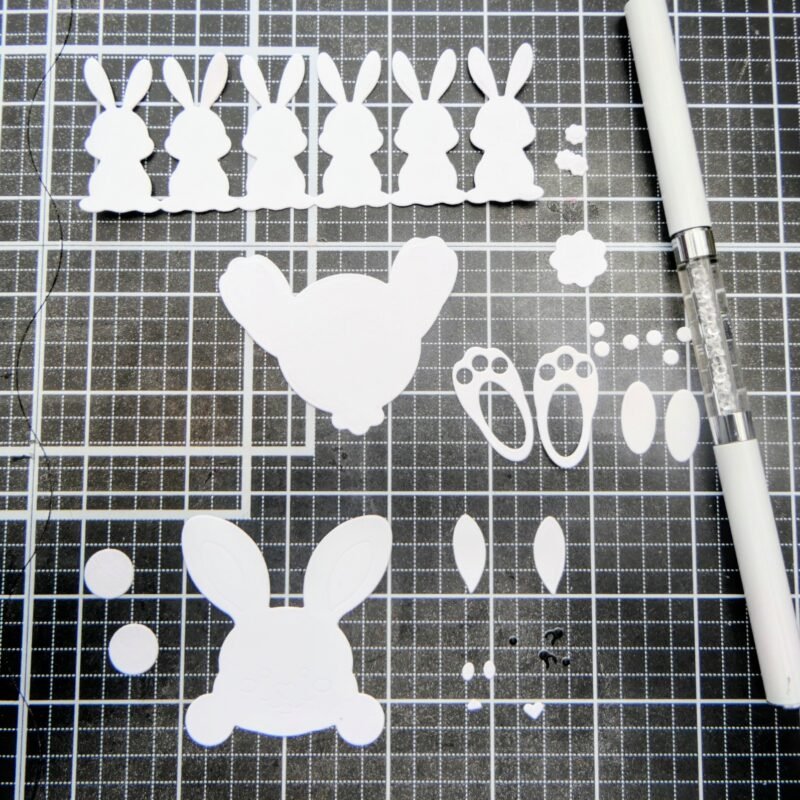
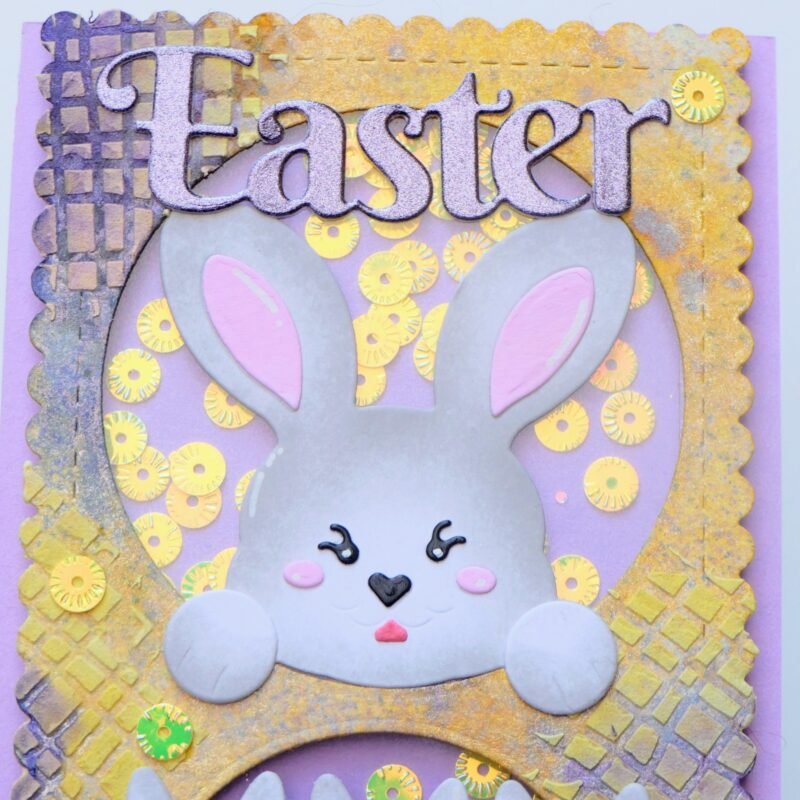
The sentiment “Easter Wishes” was die cut from purple pearl paper for a soft shine.
Bunnies blended grey (darker at the edges, lighter to the center) using Kat Scrappiness blending brushes
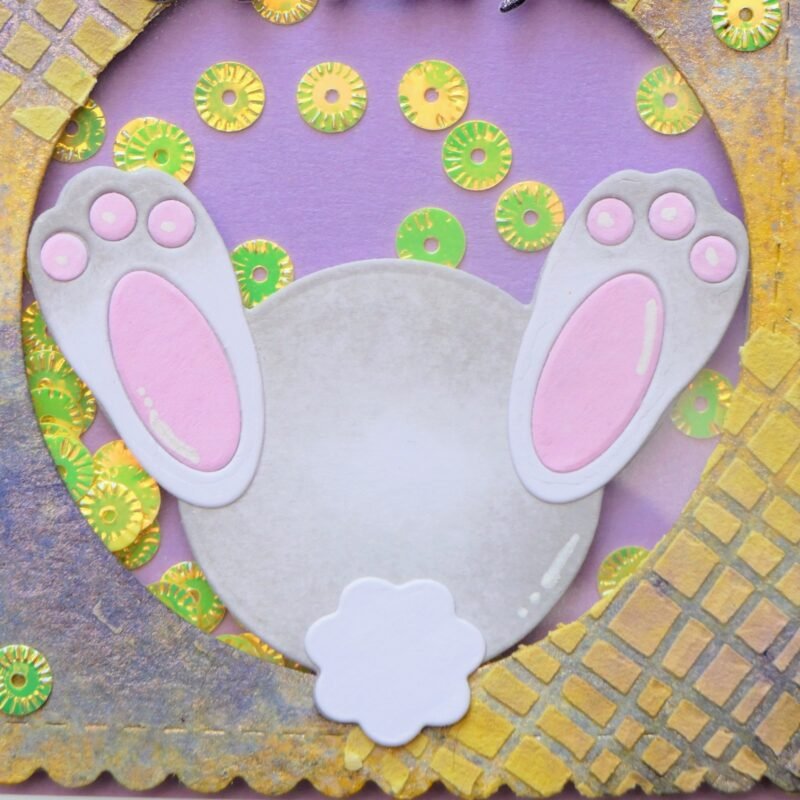
Inner ears & paws: soft pink
Tongue: light red
Small bunny tails: lilac
Large bunny tail: white
Highlights added with Nuvo White Gel Pen
I adhered the acetate behind the front panel using strong double-sided tape.
Foam tape was added around the edges and between the circle openings to create three separate shaker pockets. I used anti-static powder to prevent the sequins from sticking.
Each pocket was filled with the Yellow Pinwheel Sequin Mix, and the lilac cardstock panel was adhered to seal the shaker.
Finally, the completed shaker panel was attached to the white card base.
The bunnies were adhered onto each circle window:
Peeking bunny on top
Trio in the center
Bunny butt at the bottom
The sentiment was added, and I finished the card with a few extra sequins on the front for added sparkle and dimension.
And that completes this card.
This Easter slimline shaker card was such a joy to create. The combination of soft spring colors, texture, and playful bunny elements makes it perfect for sending cheerful Easter wishes.
I hope this tutorial inspires you to create your own slimline shaker card, whether it is an Easter card or anything else.
Thank you so much for stopping by, and don’t forget to check out What’s New at Kat Scrappiness for even more crafty inspiration!
Until next time — happy crafting!
Hugs,
Angelique 💗