Hi everyone, it’s Tina here. Today I am so excited to share a card using the new Merry Christmakah with Shadow die. I have been wanting this die for a long time. In my family we have mixed marriages and combining two holidays with one die will make my holiday cards meaningful. Below is the steps to create your own card and I have a matching mini slimline envelope card as well.

Step 1 – Trim White Cardstock to 7” x 6”, score at 3 1/2” and fold in half for a horizontal top fold card. (Mini Slimline)
Step 2 – Diecut Mini Slimline Double Stitched using Pattern Paper from your stash. Adhere to card front using Bearly Art Precision Glue.
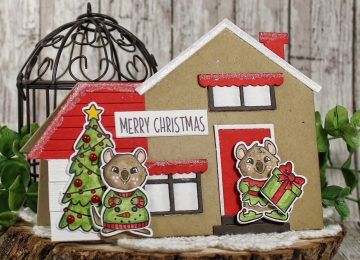
Step 3 – Stamp Dress Up Quokka using Gina K Amalgam Ink on White Cardstock. Color image using alcohol markers of your choice. Diecut with matching die.
Step 4 – Stamp Ugly Sweater Add On (sweater and image inside sweater) using Gina K Amalgam Ink on Patterned Paper. Diecut with matching die.
Step 5 – Stamp Christmas Costume Add On (tree) using Gina K Amalgam Ink on Patterned Paper. Diecut with matching die. (At the moment there is a digital cut file). Adhere the tree and Quokka image with the ugly sweater to the card front using Foam Tape.
Step 6 – Diecut Merry Christmakah using Vellum for the Shadow die and Patterned Paper for the word die. Adhere to card using Bearly Art Precision Glue.
Step 7 – For added interest and sparkle adhere Red Rose Pearl Mix to the trees and card and Gold Mine Rhinestone to the top of the tree.
Step 8 – Diecut Happy Mail Mini Slimline Envelope using matching Patterned Paper. See below for photos for assembly.


I love having a matching envelope to go with my card. It adds a personal touch with the work that went into your card. Below is a link to all the products used. Thanks for stopping by and Happy Crafting!
Products Used: