Follow:
    Design Team Projects

    A Halloween Boo! Card

    Hello Friends!!! Nora here on the blog today with a festive Halloween card using some of the FABULOUS Kat Scrappiness Shop Halloween products. Today I focused on using the new Creepy and Kooky Paper Pad and some of the fun KS dies for accents.

    How I created this card:

    • Blend orange ink on the front of an A2, white card base.
    • Die cut a spider web border out of black paper using the Halloween Border Dies.
    • Using the Creepy and Kooky Pattern Paper Pad, cut a piece of pattern paper 1 1/2″ by 5 1/2″ and a piece of striped paper into a 1/4″ by 5 1/2″ strip. Adhere to the top of the card, tucking your border die cut underneath the striped strip.
    • With the Kat Scrappiness Condensed Uppercase Alphabet Dies, die cut the word “boo.” Ink blend the letters with purple ink and adhere to the card front as shown.
    • Use the Kat Scrappiness Boo-gy Ghosts Dies to die cut a ghost, broom and the witch hat out of paper. Adhere the ghost and witch hat to the card front using foam adhesive. Adhere the broom at the end of the sentiment.
    • Fussy cut the candy corn out of the same paper that was used at the top. Adhere randomly to the card front.
    • Cover the candy with Glossy Accents. Use Glossy Accents to add “drips” to the top of the die cut letters in the sentiment and the card is complete!

    I hope this festive card inspires you to create one of your own Halloween creations.

    Thank you for taking the time to stop by today. Be sure to check back in to the Kat Scrappiness Blog to see some more fabulous projects by the Design Team.

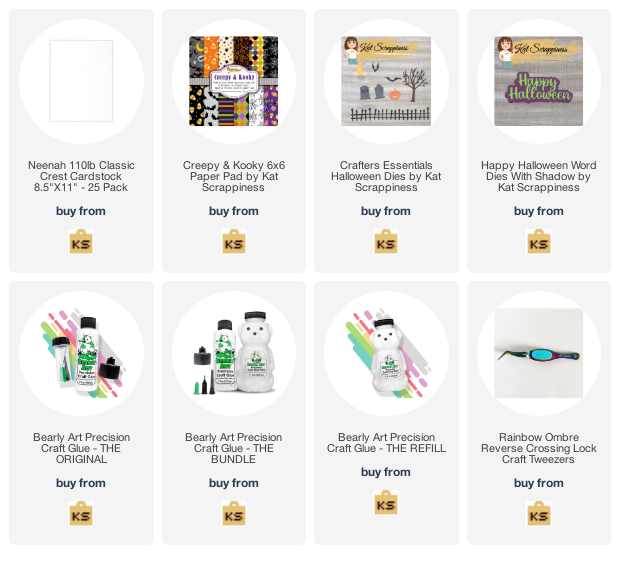
    Below are links from the products used from the Kat Scrappiness Shop. Affiliate links are used at no extra cost to you.


    Design Team Projects

    Boo

    Happy Wednesday everyone.  It’s Caren here on the blog today.  I have a fun Halloween edge to edge shaker card for you today using lots of Kat Scrappiness products!

    Here is how I created the card:

    Thanks for stopping by!

    – – –– – –– – –– – –– – –– – –– – –– – –– – –– – –– – –– – –– – –– – –– – –– – –– – –– – –– – –– – –– – –– –

    Here is a link to the Kat Scrappiness shop and direct links for products I used on today’s card.

    – – – SUPPLIES for today’s project– – – – – – – – – – – – – – – – – – – – – – – – – – – – – – – – – – – – – – –

    Design Team Projects

    Candy Corn Halloween Card

    Hello crafty friends! Sammi here to show you how to make this super easy and quick card using the amazing Creepy & Kooky 6×6 paper pad from Kat Scrappiness! I just love this paper! It is perfect for making quick Halloween cards and I am going to show you how to make this super cool card! Here is what you do:

    1. First I cut put a piece of cardstock with the Mini Slimline Lattice Frame Die and I ink blended it black. You can also just cut it out in black cardstock, but I was not sure of the color I was going with, so I ink blended it.
    2. Then I cut a piece of the black candy corn paper the size of the mini slimline piece and glued the black Lattice Frame piece onto the candy corn paper piece using Bearly Art glue. I then cut a piece of the orange candy corn paper the same size of the middle of the Lattice Frame piece and popped it onto the card panel using foam tape.
    3. I then cut out the spiderweb border in black cardstock using the Halloween Border dies and glued the border onto the orange candy corn panel using Bearly Art glue.
    4. Using the Happy Halloween w/ shadow die, I cut out the shadow in black cardstock and the Happy Halloween sentiment in white cardstock. I then ink blended the sentiment in black and orange distress ink and then added some Glossy Accents to give it some shine. After the Glossy Accents was dry, I glued the seniment onto the shadow and then popped it up on the card pane using more foam tape.
    5. I wanted to add the little spider from the Creepy Crawly dies, so I cut him out in black cardstock and glued him onto the card panel coming down from the spiderweb. I then added some Onyx Black Pearl Mix embellishments to finish the look.
    6. I then glued the card panel onto a mini slimline card base and I was done!

    This is such a fun, cool and easy card to make! The Creepy & Kooky paper pad is so much fun to work with and you can make some amazing projects with it. Thanks for stopping by and have a great day!

    Here are the links to what you need to make this card:

    Creepy & Kooky 6×6 Paper Pad by Kat Scrappiness – Kat Scrappiness, Inc

    Creepy Crawly Dies by Kat Scrappiness – Kat Scrappiness, Inc

    Halloween Border Dies by Kat Scrappiness – Kat Scrappiness, Inc

    Happy Halloween Word Dies With Shadow by Kat Scrappiness – Kat Scrappiness, Inc

    Mini Slimline Lattice Frame Die from Kat Scrappiness – Kat Scrappiness, Inc

    Onyx Black Pearl Mix by Kat Scrappiness – Kat Scrappiness, Inc

    Bearly Art Precision Craft Glue – THE ORIGINAL – Kat Scrappiness, Inc


    Design Team Projects

    Autumn Daisies Slimline Card

    Happy Monday Crafty Friends! Priscilla here from the Kat Scrappiness Design Team. Today’s slimline card features a trailing bouquet of daisies, but not in their usual spring colors; instead, in autumn shades of rich coral, spicy mustard, and cinnamon brown.

    I used the Kat Scrappiness Oopsie Daisy stamp set and coordinating dies to make today’s card.


    This stamp set includes two daisy flowers as well as the centers, stems, and leaves.  All of these images come with multiple layers that will allow you to EASILY create beautiful, realistic stamped daisies!  A Layering Stamping Guideis included on the back of the stamp set.

    Note: Although I did not use it for this project, there’s also a Layered Oopsie Daisy Stencil set that includes three (3) reusable layering stencils that can be used separately or layered together for a more dimensional look. The Stencil Guide is located on the back of the packaging. 


    Card Details:

    • Created a Slimline side-folding card base (3.25″ x 8.25″) using a white card base.
    • Die cut a sheet from The Lumber Yard Slimline Paper Pad using the largest of the Kat Scrappiness Double Stitched Nesting Slimline Dies and adhered to the card base.
    • Stamped both styles of daisies beginning with the base layer images in the lightest ink before continuing with the remaining layers, each in darker inks until the daisies were finished.
    • Die cut the finished daisies with the coordinating dies and set aside.

    Thank you so much for stopping by! Don’t forget to check out what’s NEW in Kat’s Shop, and follow my blog, Instagram, and Facebook for more “Kat Scrappiness Amazingness”!

    Stay Safe . . .

    Priscilla 🌻

    The supplies I used are listed and linked below. I would be so grateful if you use these affiliate links  to grab your Kat Scrappiness Goodies! No extra cost to you!

    Design Team Projects

    BOO It’s a Spooky Spider Halloween Card

    Hope you are having a great weekend my crafty friends! Kathy from the Creative Crew with a FUN Halloween Card featuring the NEW Creepy & Kooky 6×6 pad from Kat Scrappiness and the Creepy Crawly Dies with some cute (yes…these are cute!).  The spider web on this card is inlaid and it’s easy to do!i

    Steps to Create the Card

    • Cut, score, and fold an A2 top folding, horizontal card base.
    • Cut another panel from the Creepy Kooky paper pad measuring 3.75″ x 5″
    • Using one of the web dies, place it on patterned paper and die-cut.  Keep all the little bits from inside the spider web.  
    • Cut another web from black card stock.
    • Cover a piece of thinner white card stock (slightly smaller than 3.75″ x 5″) with a sheet of double-sided adhesive. Remove the backer sheet and carefully add your patterned paper on top.
    • Now I’ll inlay all those little web pieces.  Alternatively, you can just glue the black web on top of the patterned paper.
    • Die-cut BOO 1x from black card stock and one time from purple card stock.  If you don’t have purple card stock, color a piece of white card stock with an alcohol marker.  
    • Cover the purple letters with clear, sparkly embossing powder and heat.
    • Slightly offset the purple letter onto the black and adhere with liquid glue.
    • Die-cut your spider, cover with clear embossing powder, and heat.
    • Put a small piece of tape behind his eye holes, and add a bit of glue, and your googly eyes.
    • I used Distress Oxide Black Soot and blended it around the card panel.  I think this adds a bit of depth. I also glued a few pairs of googly eyes around the card because…why not??  I also added a few enamel dots to the centers of a few webs.
    • I cut a piece of orange card stock 1/8″ larger and adhered it behind the main panel with double-sided tape. Finally, I added the panel to the card base with more double-sided tape.

    I hope this inspires you to make some Halloween cards with this adorable paper pad and these dies.  Here’s a list of the products used in this project.  These affiliate links are provided at no additional cost to you.  I thank you for your support when using these links!  Have a fabulous crafty day!


    https://linkdeli.com/widget.js?id=f5e8378456858c916708

    Design Team Projects

    Mini Slimline Halloween Scene Card

    Hi everyone, it’s Tina here. I have a Mini Slimline Halloween Scene card to share using the Creepy & Kooky 6×6 Paper Pad and the Crafter Essentials Halloween Dies. Below you will find the steps to create your own card.

    Step 1 – Trim White Cardstock to 7″ x 6″, score at 3 1/2″ and fold in half for a horizontal top fold card. (Mini Slimline).

    Step 2 – Trim Creepy & Kooky 6×6 Paper Pad to 2 15/16″ x 6″. Adhere to card front using Bearly Art Precision Glue.

    Step 3 – Diecut Crafters Essentials Halloween using various colors of cardstock. Adhere the fence, tree, moon, pumpkins and tombstone using Bearly Art Precision Glue. I forgot to add green cardstock behind the fence but I don’t mind the white space behind. But if you prefer the green then adhere it before adding the fence right after Step 2.

    Step 4 – Diecut Happy Halloween with Shadow using White cardstock for the shadow and Black cardstock for the word. Assemble and adhere to card using Bearly Art Precision Glue.

    Below is a link to all the products used. Thank you for stopping by and Happy Crafting!

    Products Used:


    https://linkdeli.com/widget.js?id=f5e8378456858c916708

    Design Team Projects

    Halloween Shaker

    Hello Crafters!! Happy Friday! Today I would like to share a fun Halloween shaker card I made using several Kat Scrappiness Products.

    .

    I just love shaker cards. Kat Scrappiness has so many great embellishments to add to your shaker cards. Check out these cute Simply Batty Sprinkles, and the Orange Creamsicle Pearl Mix . These are just a couple of the NEW Released Embellishments.

    x


    I also used the NEW Halloween Paper Pad Creepy & Kooky. This paper pad has so many great Halloween designs.

    Also to create this card I used the following dies.

    Crafters Essential Fall Dies – The Crafters Essentials Fall Dies include 9 individually designed dies that you can mix and match to create uniquely designed cards time and time again.

    Wood Grain Framed Diamond Wire – This die features an intricate diamond wire background design with an embossed wood grain frame.  It measures approximately 4.25 x 5.5.  This unique background die is perfect for greeting cards, mixed media and scrapbooking projects.

    Lastly, I used the Happy Halloween Sentiment from the Toil & Trouble Layered Stamp Set.

    I hope you enjoyed my creation. Thanks so much for stopping by, have a GREAT day!!