

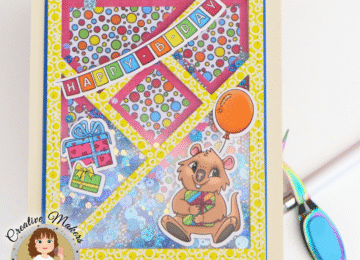
- Prepare the background by ink-blending a panel of Bristol Smooth White Card Stock measuring 4 1/4 x 5 1/2 inches with Scattered Straw, Cracked Pistachio and Peacock Feathers Distress Oxide Inks using small ink blending tools. Adhere this panel on some A2-size notecard.
- Die-cut the pink frame using the Layered Balloons Coverplate Die on some 110 lb. Neenah Solar White Card Stock. Adhere this frame on the ink-blended panel with foam adhesive for added dimension.
- Use the Laminator and Deco Foil Toner Sheets with Deco Foil Transfer Sheet in Shattered Glass to foil this panel.
- Use the balloon dies from the Layered Balloons Coverplate Die to die-cut the balloons. Foam-mount the pieces on the card panel for added dimension.
- Foam-mount the frame on the card for added dimension.

- Die cut the words “Happy Birthday” using the Happy Birthday Word Die with Shadow on some Black and white card stock. Adhere them together with liquid glue.
- Finish the card design by adhering the sentiment on the card.

———–SUPPLIES———-
No Comments