
Hi everyone, it’s Tina here. I have a Rainbow Balloons and Background Card to share using the Layered Balloon Coverplate and Make A Wish w/Shadow Die. Below you will find the steps to create your own card.

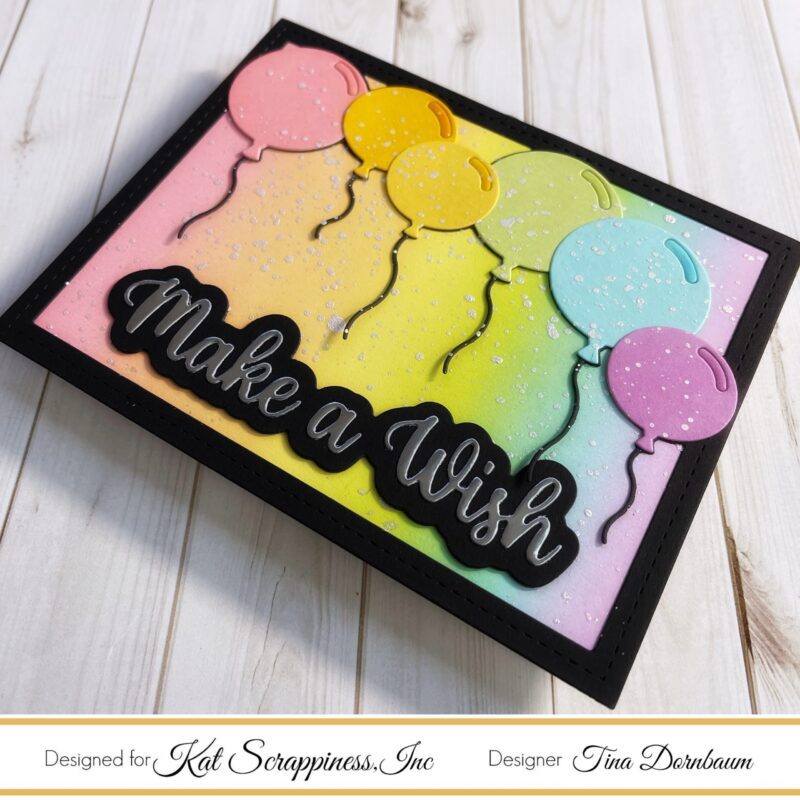
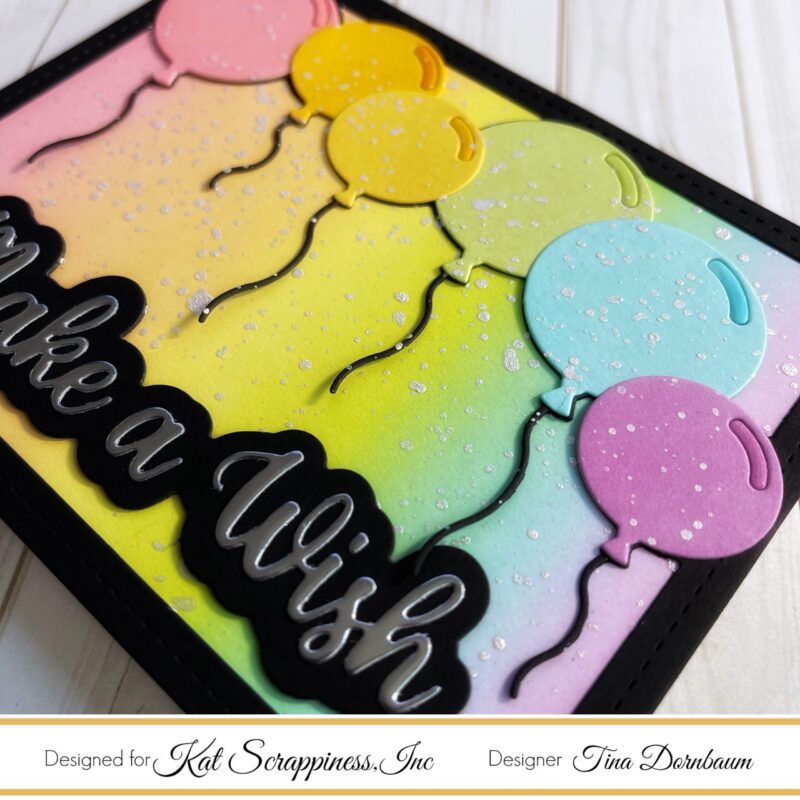
Step 1 – Trim White Cardstock to 5 1/2” x 8 1/2”, score at 4 1/4” and fold in half for a horizontal top fold card. (A2)
Step 2 – Trim White Cardstock to 4 1/4” x 5 1/2”. Apply Inks of your choice in rainbow order using a Blender Brush. I used Inks from left to right in colors Light Red, Orange, Yellow, Green, Lt. Blue and Purple. Adhere to card front using Bearly Art Precision Glue.
Step 3 – Diecut Layered Balloon Coverplate using Black Cardstock. Adhere to card using Bearly Art Precision Glue. Diecut Layered Balloon Coverplate (single balloons) in the same colors of cardstock as the background. Adhere to card using Bearly Art Precision Glue.
Step 4 – Optional – Mask the edges with Post It or whatever you have on hand and splash with a fan brush Gansai Tambi Pearl Colors. I used White Gold. If you don’t have then you can use Perfect Pearls Pewter Color by adding some water or whatever Spray you have in Silver. Let dry.
Step 5 – Diecut Make A Wish w/Shadow using Silver Cardstock for word and Black Cardstock for shadow. Assemble and adhere to card using Bearly Art Precision Glue.
This card can be used for several occasions by changing the sentiment. Below is a link to all the products used. Thank you for stopping by and Happy Crafting!
Products Used:
https://linkdeli.com/widget.js?id=f5e8378456858c916708
1 Comment
So pretty! Love the matching balloons!!
February 17, 2022 at 3:39 pm