Follow:
    Design Team Projects

    Spring Fling Thanks Card

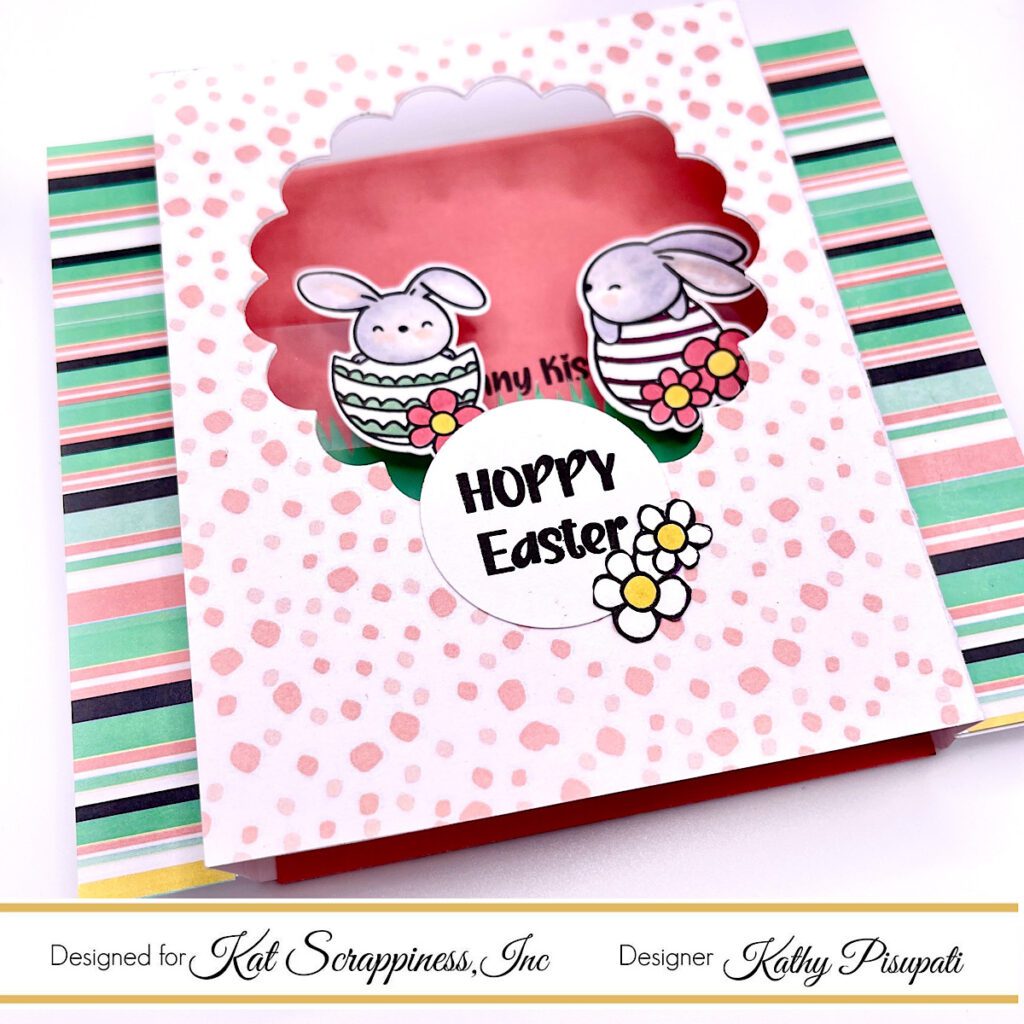
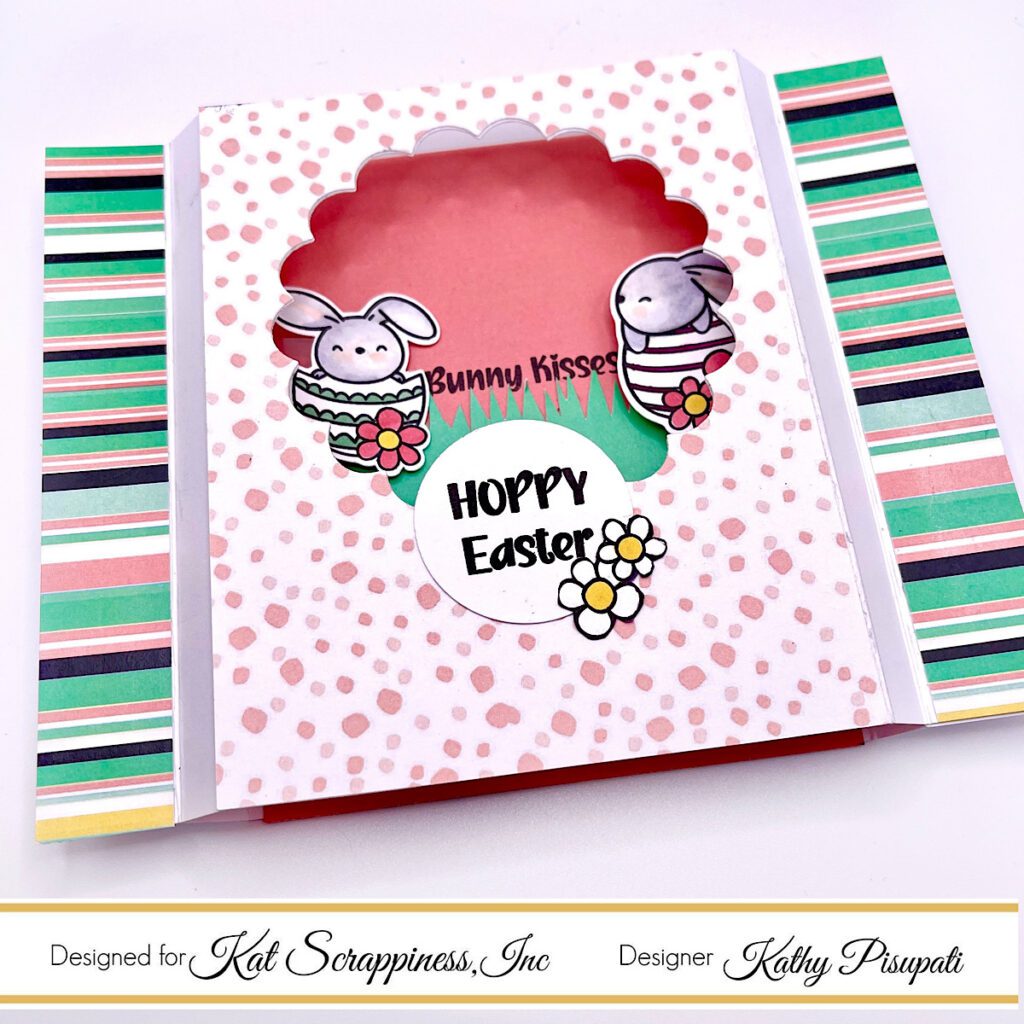
    Hello my crafty friends! Sammi here to share a card made with the new Spring Fling 6×8 Paper Pack, which I love the colors in this pack! I decided I wanted to play with the polka dots, and I thought the Never Ending Circle dies would be perfect to compliment this paper. Here is how I made this card:

    1. Using the Emossed Rope Rectangle dies, I used the larger die to cut out the solid seafoam colored paper, and then I used the next size down die to cut out the solid coral colored paper and the polka dot paper.
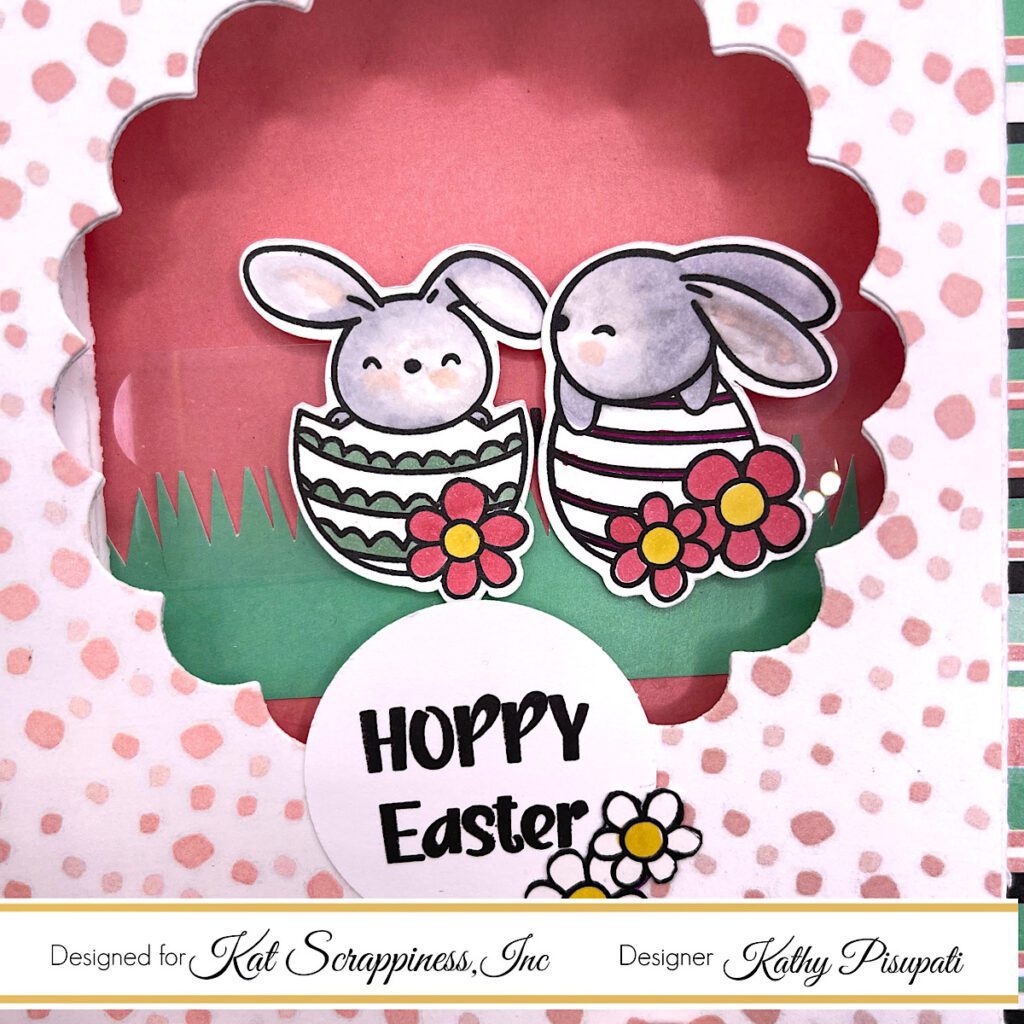
    2. Using one of the Never Ending Circle die, I cut out the middle of the polka dot paper, and then popped it up with foam tape on top of the coral colored piece.
    3. I then cut out the Thanks sentiment using the Thanks w/ Shadow Word die three times from 110lb Neenah cardstock and glued them on top of each other so I had depth. I then glued the Thanks sentiment in the middle of the circle with some Bearly Art Glue.
    4. I then glued the polka dot piece onto the seafoam colored piece, then glued the panel onto a prepared A2 sized card base.
    5. To finish the look, I added some Seafoam Pearl Mix and Bumble Bee Pearl Mix embellishments.

    I love how this card turned out and it was so easy to put together! Great if you need to make a Thanks card! Many other sentiments will work for this technique as well, so check out all of the sentiment word dies from Kat Scrappiness! Thanks for stopping by and have a great day!

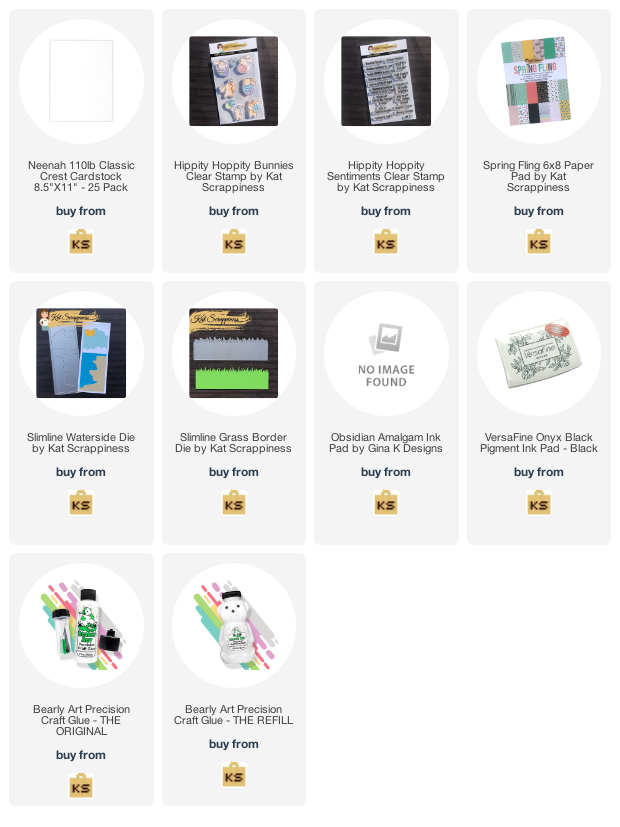
    Here is what I used for this card:

    Spring Fling 6×8 Paper Pad by Kat Scrappiness – Kat Scrappiness, Inc

    Embossed Rope Nested Rectangle Dies by Kat Scrappiness – Kat Scrappiness, Inc

    Never Ending Circle Dies by Kat Scrappiness – Kat Scrappiness, Inc

    Thanks Sentiment w/Shadow Die by Kat Scrappiness – Kat Scrappiness, Inc

    Seafoam Pearl Mix by Kat Scrappiness – Kat Scrappiness, Inc

    Bumble Bee Pearl Mix by Kat Scrappiness – Kat Scrappiness, Inc

    Bearly Art Precision Craft Glue – THE BUNDLE – Kat Scrappiness, Inc

    Neenah 110lb Classic Crest Cardstock 8.5″X11″ – 25 Pack – Kat Scrappiness, Inc

    Design Team Projects

    Spring Fling Paper Pad Release Winner

    So sorry for the delay!!!

    Thank you on behalf of the entire team at Kat Scrappiness for all your kind words about the products and inspiration the team made for the Spring Fling Paper Pad release.

    We had 18 comments on the release post and Random Number Generator choose comment 6 as the winner!!!

    The winner of the 6 x 8 Spring Fling and 6 x 8 Spectrum of Love paper pads is Tory Doherty


    .

    Please claim your prize within 48 hours and send an email to: winners@katscrappiness.com.   Have a wonderful day!

    Design Team Projects

    Happy Mother’s Day

    Happy Tuesday Crafty Friends! Priscilla here from the Kat Scrappiness Design Team. Today I am sharing a Mother’s Day card featuring an adorable quokka, complete with her own British “Fascinator” headpiece. A quokka (pronounced k waa-kuh) is a short-tailed scrub wallaby from Australia. She’s known as the “World’s Happiest Animal.” What an appropriate critter then to wish any Mom a “Happy Mother’s Day!”

    I used the Kat Scrappiness Valentine Quokka Stamp Set and Coordinating dies, the Happy Mother’s Day Word Die and Shadow, and several papers from the new 6″ x 8″ Spring Fling Paper Pad.

    Card Details:

    Thank you so much for stopping by! Don’t forget to check out what’s NEW in Kat’s Shop, and follow my blog, Instagram, and Facebook for more “Kat Scrappiness Amazingness”!

    Stay Safe . . .

    Priscilla 🌻

    The supplies I used are listed and linked below. I would be so grateful if you use these affiliate links  to grab your Kat Scrappiness Goodies! No extra cost to you!

    Design Team Projects

    Bunny Kisses – Interactive Shadow Card

    Good Morning, it’s Kathy from the Design Team! It’s time for some more inspiration on the Kat Scrappiness blog today. While Easter is over I had to share my last Easter wish of the season with you. This is a cute interactive shadow box with the adorable Hippity Hoppity Stamp Set and Hippity Hoppity Sentiment Stamps. I also used the Spring Fling paper pack from Kat Scrappiness. The colors are amazing, the paper is double-sided and the pack also includes solid colors. This card was inspired by Funn University and Mary Gunn. I will link to the video below so you can get measurements for a card that measures 4.25″ x 4.25″ Mine is larger and I fumbled a bit with it so do as I say not as I do, check out the video!

    As I mentioned I am giving you the dimensions for a card that measures 4.25″ x 4.25″. Here is a tip for making this card – DON’T use 110 lb card stock. This card will stand on its own with 80 lb card stock. I have included a graphic below to show you the measurements and score lines.

    Card Supplies

    Card Details

    I am not going to go into too many details because it is better to watch the video. You can make your card any size you want so remember that whatever the size of your center panel you need to add 1″ to get the correct envelope size. So for a 4,25″ center your final card inserted into an envelope will be 5.25″. So if you use the template above your card will fit into a standard A2 envelope.

    Here are the rough details for the card I made. (Again, I am not going to give you my measurements. Follow the template for a more normal-sized card.)

    • Cut 2 pieces of card stock to the measurements in the graphic above.
    • Score at 1/2″ and 1″ on both ends using your Kat Scrappiness bone folder.
    • Fold and crease at all score lines.
    • Select the coordinating papers you want to use from the Spring Fling Paper Pack.
    • You will need a A2 pieces at 4.25″ x 4.25″. I used the dot pattern on the front and a beautiful coral solid for the inside.
    • You will need 2 OR 4 pieces cut 1/2″ x 4.25″. I only decorated one of the 1/2″ areas on both sides.
    • Cut a center out of the front panel area. Use a die you have in your stash.
    • Stamp and color your two images. These images will cover a small sentiment so test them out. There were many perfect sentiments for me to use in the Kat Scrappiness Hippity Hoppity Sentiment set.
    • Stamp another sentiment for the front of your card. I stamped Hoppy Easter on a small circle die. The flowers were part of the Hippity Hoppity Bunny set and I just cut them off one of the stamped bunny images.
    • I didn’t have a die to create grass so I used my handy scissors. Hey….it works!
    • Work out the placement of your stamped images. You can have them meet in the middle or stack on top of each other. Watch this video for the mechanics.
    • Once I had all the mechanics worked out (well, I didn’t because I don’t follow instructions very well!) Use double-sided adhesive to adhere all of your elements. TIP: I add a bit of liquid glue to the top of the double-sided adhesive which allows me some wriggle room.

    These stamps and sentiments from Kat Scrappiness are perfect for this type of card. I encourage you to hop over to the shop to see all of the other critters you could use like our Quokkas! Check them out as well. As always, thank you for stopping by I appreciate everyone of you. Have a fabulous day!

    Design Team Projects

    Spring Has Sprung Mini Slimline Card

    Hi everyone, it’s Tina here. Spring is in the air and I couldn’t resist using the Slimline Waterside for the cloud and sun and the Slimline Grass border along with the Spring Fling papers and Hippity Hoppity Bunnies and sentiment stamps. Below is the steps to create your own card.

    Step 1 – Trim White Cardstock to 7” x 6”, score at 3 1/2” and fold in half for a vertical side fold card. (Mini Slimline)

    Step 2 – Trim Spring Fling (pattern) to 3 1/2” x 6” and adhere to card front using Bearly Art Precision Glue. Trim Spring Fling (solid) to 2 3/4” x 5 1/4” and adhere to card front using Bearly Art Precision Glue.

    Step 3 – Trim White Cardstock to 2 1/2” x 5”. Diecut Slimline Waterside using Spring Fling solid and adhere to the top of the panel. Diecut Slimline Grass Border using Spring Fling solid and adhere to bottom of the panel using Bearly Art Precision Glue.

    Step 4 – Stamp Hippity Hoppity Bunnies using Gina K Amalgam Ink. Color in using and color medium of your choice. I used Copic Markers in the same tones as the Spring Fling. Fussy cut the image and adhere to the panel created in Step 3.

    Step 5 – Stamp Hippity Hoppity Sentiment using Versafine Onyx Black Ink on the panel created in Step 3. Adhere to card front using Bearly Art Precision Glue.

    This card can be for several occasions by changing the sentiment. Below is a link to all the products used. Thank you for stopping by and Happy Crafting!

    Products Used:


    https://linkdeli.com/widget.js?id=f5e8378456858c916708

    Design Team Projects

    Thank You Shaker

    Happy Saturday Everyone! Crystal here and today I wanted to share a mini slimline shaker card I made using the new Spring Fling Paper Pad and the Friendship Greetings stamp set! I love these two products together. The paper is perfect for this stamp set.


    For this card I also used the Thanks Sentiment with Shadow Die. I have needed a lot of thank you cards lately and this sentiment was just perfect. I love the shadow behind the sentiment, it really makes it pop. I also made this card a shaker. I adore shaker cards they are so much fun and fun for the recipient. For the shaker part of the card, I used the Mini Slimline Tri-Frame Dies. This die is perfect for your shaker cards. There is plenty of room on your frame for your foam tape. For those that make shaker cards knows how important that is. I also used the Mini Slimline Acetate Sheets. Yes Kat Scrappiness sells a lot of different sizes of acetate, I love how they are already cut to fit your card. Last but not least I used Black Obsidian Jewel Mix for the shaker. These jewels are beautiful. Have you checked out all the Jewels Kat Scrappiness sells? Wow they carry a large variety of jewels and all different colors and styles. This card was a lot of fun and can’t wait to mail this one out.

    Thank you so much for stopping by, I hope everyone has a wonderful weekend!!!


    Design Team Projects

    Last Minute Easter Card

    When you need a last minute card, it’s nice to have some fabulous dies and patterned papers that allow you to make a card in less than 10 or 15 minutes!


    For this card, I used 3 pieces of the Spring Fling patterned paper, the Leafy Frame Mini Slimline die, the Happy Easter word and shadow die, and some enamel dots.

    The patterned paper has several pieces of solid cardstock that coordinate beautifully with the patterned papers.  I used the mint green and the coral to die cut out the leafy frame and the Happy Easter word die sentiment.

    You can also see that I added 3 large enamel dots to the bottom right corner of the frame.  The enamel dots come on an acrylic sheet in a variety of sizes and colors.  These perfectly coordinated with the patterned paper!

    Video:  See all the card details and how to on the video below:


     [youtube https://www.youtube.com/watch?v=JNxdQZHR9WQ]


    Supply List:


    https://linkdeli.com/widget.js?id=f5e8378456858c916708

    Thank you so much for stopping by!  You can find more of my ideas and inspiration at Stamping Imperfection!