Follow:
    Design Team Projects

    Congrats Graduate

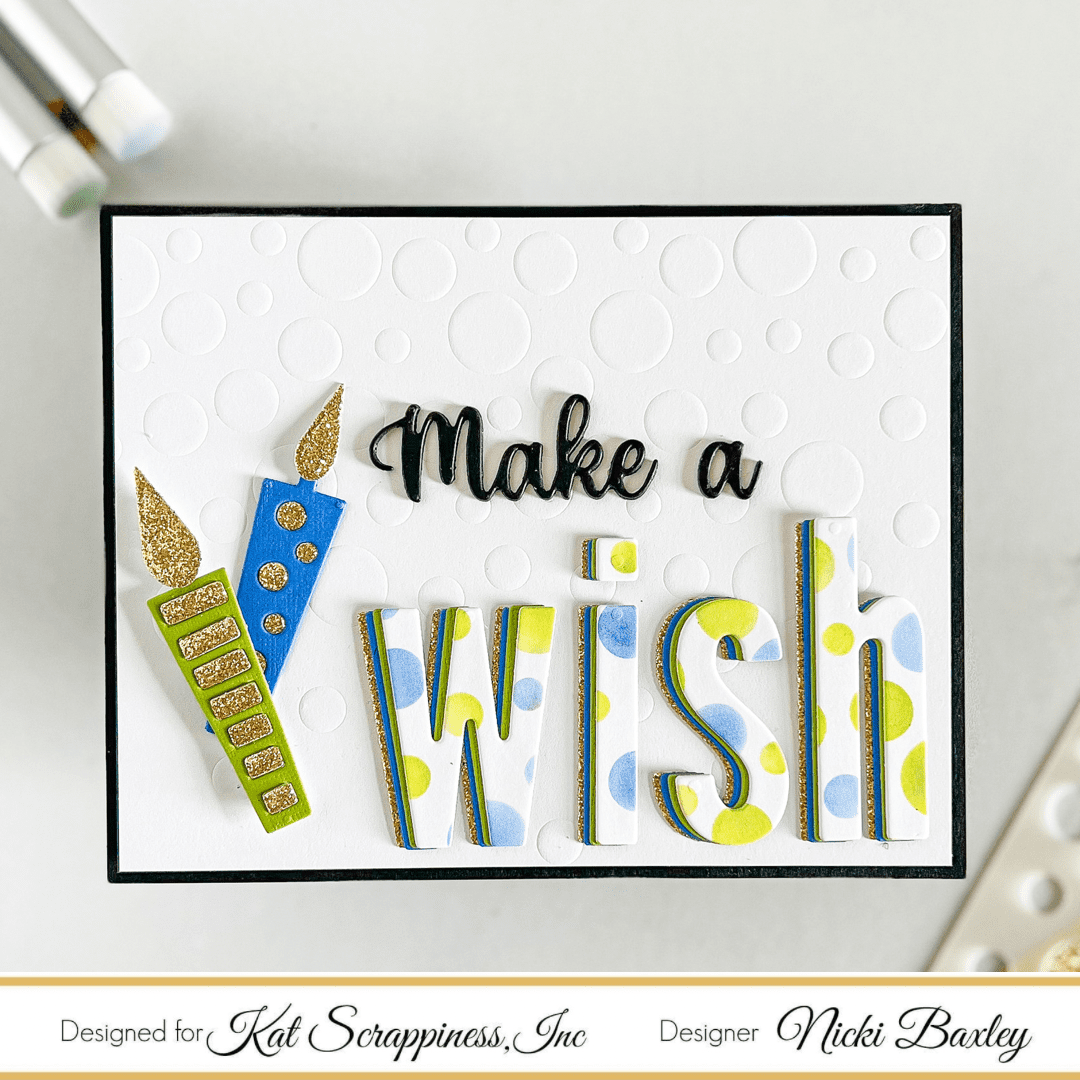
    Happy Monday Crafters. Today I would like to share a Graduation card I made with the fun new stencil Falling Stars along with the Everyday Quokka Stamp Set and the coordinating dies.


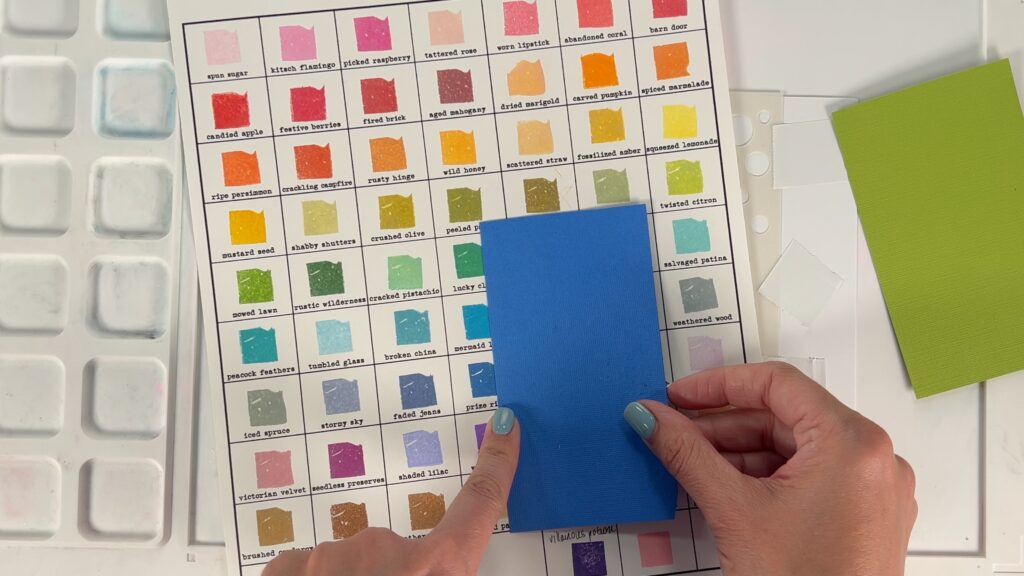
    Isn’t he just so cute? I stenciled my white base with red ink. I colored the quokka with tombow alcohol markers and prisma colored pencils. I cut him out then I added a graduation cap and a diploma to make him perfect for a graduation card. I used the congrats word die with shadow to give the card a sentiment.

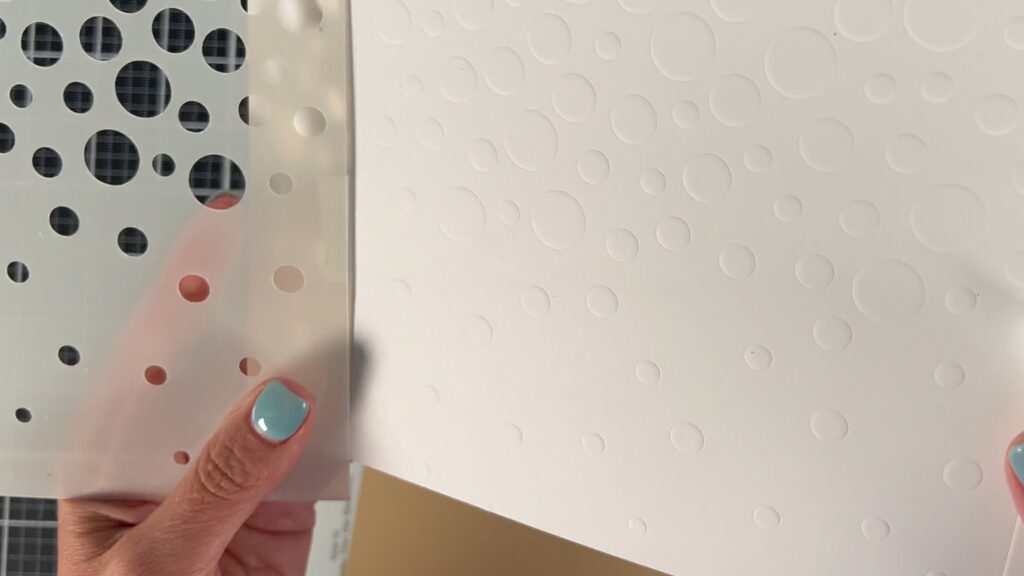
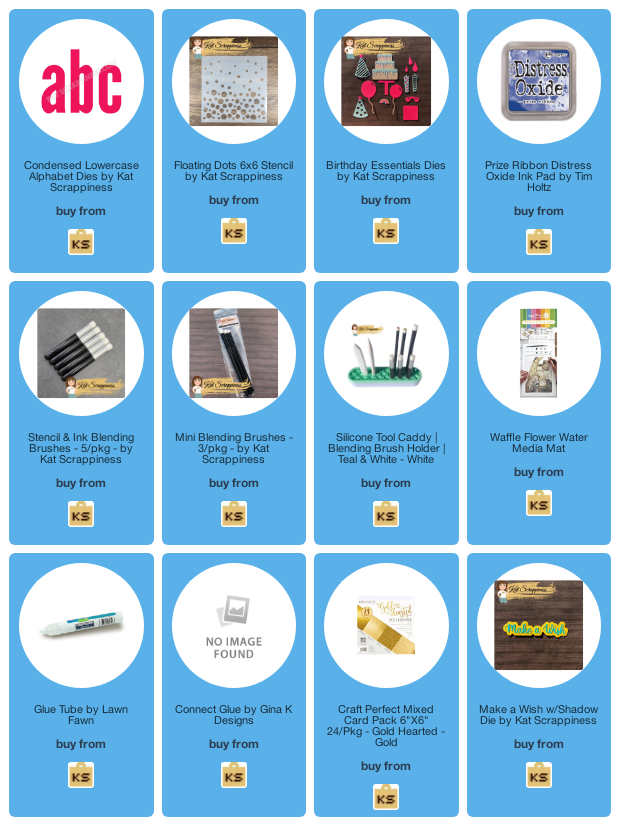
    If you haven’t had a chance to check out the new stencils go to the store and check them out HERE. These stencils are made from a thin but strong and flexible plastic and can be used with inks, paints, gels, sprays, embossing pastes, chalks, watercolors, and more. You will love using these stencils. Also Kat Scrappiness has stencil and ink blending brushes they are fantastic and they are what I used when I stenciled my stars. Check them out and get yours today!

    I hope everyone has a great Monday and week! Happy Crafting!


    Design Team Projects

    Birthday Kisses

    Hello Crafty Friends!  Donna W. here with a Birthday Card that features a mixed media vibe and one of the newest stencils.  Before we get to my card, I want to remind everyone of the 50% off All Clearance Sale that is currently on offer at The Kat Scrappiness Shop.  Stop by and check out the Clearance Category, now is a great time to get your hands on some crafty items!

    Now for my card!  I love stenciling on projects and have been active in my Art Journal so I’ve been “Mixed-Media”  minded lately.  This birthday card has a stenciled and inked background that is similar to how I break a blank page for my Art Journal.

    Using shades of Pink and Purple Ink Sprays, I inked a background panel of watercolor card.  Once completely dry, I’ve stenciled using the new Falling Hearts Stencil and a new Mini Stencil and Ink Blending Brush with ink in a shade of deep violet.  I’ve added splatters of white and silver watercolor paint to the background for that artsy look.

    To finish off the design, using the sentiment shadow from the Birthday Kisses Sentiment Die, I’ve die cut from the panel, cut the wording from silver mirror card, adhered all together and popped on craft foam for dimension.   Lastly, Pretty Pegasus Dual Colored Pearls and a doodled frame were added for additional interest.

    That’s all I have for you today.  Have a wonderful day, get inspired and Happy Crafting!

    Donna W.


    Design Team Projects

    Using Background Dies as Stencils | Patriotic 4th of July Card | Call Me Crafty Al

    Hello crafty friends!

    It’s Alicia a.k.a. Crafty Al here to share a look at the Patriotic Fourth of July card that I created with Kat Scrappiness goodies including the NEW Falling Stars stencil!

    To get started, I used the A2 Hearts Sunburst die as a stencil to create the red rays on the background of the card. While the red ink was drying I die cut 2 sets of “1776” from white and red cardstock using the Condensed Numbers dies. Later these 2 copies were adhered together for a shadow-look. After the red ink had dried I used the NEW Falling Stars stencil for the blue hearts.

    Before matting the stenciled piece, I added a strip of vellum down the center to help the die cut numbers stand out. After adhering the numbers to the card using foam tape, I added some Ice Ice Baby enamel dots to the card front for some added shine.

    You can check out my video for the full process…

    Thanks for stopping by and I hope you enjoyed today’s card!

    Alicia / Crafty Al

    Related Products:

    Kat Scrappiness

       Falling Stars stencil: http://shrsl.com/3iq7w

       A2 Heart Sunburst die: http://shrsl.com/3iq82

       Condensed Numbers dies: http://shrsl.com/3iq7x

       Ice Ice Baby Enamel Dots: http://shrsl.com/3bnb6

    Art Glitter Glue: http://shrsl.com/37svl


    **Some links above are affiliate links. I link them up for your convenience and may receive a small commission, at no extra cost to you. I hope you will consider using the links if you decide to purchase the products I share. 🙂

    Design Team Projects

    Rainbow Hugs

    Hello everyone!

    It’s Donna Idlet here featuring the NEWLY released “Floating Dots” 6×6 Stencil using Deco Foil Transfer Gel, Duo.  I am also using the KS Rainbow Hugs Sentiment W/Shadow and Hello Brush Script Word dies.  I have created two cards using the stencil with Deco Foil Transfer Gel Duo and foil.

    Here is my first card:
    1.  A2 card measuring 4 1/4 x 5 1/2.
    2.  Top layer measures 3 7/8 x 5.
    3.  Added Deco Foil Gel to the stencil.
    4.  Added the foil, shinny side down and ran it through the minc.
    5.  Die cut the Rainbow Hugs Sentiment W/Shadow die from ink blended paper, and die cut the shadow with vellum, added a plum pearl for the tittle on the “i”.
    6. Assembled the card.
    My second card is created using the reverse piece from the top card.
    1.  Used Thermoweb’s toner paper with the reverse piece, again putting the shinny side onto the toner paper.
    2.  Ran it through the minc and adhered it to an A2 card.
    3.  Die cut the Hello Brush Script Word and adhered it to the card and added glossy accent.
    Thank you for stopping by, I hope you have been inspired to try this technique.
    Here is a list of supplies I used on my card, Affiliate Links used at no additional cost. Thank you for your support.


    https://linkdeli.com/widget.js?id=f5e8378456858c916708

    Design Team Projects

    Using a Stencil 2 Different Ways

    Hi, everyone! This is Nicki from the Design Team here with a stencil project. I am so excited that Kat is launching stencils. These are affordable and easy to use to jazz up your cards. Today, we will look at using the same stencil in different ways on one card. Make sure to watch the video for all the details.

    First, I dry embossed the stencil on white paper.

    Next, I had some scraps that I wanted to use on the project so I color matched these to distress oxide colors.

    Once I had the colors, I used the stencil in the traditional way to add color to a piece of white card stock. Kat’s new small blending brushes helped make this multicolored design easier. After the stenciling was complete, I used the condensed lowercase letter dies to cut out the word “Wish” from blue, green, gold and the stenciled paper. I layered them together like this.

    While I was layering the letters, I decided that adding some candles would make a great impact so I used the same colors on the candle die cuts. Last, I need to cut out the “make a” from the “make a wish” die cut. All that was left was to put the card together.

    Nicki Hearts Cards, Nicki Baxley, make a wish, stencil card, April 2022 release, dry embossing

    Please click through these links if you are interested in any of the products or if you are planning to shop today. This helps support me and I appreciate your support so much!

    PRODUCT LINKS:

    Floating Dots Stencil

    Birthday Essentials Dies

    Condensed Lowercase Alpha Dies

    Prize Ribbon Distress Oxide Ink Pad

    Stencil & Ink Blending Brushes

    Mini Blending Brushes

    Silicone Tool Caddy

    Waffle Flower Media Mat

    Make a Wish with Shadow

    Glue Tube by Lawn Fawn

    Craft Perfect Gold Card Stock


    https://linkdeli.com/widget.js?id=f5e8378456858c916708

    Design Team Projects

    New Home Shaker Card

    Happy Wednesday Crafty Friends! Priscilla here from the Kat Scrappiness Design Team. Today I am sharing a celebratory card for a new homeowner. A shaker card filled with yellow confetti is the perfect way to say “Congratulations!”

    I used the Kat Scrappiness Small House Shaker Card Kit (043-4) and the A2 Heart Sunburst Die to make today’s card.

    Card Details:

    • Created an A2 top-folding white card base.
    • Ran the A2 Heart Sunburst Die through my Big Shot, but did not remove the die cut rays from the white cardstock
    • Sponged “Wild Honey” and “Squeezed Lemonade” Distress Inks over the die cut rays and stitched frame border and adhered to the card base.


    Thank you so much for stopping by! Don’t forget to check out what’s NEW in Kat’s Shop, and follow my blog, Instagram, and Facebook for more “Kat Scrappiness Amazingness”!

    Stay Safe . . .

    Priscilla 🌅

    The supplies I used are listed and linked below. I would be so grateful if you use these affiliate links  to grab your Kat Scrappiness Goodies! No extra cost to you!


    Design Team Projects

    Make a Wish

    Hello Friends Waleska Galindo here with my first post of the month, today I wanted to share a birthday card I created because I am always in need of birthday cards.  Birthday cards are the cards I am always giving, so what are your most used cards? For my card today I used one of the newest released stencils the falling stars I hope you like my idea.

    CARD DETAILS:

    I first started die cutting the candles from the Birthday Essentials I used different colors of cardstock for a fun color combo.  I glue all the pieces and set them aside.  I then worked on the background, with Oxide Ink in Salvaged Patina Inked around this piece leaving a white space in the middle, I added some water splashes for more interest.

    Finally I used the falling stars stencil and I added glitter paste in gold for the stars, I adhered the candles and the make a wish word die with the same colors I used for the candles.  I did a gold and white layers for the card base and this super colorful birthday card is done!

    Thank you so much for stopping by today! I hope you have a wonderful day!


    Waleska Galindo