
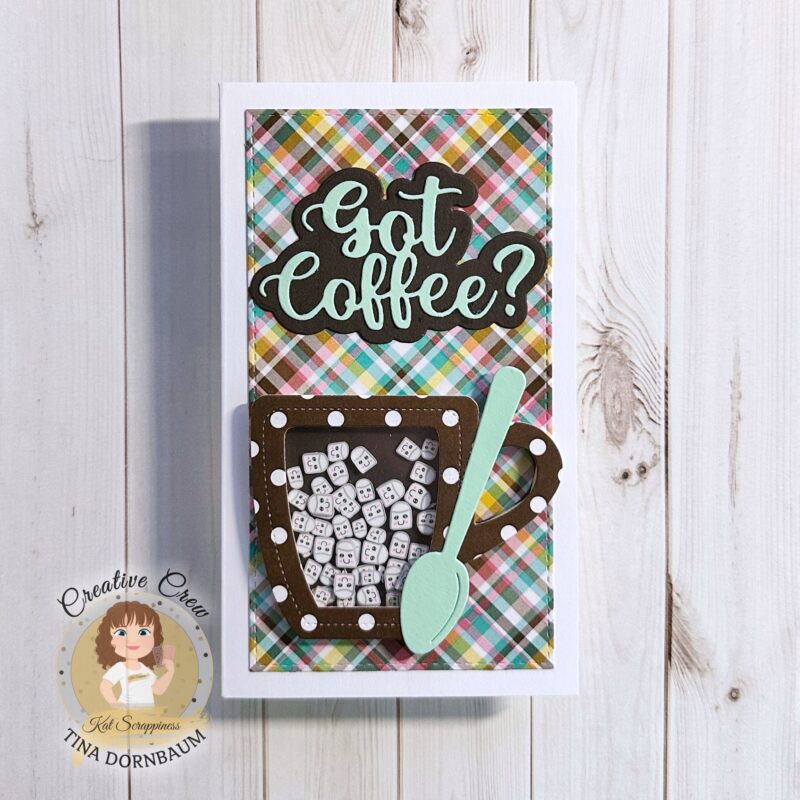
Hi everyone, it’s Tina here. I have one last Easter card to share with you using the new Hippity Hoppity Bunnies Stamps and Sentiment stamp, Hop Onto Easter Paper Pad, and the Mini Slimline Scalloped Edge and Mini Slimline Double Sided Dies. Below is the steps to create your own card.

Step 1 – Trim White Cardstock to 7″ x 6″, score at 3 1/2″ with a Bone Folder and fold in half for a vertical side fold card. (Mini Slimline)
Step 2 – Diecut Mini Slimline Double Stitched using Hop Onto Easter Paper Pad. (Green Plaid). Adhere to card front using Bearly Art Precision Glue.
Step 3 – Trim White Cardstock to 2″ x 4.5″ and adhere to the center of the card front using Bearly Art Precision Glue.
Step 4 – Diecut Mini Slimline Scalloped Edge and Mini Slimline Double Stitched using Hop Onto Easter Paper Pad (multi colored stars) together to create a shaker Window. Trim a piece of Mini Slimline Acetate Sheet to fit the window and adhere the acetate to the back side of the diecut. Add Foam Tape to the backside. Set aside. See photos below but keep in mind the first photo is showing which dies to diecut but you have to turn it around to diecut as in the second photo.


Step 5 – Add some Sprinkles and Rhinestones to the center of the card front. I used Strawberry Sherbert Sprinkles (only the dark pink circles), White Rhinstone Mix. I didn’t have the right green color so I added Diamond Rhinestone mix into a small plastic container and added Alcohol Ink Citrus. I shaked the container until all the ink absorbed onto the Rhinestones. Let Dry then add it to the center. Remove the release sheet from the shaker window and add it to the card front. Now you have a shaker card.

Step 6 – Stamp Hippity Hoppity Bunnies using Gina K Amalgam Ink using White Cardstock. Color in the image using any alcohol markers. I used Copic Markers. Fussy cut the image and adhere to card using Bearly Art Precision Glue.
Step 7 – Diecut Birthday Essentials (small Balloon using Dark Pink Cardstock) and (string using Black Cardstock.) Assemble then Stamp Hippity Hoppity Sentiments using Versafine Onyx Black Ink to the inside of the Balloon. Adhere to card using Bearly Art Precision Glue.
![]()
![]()


This card can be used for several occasions by changing the sentiment and/or colors. Below is a link to all the products used. Thank you for stopping by and Happy Crafting!
Products Used:
No Comments