Follow:
    Challenges & Hops, Design Team Projects, News

    2022 FALL/WINTER COFFEE LOVERS BLOG HOP


    Welcome to our blog!  Kat Scrappiness is pleased to be a super sponsor for the Coffee Lover’s Blog Hop for the Fall/Winter 2022.  Our design team members all joined in to show you some of the fun and coffee themed cards they made using some of the Kat Scrappiness “Coffee” related products.  We currently have over 100 Coffee themed products available here!

    Remember, *everything* in our Coffee” Category is 10% off from NOV 11-18TH!!!! use coupon code: “CAFFEINE2022” for 10% off your order).

    We are also having a giveaway!  Since Kat Scrappiness is a super sponsor, we will be giving away a $25.00 gift card to the store!!!


    Each of our design team members participate in the Coffee Lovers Blog Hops and we will list photos of their projects, along with links to the designer’s individual blog or video.  That way, you can go visit the designer’s blog or video to view their projects in detail, if you would like to see how the card was made or what products were used to create them.  Each link will open in a new window so don’t worry, you won’t lose your place in the hop 🙂

    Let’s get started with our Design Team Member’s Projects!


    Priscilla: Click Here to see how this card was made and what products were used.


    Sheri: Click Here to see how this card was made and what products were used.


    Donna I: Click Here to see how this card was made and what products were used.


    Linh: Click Here to see how this card was made and what products were used.


    Caren: : Click Here to see how this card was made and what products were used.


    Crystal: Click Here to see how this card was made and what products were used.


    Nora: Click Here to see how this card was made and what products were used.


    April: Click Here to see how this card was made and what products were used.


    Kim: Click Here to see how this card was made and what products were used.


    Nicki: Click Here to see how this card was made and what products were used.


    Kathy: Click Here to see how this card was made and what products were used.


    Suzanne: Click Here to see how this card was made and what products were used.


    Revati: Click Here to see how this card was made and what products were used.


    Tina:


    Tasha:


    The Kat Scrappiness Influencers have been invited to join in on this post…


    LeeAnn: Click Here to see how this card was made and what products were used.


    Thanks for stopping by the Kat Scrappiness Blog! Don’t forget to visit the Kat Scrappiness store to save during the hop!

    Save 10% OFF ALL COFFEE PRODUCT!!!

    Use Coupon Code: CAFFEINE2022

    SHOP HERE

    (Valid from November 11th to November 18th)


    Return to the Hop Here

    Design Team Projects

    Creative Crew’s 2022 Holiday Gift Guide

    Hello Kat Scrappiness Friends!

    Sheri here today with the First Day of the Creative Crew’s 2022 Holiday Gift Guide. Throughout the month of November the team will be sharing their favorites here on the blog and over on our YouTube Channel.

    I compiled a list of my favorites and items that I reach for in my daily card making!

    1. Favorite Basic Die: Never Ending Rectangles for A2 cards.

    You can also find 5 x 7, Circles, Mini Slimline, Ovals, Slimline, and Squares.

    2. Favorite Decorative Edge Die: Mini Slimline Scalloped Edge.

    You can also find Circles, Hearts Ovals, Rectangles, Squares and Slimline.

    3. Favorite Frame Die: A2 Frame Die.

    This is also available for Mini Slimline.

    4. Favorite Backdrop Die: A2 Quilted Backdrop die.

    Great way to add texture to your background panels. This die is also available for Mini Slimline.

    5. Favorite Alphabet Die Set: Condensed Uppercase Alphabet.

    A great way to personalize a card or create your own sentiment.

    6. Favorite Sentiment Strip Die: <strong>Boxed Sentiment Strips.

    Love pairing sentiment strips with Word dies.

    7. Favorite Tag/Banner Dies: Nesting Fishtail Banner die.

    Perfect for adding layers.

    8. Favorite Tools: Teflon Bone Folder & Rainbow Ombre Reverse Connecting Lock Craft Tweezer.

    This was a hard one as I use both of these to create EVERY card I make.

    9. Favorite Embellishment: 4 mm & 6 mm Sparkling Clear Solid Confetti Mix.

    10. Favorite Kat Scrappiness Gift to Give and Receive: Kat Scrappiness Gift Certificate


    Here’s a card featuring 5 of my FAVORITES!!

    A2 Frame, A2 Quilted Backdrop, Nesting Fishtail Banner, Boxed Sentiment Strips, and 4 & 6 mm Sparkling Clear Solid Confetti Mix.

    Affiliate Links used at no additional cost to you. Thank you for your support!

    Sheri’s FAVORITE Top 10

    Affiliate Links used at no additional cost to you. Thank you for your support!


    Happy Stamping!!

    Design Team Projects

    Happy Thanksgiving

    Happy Monday everyone.  It’s Caren here on the blog today.  I have a fun Thanksgiving card for you today featuring lots of Kat Scrappiness products!


    Here is how I created the card:

    Thanks for stopping by!

    – – –– – –– – –– – –– – –– – –– – –– – –– – –– – –– – –– – –– – –– – –– – –– – –– – –– – –– – –– – –– – –– –

    Here is a link to the Kat Scrappiness shop and direct links for products I used on today’s card.

    – – – SUPPLIES for today’s project– – – – – – – – – – – – – – – – – – – – – – – – – – – – – – – – – – – – – – –

    Design Team Projects

    Furever In Our Hearts Mini Slimline Cards

    Hi everyone, it’s Tina here. Last month there was a fabulous Cat and Dog release from Kat Scrappiness for our fur babies. There was also a stamp set with sympathy. Today I am showing 2 cards I made for female and male. Below you will find the steps to create your own cards.

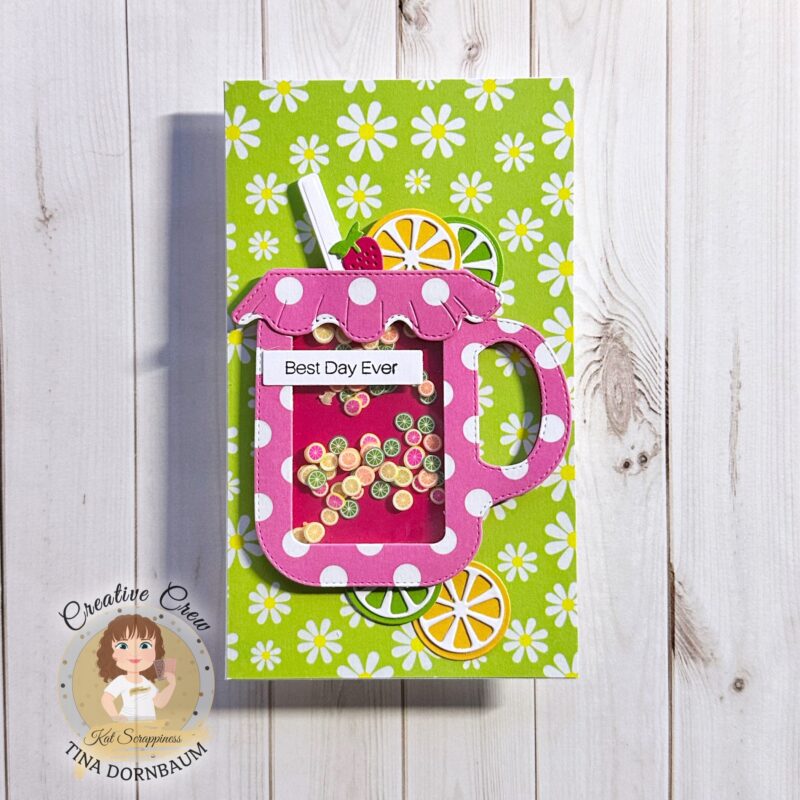
    Step 1 – Trim White Cardstock to 7″ x 6″, score at 3 1/2″ and fold in half for a vertical side fold card. (Mini Slimline)

    Step 2 – Trim Coloured Cardstock (pink for female and teal for male) to 3 1/2″ x 6″. Place Pawprint 6×6 Stencil on top of the trimmed Cardstock. Add Versamark over the stencil, remove and sprinkle Wow Matte Dull Embossing Powder. Remove the excess and heat set it with a Heat Tool.

    Step 3 – Diecut Mini Slimline Double Rectangles using the backgrounds created in Step 2. Adhere each panel to a card base use Bearly Art Precision Glue.

    Step 4 – Diecut Embossed Edge Heart using the same Coloured Cardstock as the base from Step 2. Place the diecuts in a Misty Stamping Platform and using Versafine Onyx Black Ink Stamp the sentiment, cat with wings and hearts. Let dry before you colour the hearts with an alcohol marker. However colouring in the hearts is optional. Adhere to heart to the card front using Foam Tape.

    Below you will find a link to all the products used. Thank you for stopping by and Happy Crafting!
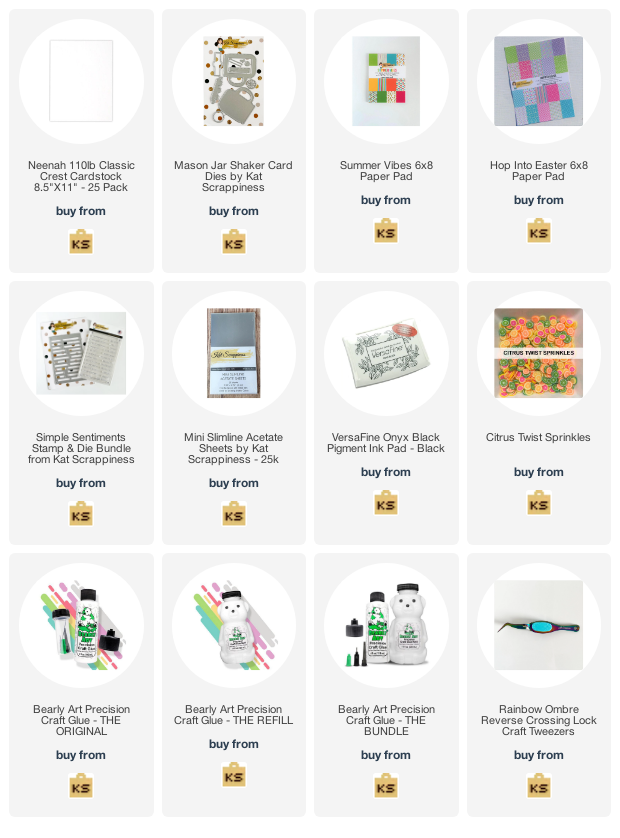
    Products Used:
    https://linkdeli.com/widget.js?id=f5e8378456858c916708

    Design Team Projects

    Naughty or Nice?

    Happy Friday, crafty friends!  Kim here, and today I am sharing a fun Christmas card, perfect for someone that you just know has landed themself on the Naughty List!  All of the supplies that I used are listed at the end of the post.

    Here is how I made my card:

    I started with an A2 (5 1/2″ x 8 1/2″) card base, scored at 4 1/4″ and burnished the score line.

    I stamped “Naughty” all over the card using Versamark Ink.  If you don’t have a Versamark pad, you can also do tone-on-tone stamping using ink the same color as your cardstock.

    I die-cut “Naughty” from silver cardstock three times, glued them together, and set them aside to dry.

    I heat embossed the sentiment in silver and trimmed it into a banner and backed it with a silver banner.

    I stamped, die-cut, colored and assembled Santa Quokka.

    Assembled the card and finished with a bow of silver metallic thread.

    Shopping List: 

    Dress Up Quokka Stamps

    Dress Up Quokka Coordinating Dies

    Quokka Christmas Costume Add-On Stamps

    Quokka Christmas Costume Add-On Coordinating Dies

    Naughty Word Die

    Naughty Clear Stamp Set

    Versamark Watermark Ink Pad

    Thank you so much for stopping by!  I hope you are inspired to get crafty!

    **Affiliate Links are provided at no additional cost to you.  Thank you for your support!**

    Design Team Projects

    From Meow to You

    I am currently in the process of moving to another destination overseas with hubby, so this project was made awhile back. I wanted to share this today since this card is super adorable, and features new products from the latest release by Kat Scrappiness, Inc.

    Here’s how I made this card:

    • prepare the background panel by ink-blending some Bristol Smooth white card stock with Distress Oxide inks.
    • use some Distress Sprayer to spray some water on the background. Pick up the excess water using some paper towel.
    • use the Stitched Nesting Hexagon Die to die-cut the window.
    • use some washi tape to temporarily adhere the Ball of Yarn Stencil to the ink-blended panel.
    • for added texture, apply some white deco-foil gel with a palette knife and gently lift the stencil. Leave this panel to dry for about half an hour.
    • adhere the background on some A2-size notecard.
    • die-cut the frame by using two of the Stitched Nesting Hexagon Dies on some white glitter card stock.
    • foam-mount the frame for added dimension.
    • adhere the hexagon die-cut on the window.
    • finish the design by stamping the sentiment onto the card using the Pawsome Cats Sentiments Stamp Set with some Versafine Onyx Black Ink and adhere some red heart for some fun texture.

    I hope you like this card today and got inspired. Below, you will find links to the supplies used to create this project(s). Where available, I use compensated affiliate links at no extra cost to you. Your support helps me to keep bringing you new projects and inspiration. Thank you for stopping by, and have an amazing day!

    ———-SUPPLIES———-

    Design Team Projects

    Hot Chocolate Tag

    Hello Friends!! Nora here with a Christmas tag I created with the NEW Kat Scrappiness Cuppa Love Shaker Card Dies.

    I like to mix up my dies and see how I can use them in different ways. I wanted to make a tag with the Cuppa Love Shaker Card Dies but make it a hot cocoa cup. I combed through my dies to see if I could find something that I could use for whip cream. I found it in the “frosting die” in the Kat Scrappiness Heart Donut Builder Dies.

    Here is how I created this card:

    • Die cut a gingerbread man from kraft cardstock using the Kat Scrappiness Design a Gingerbread Man Die. Die cut the eyes from black cardstock and the eyebrows and frosting from white cardstock.  Adhere it behind the cup.

    • Tie some twine around the cup handle. Adhere a Christmas Candy Sprinkle in the front of the bough. Tape a piece of red twine behind the gingerbread man and your tag is finished!!!

    This project is fun and easy to create in multiples. I hope it inspires you to look at your dies a in a different way.

    Be sure to stop by the Kat Scrappiness Blog tomorrow to see some other fabulous projects by the Creative Crew.

    ***************************************************************************************************

    The supplies below are from the Kat Scrappiness Shop. Affiliate links used at no extra cost to you.