Hello my crafty friends! I’m super excited to share my first post for January 2019 and it is the January release by Kat Scrappiness. Have you seen all the projects made by the team? They are awesome and I am so proud to be on the same design team as these girls. For Day 1, we are showcasing the Lacy Layered Heart dies and the Stitched Sentiment Strip dies. They go perfectly well together or on their own.
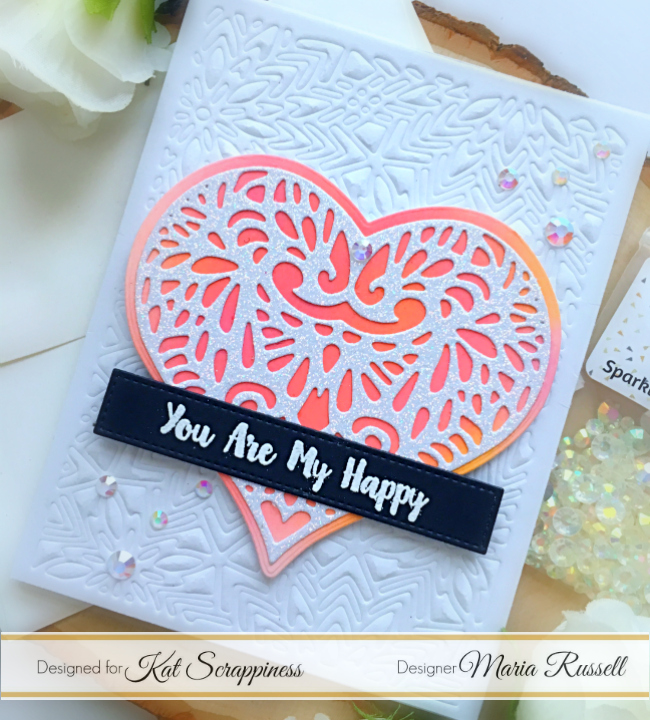
For my first card, I inked up some Bristol smooth white card stock with my distress oxide inks and die-cut the piece with the outer layer of the die. I also die-cut some Lawn Fawn glittered card stock using the lacy heart die. I adhered this piece onto my colored heart with some Nuvo liquid glue.
On another piece of some heavy-duty card stock, I used the Fancy Floral Coverplate die with an embossing mat to dry-emboss the details on the card stock. I think this turned out so beautifully. I love the impression it makes on the card stock.

I adhered the heart on this embossed piece with some foam tape. I also adhered this piece onto an A2 size card base. Here’s what it looks like:

I stamped my sentiment on some black card stock with versamark ink and heat and sprinkled some white embossing powder. I used my Wagner heating tool to heat-emboss the sentiment, and cut this piece using the new Stitched Strip Sentiment dies. I finished the design by adding some Sparkling clear jewels. Here’s a closer look:
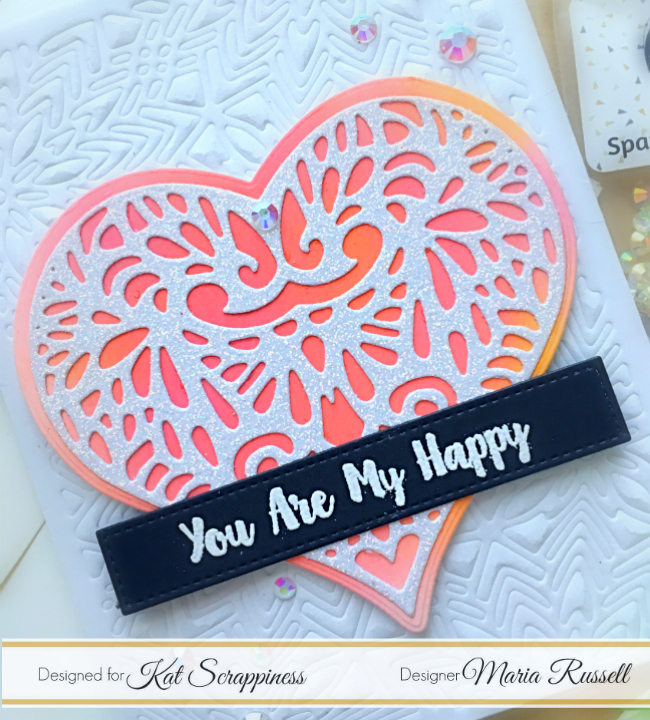
I love how this card turned out! I know this is a simple card but that glitter heart in the middle compliments the colored background. Here’s another look:
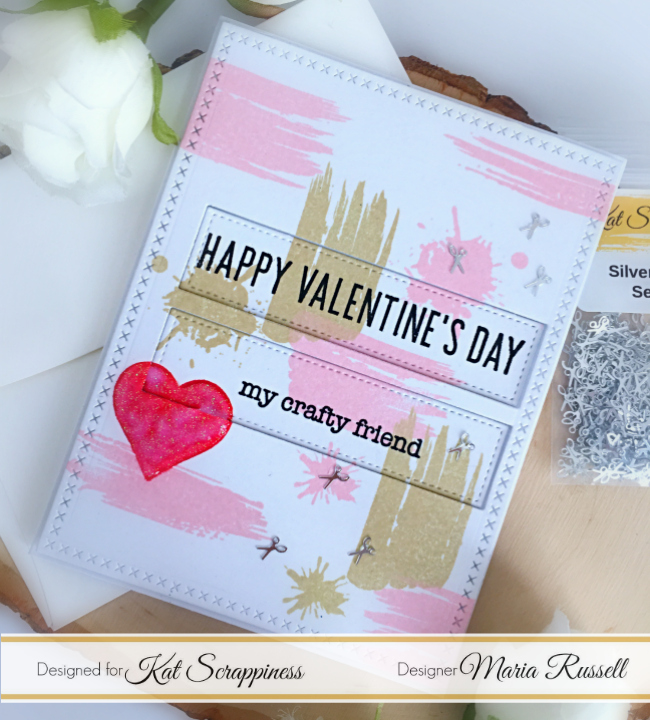
For my second project, I used the Everyday Brush Strokes stamp set and stamped the image with Ballet Slippers and Pizza Crust inks by Lawn Fawn. I used the Stitched Sentiment Strip die to die cut the middle piece. I used foam adhesive to adhered my foreground on an A2 size card base. I stamped the sentiment on the strips and adhered the pieces using Nuvo liquid glue.

To finish my design, I added the Silver Scissor Sequins mix. Since this is going to a crafty friend, I know she will appreciate those cute little touches that I added on this card. Here’s a closer look:
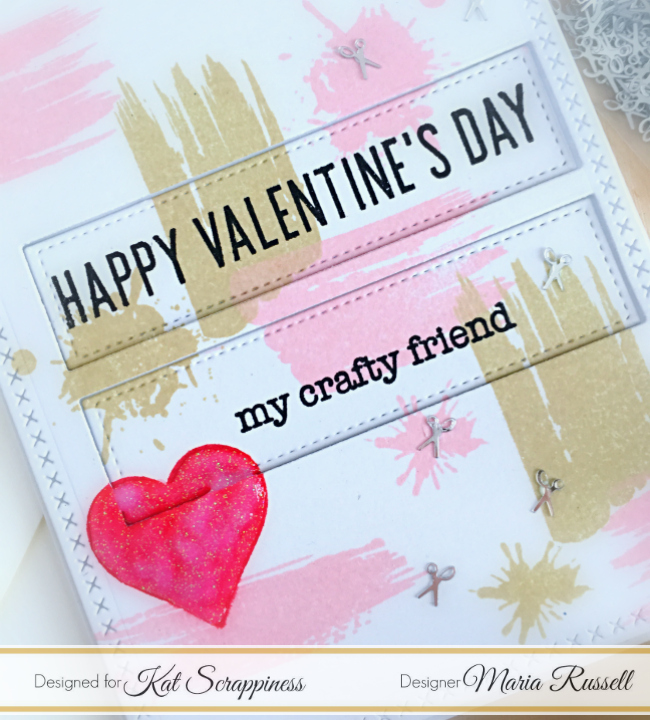
I added some Nuvo glitter drops on the heart to give it some dimension and shine. I also love how this card turned out.
I hope you like my projects today. We will also have a giveaway at the end of the release on Thursday so please stay tuned. These dies are now available at the shop. The supplies I used are listed and linked below. Don’t forget to use my coupon code “MARIA10” for 10% off your order at the shop. Happy crafting!
————SUPPLIES————-