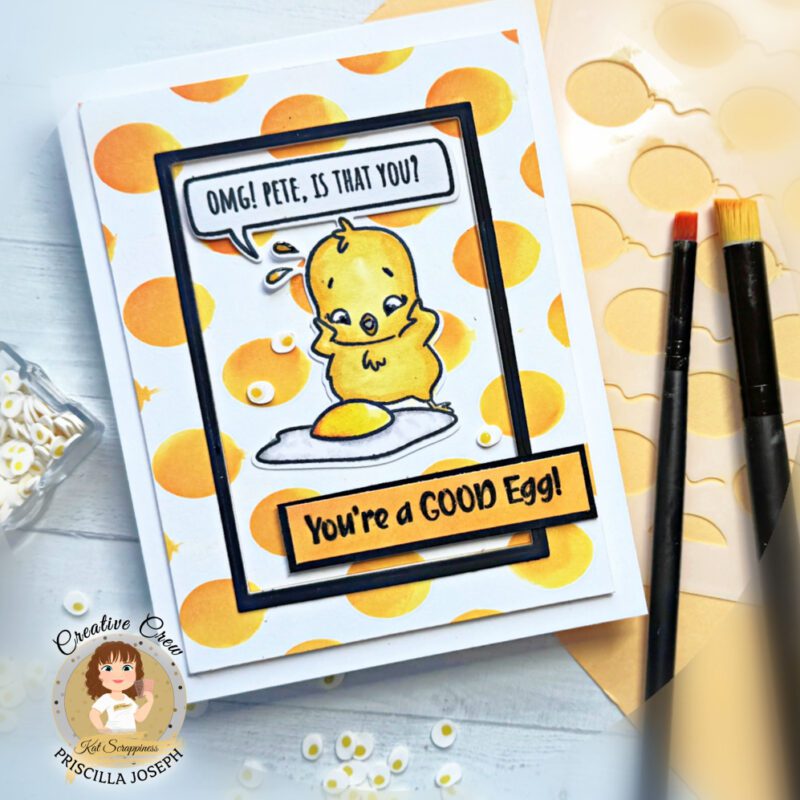
Hello Crafty Friends! Priscilla here from Nubble Light Designs. Today I am sharing a funny card featuring one of the images from the Kat Scrappiness “Easter Fun” stamp set. This poor chick just realized that his brother Pete met the somber demise that most eggs do. I created the bright background by using Kat’s “Party Balloons” stencil, BUT I turned it sideways to look like egg yolks! Then I used Kat’s new blending brushes to blend orange and yellow inks over the openings in the stencils. Viola! Not balloons anymore, but fried eggs!

Click to check out all of Kat’s stencils in her store.
Card Details:
- Created an A2 top-folding white card base.
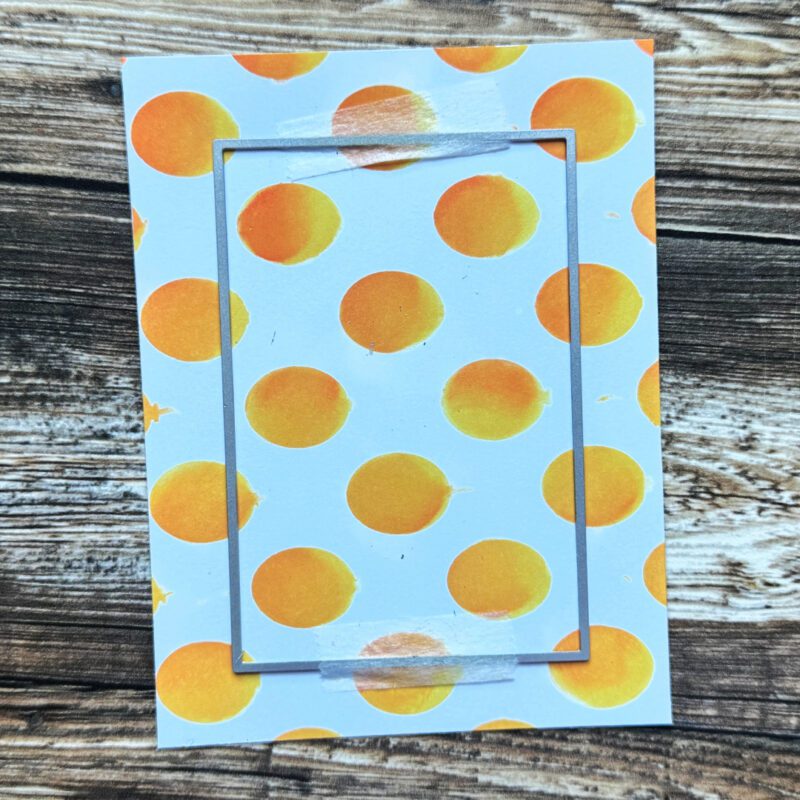
- Cut a small piece of cardstock and laid the Party Balloons stencil over it.
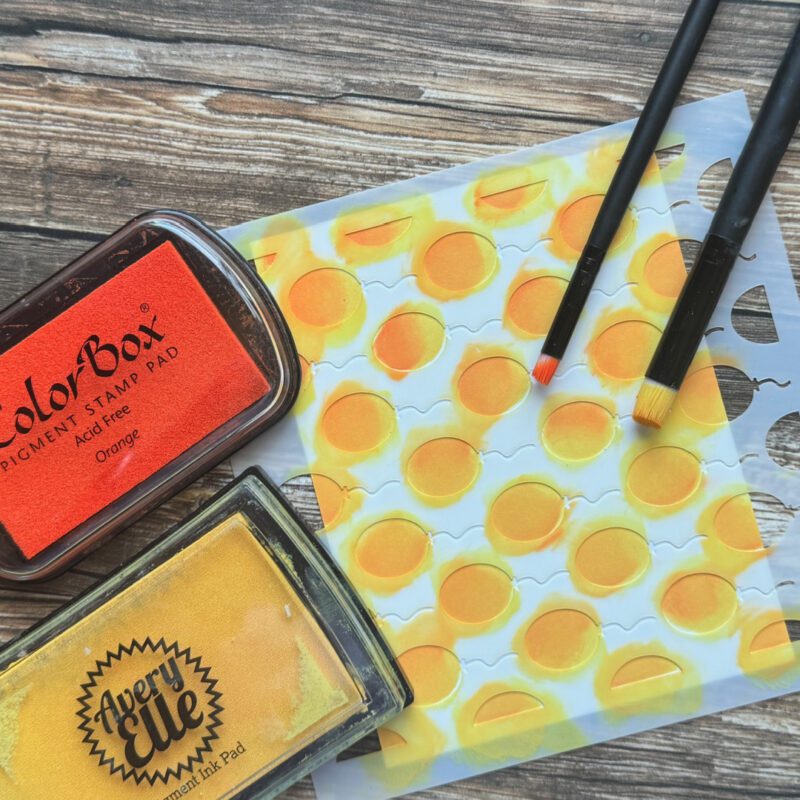
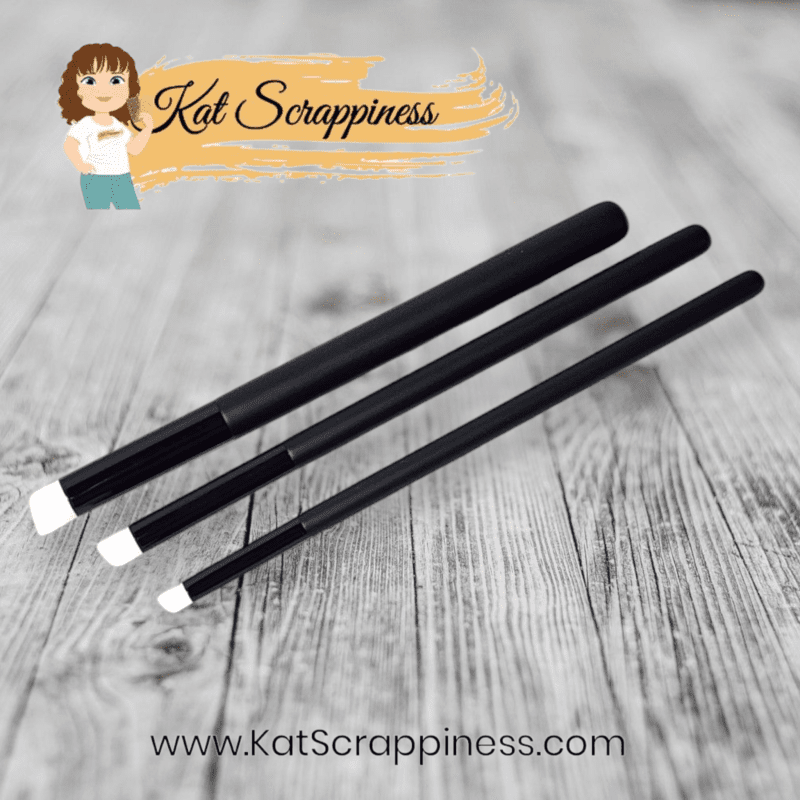
- Using the new Kat Scrappiness blending brushes, inked over the stencil openings with both orange and yellow pigment inks to turn the balloons into “fried eggs”, being careful not to ink up the balloon strings.
- Die cut a rectangular opening in the finished cardstock to create an opening.
- Added foam tape to the back of the newly created frame and adhered it to the card base.
- Adhered the center cutout back into the opening.
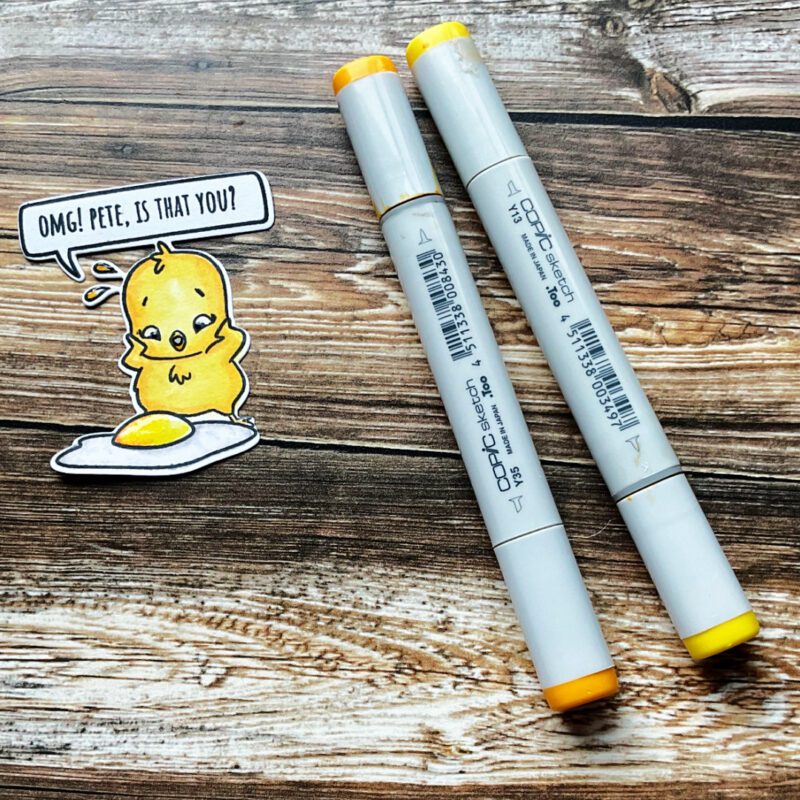
- Stamped and die cut the chick image from the Easter Fun stamp set and colored it with Copic markers.
- Adhered the chick to the opening in the front of the card.
- Die cut a black frame and adhered it around the center opening of the card.
- Stamped the sentiment from the Hippity Hoppity Sentiments stamp set on an inked cardstock strip, framed it in black, and then adhered it with foam tape to the front of the card.
- Added three Sunny-Side Up Egg Sprinkles for the finishing touch!
Thank you so much for stopping by! Don’t forget to check out what’s NEW in Kat’s Shop, and follow my blog,Instagram, and Facebook for more “Kat Scrappiness Amazingness”!
Priscilla 🐣
I would be so grateful if you use my affiliate links in this post to grab your Kat Scrappiness Goodies! No extra cost to you!