Tag: Build a Stocking dies

  • Merry Christmas

    Merry Christmas

    Hello everyone!

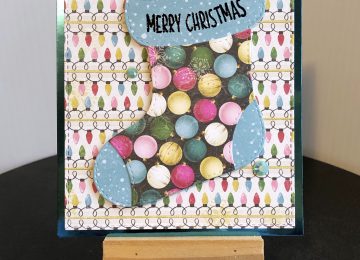
    It’s Donna Idlet here sharing a Christmas mini slimline card.  I love the color purple and I really love how this card came together.  It’s clean and simple but elegant.

    Can you believe it is only 13 days before Christmas?  For those of you who celebrate, have you gotten your Christmas cards mailed?  I haven’t, but I have gotten most of my Christmas shopping done.

    Here is my card for your inspiration:
    Here is how I created the card:
    • Cut the white Slimline Card Base: 6″ x 3 1/2″ (6″ x 7″, scored at 3 1/2″).
    • Die cut the top layer using Mini Slimline Zig Zag Dies using KS Sugar Plum Fairies slimline paper pad.
    • Die cut the word die from KS Merry Christmas W/Shadow Die, using vellum for the shadow and purple mirrored paper.
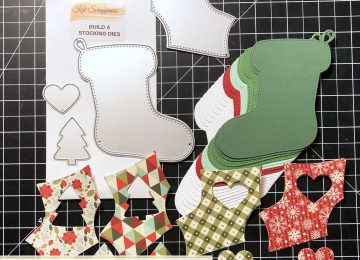
    • Die cut the snowflakes from KS Build A Stocking (Christmas) Dies.
    • Assembled the card and added some KS Violet Pearl Mix.

    Thank you so much for stopping by, please come back again soon!

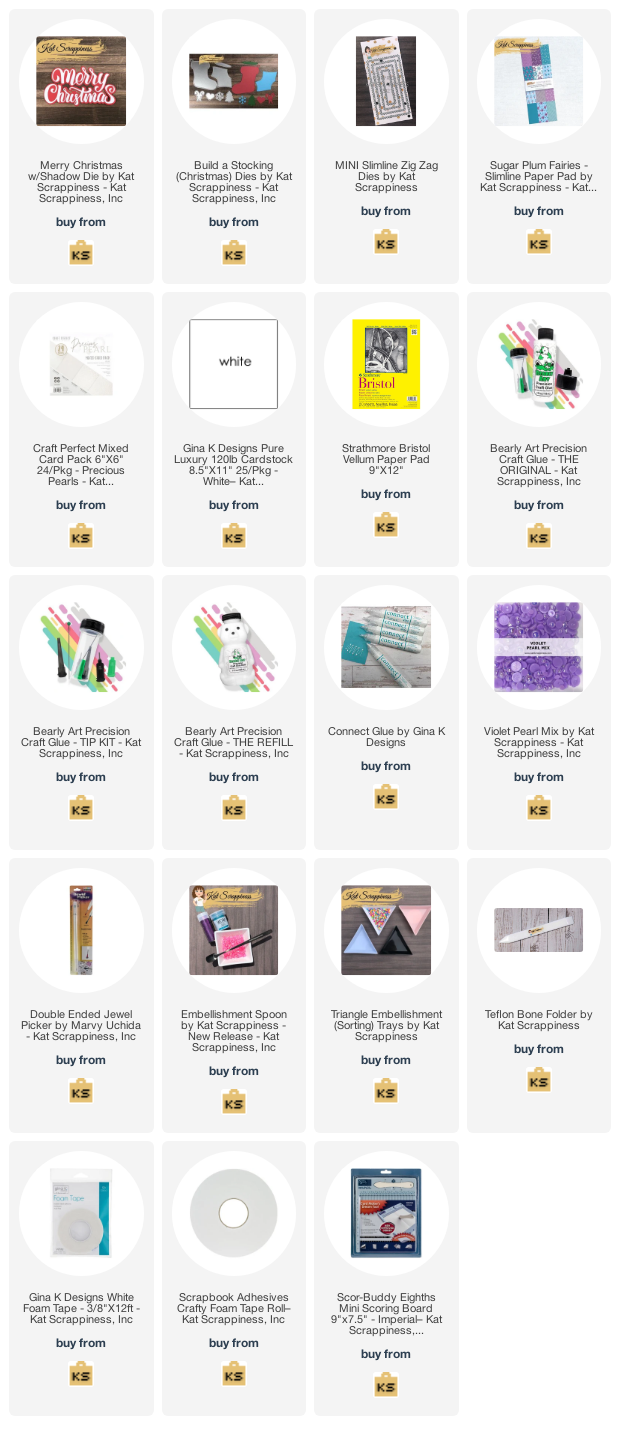
    Here is a list of supplies I used on my card, Affiliate Links used at no additional cost. Thank you for your support.

  • Christmas Stocking Gift Card Holders

    Christmas Stocking Gift Card Holders

    Happy Saturday Everyone! Priscilla here from Nubble  Light Designs. Today I am sharing two Christmas gift card holders I created that combine a Christmas stocking and a gift card holder in one. These would be perfect to add to a card, attach to a present, or actually insert into a real Christmas stocking.

    I used 2 Kat Scrappiness products – the Happy Mail Mailbox dies and the Build a Stocking dies.

    Card Details:

    • Die cut the gift card holder bases out of white and black cardstocks.
    • Die cut the stockings backs out of white and black cardstocks and embossed them with a “bubble” embossing folder.
    • Die cut the stocking fronts out of 2 different buffalo check papers.
    • Assembled the gift card holders and the stockings.
    • Adhered the assembled stockings to the fronts of the card holders, making sure to NOT glue the top sections of the stockings.
    • Adhered the stocking openings and the snowflake and candy cane embellishments (all included in the Build a Stocking die set) to the fronts of the stockings.
    • Inserted the gift cards into the slots behind the stockings.

    Thank you so much for stopping by! Don’t forget to check out what’s NEW in Kat’s Shop, and follow my blog, Instagram, and Facebook for more “Kat Scrappiness Amazingness”!

    Stay Safe . . .

    Priscilla 🎅

    The supplies I used are listed and linked below. I would be so grateful if you use these affiliate links  to grab your Kat Scrappiness Goodies! No extra cost to you!


  • Ho! Ho! Ho! | Slimline Stocking Card

    Ho! Ho! Ho! | Slimline Stocking Card

    Hi Everyone! Priscilla here from Nubble Light Designs. Today I have a slimline stocking card for you that was quick and easy to make using only dies and patterned paper – no stamping at all! Plus a Christmas stocking wouldn’t be complete without real fur trim at the top, right?  LOL!


    For this card, I used lots of Kat Scrappiness dies and one of the new Christmas slimline  paper pads in her shop, “A Cozy Christmas.”

    I started by die cutting the stocking using the “Build a Stocking” die and the blue snowflake patterned paper in the paper pad. I added a white toe and heel and a snowflake for the middle. The snowflake is one of several small dies included to help you decorate the stocking.


    For the card base I die cut the top layer from the red plaid paper in the same paper pad using the largest of the “Stitched Scalloped Nesting Slimline Dies.”

    I adhered a strip of white “fur” to the top of the stocking and die cut the sentiment using the  “Ho! Ho! Ho! Brush Script Word and Sentiment Die” and some blue card stock. Kat‘s white “Snowflake Sprinkles” colored blue with a marker were the finishing touch.

    Thank you so much for stopping by! Don’t forget to check out what’s NEW in Kat’s Shop, and follow my blog and Instagram for more “Kat Scrappiness Amazingness”!


    Stay Safe . . .

    Priscilla 🎅

    The supplies I used are listed and linked below.

    SUPPLIES

  • Build-A-Stocking Gift Tags

    Build-A-Stocking Gift Tags

    Hello, crafters!  I hope that all of you are having some fun this holiday season.  It can be extremely busy and stressful, but don’t forget to take a little break now and then to re-set and re-energize 🙂  Since crafting is such an integral part of my personal happiness, it was a pleasure to escape to my craft room and work up a little project to share with you today.  So sit back with your drink of choice (no judgement here!) and let’s dive into these Stocking Gift Tags.


    My first step was to do some die cutting with the wonderful Kat Scrappiness Build A Stocking Dies set.  I wanted a sturdy base, so I cut eight White stockings and then eight more in an assortment of greens and red.  I then selected four different Christmas themed patterned papers and cut out the “fabric” pieces two times for each paper.  I also cut some trees and hearts with the accent dies that come in the set.  I will use some of these in this project, and save the others for a future project.  I really love the size of all of these, as they are big enough to handle easily but small enough to fit into many different projects.


    Assembly of these stockings is very easy.  I glued one of the White stockings over one of the solid colored ones, then attached the patterned paper pieces into place.  You can see that this gives a nice white cuff, toe, and heel to the stockings.  You can definitely choose to make your own however you’d like – I just liked the classic look of white.  You can also see that I used the patterned hearts here, as well as some solid green trees to fill the cutouts I’d made earlier.  Again, you can use anything you’d like for this – I think a gold glitter card stock would look great, too!


    Now you KNOW I couldn’t just leave that white stocking cuff all alone, so I brought out one of my favorite new sets from Kat – the Holly & Berries Dies set!  This fabulous little set is chock full of five different sized holly leaves and three sizes of berries.  I chose to use the two smallest leaves and the middle-sized berry to create these cute little clusters.  Although they look amazing when layered with foam dots, I kept them flat for these tags.  I love how they look!


    There’s plenty of room on the backside of these tags for a message, some stamping, or a simple To and From like I chose.  Although I do have tiny stamps that say this, I went ahead and used a White gel pen to write it myself.  Easy-peasy!  You can see in the first photo of this blog post that I also added some sparkly red and white yarn to tie these tags onto my packages.  I used some simple slip knots to attach the yarn to the little loops of the stockings.


    My final touch was to add just a bit of glitter, because there is NO WAY I can create a Christmas tag with no sparkle!  The gorgeous White Blizzard Nuvo Crystal Drops added just the right amount of fun to my little berries.  Again, feel free to embellish your own stockings as much as you want!  There are no rules when it comes to gift tags 😀


    And that completes my Gift Tag project!  Making these was a joy, and I plan on making many more with all different colors and patterns – including frosty white/silver/blue tags.  If you’d like these two wonderful die sets, as well as other great items from Kat, please follow the links above or use the shopping link I’ve included below.  Don’t forget to use the discount code “CYNTHIA10” to save 10% off your entire purchase.  Thank you again for joining me today, and have a wonderful, crafty day 🙂

    Kat Scrappiness shop

    My YouTube channel


  • Holiday Cards From The Build A Stocking Dies

    Holiday Cards From The Build A Stocking Dies

    Hi Everyone, it’s Tina here. I have 2 cards to share with you using the new Build A Stocking Dies. It is so much fun and super easy to create Holiday Stocking Cards. The color and pattern choices are endless making each and every one unique. I will also show you another way to use the set for a traditional holiday card without the stocking. Below you will find the steps to replicate these cards.

    Card #1

    Step 1 – Trim White Cardstock to 8 1/2″ x 5 1/2″, score at 4 1/4″ and fold in half for a vertical side fold card.

    Step 2 – Trim Foil Cardstock to 4 1/4″ x 5 1/2″ and adhere to card from using Nuvo Deluxe Adhesive Glue.

    Step 3 – Diecut Double Stitched Rectangles using Bo Bunny 6×6 Christmas in the Village. Adhere to card using Nuvo Deluxe Adhesive Glue.

    Step 4 – Diecut Build A Stocking dies using Bo Bunny 6×6 Christmas in the Village. Assemble using adhesive of your choice. I used Nuvo Deluxe Adhesive Glue.

    Step 5 – Stamp Merry Critters sentiment using Versamark (to the top of Stocking). Sprinkle Black Embossing Powder and heat set with with a heat tool. I shaped the sentiment to follow the curve of the stocking. Adhere the stocking to front of card using foam tape.

    Step 6 – For added interest and sparkle adhere Jewels using collage medium with a Crystal Katana tool.

    Card #2

    Step 1 – Trim White Cardstock to 8 1/2″ x 5 1/2″, score at 4 1/4″ and fold in half for a vertical side fold.

    Step 2 – Trim Bo Bunny 6×6 Christmas in the Village to 4 1/4″ x 5 1/2″ and adhere to card from using Nuvo Deluxe Adhesive Glue.

    Step 3 – Trim Bo Bunny 6×6 Christmas in the Village to 1 1/2″ x 5 1/2″ and adhere to card from using Nuvo Deluxe Adhesive Glue half an inch from the bottom.

    Step 4 – Diecut Candycane from the Build A stocking Die 4 times using Bo Bunny 6×6 Christmas in the Village (Striped Paper). Diecut Candycane from the Build A stocking Die 4 times the section using Green Cardstock. Trim the green diecuts so you only have the bow. Adhere to the Striped diecuts using Nuvo Deluxe Adhesive Glue. Adhere to the front of card using Nuvo Deluxe Adhesive Glue. Optional add Nuvo Glitter Accents Fresh Snowfall to the bow. Let dry.

    Step 5 – Stamp Merry Critters sentiment using Versafine Onyx Black Ink to Green Cardstock. Adhere to card using foam tape.

    Step 6 – For added interest and sparkle adhere Jewels using collage medium with a Crystal Katana tool.

    The Build A Stocking dies are so versatile and can be used in several ways as shown above. Below is a link to all products used. To receive 10% off your order use code: TINA10 at checkout. Thank you for stopping by and have a wonderful day.

    Products Used:

    https://linkdeli.com/widget.js?1541592444444

  • Guest Designer & Build a Stocking Dies

    Guest Designer & Build a Stocking Dies

    Hey Everyone! My name is Priscilla and I am honored to be the November Guest Designer on the Kat Scrappiness blog. I am a 6th grade teacher by day, and when not grading papers, I’m crafting cards like a crazy lady at night. Hopefully, my teacher colleagues at school love receiving them! LOL!!

    Let’s get to the cards! So many awesome products in this new release! I didn’t know where to begin creating. But I quickly settled on Kat Scrappiness’s  adorable new “Build a Stocking” dies, combined with a Christmas sentiment from the new “Merry Critters” stamp set. Creating one card just wasn’t enough . . .  I had to create three . . . and could have made 50 more!

    When I first opened the die set, I looked at the pieces quizzically, trying to figure out what was the strange shaped die under the stocking in the picture below. Then it dawned on me it was the front of the stocking, which would allow me to create the toe and the heel in a different colored card stock or pattern. Sweet engineering, I’d say!

    For my first card, I created an elegant gold and black stocking. Perhaps showing you the pieces die cut out will help you understand how easy it was to “build” this stocking.

    It was so quick to assemble! I simply adhered the black “suede” stocking front to the gold glimmer stocking base, added the black oval opening (later on I changed it to the gold glimmer card stock), and then stacked three gold glimmer Christmas trees to create a dimensional “embellishment” on the front of the stocking. Then I got this crazy idea to add real (not really) fur trim to the top of the stocking!!! So fun!

    Next, I dry embossed a white card stock layer with a brick design, mounted that to the same gold glimmer card stock I used on the stocking, and adhered both layers to a white card base. I then stamped “Merry Christmas” from the Kat Scrappiness  “Merry Critters” stamp set on a white banner strip, heat embossed it in black, and foam mounted it on the right side of the card. Finishing touches?  I added a few gold snowflakes from the new Kat Scrappiness“Christmas Cheer” sequin mix and a metal brad to “hang” the stocking “by the chimney with care.”

    I loved how stocking card #1 turned out!

    I repeated the assembly process for stocking card #2, but switching the color combo to red/black buffalo check and black, with a black die cut snowflake for the stocking front. And you guessed it! “Fur” again for the trim at the top, but this time in black. I dry embossed a background of white pine branches, mounted that on red card stock, and adhered both layers  to a white card base. I sprinkled a few red “ornament” sequins from the same Kat Scrappiness “Christmas Cheer” sequin mix to finish off this card.

    Here’s a close up of Card #2.

    I was on a Christmas stocking roll by this time, so Card #3 came together quickly. The red/black buffalo check and black papers were replaced by black/white buffalo check and black, the stocking embellishment was now a black heart, and the white ‘fur” returned. The dry embossed background switched to a snowflake pattern with a black card stock layer behind it. I finished the card by adding a black enamel heart on the sentiment strip.

    Here’s Card #3.


    I love how these three cards came together. Not sure which one is my favorite. Let me know which one you like the best.


    The supplies I used are listed and linked below.  Please don’t forget to use my coupon code “Priscilla10” for 10% off your order at the shop.

    I’ll see you later in the month with more cards from the Kat Scrappiness new release.

    Happy crafting!
    Priscilla

    SUPPLIES USED

    https://linkdeli.com/widget.js?1540275216575