Follow:
    Design Team Projects

    Oopsie Daisy “Hi”

    Hello everyone!

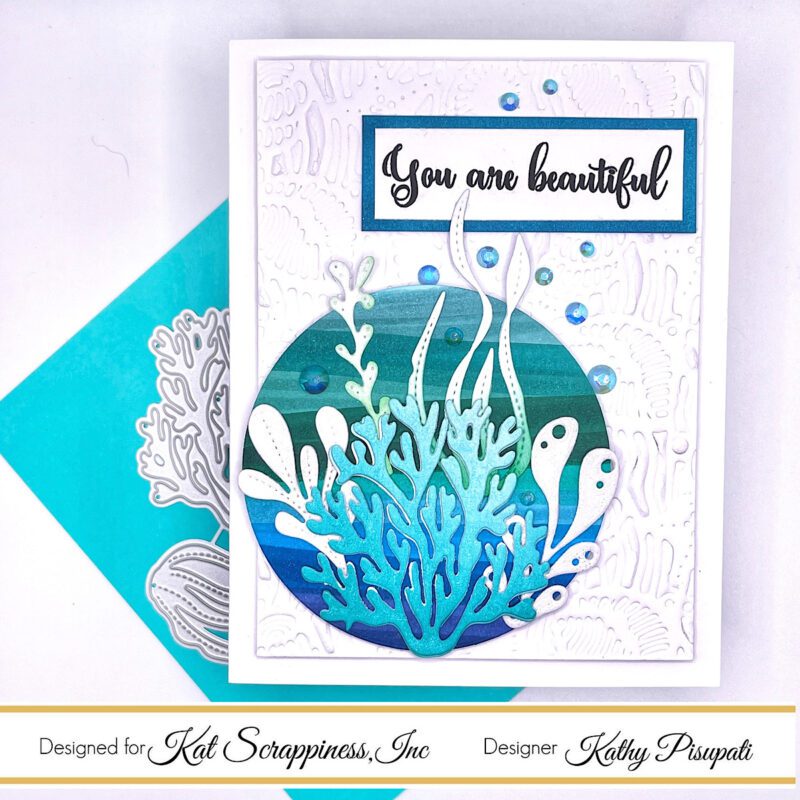
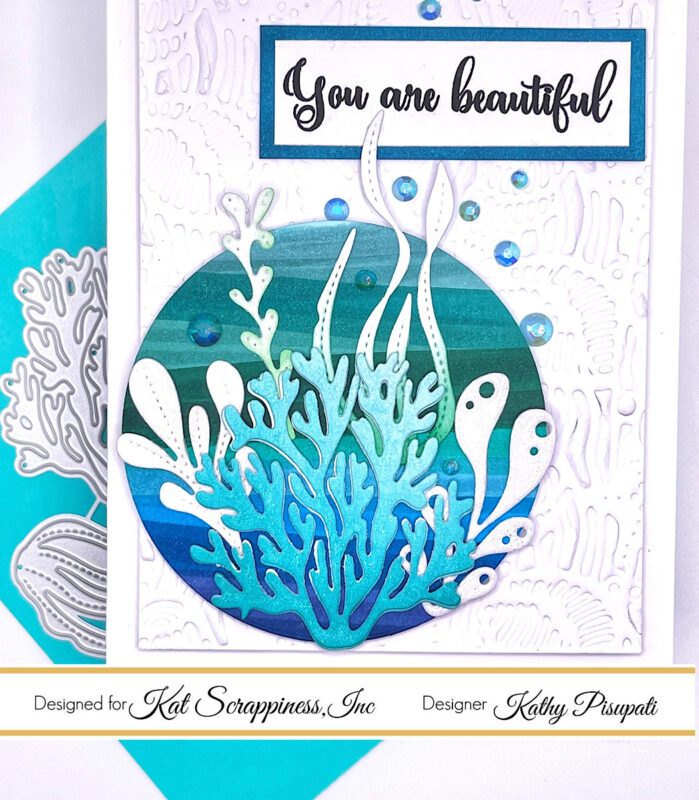
    It’s Donna Idlet her sharing a card using the Oopsis Daisy Stencil and coordinating dies. These flowers are so beautiful and can be used for many different occasions. I have made a simple card to send someone with a simple “Hi”.

    Here is how I created the card:
    • A2 card measuring 4 1/4 x 5 1/2.
    • Used the  Oopsis Daisy Stencil to create the flowers,  die cut them with the coordinating dies.
    • Die cut the A2 Lattice Frame Die which measures 4 1/4 x 5 1/2.
    • Used the A2 Frame Dies (2nd to the largest measuring 2-1/4 x 3-1/2)
    • Die cut the newly released Stitched Foliage using vellum.
    • Die cut the “Hi” sentiment from the Nesting Fishtail Banner Dies.
    • Assembled the card and finished it off by adding some KS Daisy Days enamel dots.

    Thank you for stopping by, please come back again.

    Here is a list of supplies I used on my card, Affiliate Links used at no additional cost. Thank you for your support.


    https://linkdeli.com/widget.js?id=f5e8378456858c916708

    Design Team Projects

    Rainbow Hello!

    Happy Thursday Crafters! Today I would like to share a card I made with the NEW Fluttering By Stamp Set and Matching Dies.


    For this creation I inked the background in rainbow colors. I also used the same colors to stamp each butterfly. I used the butterfly die to cut out all of the butterflies. I added pearls to the center of each butterfly and adhered them to my rainbow colored background. For this card I also used the Slimline Tri Frame Die also available at Kat Scrappiness. To finish the card off I needed to add a sentiment. I used the Hello with Shadow Die that you receive when you purchase  the Reverse Scallop Mini Slimline Dies.

    Thanks so much for stopping by, I hope you have a wonderful day!!

    Design Team Projects

    Creating a Card Based on Your Embellishments!

    Hi, everyone! This is Nicki from the Design Team here with a fun project to get you using those embellishments! If you are like me, you have some that you think are too pretty to use. That is the case with the beautiful embellishments we are using today.  Hopefully, this will motivate you to grab them and use them on a card!

    For all the details, make sure to check out the YouTube video.

    First, I grabbed the beautiful Rose Garden Pearl Mix.

    Next, I looked at my ink pad colors and chose 2 inks that coordinated well with these colors. Once, I had the colors picked, it was time to play with some of the new products from Kat Scrappiness. I used the Mini Slimline Lattice Frame Die.

    I decided to create some inlaid die cutting with pink and green to coordinate with the pearls.

    Next, I did some ink blending with the same inks and used the “Fluttering By” dies to cut out butterflies. After die cutting the butterflies, I added the pearls to the wings to create interest.

    All that was left to do was to put it all together with the sentiment.

    Supplies:

    Rose Garden Dual Color Pearl Mix

    Mini Slimline Lattice Frame Die

    Get Well Soon Word w/Shadow Die

    Fluttering By Coordinating Dies

    Rainbow Ombre Reverse Crossing Lock Craft Tweezers

    Bearly Art Precision Craft Glue – THE BUNDLE

    Waffle Flower Water Media Mat

    Connect Glue Tube by Gina K Designs


    <!– LinkDeli Code Start –><!– KS 7 27 only KS –><a class=”linkdeli-image” target=_blank href=”https://linkdeli.com/view/52438fc6-ebd0-439a-9d88-185a91c5b451″ rel=”nofollow”><img src=”https://linkdeli.s3.amazonaws.com/public/placeholders/52438fc6-ebd0-439a-9d88-185a91c5b451.jpg”></a>
    https://linkdeli.com/widget.js?id=f5e8378456858c916708<!– LinkDeli Code End –>

    Design Team Projects

    Every Day Card

    (affiliate links for most products are provided below at no additional cost to you)

    Good Morning! I am up on the Kat Scrappiness Blog today with a new card featuring the new Under the Sea dies. There is a beautiful new cover plate and a set of amazing ocean plant dies. They can be used for any occasion and are bound to be hit in your craft room! So let’s make a card!

    Card Supplies


    Card Details

    • Cut, score, and fold a side-folding A2 card base.
    • Using the Under the Sea Cover Plate DRY EMBOSS a piece of white card stock using the settings on your die-cutting machine. Trim to 3.75″ x 5″.
    • Using a circle die, die-cut a 3.5″ circle from white card stock.
    • Choose coordinating ocean colors from your marker stash and randomly draw overlapping stripes across your circle die.
    • Cut several of the plants from the Life Under the Sea dies from white card stock. I chose to ink blend some Distress Oxide inks over a few of them. This is optional.
    • Stamp your sentiment and die-cut using the Boxed Sentiment dies. Trim to the desired length.
    • Cut a piece of white card stock slightly larger than your sentiment strip. Color the edges with a marker used on the circle die. Adhere the sentiment to this strip with glue.
    • Layout your plants on your circle die and then adhere using strong glue.
    • Add foam tape to your dry-embossed, cover plate panel and adhere to the card base.
    • Glue your sentiment strip directly to the card panel.
    • Add foam tape to the back of the circle die and add to the card panel.
    • Add a few jewels and you’re done!

    This is a pretty easy card to make and I can’t wait to see your creations. Please share them with us over on the Kat Scrappiness Insiders Facebook Page. Please make sure to take a peek at all of the inspiration on the Kat Scrappiness Blog as well! And don’t forget to stop by the Kat Scrappiness Store to see all of the amazing products!


    https://linkdeli.com/widget.js?id=f5e8378456858c916708

    Design Team Projects

    Hope Candle & Matching Card

    Hello everyone! Maria here on the blog with you sharing two projects, showcasing the #Ukraine Strong Stamp Set and Coordinating Dies, along with the Condensed Lowercase Alpha Die Set, Layered Bubbles Stencil Set and Transparent Heart Droplets.

    I know that #Ukraine Strong Stamp Set was originally made to support Ukraine (and all profits will be donated to the  Ukraine Crisis Relief Fund. )  However, I am here to show you that you can stretch your stamps and use it for a different purpose.

    I made these projects to support my sister who was diagnosed with Stage 4 Lymphoma in March this year. She went through chemo treatments (I cannot even tell you how hard it really was to see her go through it) and after her PETScan this month, the doctors told us that the chemo worked successfully. Even though she is not out of the woods yet and will still go through a few radiation treatments, we are so happy with this news.

    The purple ribbon represents all types of cancer so this blog post is dedicated not only to my sister Maria Pilar, but to all people who are either going through treatments or have survived this nasty disease.

    For my first project, I decided to make this “Hope” candle. In my sister’s case, it just goes to show you that there is always HOPE at the end of the tunnel, and the power of prayer is really STRONG! You just need to believe that you can do it, and have faith in God to work his mysterious ways!

    Here’s how I made this project:

    My next project is the matching card to go with this candle.

    I hope you like these projects and got inspired. Below, you will find links to the supplies used to create these projects. Where available, I use compensated affiliate links at no extra cost to you. Your support helps me to keep bringing you new projects and inspiration. Thank you for stopping by, and have an amazing day!

    ——–SUPPLIES——

    Design Team Projects

    Rainbow of “Hope” Slimline Card with Eclipse Effect | Call Me Crafty Al

    Hello crafty friends!

    It’s Alicia a.k.a. Crafty Al here to share a look at the card that I created using some of the NEW products from Kat Scrappiness – including the Fluttering By Collection.

    To get started I stamped the solid butterfly from the Fluttering By stamp set in a rainbow of inks along the bottom of a slimline-sized piece of cardstock.

    I wanted to use the “eclipse” technique for this card so I used some letters from the Uppercase Condensed Alpha die set and the solid butterfly from the Fluttering By die set to cut out parts of the stamped piece. I also used the middle die from the Slimline Reverse Scallop die set to cut a white frame. I thought this would help separate the background from the die cut pieces.

    To finish the card I popped the die cut pieces over their openings using foam tape and added some shine with the Sparkling Snow Pearl Mix.

    You can check out my video for the full process…

    Thanks for stopping by and I hope you enjoyed today’s card!

    Alicia / Crafty Al

    Related Products:

       Kat Scrappiness

          Fluttering By stamp set: http://shrsl.com/3k7ee

          Fluttering By dies: http://shrsl.com/3k7ef

          Slimline Reverse Scallop dies: http://shrsl.com/3mk0c

          All NEW Products: http://shrsl.com/3hq9p

          Uppercase Condensed Alpha die set: http://shrsl.com/3grkx

          Sparkling Snow Pearl Mix https://shrsl.com/3831u

          Triangle Embellishment Tray: http://shrsl.com/37sxh

          Embellishment Organizer: http://shrsl.com/37sxi

        MISTI http://shrsl.com/3lyat

       Jewel Picker https://shrsl.com/3bedx

       Art Glitter Glue: http://shrsl.com/37svl

    **Some links above are affiliate links. I link them up for your convenience and may receive a small commission, at no extra cost to you. I hope you will consider using the links if you decide to purchase the products I share. 🙂

    Design Team Projects

    Together We Can Make A Difference

    Happy Saturday Friends!

    It’s Sheri here today! Before we get to today’s card I have a SALE to share with you!

    This weekend get 13% OFF STOREWIDE with Coupon Code: SECRETSALE.

    Sale ends 7/24 at Midnight PST. To SHOP, click HERE!!

    ———-

    I’m back this week to showcase another card featuring the #UkraineStrong Fundraiser Products! The #UkraineStrong products (stamps, die set & paper pad) can now be purchased as a bundle or individually. Kat has also extended the fundraiser and will continue donating the profits from #UkraineStrong Products to the Ukraine Crisis Relief Fund via GlobalGiving.org until they are all sold. You can find them HERE.

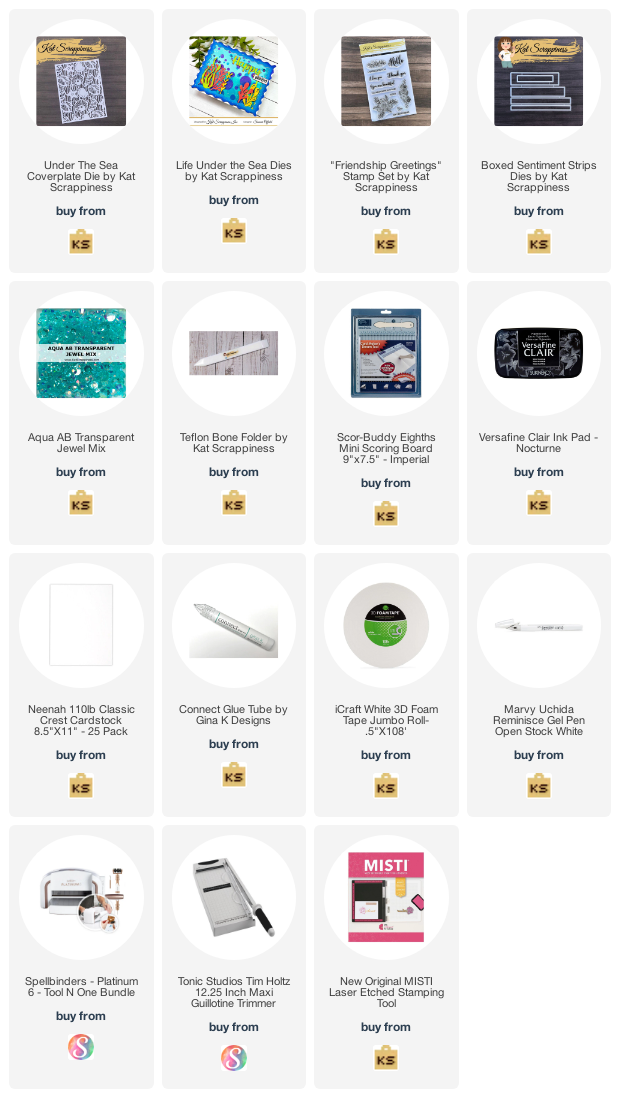
    (These products are excluded from the sale)

    These products are so well coordinated and make it very easy to create some really beautiful cards to show our support to Ukraine!

    Steps to Create Card:

    • Cut White A2 Top Fold Card Base: 4 1/4″ x 5 1/2″ (4 1/4″ x 11″, scored at 5 1/2″ on 11″ side)
    • Cut Blue Mat: 3 15/16″ x 5 3/16″
    • Cut #UkraineStrong Pattern Paper: 3 13/16″ x 5 1/16″
    • Cut #UkraineStrong Pattern Paper Strip with Stitched Slimline Strips die: 1/2″ x 5 1/16″
    • Cut Yellow banner with the Nesting Fishtail Banner die: 2 5/8″ x 4″
    • Cut 2 leaves from the Stitched Foliage die set using blue card stock.
    • Stamp 2 sunflowers from the #UkraineStrong Stamp Set. I used blue and yellow ink pads.
    • Stamp sentiment from the #UkraineStrong Stamp Set using embossing ink on blue card stock and emboss with white embossing powder. Next cut out with 2 1/2″ Never Ending Circle die.
    • Assemble card. The yellow fishtail banner and sunflowers are popped up with foam tape. (Optional)
    • For embellishment I added a few Clear Solid Round Confetti.

    Here’s a list of the supplies I used from the store.
    Affiliate links are used at no additional cost to you. Thank you so much for your support!


    Happy Stamping!!