Tag: Never Ending Circle Die

  • Creative Crew’s 2022 Holiday Gift Guide

    Creative Crew’s 2022 Holiday Gift Guide

    Hello Friends!! Have you started your Christmas shopping yet? Are your friends and family bugging you for some ideas? Nora here with a few of my FAVORITE Kat Scrappiness products for the Creative Crew’s 2022 Holiday Gift Guide. The entire Design Team is sharing their favorite products so be sure to check back to the Kat Scrappiness Blog for some fabulous ideas!!!

    Here are my favorite TOP FIVE ITEMS from Kat Scrappiness that I think are must haves for any collection.

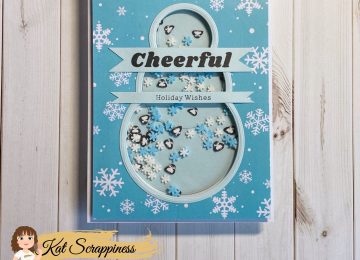
    Number ONE on my list are the Stitched Nesting Dome Dies.

    I love these dies because you can use them in so many ways. You can make a window in a card front, add a punched hole to make a tag or even flip them the die over like I did below to create a fun backdrop for a card.

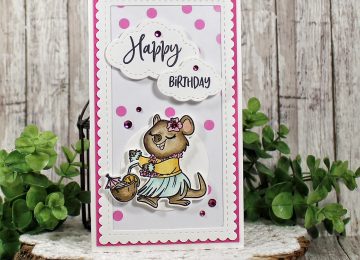
    Number TWO on my list is the Stitched Scalloped Collage Frame Die.

    I love this die because you can take smaller stamped images or small die cuts and layer them with in to create a collage. It is a way to stretch your products, using the tiny elements that you might otherwise overlook.

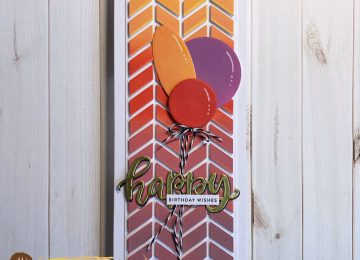
    Number THREE on my list are the Heart Donut Builder Dies.

    These dies can be used on all sorts of cards!! You could use some of the elements to create Christmas cookies, or flip the the frosting over and combine with a cup to make whip cream for hot chocolate. The ideas are ENDLESS!!!

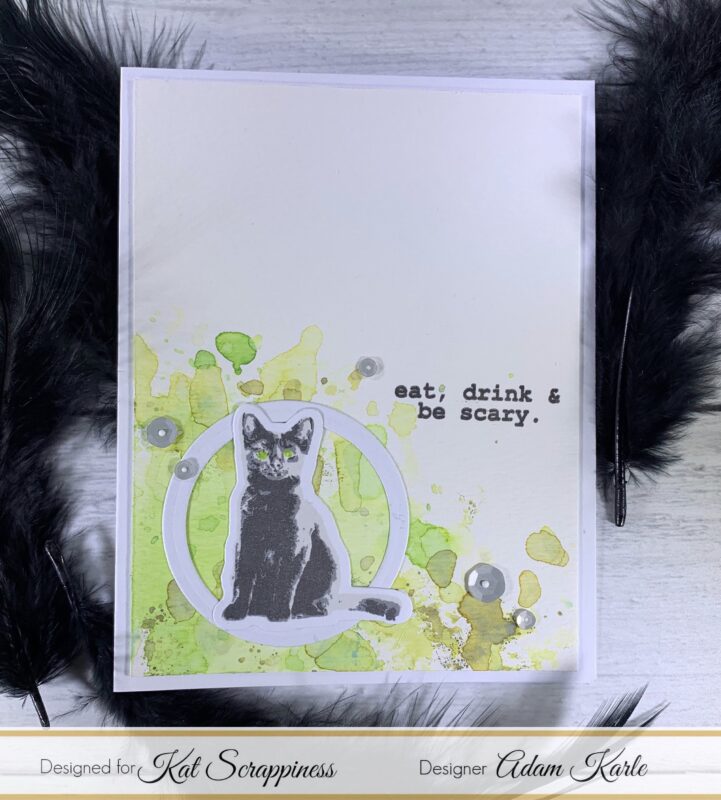
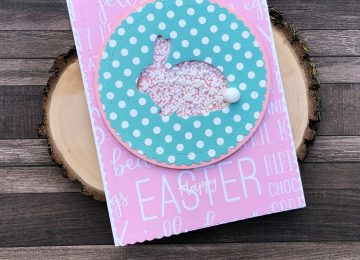
    Number FOUR on my favorite things list are the Never Ending Circle Dies.

    A set of circle dies like these are ESSENTIAL in any collection. I use this type of die the most, whether it is to cut out images for layering or taping together to make a circle frame. Below I used the dies to create a simple word ballon for my sleeping cat.

    Number FIVE on my list are the simplest of all to give-Kat Scrappiness Gift Cards!!!

    Gift cards are the BEST because you or your crafty friends can buy whatever you would like!!! They start at $10 and can be bought for as much as you want. You can use them on anything in the Kat Scrappiness Shop. One of the EASIEST gift buying option there is!!!

    That is all from me today!! Be sure to pop back in to the Kat Scrappiness Blog to see some FABULOUS ideas for your shopping lists. Thank you for stopping by. Have a great day!

    ***Just a reminder that all links in this post are Affiliate Links used at no extra cost to you.

  • Happy Birthday

    Happy Birthday

    Hello Everyone!

    Sheri here today with a fun BIRTHDAY card featuring Kat Scrappiness  Summer Quokka stamp and coordinating die set along with a sentiment from the Happy Day stamp set.

    Before we get started let’s take care of a little housekeeping…

    Have you seen the August 2021 Release Yet?

    Or shopped the Enamel Dots SALE that ends today?

    Now back to the card…

    Steps to Create Card:

    • Cut Mini Slimline Card Base: 7″ x 6″ (7″ x 6″, scored at 3.5″ on the 7″ side)
    • Cut Pink Mat: 3 1/4″ x 5 11/16″
    • Cut White Scallop Frame: Take largest die from the Mini Slimline Scalloped Edge die set & the 3rd largest die from the Mini Slimline Never Ending die set to create your frame. Frame Size is 3 1/8″ x 5 5/8″.
    • Cut piece of pattern paper from the Rainbow Confetti Paper Pad: 3 1/8″ x 5 5/8″
    • Cut 2 Clouds from the Stitched Puffy Cloud die set.
    • Cut 1 Circle from the Never Ending Circles die set: 2″
    • Stamp “Happy” and “Birthday” on the clouds.
    • Stamp one of the Quokka’s from the  Summer Quokka stamp set. Color with your favorite medium. I used an alcohol friendly ink and copic markers.
    • Cut Quokka out with the Summer Quokka coordinating die set or fussy cut it out.
    • Assemble card. Foam tape is optional if you would like to add some dimension.
    • For embellishment add Fuchsia Berry Rhinestone Mix using a Jewel Picker and Gina K. Designs Connect Glue.

    Here’s a list of the supplies I used from the store.

    Affiliate Links used at no additional cost to you. Thank You so much for your support!


    Happy Stamping!!

  • Fun Mini Slimline Card Using Rainbow Dreams Pattern Paper


    Hey friends, and welcome.  Katy here and in today’s video I thought I would show you another way to use the Rainbow Dreams Slimline Pattern Paper to create a fun Happy Summer card.  I used the large dot patter paper and a coordinating circle die to cut out each colored dot. Click here to watch how this card came together. Products used are listed down below. Thanks for watching.

    PRODUCTS USED:

    Rainbow Dreams Slimline Pattern Paper  http://shrsl.com/3472o

    Mini Detail Blending Brushes http://shrsl.com/3472q

    Mini Slimline White Card base and Envelope http://shrsl.com/3472t

    White Rhinestone Mix http://shrsl.com/3472x

    Happy Summer Die http://shrsl.com/34730

    Never Ending Circle Layering Dies http://shrsl.com/3473c

    Slimline Never Ending Dies http://shrsl.com/3473e

    Silver Sparkle Embossing Powder http://shrsl.com/3473h

    Versamark Ink http://shrsl.com/3473k

    Heavyweight White Cardstock http://shrsl.com/3473m

    Heavyweight Black Cardstock http://shrsl.com/3473o

    Bearly Art Glue http://shrsl.com/3473q

    FIND US HERE…

    Kat Scrappiness http://KatScrappiness.com

    Blog: http://KatScrappinessBlog.com

    Facebook: https://www.facebook.com/KatScrappiness

    Instagram: https://www.instagram.com/katscrappiness/

    You can ———————— FOLLOW KATY————————here

    YOUTUBE: https://www.youtube.com/c/eastwickspaperandink

    INSTAGRAM: https://www.instagram.com/eastwickspaperandink

    FACEBOOK: fb.me/eastwickspaper

    BLOG: https://www.eastwickspaperandink.com

  • Cheerful Holiday Wishes Card

    Cheerful Holiday Wishes Card

    Hi everyone, it’s Tina here. Today I am sharing how I created a Snowman Shaker Card using the Never Ending Circles Dies with the new A Cozy Christmas Slimline Paper. Below you will find the steps to create your own Cheerful Holiday Wishes Card.

    Step 1 – Trim White Cardstock to 8 1/2″ x 5 1/2″, score at 4 1/4″ and fold in half for a vertical side fold card. (A2)

    Step 2 – Diecut Never Ending Circles using A Cozy Christmas Paper Pad (3 dies sizes – start with the smallest circle but skip the next die so that you will be able to create a circle border for the top of card). Each circle die will have to be diecut separately. See photo below for visual.

    Step 3 – Adhere a piece of acetate to the backside of the panel created from Step 2. Add Foam Tape to the backside excluding the window area. Add Chilly Willy Sprinkles on top of the card front making sure they are inside of the window area. Remove the release sheet from the Foam Tape and adhere to the card front sealing the sprinkles inside.

    Step 4 – Stamp sentiment using Versafine Onyx Black Ink on Light Blue Cardstock. Trim out the sentiments and adhere to card front using Nuvo Deluxe Adhesive. (I originally intended to adhere the sentiments to the bottom of the snowman but a couple of my sprinkles locked on the side and in order to fix it I had to scratch my acetate window. Instead of starting over I used the sentiment to cover this). Easy fix!

    This card can be used for several occasions by changing the sentiment. Christmas sentiment for a holiday card, Winter sentiment for a winter card and Birthday sentiment for those birthdays during the winter season. Below is a link to all the products used. Thank you for stopping by and Happy Crafting!

    Products Used:


    https://linkdeli.com/widget.js?id=f5e8378456858c916708

  • Happy Birthday Wishes Slimline Card

    Happy Birthday Wishes Slimline Card

    Hi everyone, it’s Tina here. I have an intricate card to share with you but actually very easy to make using the Chevron Slimline Coverplate. Below I will show you how so you can create your own Happy Birthday Wishes Slimline Card.

    Step 1 – Trim White Cardstock to 7” x 8 1/2”, score at 3 1/2” and fold in half for a vertical side fold card. (Slimline)

    Step 2 – Trim White Cardstock to 3 1/2” x 8 1/2”. Apply ink of your choice to the entire panel. I used Distress Oxide Inks in Spiced Marmalade, Candied Apple, Fired Brick and Aged Mahogany.

    Step 3 – Diecut Chevron Slimline Coverplate using the panel created in Step 2. Be careful to keep all the pieces intact. Use Press n Seal to cover the backside. This will keep all the pieces together. Turn around and remove the die. Now place another piece of Press n Seal to the top, turn around and remove the back Press n Seal. If you do not have Press n Seal then Masking Sheets will work as well. Add Foam Tape to all the negative pieces. Remove the release sheets and then carefully turn over the diecut and place on top of the card front. Remove the Press n Seal and carefully remove the positive diecut. See photos below for visual.

    Step 4 – Apply ink of your choice on a scrap piece of White Cardstock. I used Distress Oxides Ink in Candied Apple, Spiced Marmalade, and Seedless Preserves. Diecut Never Ending Circles and Ovals to create balloons. Trim out a triangle in each color and adhere to card. Big circle balloon and oval using Nuvo Deluxe Adhesive and small circle using Foam Tape. Add Baker’s Twine to the back of the balloons and tie a bow to the small circle.

    Step 5 – Diecut Happy from the Happy Easter with Shadow die (word only) using Gold Metallic Cardstock and another time with Black Cardstock. Adhere the gold on top of the black with Nuvo Deluxe Adhesive by offsetting the black. Adhere to card using Nuvo Deluxe Adhesive.

    Step 6 – Stamp sentiment using Versafine Clair Nocturne Ink on White Cardstock. Trim and adhere to card using Nuvo Deluxe Adhesive.

    Step 7 – For added interest add some detail to the balloons using a White Gel Pen.

    This card can be used for many occasions by changing the colours and/or sentiment. Below is a link to all the products used. Thank you for stopping by and Happy Crafting!

    Products Used:


    https://linkdeli.com/widget.js?id=f5e8378456858c916708

  • Spooky Cat

    Spooky Cat

    Hello Crafters,

    Halloween will be here before we know it.  I am sure everyone will want to send out cards to their special people in their life. Today’s card is quick and fun to create.

    I started with a traditional black cat. This cat is a three layered stamp from the Kat Scrappiness Stamp set called Toil & Trouble Stamp and die. Using three shades of gray I stamped the cat. Used green to stamp the eyes then die cut it out.

    To create the background I used a Kat Scrappiness A-2 piece of acetate as my palette. On this acetate I dabbed Tim Holtz Distressed   oxide in mowed lawn, peeled paint and forest moss. Then water is spritzed onto the ink. The layer one piece of water color paper is then pressed onto the inks. Dabbing the ink onto the paper to create the background. This is done to the liking of the creator of the card.

    Using Kat Scrappiness Never Ending Circle dies cut out a circle/ring for the cat to be framed. Stamp the sentiment from the Toil & Trouble  Stamp set in black. Adhere the circle over the inked background and center the cat in it. Add a few sequins from the Kat Scrappiness Black Tie sequin mix and the card is complete.

    Cards can be simple and still be beautiful.

    Kat Scrappiness Supply List:

    Kat Scrappiness Toil & Trouble Stamp and Die set

    Kat Scrappiness Never Ending Circle Dies

    Kat Scrappiness A-2 Acetate sheets

    Kat Scrappiness Black Tie Sequin Mix

    Tim Holtz Distress Oxide- mowed lawn, peeled paint, forest moss


  • Happy Easter – Crafter’s Essentials Easter

    Happy Easter – Crafter’s Essentials Easter

    Hi everyone!  Did you get a chance to see all the new dies that were released this month?

    Today, I have a shaker card with a lot of Kat Scrappiness products including the new Crafters Essentials: Easter die set and some sprinkles.

    I started off by using one of the scalloped stitched circle dies with some blue and while polka dot paper.  I then cut out a circle using the Never Ending circle dies out of pink card stock.  I adhered those pieces together and used the bunny from Crafters Essentials: Easter die set to cut the bunny out.  Next, I adhered a piece of clear acetate to the back.

    For the shaker part, I added white sprinkles and some white hearts from the Black and White heart sprinkles.  I double up the foam adhesive on the back of this and then added a piece of the same pink card stock to the back.

    I found some cute pink Easter paper with words relating to Easter in my stash.  I used the Stitched Scalloped rectangles to cut out the front panel of my card.  I strategically cut it out so that the word Easter would be at the bottom of the card.  I then used the word Happy from one of the sentiments from the Happy Fall Ya’ll stamp set to white heat emboss that over the word Easter.

    I adhered everything to a white card base and finally added a cute bunny tail with one of the Bunny Tail pom poms!

    I decided to add the bunny that was cut from the scalloped circle to the inside of the card.

    – – –– – –– – –– – –– – –– – –– – –– – –– – –– – –– – –– – –– – –– – –– – –– – –– – –– – –– – –– – –– – –– –

    Use code caren10 for a 10% discount in the Kat Scrappiness shop.

    Thanks for stopping by and happy stamping!

    – – – SUPPLIES for today’s project– – – – – – – – – – – – – – – – – – – – – – – – – – – – – – – – – – – – – – –

  • Bokeh Background And Zig Zag Border Dies

    Bokeh Background And Zig Zag Border Dies

    Hi Everyone, its Tina here. I have a card to share with you using a Bokeh Background and the new Zig Zag Border dies. I used the Zig Zag Stitch Border dies to tone back my background. Below you will find the steps to create your own card.

    Step 1 – Trim White Cardstock  to 8 1/2″ x 5 1/2″, score at 4 1/4″ and fold in half for a vertical side fold card. (A2)

    Step 2 – Trim White Cardstock to 5 1/2″ x 4 1/4″. Using the Picket Fence Life Changing Brushes apply Distress Oxide Inks in various sizes of circles. I used Seedless Preserves, Antique Linen, Picked Raspberry, Spiced Marmalade, Barn Door.

    Step 3 – Diecut Never Ending Circles to create a stencil of various size circles. For a smaller circle use any punch or circle you have from another set. Randomly apply various sizes of circle using White Ink and a mini ink blending tool to the background created from Step 2. See photo below for finished Bokeh Background. Let Dry then adhere to card using Nuvo Deluxe Adhesive.

    Step 4 – Diecut Zig Zag Stitch Border two times using White Cardstock. Adhere to card one on top and one on the bottom using Nuvo Deluxe Adhesive. The white helps to tone down the background.

    Step 5 – Diecut sentiment and adhere to card using Collage Medium.

    Step 6 – For added interest adhere Fuschia Jewels using a Crystal Katana and collage medium.

    This card can be used for any occasion by changing the sentiment and colors. There are many new Zig Zag Stitch Dies in the store in various shapes. To receive 10% off your next order use code: TINA10 at checkout. Below is a link to all products used. Thank you for stopping by and have a wonderful day.

    Products Used:
    https://linkdeli.com/widget.js?1551106829638

  • Using Black To Make Colors Pop With The Medallion Coverplate

    Using Black To Make Colors Pop With The Medallion Coverplate

    Hi Everyone, It’s TIna here. Today I have 2 cards to share with you using the new Medallion Coverplate die and I will show you how to get the colors pop using Distress Oxide Inks and Black Cardstock. Below are the instructions to create your own card.

    Card 1

    Card 2

    Step 1 – Trim White Cardstock to 8 1/2″ x 5 1/2″, score at 4 1/4″ and fold in half for a vertical side fold card. (A2) (Card 1 and 2)

    Step 2 – Trim White Cardstock to 5 1/2″ x 4 1/4″. Apply Distress Oxide Ink using Picket Fence Life Changing Brush. (Card 1 and 2)

    Panel for Card 1

    Panel for Card 2

    Step 3 – Diecut Medallion Coverplate using Black Cardstock. (Card 1) Diecut Medallion Coverplate using Panel 2. (Card 2)

    Step 4 – Card 1 – Adhere Medallion Coverplate black diecut to Panel 1 (Trim off excess of panel) and then to card front using Nuvo Deluxe Adhesive.

    Card 2 – Adhere Medallion Coverplate Panel 2 to Black Cardstock then trim 1/8″ all around and adhere to card front.

    Step 5 – Stamp Sentiment using Versamark, sprinkle White Embossing Powder, remove excess and heat set it with a heat tool. (Card 1 and 2)

    Step 6 – Card 1 – Stamp and color image and adhere to card above the sentiment.

    Card 2 – Adhere Pastel Pop Sequins for added interest.

    Card 1


    Card 2

    I hope you enjoyed today’s cards using the Medallion Coverplate. These cards can be used for any occasion by changing the colors and sentiment. To receive 10% off your order at Kat Scrappiness use code: TINA10 at checkout. Below is a link to the products used. Thank you for stopping by and have a wonderful day.

    Products Used:

    https://linkdeli.com/widget.js?1549439153802

  • Mandala Die – Happy Valentine’s Day

    Mandala Die – Happy Valentine’s Day

    Have you been keeping up with the February release?  Today is the grand finale!  Be sure to check out all the beautiful dies that were released this week.

    For today’s card, I’m using the new Mandala die from Kat Scrappiness.  I love all the new dies buy I think this one is my favorite!

    I die cut the Mandala die four times out of some white card stock.  I then found a perfect sized circle from Kat Scrappiness’ Never Ending circle dies to back the Mandala die.  I cut the circle die out of purple card stock.  I then sponged a little bit of Dusty Concord distress ink into the center of each purple circle.  I adhered the white Mandala die cuts to the purple circles and adhered them to my card base.

    For the sentiment, I used one of the Stitched Sentiment dies.  I heat embossed my sentiment using white embossing power.  I then sponged on Dusty Concord distress ink.  I adhered it to my card using foam adhesive, then added some Lilac jewels to finish off the card.

    Here are a couple of other cards I created for the Mandala die release:

    – – –– – –– – –– – –– – –– – –– – –– – –– – –– – –– – –– – –– – –– – –– – –– – –– – –– – –– – –– – –– – –– –

    Use code caren10 for a 10% discount in the Kat Scrappiness shop.

    Thanks for stopping by and happy stamping!

    – – – SUPPLIES for today’s project– – – – – – – – – – – – – – – – – – – – – – – – – – – – – – – – – – – – – – –