Howdy Kat Scrappiness fans! Maria here on the blog today with a simple card, showcasing the Crafter’s Essentials 1 die…
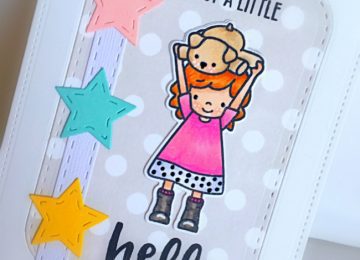

Howdy Kat Scrappiness fans! Maria here on the blog today with a simple card, showcasing the Crafter’s Essentials 1 die…
Hello again, crafters! I hope that you are all doing well, and having a happy July. With all the sunshine…
Hello, crafters! I’m back today with a brand new card using the Kat Scrappiness Stitched Scalloped Circle Dies and Lawn…
Hello, crafters! Thanks for joining me for today’s card project. I was playing around with the Stitched Flag Dies from…

National Scrapbooking Day is May 5, 2018 and we are planning on having a SALE, card challenge and SEVERAL giveaways…
Hello, crafters! I hope that you’re all having a great day out there. My project for the end of…
Hello my crafty peeps! I am back today for Kat Scrappiness sharing a process video on how I made these…