Tag: Fluttering By

  • Fluttering By

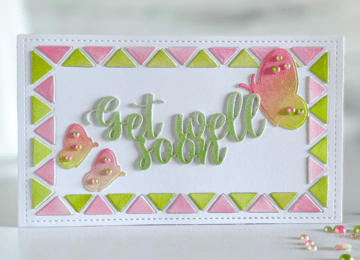
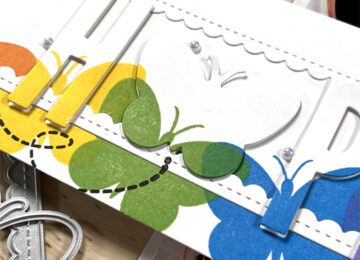
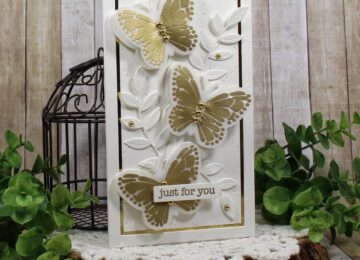
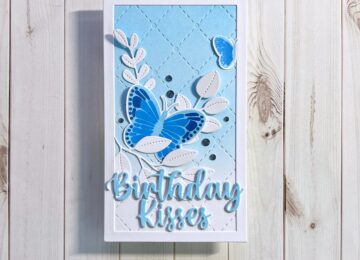
    We are re-introducing some of our favorites with the help of the #kscreativecrew Everyone has shared videos and projects on social media using the lovely Fluttering By Stamp set. You get 3 different-sized butterflies, the medium and smaller ones have 2 steps for stamping and the larger one has 3 steps. You also get this super cool dashed line to represent the flying of the butterflies.


  • Creating a Card Based on Your Embellishments!

    Creating a Card Based on Your Embellishments!

    Hi, everyone! This is Nicki from the Design Team here with a fun project to get you using those embellishments! If you are like me, you have some that you think are too pretty to use. That is the case with the beautiful embellishments we are using today.  Hopefully, this will motivate you to grab them and use them on a card!

    For all the details, make sure to check out the YouTube video.

    First, I grabbed the beautiful Rose Garden Pearl Mix.

    Next, I looked at my ink pad colors and chose 2 inks that coordinated well with these colors. Once, I had the colors picked, it was time to play with some of the new products from Kat Scrappiness. I used the Mini Slimline Lattice Frame Die.

    I decided to create some inlaid die cutting with pink and green to coordinate with the pearls.

    Next, I did some ink blending with the same inks and used the “Fluttering By” dies to cut out butterflies. After die cutting the butterflies, I added the pearls to the wings to create interest.

    All that was left to do was to put it all together with the sentiment.

    Supplies:

    Rose Garden Dual Color Pearl Mix

    Mini Slimline Lattice Frame Die

    Get Well Soon Word w/Shadow Die

    Fluttering By Coordinating Dies

    Rainbow Ombre Reverse Crossing Lock Craft Tweezers

    Bearly Art Precision Craft Glue – THE BUNDLE

    Waffle Flower Water Media Mat

    Connect Glue Tube by Gina K Designs


    <!– LinkDeli Code Start –><!– KS 7 27 only KS –><a class=”linkdeli-image” target=_blank href=”https://linkdeli.com/view/52438fc6-ebd0-439a-9d88-185a91c5b451″ rel=”nofollow”><img src=”https://linkdeli.s3.amazonaws.com/public/placeholders/52438fc6-ebd0-439a-9d88-185a91c5b451.jpg”></a>
    https://linkdeli.com/widget.js?id=f5e8378456858c916708<!– LinkDeli Code End –>

  • Rainbow of “Hope” Slimline Card with Eclipse Effect | Call Me Crafty Al

    Rainbow of “Hope” Slimline Card with Eclipse Effect | Call Me Crafty Al

    Hello crafty friends!

    It’s Alicia a.k.a. Crafty Al here to share a look at the card that I created using some of the NEW products from Kat Scrappiness – including the Fluttering By Collection.

    To get started I stamped the solid butterfly from the Fluttering By stamp set in a rainbow of inks along the bottom of a slimline-sized piece of cardstock.

    I wanted to use the “eclipse” technique for this card so I used some letters from the Uppercase Condensed Alpha die set and the solid butterfly from the Fluttering By die set to cut out parts of the stamped piece. I also used the middle die from the Slimline Reverse Scallop die set to cut a white frame. I thought this would help separate the background from the die cut pieces.

    To finish the card I popped the die cut pieces over their openings using foam tape and added some shine with the Sparkling Snow Pearl Mix.

    You can check out my video for the full process…

    Thanks for stopping by and I hope you enjoyed today’s card!

    Alicia / Crafty Al

    Related Products:

       Kat Scrappiness

          Fluttering By stamp set: http://shrsl.com/3k7ee

          Fluttering By dies: http://shrsl.com/3k7ef

          Slimline Reverse Scallop dies: http://shrsl.com/3mk0c

          All NEW Products: http://shrsl.com/3hq9p

          Uppercase Condensed Alpha die set: http://shrsl.com/3grkx

          Sparkling Snow Pearl Mix https://shrsl.com/3831u

          Triangle Embellishment Tray: http://shrsl.com/37sxh

          Embellishment Organizer: http://shrsl.com/37sxi

        MISTI http://shrsl.com/3lyat

       Jewel Picker https://shrsl.com/3bedx

       Art Glitter Glue: http://shrsl.com/37svl

    **Some links above are affiliate links. I link them up for your convenience and may receive a small commission, at no extra cost to you. I hope you will consider using the links if you decide to purchase the products I share. 🙂

  • Just for You Butterfly Mini Slimline

    Just for You Butterfly Mini Slimline

    Happy Thursday Friends!

    It’s Sheri here today with an elegant “Just for You” mini slimline card featuring the NEW Fluttering By stamp and die set from Kat Scrappiness Summer Vibes Release!  If you haven’t had a chance to check out the NEW Summer Vibes Release yet, you can find it HERE!!


    Steps to Create Card:

    • Cut White Mini Slimline card base: 3 1/2″ x 6″ (7″ x 6″, scored at 3 1/2″ on 7″ side).
    • Cut White Panel: 3 1/2″ x 6″ and use MSL Quilted Background die to add texture to panel.
    • Cut White Fame using the largest frame from the MSL Frames die set.
    • Cut Gold Mirror by cutting a panel 3 1/2″ x 6″ and cut out a window with the second largest rectangle from the MSL Never Ending die set.
    • Cut 3 White Leaves from the Stitched Foliage Die set.
    • Cut 3 White Butterflies from the Fluttering By die set.
    • Cut 3 Vellum Butterflies from the Fluttering By die set. Next stamp and emboss using gold embossing powder the two outline stamps from the Fluttering By stamp set.
    • Stamp & emboss with gold embossing powder the Just for You sentiment from the Everyday Brush Strokes stamp set.
    • Assemble card. The butterflies (both solid butterfly and vellum butterfly) and sentiment are popped up with foam tape .
    • For embellishment I added gold pearls to the body of the butterflies to hide the foam tape. I also added a few around the stitched foliage.


    Here’s a list of the supplies I used from the store.
    Affiliate links are used at no additional cost to you. Thank you so much for your support!

    Happy Stamping!!

  • Birthday Kisses Mini Slimline Card

    Birthday Kisses Mini Slimline Card

    Hi everyone, it’s Tina here. Today’s card is using products from the new Summer Vibes release. I just love this release. Below are the steps to create your own card.

    Step 1 – Trim White Cardstock to 7” x 6”, score at 3 1/2” and fold in half for a vertical side fold card. (Mini Slimline)

    Step 2 – Diecut Mini Slimline Quilted Backdrop using White Cardstock. Apply Light Blue Ink using a Blender Brush on the top and stopping about 2” from the bottom. Adhere to card front using Bearly Art Precision Glue.

    Step 3 – Diecut Mini Slimline Frame using White Cardstock. Adhere to card front using Bearly Art Precision Glue.

    Step 4 – Stamp Fluttering By using 3 shades of Blue Ink. Diecut with the coordinating die. Adhere to the card using Bearly Art Precision Glue. I applied the glue only to the center to give dimension to the wings.

    Step 5 – Diecut Stitched Foliage using White Cardstock. Adhere 2 Foliage behind the Butterfly and 1 in front of the Butterfly.

    Step 6 – For some added interest and sparkle randomly adhere some Blue Diamond Rhinestones using a Pick Up Tool and Bearly Art Precision Glue.

    Step 7 – Diecut Birthday Kisses sentiment 3 times. 2 using White Cardstock and 1 using the same Ink color used in Step 2. Attach each layer using Bearly Art Precision Glue making sure that the Blue layer is on top. Adhere to the card front.

    This card can be used for many occasions by changing the color and/or sentiment. Below is a link to all the products used. Thank you for stopping by and Happy Crafting!

    Products Used:
    https://linkdeli.com/widget.js?id=f5e8378456858c916708