Follow:
    Design Team Projects

    Happy Retirement Card

    Hello everyone!!

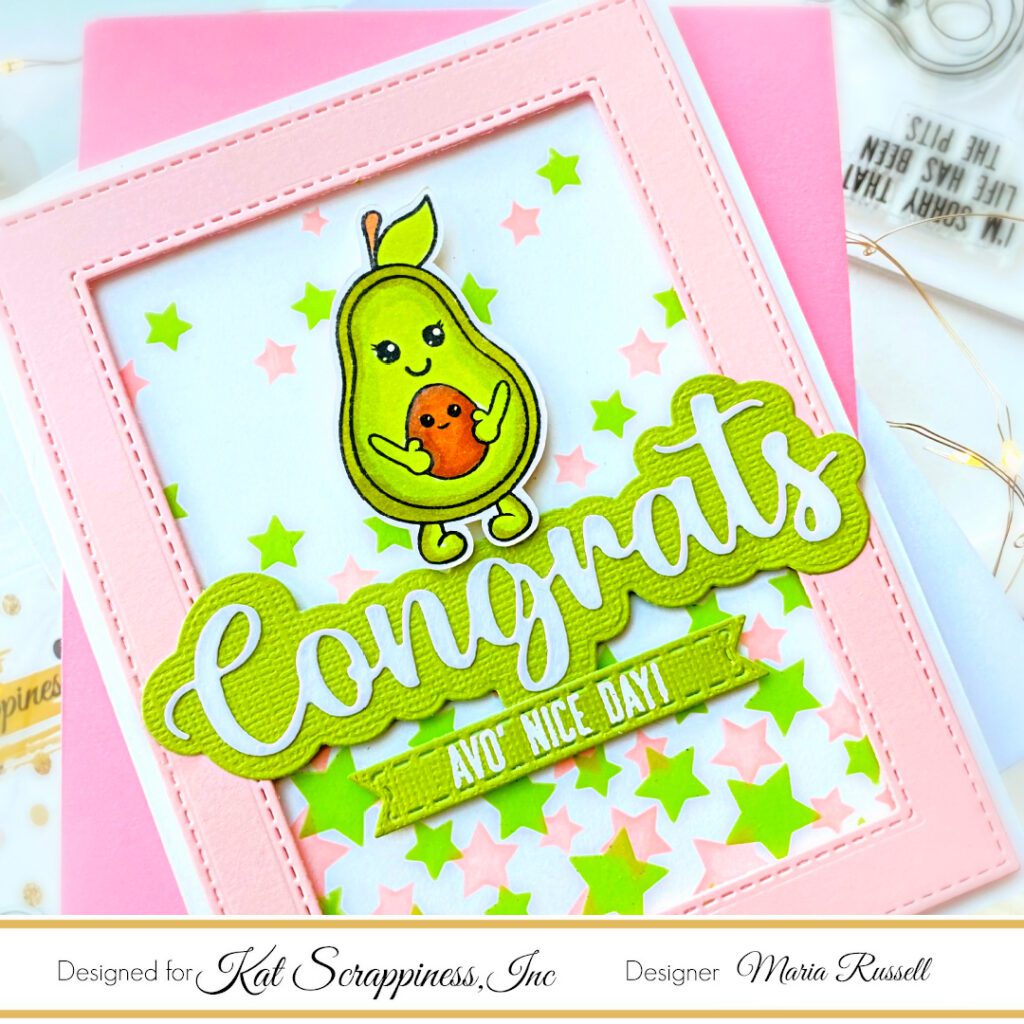
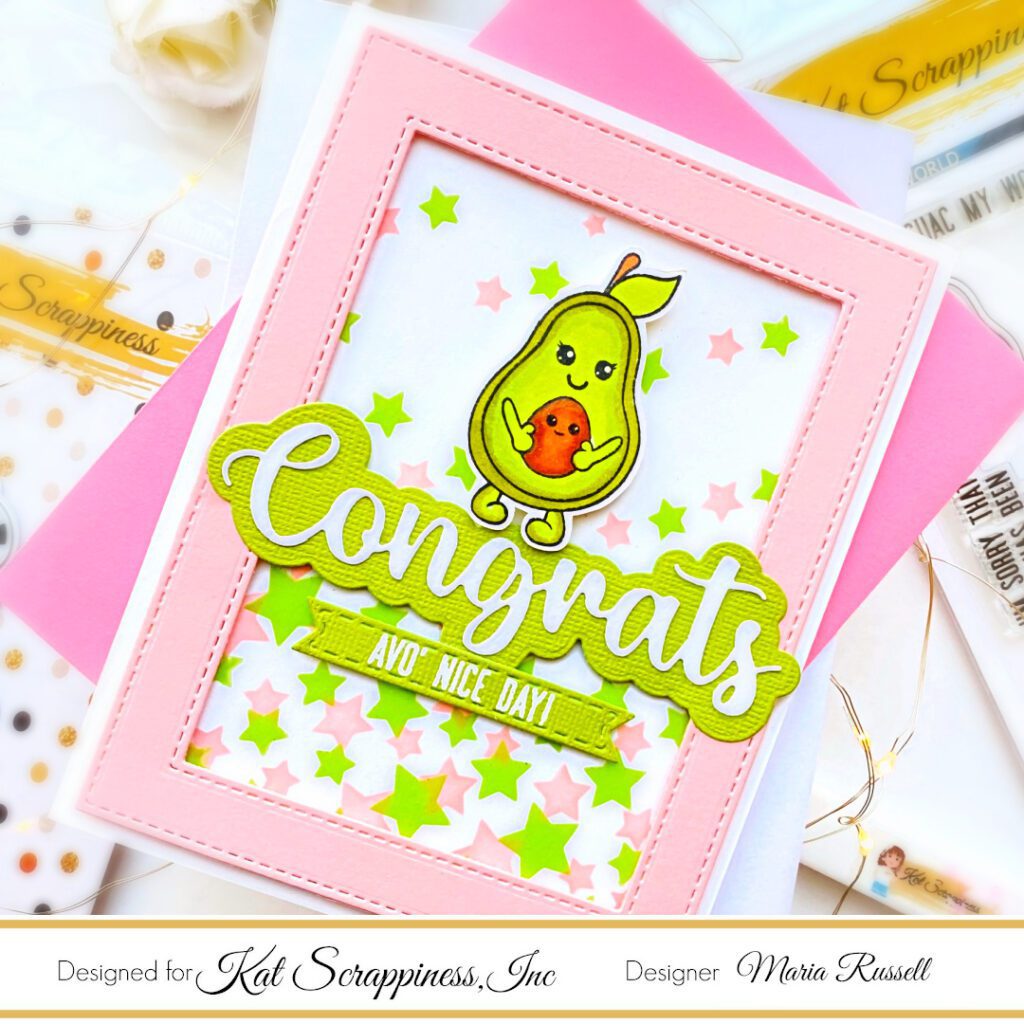
    Nora here on the blog with a serene retirement card featuring the Kat Scrappiness A2 Waterside Die, paper scraps, cardstock and the KS Happy Day Stamp Set. I work in a school and this is the time of year for teachers to retire. The A2 Waterside Die, is PERFECT for a retirement card. Who wouldn’t want to sit by a tropical beach year round?

    Step-by-Step Directions:

    • I started off by cutting a piece Neenah White Cardstock in half length wise to create an A2, top folding card base.
    • Next I used the Kat Scrappiness A2 Waterside Die to die cut two of the beach scene out of white cardstock.
    • I used the same die to cut paper scraps from the Kat Scrappiness Birthday Essentials 6″ by 8″ Paper Pad (the sun) and cardstock scraps for the palm tree.
    • I separated the white frames from both white scenes and adhered them to the card front.
    • I disconnected all my white pieces of the A2 Waterside Die and used Distress Ink in Speckled Egg and Salvaged Patina to create my tropical ocean. I used the Kat Scrappiness Blending Brushes to shade the sky in blue and to add some brown ink to my sun and the palm trunk to give these elements a richer color. These small brushes are perfect for blending over the tiny pieces of this die cut scene.
    • Using Copic Markers, I created my beach. I used tiny dots of different browns to make the sand.

    • All the pieces were colored and I glued them together inside the frames that I had previously adhered to my card front.
    • I used some clear sparkle marker over the sun and added Glossy Accents over the top.
    • I added white stencil paste using the Kat Scrappiness Teflon Pencil Bone Folder to create waves. The bone folder was the perfect size to “draw” the chunky paste lines of the waves. I added some iridescent glitter over the top to give the waves some shine.
    • I trimmed a second palm branch and added it over the tree with foam adhesive.
    • My last step was to use the Kat Scrappiness Happy Day Stamp Set to stamp the sentiment and I adhered the strips onto my card.

    I want to thank you for taking the time to stop by today. The links used in the directions are affiliate links and are used at no extra cost to you.

    There is a new release post tomorrow on the Kat Scrappiness Blog so be sure to check it out!!

    Design Team Projects

    Happy Belated Birthday!

    Hello everyone!

    It’s Donna Idlet here featuring the adorable stamp set from KS called “Stewart The Sloth” Stamp Set and the A2 Postcard die.  I love how the card came together with the A2 Postcard Die as the background.


    Here is how I created the card.

    1. Card is an A2 size – 5 1/2 x 4 1/4 card base.

    2. Die cut the Postcard die using Kraft paper, the postcard die measures 5 1/2 x 4 1/4, adhered the postcard panel onto the card base.

    3. Stamped and die cut the images from the “Stewart The Sloth” Stamp Set.  Colored the images with copics and added the images onto the card.

    4. Stamped the sentiment from the “Stewart The Sloth” Stamp Set in black ink.

    5.  Added the “hello” from the Reversed Scallop Mini Slimline W/Hello Die set.
    Thank you for stopping by, please come back again.Here is a list of supplies I used on my card, Affiliate Links used at no additional cost. Thank you for your support.


    https://linkdeli.com/widget.js?id=f5e8378456858c916708

    Design Team Projects, PROJECT INSPIRATION

    Rainbow Post Card

    Hello Friends Waleska Galindo here, for my second post for the month of May, for today’s post I was inspired by one of my crafty friends in need of a cheer up card! I made her a very colorful card using the beautiful post card die let me share with you how I created this card.

    CARD DETAILS:

    For this card I started by die cutting the Post Card Die on white cardstock, I then with oxide inks in colors : Candied Apple, Carved Pumpkin, Mustard Seed, Mowed Lawn, Salty Ocean and Wilted Violet Inked this piece, I added some water splashes and sparkle.

    After that I stamped and color the color pencils on the Crafters Gonna Craft stamp set in the same colors I used for the background.  I adhere them around the inked piece and stamped some crafty words for a crafty friend with the Everyday Brush Strokes stamp set

    I finish this card by adding some sequins and adhering this panel to a black cardbase.  I hope you can be inspired by this colorful card and you can also think on some crafty friend that might need some encouragement.  Happy Saturday!


    Waleska Galindo

    Design Team Projects

    Creating a Postcard Beach Scene

    Hello, everyone! Are you ready for summer?? I got inspired with this fun postcard beach scene. For all the details, make sure to watch the video on the Kat Scrappiness channel.

    Let’s start with some ink blending. I used distress oxide inks in antique linen, tea dye, salty ocean and tumbled glass to create the base of the scene.

    Next, I added depth and interest with copic markers. For the sand, I used E11 and E33. The ocean was highlighted with B24 and B28. Last, I added white gel pen dots.

    Next, I used the postcard die to emboss lines on the panel. Then, I stamped and colored the images from the Summer Gnome stamp set. Last, I added the sentiment and the images.

    Make sure to click through the links below to find the products. Thank you so much for your support! Happy crafting!

    A2 Postcard Die

    Summer Gnome Stamp Set

    Mini Blending Brushes 3pk


    https://linkdeli.com/widget.js?id=f5e8378456858c916708

    Design Team Projects

    YAY It’s Your Birthday! Simple Die-Cut Card

    (affiliate links for most products are provided at no additional cost to you)

    Good Morning it’s Kathy with the Kat Scrappiness Design Team here!   How is your weather today? It is bright and sunny here in Arizona so I thought I would share a bright and cheery birthday card featuring the fabulous Birthday Essentials Die set and the Condensed Lower Case Alpha dies from Kat Scrappiness. I had a fun background in my mixed media stash and combined with these beautiful products I think it makes for a cute card. Let me know what you think!

    card supplies

    card details

    • Cut, score and fold an A2 side folding card base.
    • Select a background panel you have in your stash that you want to use.
    • Cut this panel to 4″ x 5.25″.
    • Cut a border panel slightly smaller from white card stock. I have about a 1/8″ border.
    • WIth scrap white card stock cut 8 pieces of the letter y, 4 of the letter a, and 4 of the balloon. Cut 1 of the balloon string.
    • I used Distress Oxide Twisted Citron to ink my letters and the edge of my border panel.
    • Glue the letters together and allow them to dry.
    • Glue the balloons together and allow them to dry.
    • Using your stamp platform (optional) stamp happy birthday from the Everyday Brushstroke stamp set.
    • Use your anti-static powder tool and heat embossed with Versamark Ink and gold embossing powder.
    • Use one of the Block Strips from Kat Scrappiness to cut the sentiment and then trim the ends.
    • To assemble the card, glue the background to your border panel.
    • Arrange and glue down your die-cut letters and balloon.
    • Glue the sentiment down and add a bit of foam tape where it hangs off the die-cut letters.
    • Glue down your confetti.
    • Add foam tape to the back of the entire panel and adhere to your A2 card base.

    I told you it was simple! We always need birthday cards in our stash and this is honestly one of my favorite die sets. Thanks for stopping by today! I appreciate all of you and your feedback. Please stop over to the Kat Scrappiness shop and get your supplies today. You can find all of the links below. Make sure you visit a few more blog posts from my wonderful, design team friends.


    https://linkdeli.com/widget.js?id=f5e8378456858c916708

    Design Team Projects

    You Guac My World

    Hello KS fans! Maria Russell here on the blog with you today, sharing this cute Congrats Card, showcasing one of my favorite older KS stamp set called You Guac My World, along with the Double Stitched Rectangle Die Set, Congrats Word Die with Shadow, Stencil & Ink Blending Brushes, Fishtail Banner Dies and the Falling Stars 6×6 Stencil.

    Here’s how I made the card:

    • Prepare the background by ink-blending a panel of Neenah solar white card stock measuring 4 x 5 1/4 inches, using the Stencil & Ink Blending Brush with the Falling Stars 6×6 Stencil and pink dye ink.
    • Using the same stencil, apply some Lime Chroma Glaze and Stencil Pal to spread the paste all over the background. Set this aside to let it dry for about 2 hours.
    • Stamp the image on some Neenah solar white card stock and color the images in with alcohol markers. Use Brother Scan N Cut machine or precision snips to cut the image out.
    • Once the background panel is dry, adhere the same on some A2-size notecard.
    • Die-cut the pink frame using the Double Stitched Rectangle Die Set on some pink card stock.
    • Foam-mount the frame on the card for added dimension.
    • Die cut the word “Congrats” on some Apple Green and White card stock using the Congrats Word Die with Shadow. Adhere them together with liquid glue.
    • Foam-mount the Congrats die-cut onto the card so that it is the same height with the frame.
    • Adhere the focal image using foam adhesive.
    • Add glossy accents to the Avocado image.
    • Die-cut some Apple Green Card Stock using the smallest die from the Fishtail Banner Die Set. Stamp the sentiment on this piece with Versamark ink and heat-set with heating tool.
    • Foam-mount the sentiment strip on the card to finish the design.

    I hope you like this simple card today and got inspired. Below, you will find links to the supplies used to create this project(s). Where available, I use compensated affiliate links at no extra cost to you. Your support helps me to keep bringing you new projects and inspiration. Thank you for stopping by, and have an amazing day!

    ———–SUPPLIES———-

    Design Team Projects

    Bunny Hello

    Hello Crafters! Today I would like to share a card that I made using several Kat Scrappiness Products. Have you checked out the new stencils?? For this card I used the Floating Dots stencil and a cute bunny from the set Hippity Hoppity Bunnies stamp set.


    I just love this new stencil. All the new stencils are made from a thin but strong and flexible plastic and can be used with inks, paints, gels, sprays, embossing pastes, chalks, watercolors, and more. Check them all out HERE. Kat Scrappiness is also carrying Stencil & Ink Blending Brushes. These blending brushes are perfect to apply and blend ink to your stencils. You can also ink your die cuts and embellishments easily! GREAT for layered stencils.

    For this card I also used the Mini Slimline Cheveron Coverplate die along with the hello sentiment that is also available at Kat Scrappiness. Kat Scrappiness custom dies are high-quality steel and are compatible with most die cutting machines! If you haven’t tried these dies check them out they are amazing!

    Thanks so much for stopping by. I hope everyone has a wonderful Tuesday!