Follow:
    Design Team Projects

    Bunny In A Basket Card

    Hi Everyone, it’s Tina here. Today is release day for the Crafters Essentials Easter dies. The Crafters Essentials come packed with many dies at an awesome price. When I opened this dieset I already had several ideas brewing. The first idea was a basket with flowers and a bunny. Below are the steps to create your own Bunny In A Basket Card.

    Step 1 – Trim Kraft Cardstock to 8 1/2″ x 5 1/2″, score at 4 1/4″ and fold in half for a vertical side fold card. (A2)

    Step 2 – Trim Black Cardstock to 4 1/8″ x 5 3/8″. Adhere to card front using Nuvo Deluxe Adhesive.

    Step 3 – Using a background stencil apply Distress Oxide Ink Brushed Corduroy with an ink applicator on White Cardstock. Stamp sentiment to bottom using Versafine Onyx Black Ink. Diecut Double Stitched Rectangles to the background. Adhere to card using Nuvo Deluxe Adhesive.

    Step 4 – Diecut Crafters Essentials Easter (bunny in grey and black cardstock, basket in kraft cardstock, bow in orange). Distress the edges of the basket with Distress Oxide Vintage Photo. Adhere to card using Nuvo Deluxe Adhesive only applying the glue to the edges. You want to leave the opening free of glue. Adhere the bunny (grey on top and black on the bottom) using Nuvo Deluxe Adhesive Glue only at the bottom of the bunny. Assemble the bow and adhere to card.

    Step 5 – Optional – Diecut any flowers die you have or use flowers from your stash. Adhere to the card in the basket opening and if you can intertwine it with the bunny.

    This card can be used for any occasion by changing the sentiment and colors. Below is a link to the products used. To receive 10% off your order use code: TINA10 at checkout. Thanks for stopping by and have a wonderful day.

    Products Used:

    https://linkdeli.com/widget.js?1552642647875

    Design Team Projects, New Releases, News

    Kat Scrappiness March Release – Day 1 – Crafter’s Essentials Easter Dies

    Hello Kat Scrappiness fans!  It is that time of the month when Design Team gets to show off the new products available at the shop.  We will also be giving away the die set that is being revealed each day during release week and a SPECIAL GIFT to whoever places an order until March 22nd using the supplies linked below. PLEASE SCROLL THROUGH AT THE END OF THE POST TO FIND OUT HOW TO WIN.


    Before we proceed with the reveal, Kat Scrappiness would like to let you know to take advantage of our St. Patrick’s Day sale.  See details below.  Use coupon code “PATTY2019” for 20% off your order from March 15 tp March 18, 2019.


    For the first day of the reveals, we are showcasing the Crafter’s Essentials Easter Dies set.  Here’s what they look like:


    Crafter’s Essentials Dies – Easter


    I have to apologize that you will not see projects from me this week.  There was a major fiasco in New York and my package ended up getting shipped to the wrong person.  I still have not received it as I write this post.  However, as soon as I have them in my hands I will be posting videos on our YouTube channel to show you my projects, so please stay tuned.


    Are you ready to get “wowed” by the design team?  Here are the AMAZING projects from the team:


    CAREN BARTHOLOMEW


    Caren used some really cute patterned papers to die cut the basket, the bow and the grass hill from the Crafter’s Essentials – Easter dies set.  She die-cut the little chickie with some white card stock and colored it in with some Copic markers.  Caren also used the new Zigzag Rectangle dies and added the sentiment “Happy Easter”.  I love that she mixed and matched a couple of products from the shop.


    LISA GOLZBEIN


    For Lisa’s first project, She stamped and colored the bunny, carrots and easter eggs and die-cut the same with the coordinating dies.  She inked up her background with some distress oxide inks and added the clouds to create her seen.  She die-cut the basket from the Crafter’s Essentials Easter dies set on brown patterned paper.  To finish her design, she added the little pop-up Happy Easter sentiment.


    For Lisa’s second project, She die-cut the bunny from the Crafter’s Essentials Easter Dies three times on different patterned papers.  To make it more fun, she added the Bunny Tails Pom Pom from the shop.  She used a Polka dot embossing folder to dry emboss her white card stock and adhered this piece on blue patterned paper.  She adhered the three bunnies using foam tape, and added “Hello Spring” as her sentiment.
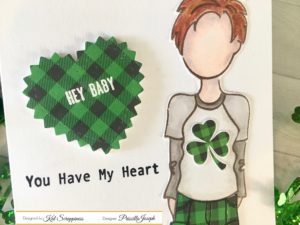
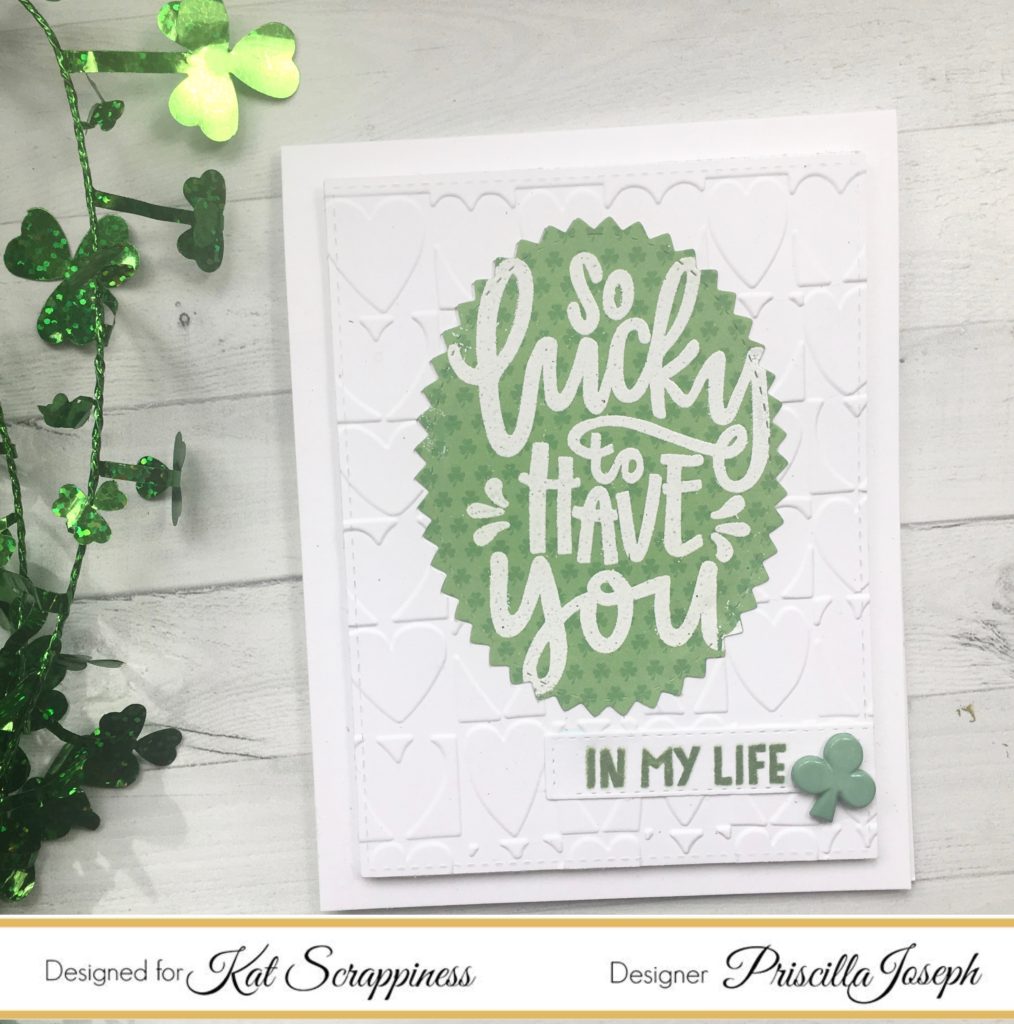
     

    PRISCILLA JOSEPH


    For Priscilla’s first project, she used the Zig Zag Rectangle dies, Easter Egg Hunt Sequin Mix, the Black & White Heart Sprinkles, and the Bunny Tails White Pom-Poms.  She also added the easter eggs in pastel colors and use a grass border die to die-cut it in white.  I love that she added some googly eye to the bunny.


    For Priscilla’s second project, she die-cut the bunny, bow, basket and butterflies using the  Crafter’s Essentials Easter dies set.  She also used the Spring Fling 6×6 paper pack from Echo Park and Easter Egg Hunt Sequin Mix.


    TINA DORNBAUM

    For Tina’s first card, she created this BEAUTIFUL pastel-themed background.  She die-cut the little chickie and the egg shell using the Crafter’s Essentials Dies set and colored the chick with alcohol marker.  She added some white jewels to embellish and finish her card design.


    For Tina’s second card, she used a brick stencil from her stash and inked up her background with some distress oxide inks.  She die-cut the basket, bow and bunny using the Crafter’s Essentials Easter Dies set.  She added some flowers and leaves and stamped “Happy Easter” to finish her design.  I absolutely LOVE this card!


    There are TWO WAYS to win from our March release:

    (1) You can WIN this Crafter’s Essentials Easter Die set by leaving  a comment below and let us know what you like about the Crafter’s Essentials Easter dies.

    (2) We will also be giving away a SPECIAL GIFT to whoever places an order this week (until march 22nd) using the supplies link below.  It doesn’t matter how small or big the order is, you will be entered into a drawing to win a SPECIAL GIFT.  This is our way of saying thank you for being a loyal customer and for supporting a small family-owned business.   (P.S. Make sure to click on the supplies link below so that we will get a notification of your order number and be entered in this giveaway).


    I hope you guys like the projects we showed you today.  Come back tomorrow to see the second day of our reveals.  Have a great day and Happy crafting!
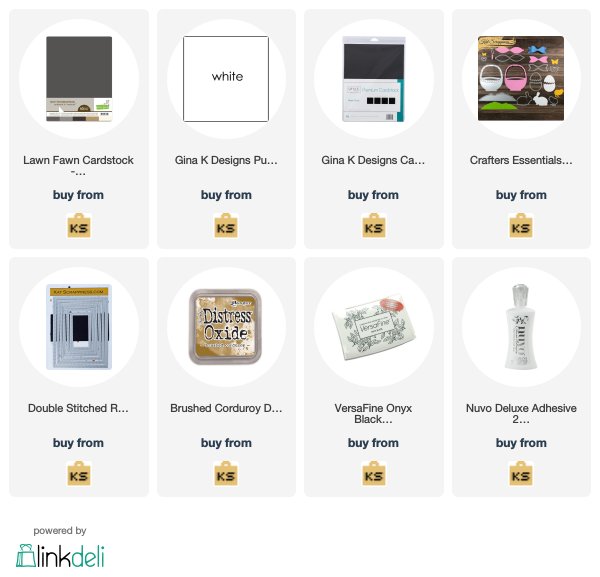
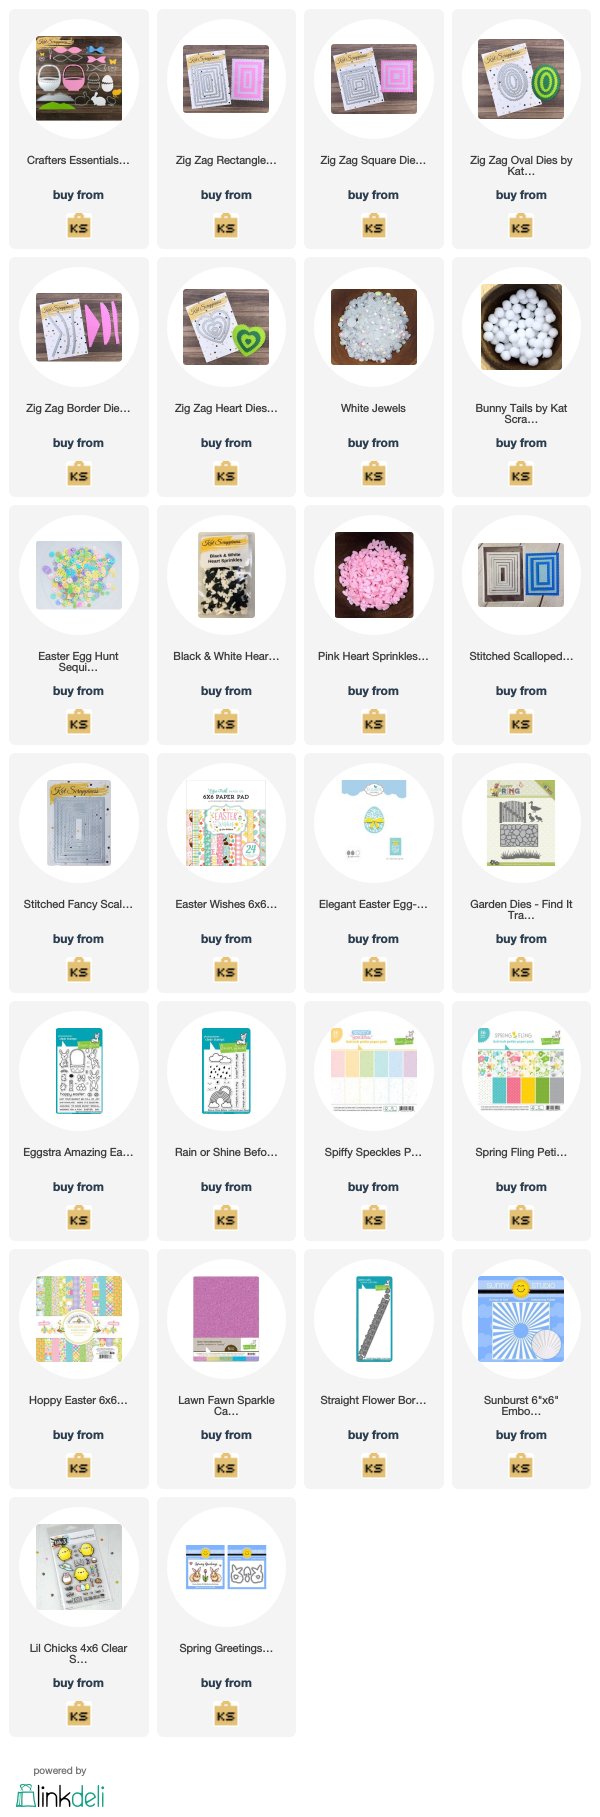
    ————-SUPPLIES———–


    Design Team Projects

    A Note for You – Zig Zag Circle dies

    Happy St. Patrick’s Day!  For some reason, I thought this post was supposed to go live on the 14th or otherwise, I would have posted a St. Patrick’s day card.  Instead I have a card using the awesome Zig Zag Circle dies from Kat Scrappiness.


    For my card today, I brought out my embossing folders.  I love the look that they add to a card, but I don’t use them that often.  I wanted a flatter look for my card, so I inlaid the Zig Zag circle die cuts.  The only item that is “popped up on the card” is the top circle die from the Never Ending Circle dies from Kat Scrappiness.

    After I adhered everything to the card, I added some Glossy Accents to the bottle to make is shiny.  I love the look that it gives!


    – – –– – –– – –– – –– – –– – –– – –– – –– – –– – –– – –– – –– – –– – –– – –– – –– – –– – –– – –– – –– – –– –

    Use code caren10 for a 10% discount in the Kat Scrappiness shop.

    Thanks for stopping by and happy stamping!

    – – – SUPPLIES for today’s project– – – – – – – – – – – – – – – – – – – – – – – – – – – – – – – – – – – – – – –

    Design Team Projects

    Crafters Gonna Craft Card for the Rainbow Challenge

    Hello crafty friends! Today I wanted to share a card for the latest Kat Scrappiness Challenge. The theme is rainbows and rainbow cards always make me smile so I had to play along. I thought the Crafters Gonna Craft stamp set was perfect for the challenge because you could easily make a rainbow of craft supplies. I cut the panel out of Cross Stitched Rectangles. For a bit more info check out the video:

    [youtube https://www.youtube.com/watch?v=qo8VQ_sn-cs]

    I decided to finish off the card with these Shimmering Onyx sequins from Kat Scrappiness. I say this all the time, but Kat’s glitter sequins are my absolute favorites.


    https://linkdeli.com/widget.js?1551106829638

    Design Team Projects

    Zig Zag Rectangles by Martha Lucia

    Hello friends, Martha Lucia here!

    As I promised you a few days ago, I have more cards to share with you using the new Zig Zag Die Cuts. Let the fun start:

    Zig Zag Rectangles by Martha Lucia

    To make this card I used the new Zig Zag Rectangle Dies from Kat Scrappiness and I want to share the entire process with you:

    1. Cut all the rectangles using different colors of card stock but cut them centered on a regular layer of card stock (4-1/4″x 5-1/2″). If you want you can use different tones of the same lane of colors or simply different colors. Keep all the negative pieces.
    2. Paste centered all the zig zag rectangles starting from large to small.
    3. Create the card base. It could be horizontal or vertical. My sample is a vertical card.
    4. Arrange the entire piece created with the zig zag rectangles on top of the card base leaving on of the sides off.
    5. Paste the zig zag rectangles and cut the excess with the paper trimmer.
    6. Arrange the excess over the free areas of the card base and repeat the process.
    7. Personalize and finalize your decoration.

    Zig Zag Rectangles by Martha Lucia

    On my first card, I suggested to cut all the zig zag rectangles centered on the layers and keep all the negative parts. With these negative parts you can create a second card. I decided to make a shaker card. Let me share it with you:

    Zig Zag Rectangles by Martha Lucia

    To create this card, I only used three negative frames obtained with my first cuts. This time I arranged them in opposite side, small to large, to create a window on the center.

    1. Centered and Paste the three frames. Don’t worry if you have excess on the side borders. The most important border is the large frame. Then you can cut all the excess.
    2. Paste a transparency sheet to cover the centered window.
    3. Turn around the card and add some Sprinkles and/or Confections over the transparency and cover it with a second sheet of transparency.
    4. Create a card base.
    5. Paste a decorate layer to see through the window.
    6. If it is necessary, resize the negative layers created with the zig zag rectangles.
    7. Add some pieces of double sided foam tape to the entire shaker piece and paste over the card base.
    8. Finalize and personalize your decoration. To my sample, I just added some splatters of Dandelion Fireworks.

    Zig Zag Rectangles by Martha Lucia

    To decorate my shaker card I used the XL Butterfly Die from Gina Marie Designs and the new Cupcake Sprinkles. I also added a stamped sentiment from the Spring Stroll stamp set that I cut using one of the Stitched Sentiments Strips.

    You can buy these Zig Zag Rectangles or any other product with the 10%OFF using the code Martha10 on Kat Scrappiness Store. I am sure that you will always find something that you will like and you will use in your creations.

    Thank you for stopping by and happy shopping!

    Martha Lucia

    Design Team Projects

    Bunny Spinner Card with Video

    Welcome back to the blog Kat Scrappiness fans!

    It’s Lisa here with you today and I have a really fun

    and interactive card to share with you!

    I made a spinner card using the Chubby Bunny stamp set from

    Sunny Studios and the sentiment is from the Gerda Steiner set

    called Peeking Easter Friends.

     I have a video tutorial to show you just how I made it!

    It looks difficult but it’s really quite easy!

    I used the brand new Rectangle Zig Zag Dies dies in the shop

    for the front of my card and I just love that jagged stitched edge it makes!

    They are also available in circles, ovals, squares, hearts and borders.

    I did some fun stenciling on the front of the card as well using 

    3 different colors of Distress Oxide inks.

    I filmed a video to show you just how easy this card is to make.

    You can view it here or on YouTube.

    [youtube https://www.youtube.com/watch?v=mSZMIiX_Yf8]

    Here is a supply list of Kat Scrappiness products used on my card:
    If you’d like to do some crafty shopping at Kat Scrappiness

    you can use my code LISA10 to save 10% on your order anytime.

    Thanks for stopping by today!

    Have a great day, I already am!

    ?Lisa ?

    Design Team Projects

    Celebrating St. Patty’s Day with the New Kat Scrappiness Zig Zag Dies

    Hey Crafters! Priscilla here with lots of fun St. Patty’ cards— all featuring Kat‘s new “Zig Zag” dies. I love making St. Patrick’s Day cards, I think because the bold green on them give me hope that spring is right around the corner. Plus isn’t everyone “Irish” on St. Patty’s Day? LOL!

    My first card features “Aidan,” one of the Julie Nutting dolls. Isn’t he handsome in his green and black gingham pants?

    Because Aidan is so long, I created an 8 x 4.25 card base and stamped him directly on the front. After Copic coloring his skin and hair, I paper -pieced his pants and t-shirt logo using paper from the Doodlebug  “Lots O’ Lucky”paper pad.

    I cut out a heart from the same Doodlebug paper pack using the Kat Scrappiness“Zig Zag Heart Dies”and white heat embossed the “Hey Baby” sentiment from Kat’s “Say it With Hearts” stamp set.


    My second card feature the new “Zig Zag Oval Dies” and a stamp set from Neat & Tangled, “So Lucky.”

    I cut a large oval from the die set and white heat embossed the sentiment on it. I also used the same oval to die cut the center of a white “heart embossed” panel and insert the green oval inside it.


    The sentiment “In My Life,” also from the “So Lucky” set was stamped on an “Stitched Sentiment Strip”die, adhered to the front panel, and topped off with a resin shamrock from my stash.


    Speaking of shamrocks, this next card features a whole jar full of them! I used Lawn Fawn’s “How You Bean?” stamp set and coordinating diesto create the jar, and once again using the Doodlebug “Lots O’Lucky” papers.  

    I used the “Zig Zag Rectangle”die to create a panel for the front of the card, with some Doodlebuggingham behind it. The “Lucky Me” die cut is also from this same paper pad.

    Before “filling” the jar with shamrocks, I mixed clear glitter and Kat‘s “Kelly Green Star Solid Confetti Sequins”and adhered them to the base of the jar. Some more Kelly Green stars and silver thread provided a finishing touch for this card.


    I call this card my “Quilt Card,” and Kat’s “Zig Zag Square Dies” helped me piece it together for the front of this next card.


    The quilt squares, the rainbow paper, and the sentiment all  came from the Doodlebugpaper pack. Kat‘s “Kelly Green Star Solid Confetti Sequins” highlight the lucky rainbow.


    I got to play around with alcohol inks for Card #5! I mixed several shades of greensplus gold on Yupo paperto create a “marble background” for the front of this card.

    I used one of the “Zig Zag Border Dies”to add a cool edge to the front panel that mimics the musical notes on the patterned paper strip.


    My final card is not a card at all, but a cute “St. Patty’s” tag, using three of the “Zig Zag Circle Dies.”

    The center features an adorable moose from the “Clover Riley”stamp set. I copic colored him and added some of Kat’s “Sparkling Clear Jewels” to his pot of gold.


    Well, that’s all for today. See you again soon!

    The supplies I used are listed and linked below.  Please don’t forget to use my coupon code “Priscilla10” for 10% off your order at the shop.

    PRISCILLA


    SUPPLIES