Hi Everyone, it’s Priscilla here. Today I have four unique Thanksgiving cards created from Kat’s newly released dies – the “Give Thanks Word Die with Shadow” and the “Give Thanks Wreath Die.” Both were so much fun to work with!
My first card uses classic Thanksgiving colors with a graphic twist– I added a bold gingham plaid shadow behind the brown “Give Thanks” sentiment for an unexpected pop of color.
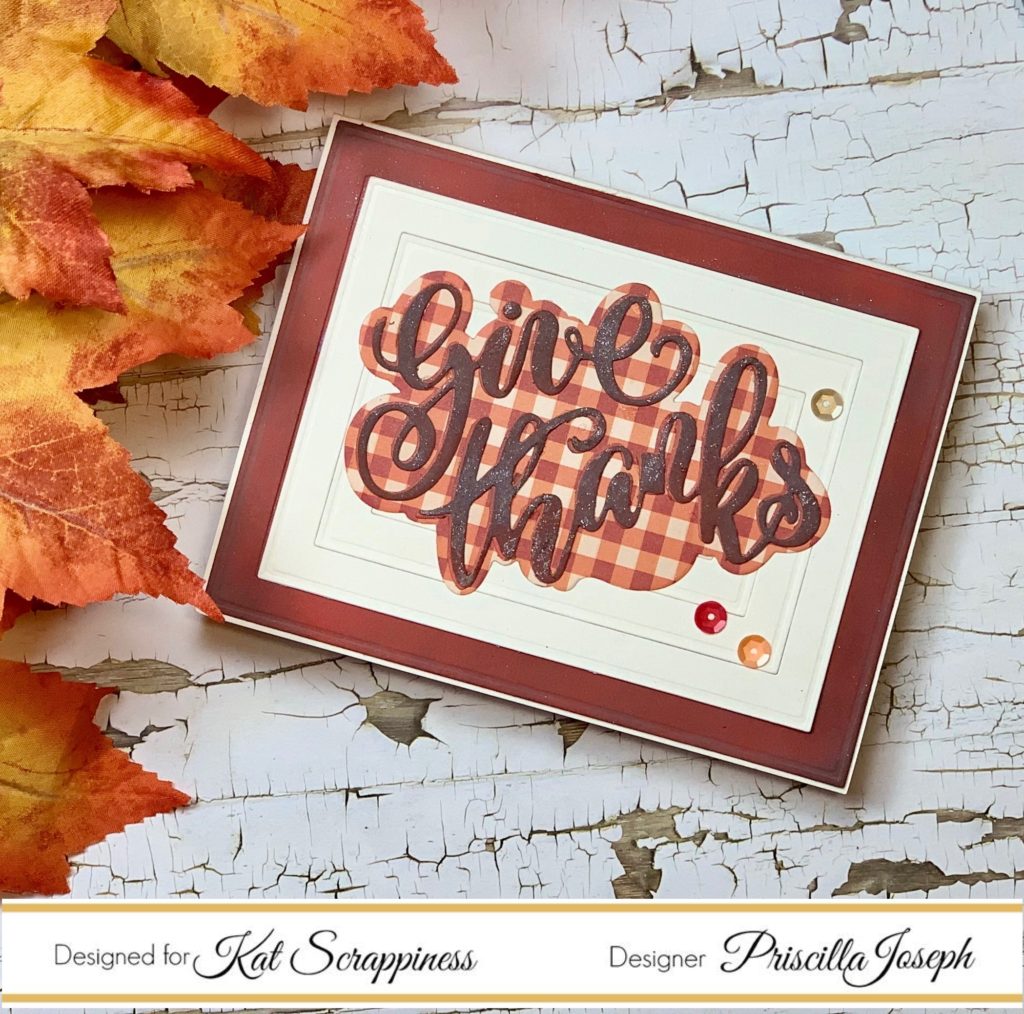
The background for this card uses Kat‘s newly released “Embossed Edge Rectangle Dies” nested inside of one another and enclosed in a distressed rust border, also created from the same die set. Kat’s “Aww-tumn Sequin Mix” was the finishing touch.
I used the same die on my second card to create a “glitzy” gilded effect.
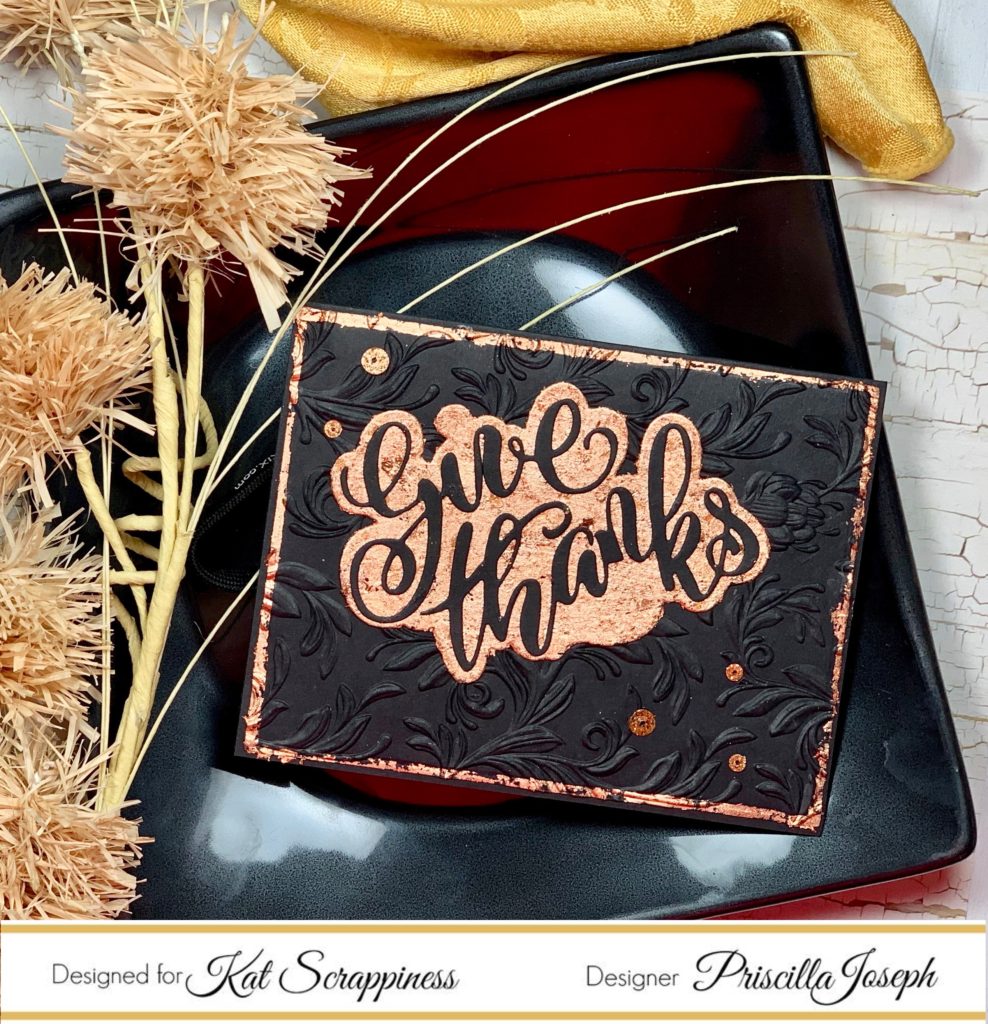
This time I adhered Nuvo copper “Gilding Flakes” on the shadow and also on the embossed edges of the card. I used the Sizzix “Botanical 3D Texture Fades” embossing folder to create a dramatic black background. Finally, I added some copper sequins from the “Going Batty” collection.
My next “card” is actually a tag created with the new “Give Thanks Wreath Die” and Kat‘s new “Embossed Edge Circle Dies.”
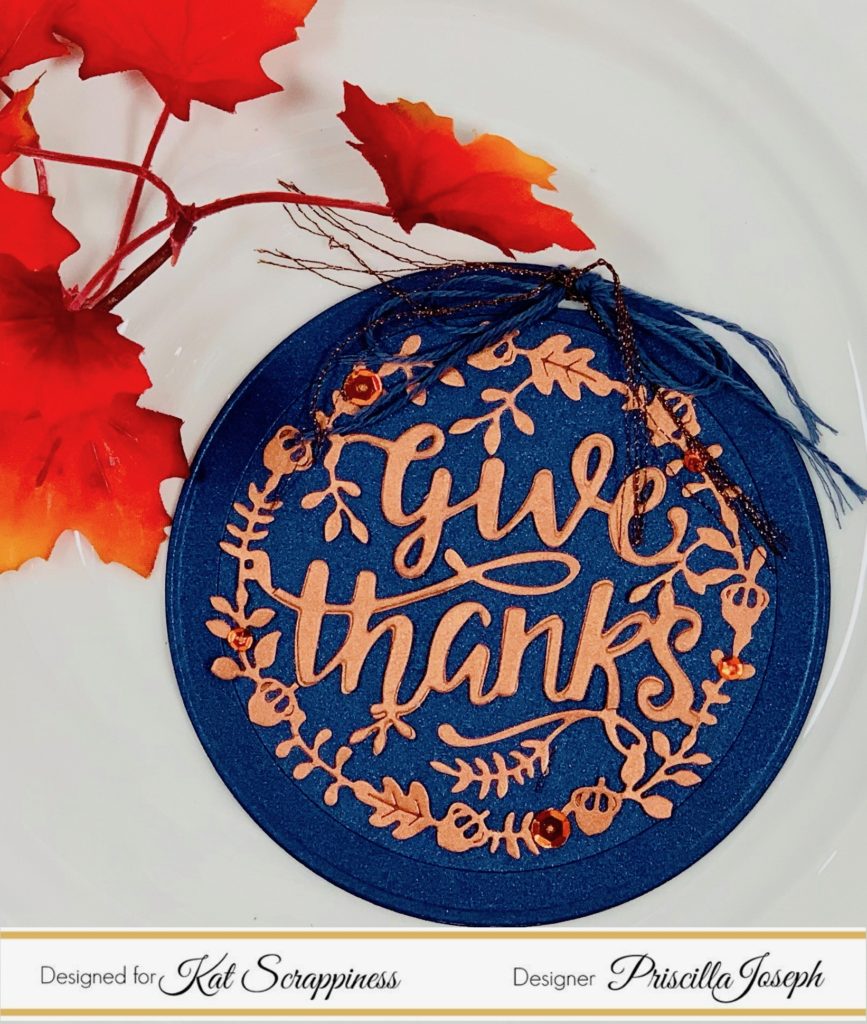
I die cut the “Give Thanks Wreath” from copper card stock and adhered it on a background created with Kat‘s new“Embossed Edge Circle Dies.” Once again, I added some copper sequins from the “Going Batty” collection.
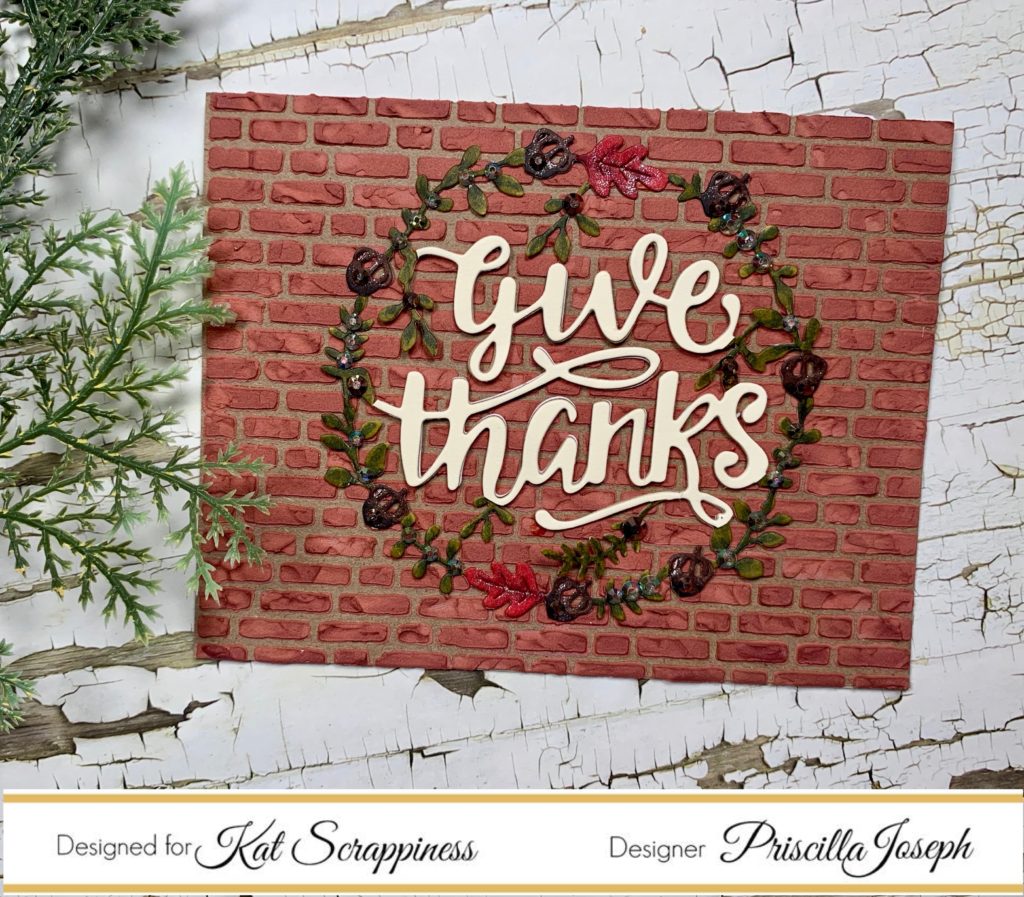
My final card features the “Give Thanks Wreath” die again, this time die cutting it from vanilla card stock before coloring the wreath only with Copic Markers. I created the brick background using a stencil from my stash and the Distress Oxide “Fire Brick” reinker mixed into texture paste. Finally, Kat‘s “Clear Sparkling Jewels” were added to the wreath.
Thank you so much for stopping by! Don’t forget to check out what’s NEW in Kat’s Shop, and follow my blog and Instagram for more “Kat Scrappiness Amazingness”!
Priscilla ???
The supplies I used are listed and linked below.
SUPPLIES


 .
.