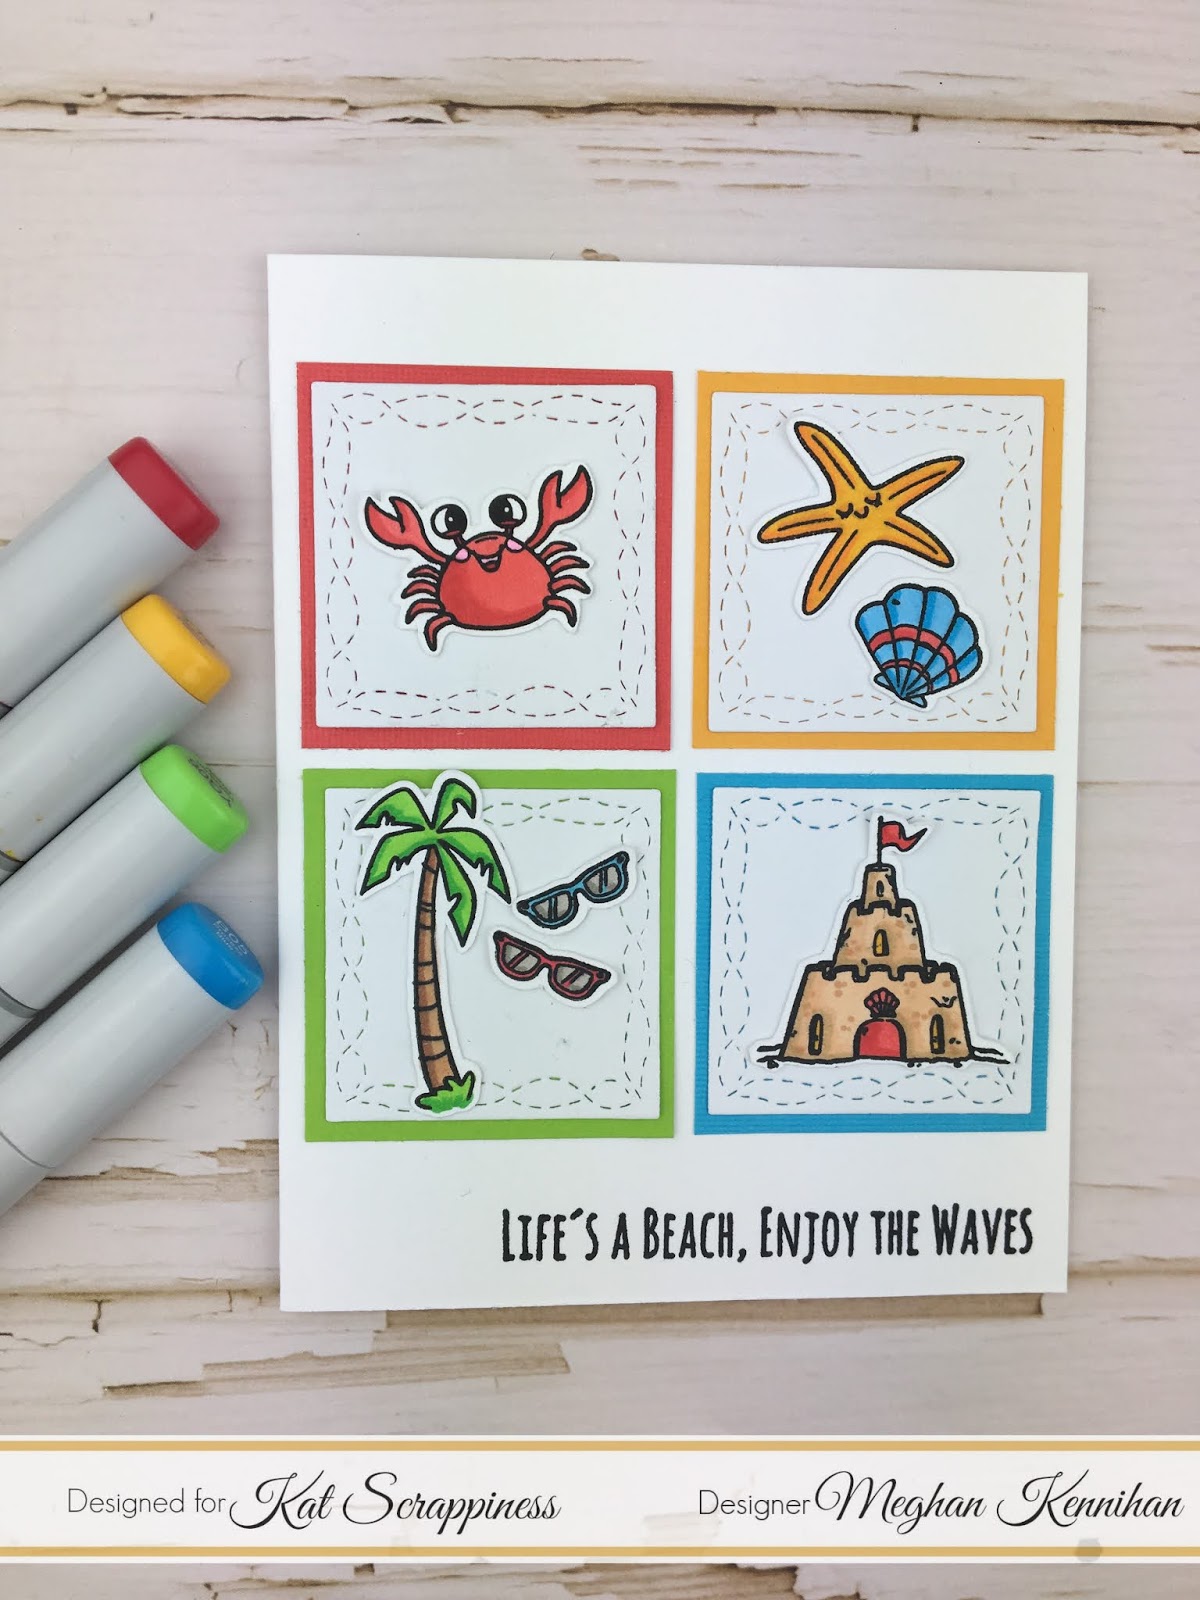
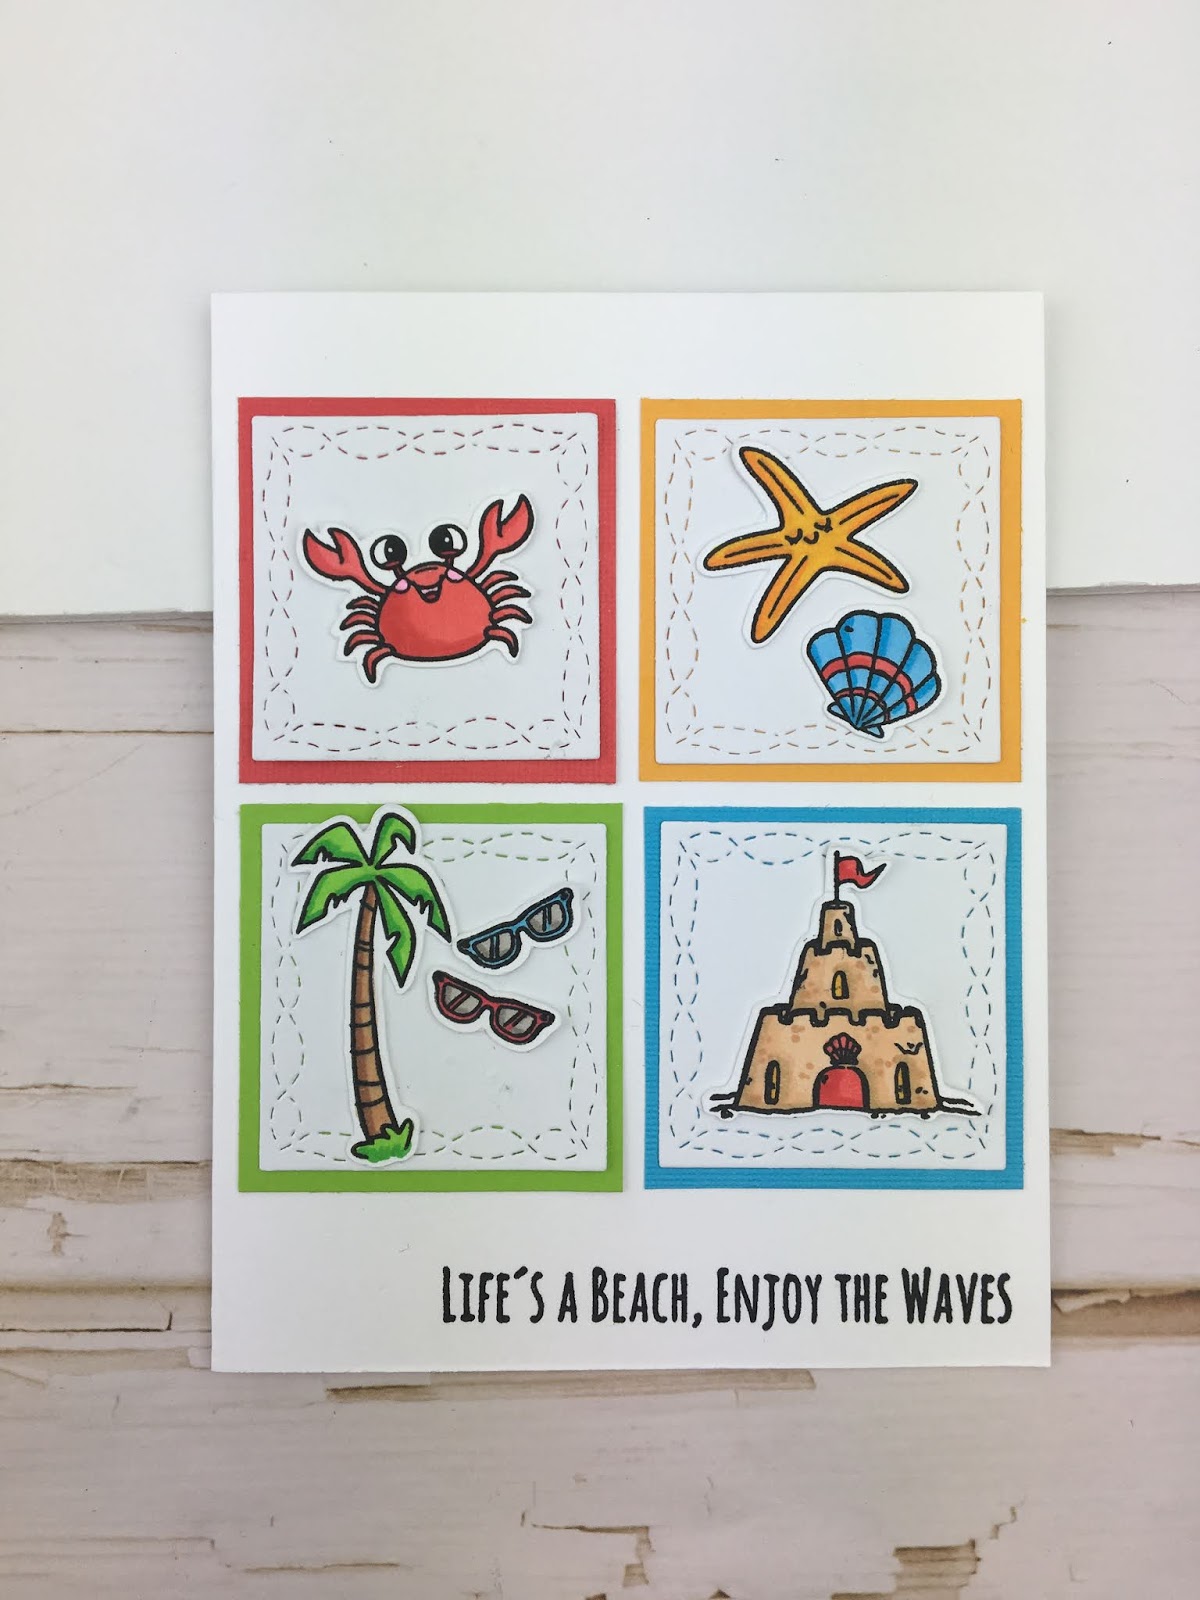
Follow:
    Design Team Projects

    Christmas is Gnoming!

    Hi crafters, it’s Caren here today with a Christmas in July card.  Did everyone have a chance to look a the new release goodies?  What was your favorite product?  Mine is the Christmas Gnome stamp set!  It is so cute, and I love the punny sentiments.

    For my card, I used the gnome holding the candy cane with the Christmas is Gnoming sentiment.  I colored the image using Copic markers and cut it out using my Silhouette Cameo machine.  From white card stock, I die cut the Stitched Winter Swirl Backdrop die and applied distress ink using brushes.  I think used one of the Double Stitched Rectangle dies to cut out a portion of this die and layered it on black card stock.

    I found a piece of red snowflake patterned paper in my stash and die cut it with the largest Double Stitched Rectangle die and layered it with black card stock.  I stamped the sentiment using Versamark ink and white embossing powder on the banner die from the Crafters Essentials Fall die set.  I then layered these panels onto a white card base.  I used dimensional adhesive to add the gnome and sentiment banner.  I added a few Sparking Clear jewels to finish off the card.

    Have you started making your Christmas/Holiday cards yet?

    – – –– – –– – –– – –– – –– – –– – –– – –– – –– – –– – –– – –– – –– – –– – –– – –– – –– – –– – –– – –– – –– –

    Here is a link to the Kat Scrappiness shop and direct links for products I used on today’s cards.

    – – – SUPPLIES for today’s project– – – – – – – – – – – – – – – – – – – – – – – – – – – – – – – – – – – – – – –

    Design Team Projects

    Backgrounds and Large Sentiment Dies

    Hi Everyone, it’s Tina here. Do you create backgrounds but set it aside because you don’t know what to do with them? I admit I create a lot of backgrounds and have a pile. Last month Kat Scrappiness came out with big sentiment with shadow dies. Just add a big sentiment to your background and you have a card. Below you will find the steps to 2 examples.

    Card #1

    Step 1 – Trim White Cardstock to 8 1/2” x 5 1/2”, score at 4 1/4” and fold in half for a vertical side fold card (A2)

    Step 2 – Create a bokeh background. To do this apply ink in a circular motion using an ink applicator in various colours. Let dry. Take a circle stencil and apply white ink. This will allow the colour beneath to show softly and will create the bokeh effect. If you do not have a circle stencil simply diecut various circles from the Never Ending Circles dies.

    Step 3 – Diecut Double Stitched Rectangle to the panel created in Step 2 and adhere to the card front using Nuvo Deluxe Adhesive.

    Step 4 – Diecut Hooray using White Cardstock and the shadow using Blue Cardstock. Assemble and then adhere to card using Nuvo Deluxe Adhesive.

    Step 5 – For added interest randomly adhere Pastel Confetti Sprinkles using Nuvo Deluxe Adhesive and a Crystal Katana.

    Card #2

    Step 1 – Trim White Cardstock to 8 1/2” x 5 1/2”, score at 4 1/4” and fold in half for a vertical side fold card (A2)

    Step 2 – Create a background using a stencil and ink blending.

    Step 3 – Diecut Double Stitched Rectangle to the panel created in Step 2 and adhere to the card front using Nuvo Deluxe Adhesive.

    Step 4 – Diecut You Rock using Blue Cardstock and the shadow using White Cardstock. Assemble and adhere to card using Nuvo Deluxe Adhesive.

    These cards can be used for many occasions by adding a small sentiment strip. For example the Hooray card can be a birthday card by adding a small sentiment strip It’s Your Day! Below is a link to the products used. Thank you for stopping by and Happy Crafting!

    Products Used:

    https://linkdeli.com/widget.js?id=f5e8378456858c916708

    Design Team Projects

    My Hero Cityscape Card

    Hi there it’s Lisa here from Oh So Cute By LisaI am up on the Kat Scrappiness blog today with a card using one of the brand new Slimline Dies just released this weekend! For my card I used the Cityscape Slimline Layered Dies. Now as you may have noticed my card is not a slimline card but that is the beauty of this particular die.  You can cut it down to make a standard A2 sized card very easily!

    To start with I took a ray themed stencil and did some stenciling on the background of my card.  I used 2 different colors of Distress Oxide inks, Fossilized Amber and Squeezed Lemonade. Once I had the background done I adhered the bottom layer of the Cityscape Slimline Layered Dies in yellow and the top layer in black.  Since there are lots of tiny holes in the top layer the yellow paper makes it appear that the lights are illuminated in all of the buildings.

    Now that the base of the card was prepped I started on my little super hero. I stamped the little guy from the Heffy Doodle Super Dudes in Memento Tuxedo black ink and colored him with my Copic Markers. Once I had him colored I popped him up on my card with foam tape. The “my hero” die cut was cut from black paper using the My Hero Heffy Cuts. For some extra highlights I used the Sakura Gelly Roll Pen Classic Size 10 to highlight all of the images and words. This particular gel pen is the best one I’ve ever used and I think it makes such bold lines because it is the #10 size.

    For a final touch I added some very appropriate Kat Scrappiness Superhero Sprinkles to my card!

    I really hope you enjoyed my card today, I certainly enjoyed creating it!

    Make sure to check out the Kat Scrappiness online store to see all of the
    new releases in the shop today!
    What is a holiday weekend without a sale?
    Check out this Star Spangled Sale going on today through July 6th!

    Don’t forget to follow Kat Scrappiness on all
    social media platforms to be alerted to new releases, sales and giveaways!
    Thank you so much for stopping by the blog today!
    Have a wonderful day, I already am!
     
    ?‍♂️ Lisa ?‍♂️  
    Design Team Projects

    Jingle Bells

    Hello fellow card makers,

    Today I am sharing a Christmas card made using products from the Kat Scrappiness newest release. We all know Christmas planning starts in July so let’s get started on those cards.

    Using the new slim line dies I cut the different layers of the card. I used the Wonky Edge Slimline die and the Embossed Edge Slimline dies in two sizes.

    Next I die cut the trees using the tree die from the KS Crafter’s Essentials Winter Die Set. I did cut the trees in two shades of green and cut some of the tree line apart in order to arrange the trees to fit the slimline format. Before putting the trees on the card I splatted white paint onto them. When attaching the trees I used some foam tape to give the card dimension. I stamped some clouds in the sky above the tree line.

    Now for the best part of the card! The adorable Christmas Gnome from the newest release alone with a sentiment from the set were stamped and added to the card to complete the look but not without a few sequins. Excited to see all the Christmas cards to be made with this wonderful new stamp set.

    supplies from Kat Scrappiness-

    Christmas Gnome Stamp

    Crafters Essentials Winter Die

    Embossed Edge Slimline Die

    Wonky Stitched Slimline Die

    Giveaways, New Releases

    KS July Release – Day 2 – More Slimline Dies, Coffee Background & Christmas Gnomes

    Hello Kat Scrappiness fans!  Welcome to Day 2 of the July release!    As mentioned yesterday, we changed things a bit for our release post.  Each design team member was assigned a specific product to feature.  By doing so, you’ll be able to see different products and samples made by the team.  Throughout the month of July,  you will see samples from the team that you haven’t seen from the release posts. This will keep things fresh and interesting, and you will be amazed with what the entire team has in store for you.  Stay tuned and subscribe to our Blog and YouTube channel to see all of these projects.


    The sale is still going today until July 6th!!!!!!


    Don’t forget that we also have a giveaway every day during the reveals so PLEASE SCROLL THROUGH AT THE END OF THE POST TO FIND OUT HOW TO WIN.


    For todays reveal, we are showcasing a few Slimline dies –> the Stitched Wave, Stitched Hills and Wonky Slimlines with the Coffee Background die and the Christmas Gnome stamp set.  Design Team member, Sandra is showcasing (the previously released) Lola the Giraffe stamp set but the coordinating die didn’t come in time for this release.  Here’s what the dies and stamp set looks like:


    Are you ready to see the samples?


    WAVE SLIMLINE DIE – MEGHAN


    Meghan created this AMAZING summer-themed slimline card!  She stamped the images using the Summer Gnomes and Summer Gnome Add-on stamp sets and colored the images in with her Copic markers.  She used her Scan N Cut machine to die-cut the images.  The scalloped background panel was die-cut using the Stitched Scalloped Nesting Slimline die, and ink-blended with distress oxide ink.  Meghan masked off the clouds using a Clouds stencil.  The beach wave was die-cut using the Stitched Wave Slimline die and the sand hill was die-cut using the Stitched Hills Slimline die.  Here’s a closer look:


    I always love Meghan’s cheerful cards!


    STITCHED HILLS SLIMLINE DIE – WALESKA GALINDO


    WOW, WOW, WOW!  I just LOVE this card!   To create her scene, Waleska inked up her background panel (die cut using the Wonky Slimline die) with a Sunburst stencil and some distress oxide ink.  The water was die-cut using the Stitched Waves Slimline die and the hills using the Stitched Hills slimline die.  She finished her design by adding the images from the Summer Gnomes Add-On stamp set.  Does anyone else feel like going to the beach now?  I do!


    WONKY SLIMLINE DIE – PRISCILLA JOSEPH


    Priscilla also created a summer-themed card.  This scene reminds me of the time I was vacationing in The Maldives when I saw dolphins for the first time!  The dark frame was made using the Wonky Slimline die.  Her background was ink-blended with oxide inks and clouds stencil.  She also used the Waves Slimline Die to create her water scene, and adhered the Dolphins using the Stitched Dolphins die set with foam adhesive for added dimension.


    This second card by Priscilla is such a cute design.  The dark frame was die-cut using the Wonky Slimline die, adding the spotted patterned paper with the ruler as her background for Lola the Giraffe popped up on the card with some foam adhesive for added dimension.  She finished her design by popping up the sentiment as well with some foam adhesive.  The ruler behind Lola is such a great feature on this card!  Brilliant design!!!


    COFFEE BACKGROUND DIE – CAREN BARTHOLOMEW


    Check out this beautiful coffee-themed card by Caren!  I love how she inked up the coffee background panel using the Coffee Background die with some distress oxide ink and adhered this on some colored background that highlighted the coffee beans and cups!    She finished her design by adding the sentiment using the Let’s Get Caffeinated stamp set.  I really love the pop of color on this card by Caren!  She always makes the best CAS cards ever!


    LOLA THE GIRAFFE – SANDRA BEUS


    An amazing design from Sandra using a lot of KS products.  The background panel was die-cut using the Wonky Slimline die set and the grass hills using the Stitched Hills slimline dieLola the Giraffe was colored with alcohol markers.  She created her outdoor scene by adding the little trees, house, sun and clouds.  She finished her design by adding the colorful butterflies and popped up her sentiment with some foam adhesive for added dimension.


    CHRISTMAS GNOME STAMP SET – ADAM KARLE


    Adam’s cards are always cheerful and beautifully designed.  This slimline Christmas card is just so adorable!  The background patterned paper was die-cut using the Wonky Stitched Slimline die.  He also inked up the background with distress oxide and use the pine trees from the Crafter’s essentials – Winter die set. using a paintbrush and white paint to create the “snow” for added detail and dimension.  He stamped and colored the Gnome from the Christmas Gnomes stamp set.  He finished his design by adding the sentiment and a black bow. Very classy!


    Would you like to win a $25 Gift Card to the KS shop?   We will pick one lucky winner!
    Here’s how to win:
    Leave a comment on this blog post and tell us what project/s inspired you to the most today.  You have until July 6 to leave a comment.  Winners will be announced on Tuesday, July 7thWinners should send an email to: winners@katscrappiness.com to claim their prize within 48 hours.
    ——-SUPPLIES———


    Design Team Projects

    City Scape Slimline Die by Martha Lucia

    Hello crafty friends, I hope you are enjoying the new release of slimline dies. I believe all of them are spectacular and really inspire us to create. Well, today I want to share one of my card for this release. Let me start with the City Scape  Slimline with Florida style!

    I am fascinated with the City Scape Slimline Die Set. It includes two slimline die. One just with the city scape and second with a detailed city scape. But let me share ho to make this card:

    1. Die cut the plain city scape onto white card stock.
    2. Apply ink on top of the negative part to create the ski. In my model I used two different colors of distress ink. I used broken china and Blueprint Sketch.
    3. Paste the negative part of the white layer directly onto the card base. I am using a yellow card base to create more contrast.
    4. Cut the detailed city scape onto white card stock. If you want you can use the piece obtained on the first step.
    5. Sponge the detailed city scape with your favorite color of ink. I used the Mustard Seed and applied the ink with a brush blender.
    6. Paste the detailed onto the card base using crafty foam tape.
    7. Splatter the entire layer with fireworks or any distress ink.
    8. Stamp a sentiment to complete your card. I stamped one of the sentiments included on the stamp set Friendship Greetings.
    9. Sponge the sentiment with a blue distress ink.
    10. Die cut the sentiment with one of the Stitched Sentiment Strips Dies.
    11. Embellish your card. I used one red heart sprinkle from the Kat Scrappiness Sprinkles collection.

    Easy and fun!

    Thank you for stopping by and remember to take a look of Kat Scrappiness Store because during this weekend the is all 15% OFF.

    See you soon and happy 4th of July!

    Martha Lucia

    Giveaways, New Releases

    KS July Release – Day 1 – New SlimLine Dies & 4th of July SALES!!!!

    Hello Kat Scrappiness fans!  Welcome to Day 1 of the July release!    We are changing things a bit for our release post and hopefully you’ll be glad why we did it this way!  We have a HUGE release and each design team member was assigned a specific product to feature.  By doing so, you’ll be able to see different products and samples made by the team.  Throughout the month of July,  you will see samples that you haven’t seen from the release posts. This will keep things fresh and interesting, and you will be amazed with what the entire team has in store for you.  Stay tuned and subscribe to our Blog and YouTube channel to see all of these projects.


    Don’t forget that we also have a giveaway every day during the reveals so PLEASE SCROLL THROUGH AT THE END OF THE POST TO FIND OUT HOW TO WIN.


    Before I show you the products, I just want you all to know that Kat Scrappiness is having a 4th of July weekend “SITEWIDE” sale (excludes Slimline products).  Use the coupon code (‘FREEDOM”) to get 15% off.


    For todays reveal, we are showcasing a few Slimline dies –> the Cityscape, Tri-Frames and Double Stitched Nesting with the Coffee Background die and the Christmas Gnome stamp set.  Design Team member, Martha is showcasing (the previously released) Lola the Giraffe stamp set but the coordinating die didn’t come in time for this release.  However, you will still see Martha’s project today.  Here’s what the dies and stamp set looks like:


    Are you ready to see the samples?


    CITY SCAPE SLIMLINE DIE – MARIA RUSSELL


    I created the background by die-cutting masking paper using the Nesting Circle dies.  I ink-blended a Bristol smooth panel with Chipped Sapphire, Faded Jeans, Wilted Violet and Black Soot.  I used a paintbrush to flick some water on the colored panel and dabbed it with paper towel to dry.  Removing the mask revealed the full moon.  I used the Cityscape die to die-cut it in black and kept it simple by adhering it onto the colored panel with liquid glue.  I finished the design by stamping the sentiment with Versafine Onyx black ink and added an enamel heart.  Here’s a closer look:


    For my second card, I wanted to showcase the Cityscape die on an A2 size card to show versatility, die-cutting it a couple of times with some Bristol smooth white card stock and inking them up with some distress oxide inks in rainbow order.


    I used the Sunscape stencil to create a subtle hue for my background.  I finished the design by adding the sentiment from the Everyday Brush Stroke stamp set.  Here’s a closer look:


    TRI-FRAMES SLIMLINE DIE – JO THOMPSON


    This slimline card by Jo is just stunning!  She used the new Tri-Frames die set to die cut them in brown and yellow that matches the colors of Lola the Giraffe, adding a stenciled background using a grass stencil and finishing her design by adding a few colorful butterflies.  


    Here is Jo’s process video for this card:


    DOUBLE-STITCHED NESTING SLIMLINE DIE – JO THOMPSON & MARIA RUSSELL


    Jo used the new Cityscape Slimline die and the Tri-Frames Slimline dies to create this cute shaker card.  For her sentiment, she used the You Rock Sentiment die and used the new Old Glory Sprinkles, just in time for your Patriotic-themed projects.


    Here’s Jo’s process video for this card:


    I went for a simple card.  I die-cut the panel using the Double-Stitched Nesting Slimline dies and stamped the rainbows and other images a few times on the card.  The frame was foam-mounted for added dimension and to finish the design, I added some Sparkling clear jewels.  They are my favorite to use for cards!


    COFFEE BACKGROUND DIE – KATHY SCHWEINFURTH


    I absolutely LOVE this design by Kathy.  The background was die-cut using the new Coffee Background die and ink-blended to look like coffee stain.  She then adhered this piece on some brown card stock to make the images pop.


    Kathy added the coffee cup die-cut from the Layered Coffee Cup die set, popping them up with foam adhesive.  She finished her design by adding the Hooray sentiment and Coffee Beans sprinkles, all available at the shop.


    LOLA THE GIRAFFE – MARTHA GOMEZ


    Even though we didn’t received the coordinating die for Lola the Giraffe because of the delay in shipping, Martha managed to create this cute card using the stamp set.


    Martha stamped the image four times on this card panel and colored them in with alcohol markers.  She die-cut the gingham pattern frame using the new Tri-Frames Slimline die set.  She finished her design by popping up the sentiment and added a few sprinkles.  Here’s a closer look:


    CHRISTMAS GNOME STAMP SET – LISA GOLZBEIN


    Lisa created three (3) adorable Christmas tags using the Christmas Gnome stamp set.  She colored her images with some alcohol markers, and use her Scan N Cut to die-cut them out.  She die-cut the tags three times using the Stitched Scalloped Nesting dies and stamped the sentiment a couple of times to create the background.  She used foam adhesive to pop up the images and the sentiment.  She finished her design by adding a festive red ribbon with some red and white twine.


    We have also changed the giveaway prize so that you can pick what you want from the shop.  Would you like to win a $25 Gift Card to the KS shop?   We will pick one lucky winner!
     
    Here’s how to win:
     
    Leave a comment on this blog post and tell us what project/s inspired you to the most today.  You have until July 6 to leave a comment.  Winners will be announced on Tuesday, July 7thWinners should send an email to: winners@katscrappiness.com to claim their prize within 48 hours.
     
     
    ————SUPPLIES———–