Follow:
    Design Team Projects

    Let’s Hang Out

    Hi,

    I am so excited to share this adorable little guy today. I started by stamping and coloring the baby giraffe and butterflies from the Kat Scrappiness Lola the Giraffe and Die Set. Now what to do with so much cuteness?

    Create a scene of course! I decided to make a card base by cutting it using an octagon die. I then used a light blue card stock and stamped clouds in blue ink. I die cut a grass edge to a piece of green card stock and added some additional stamped grass tuffs. This background was then die cut using a smaller octagon die.  The final step was attaching the cuteness to the card. I felt one of the butterflies had to go on Lola’s nose to complete the look.  The final step was adding the sentiment.

    It is always fun to experiment with shapes and I hope you will too.

    Supplies: KS Lola the Giraffe and Die set

    Design Team Projects

    Hello Slimline Shaker Card

    Happy Friday everyone!

    Today I have a fun slimline shaker card to share with you.

    For the shaker portion of my card, I used one of the Tri-Frame slimline dies and the Kat’s acetate sheets.  I filled the shaker part with Little Ladybug sprinkles, Red Confetti sprinkles, Happy Mail sprinkles, and mirrored clear heart sequins.  I cut a panel from black and white plaid paper using one of the Double Stitched slimline dies and layered this panel on red and black panels.

    I adhered all the panels and the shaker portion to my white card base.  I then used a hello die from my stash, and die cut it from red and holographic paper.  I also stamped and fussy cut two envelopes from red patterned paper.  I glued these pieces directly on the acetate of the shaker card.

    I just love shaker cards, they are so fun.  Do you guys like making shaker cards?

    Thanks for stopping by!

    – – –– – –– – –– – –– – –– – –– – –– – –– – –– – –– – –– – –– – –– – –– – –– – –– – –– – –– – –– – –– – –– –

    Here is a link to the Kat Scrappiness shop and direct links for products I used on today’s cards.

    – – – SUPPLIES for today’s project– – – – – – – – – – – – – – – – – – – – – – – – – – – – – – – – – – – – – – –

    Giveaways, News

    KS July Inspiration WINNER


    We are pleased to announce the WINNER fo the July Release Inspiration Post. Thank you all for taking the time to leave a comment. We love getting your feedback.

    If you didn’t win this time, please try again on our next release. Please stay tuned for more inspiration from the design team.

    WINNER of $20 Gift Card – SLADJANA PERISIC

    Please claim your prize within 48 hours and send an email to: winners@katscrappiness.com

    Have a wonderful day!

    Design Team Projects

    Lola Happy Birthday Slimline Card

    Hi everyone, it’s Tina here. Slimline cards are the rage right now and Kat Scrappiness has you covered with an awesome selection of dies. Below you will find the steps to create your own Lola Happy Birthday Slimline Card.

    Step 1 – Trim White Cardstock to 7” x 8 1/2”, score at 3 1/2” and fold in half for a vertical side fold card. (Slimline)

    Step 2 – Diecut Wonky Stitched Nesting Slimline using White Cardstock. Adhere to card front using Nuvo Deluxe Adhesive.

    Step 3 – Trim White Cardstock to 2 1/2” x 7 1/2”. Apply Distress Oxide Ink Speckled Egg and Stormy Sky onto a kraft mat, spray with water and dip the panel into the ink. Heat set in between dips and repeat until desired effect is achieved. Set aside to dry.

    Step 4 – Diecut Never Ending Circles to create Balloons using various colours of Cardstock. (If you have a Balloon die then use that instead). Cut out a small triangle to place in back of the circles. Add string to the back using a piece of tape. Adhere to panel created in Step 3. Bottom Balloon is adhered using Foam Tape and Nuvo Deluxe Adhesive to the balance. Trim off the Balloons that is hanging off the edges. Adhere the entire panel to the card front.

    Step 5 – Stamp Lola The Giraffe using Gina K Amalgam Ink on White Cardstock. Colour in with any Alcohol Markers of your choice. I used Spectrum Noir Classique Markers. Fussy cut the image and using a Black marker add Black ink to the edges. While I was doing that my marker slipped and I marked the ear and the foot. To fix this I created a bow to cover the ear and recoloured the feet and that fixed my errors. Wrap the strings around the horn on the left side and adhere the image using Foam Tape

    Step 6 – Stamp Everyday Brush Strokes sentiment using Versafine Onyx Black Ink to the bottom of the card front.

    Step 7 – For added interest and sparkle randomly adhere Sparkling Clear Jewels using a Crystal Katana and Collage Medium.

    This card can be used for many occasions by changing the colours and sentiment. For an example it can be for an anniversary or baby shower, etc. Below is a link to the products used. Thank you for stopping by and Happy Crafting!

    Products Used:

    https://linkdeli.com/widget.js?id=f5e8378456858c916708

    Design Team Projects

    Avocado Sushi Birthday Shaker

    Hi there, it’s Lisa here with you from Oh So Cute By Lisa sharing another Kat Scrappiness inspired card!
    I’m excited to share a shaker card with you today that I made! I used quite a few products from the Kat Scrappiness store to make this fun card.
    Here are all the details:
    To start my card I colored the cute images from the You Guac My World Stamp Set and the
    Wok On Stamp Set.  I decided to use one image from each set for my card. The next step was to cut the front panel of the card using the Stitched Scalloped Collage Frame Die which served as the perfect shaker window.  It’s great because it makes 3 windows that you can put different shaker bits in. I backed that frame with a piece of acetate from the A2 Acetate Sheets and then built the back of it up with foam tape.
    Now it was time to prepare the base of the card. I used the Stitched Scalloped Rectangle Dies and I cut out a piece of pink polka dot paper for my background.  Before I adhered that panel to the base of my A2 sized card I stamped 2 sentiments in black ink from the You Guac My World and
    Wok On Stamp Sets in the space that will be the largest window opening.  I embossed it with clear embossing powder to give it a shiny appearance.
    Now the fun part! Adding the sprinkles to the card! The technique that I use is to put my sprinkles on the base of the card and place the frame with the foam tape over those sprinkles. This way I can see the sprinkles and the base of the card and I can place the window down in the exact center of that base panel.
    I chose 3 different embellishments for my shaker windows. I used the Avocado Sprinkles and the Sushi Sprinkles for the two smaller windows and I used the 3mm Mirrored Clear Solid Stars for the largest window with the sentiment. The last thing to do was adhere the two little avocado and sushi images to the front of the card. Here’s a closeup of those fun sprinkles:
    This was a fun card to make and it always amazes me how many products you can use on one card.  Kat Scrappiness has so many awesome stamps dies and embellishments in the store, you can find EVERYTHING you need and so much more!
    Here is one more look at my card with all the supplies shown:
    Thank you so much for joining me today, I’m so glad you stopped by to check out my latest card and I hope you’ll check out all the fun shaker bits in the store and make your own card.
    Don’t forget to follow
    Kat Scrappiness on all
    social media platforms to be alerted to new releases, sales and giveaways!
    Have a great day, I already am!
    Design Team Projects

    My Obsessions by Martha Lucia

    Yes! My obsession is make cards and I am fascinated with the products from the last release! Hello crafty friends, Martha Lucia here with you to share two of my cards with the products recently release and available at Kat Scrappiness Store!

    Summer is not finished but Fall is around the corner…the perfect excuse to make one card for each season! Let me start with the summer card.
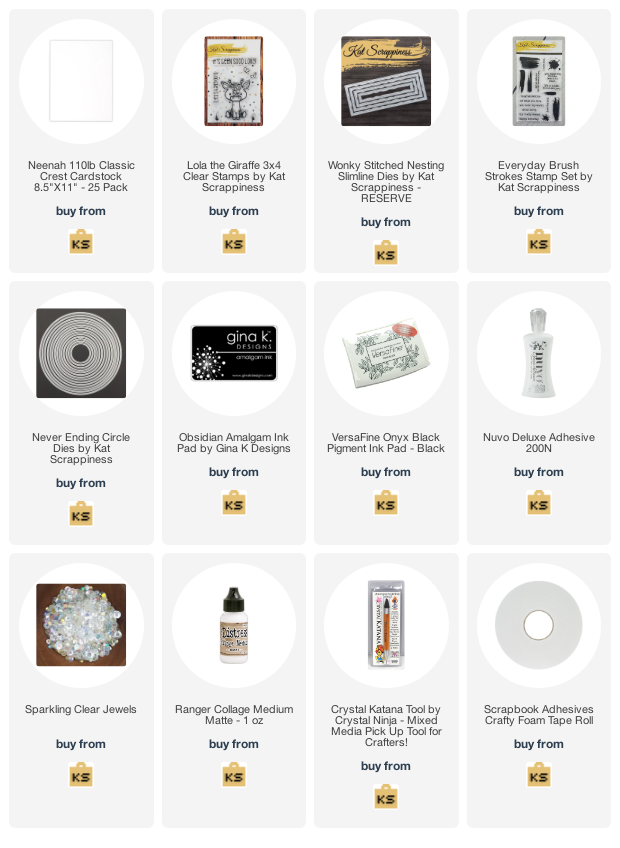
    CARD DETAILS:

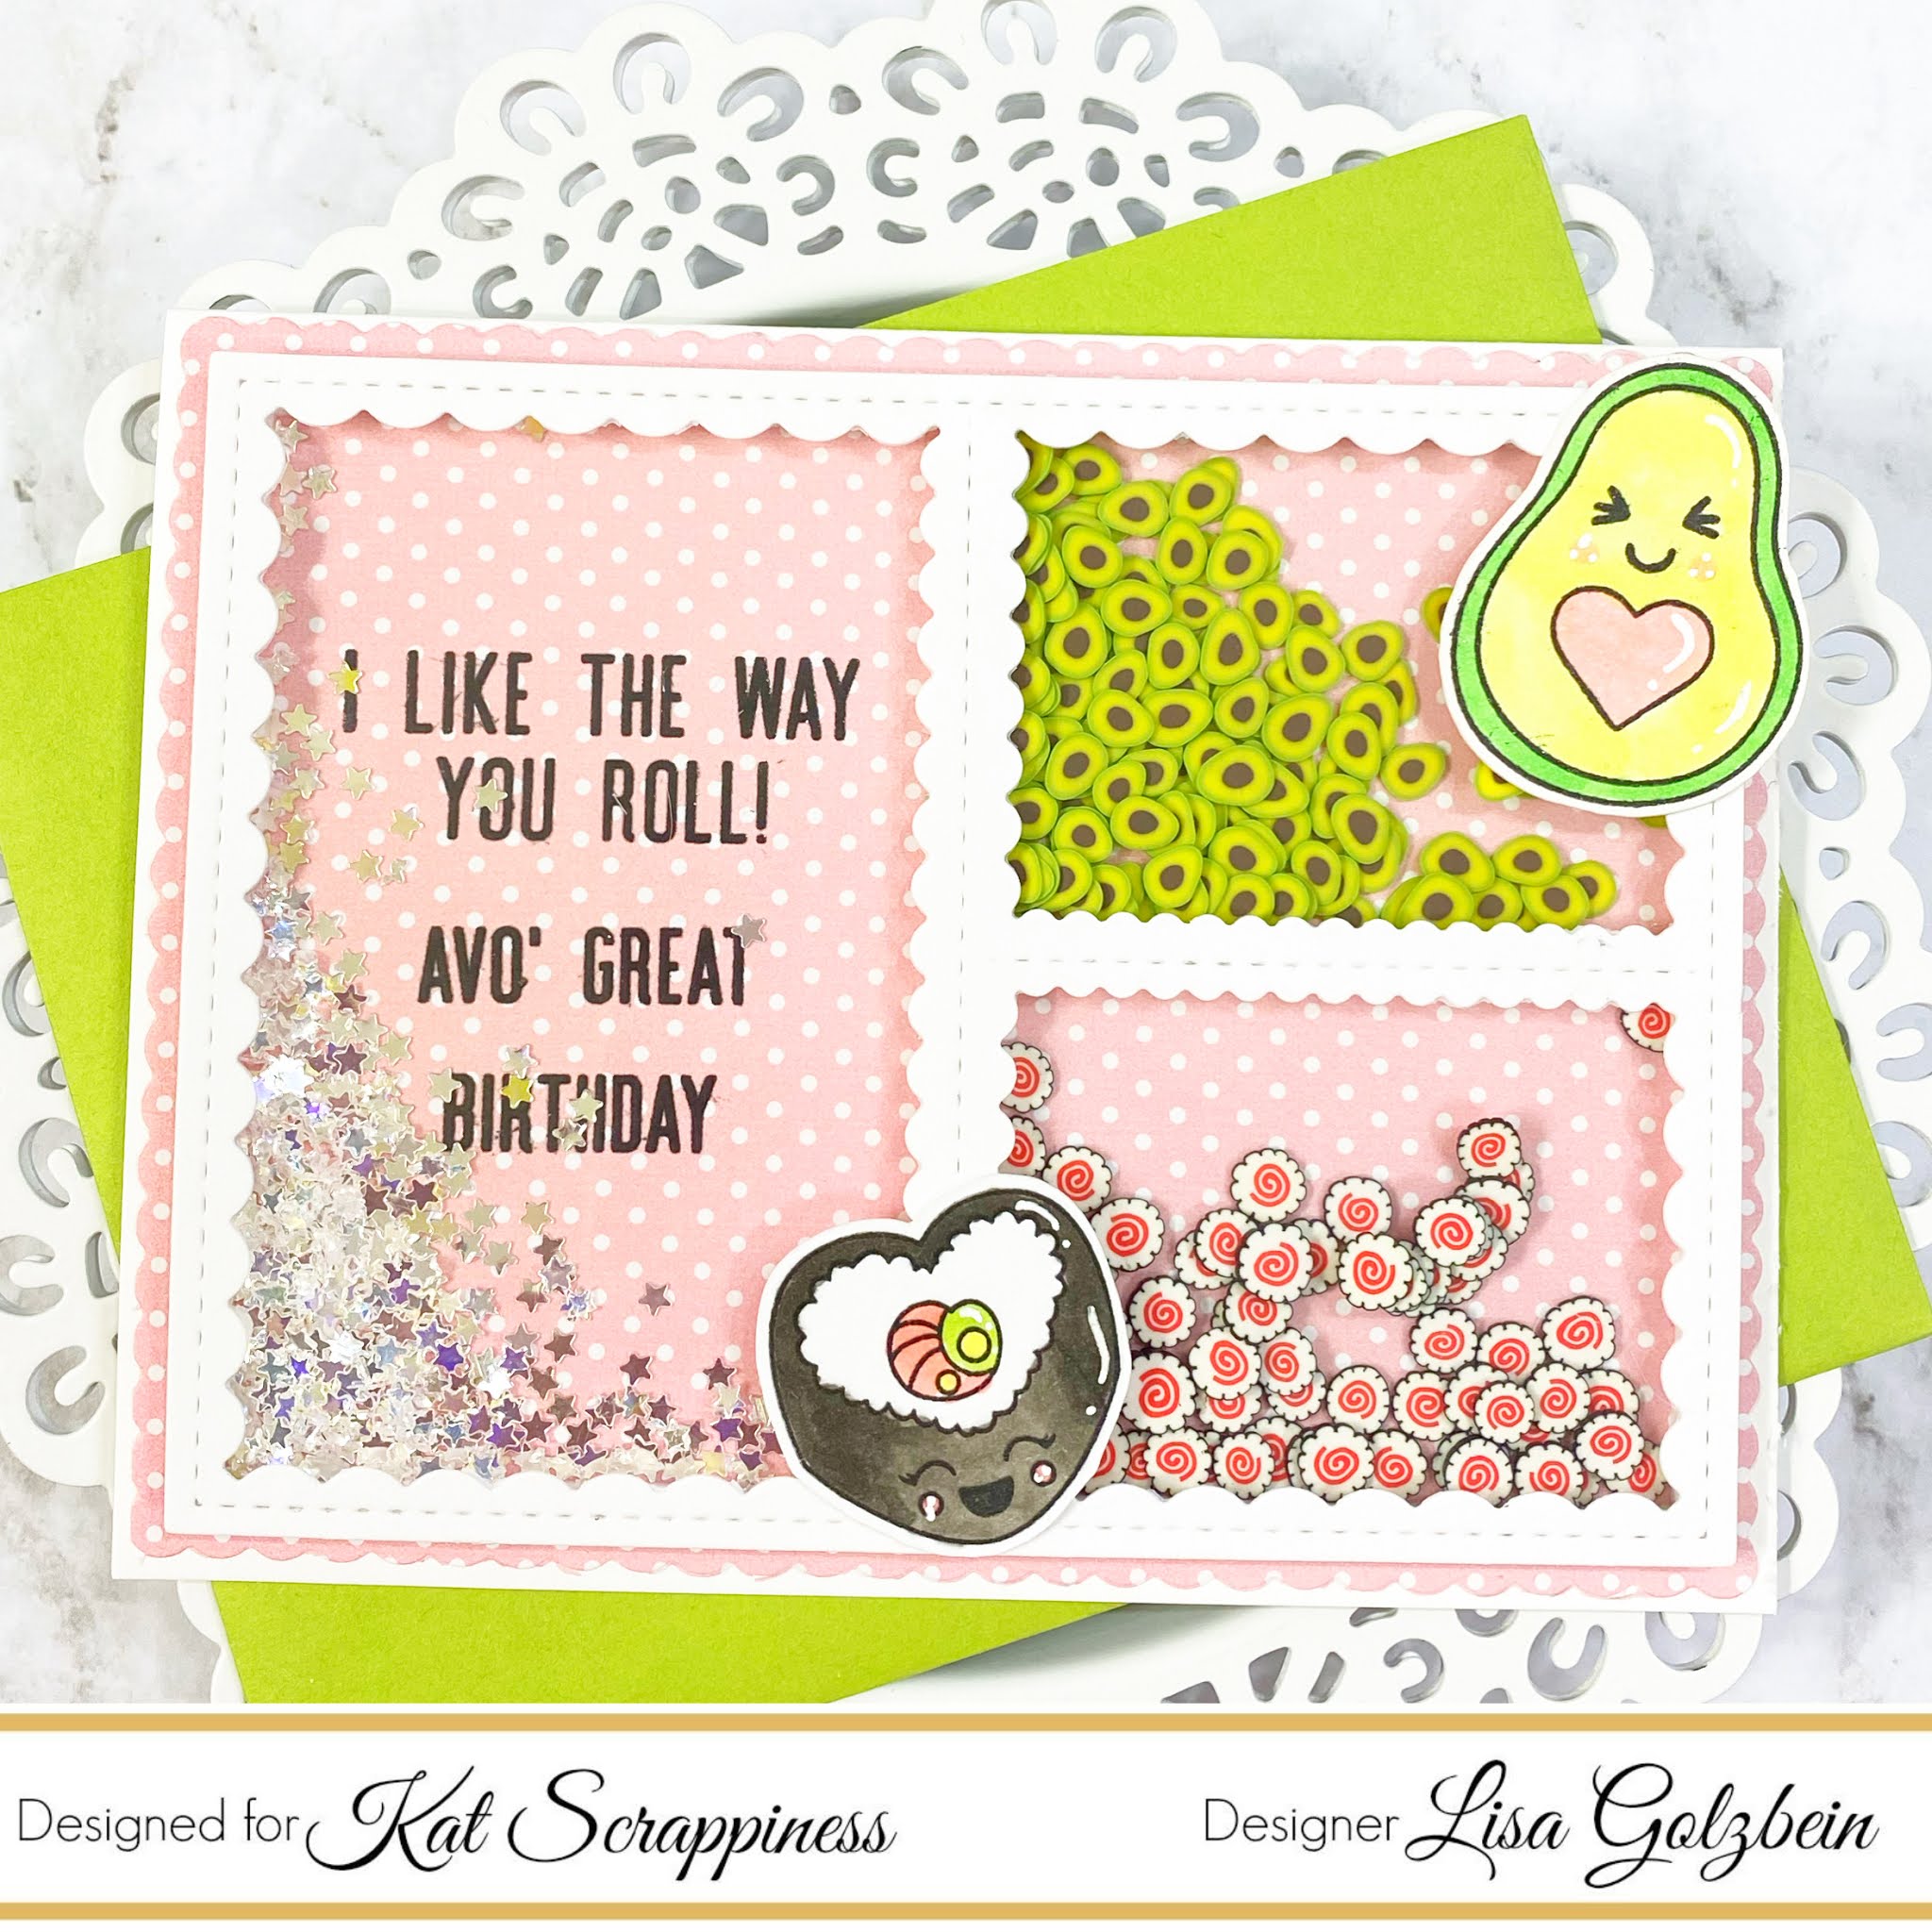
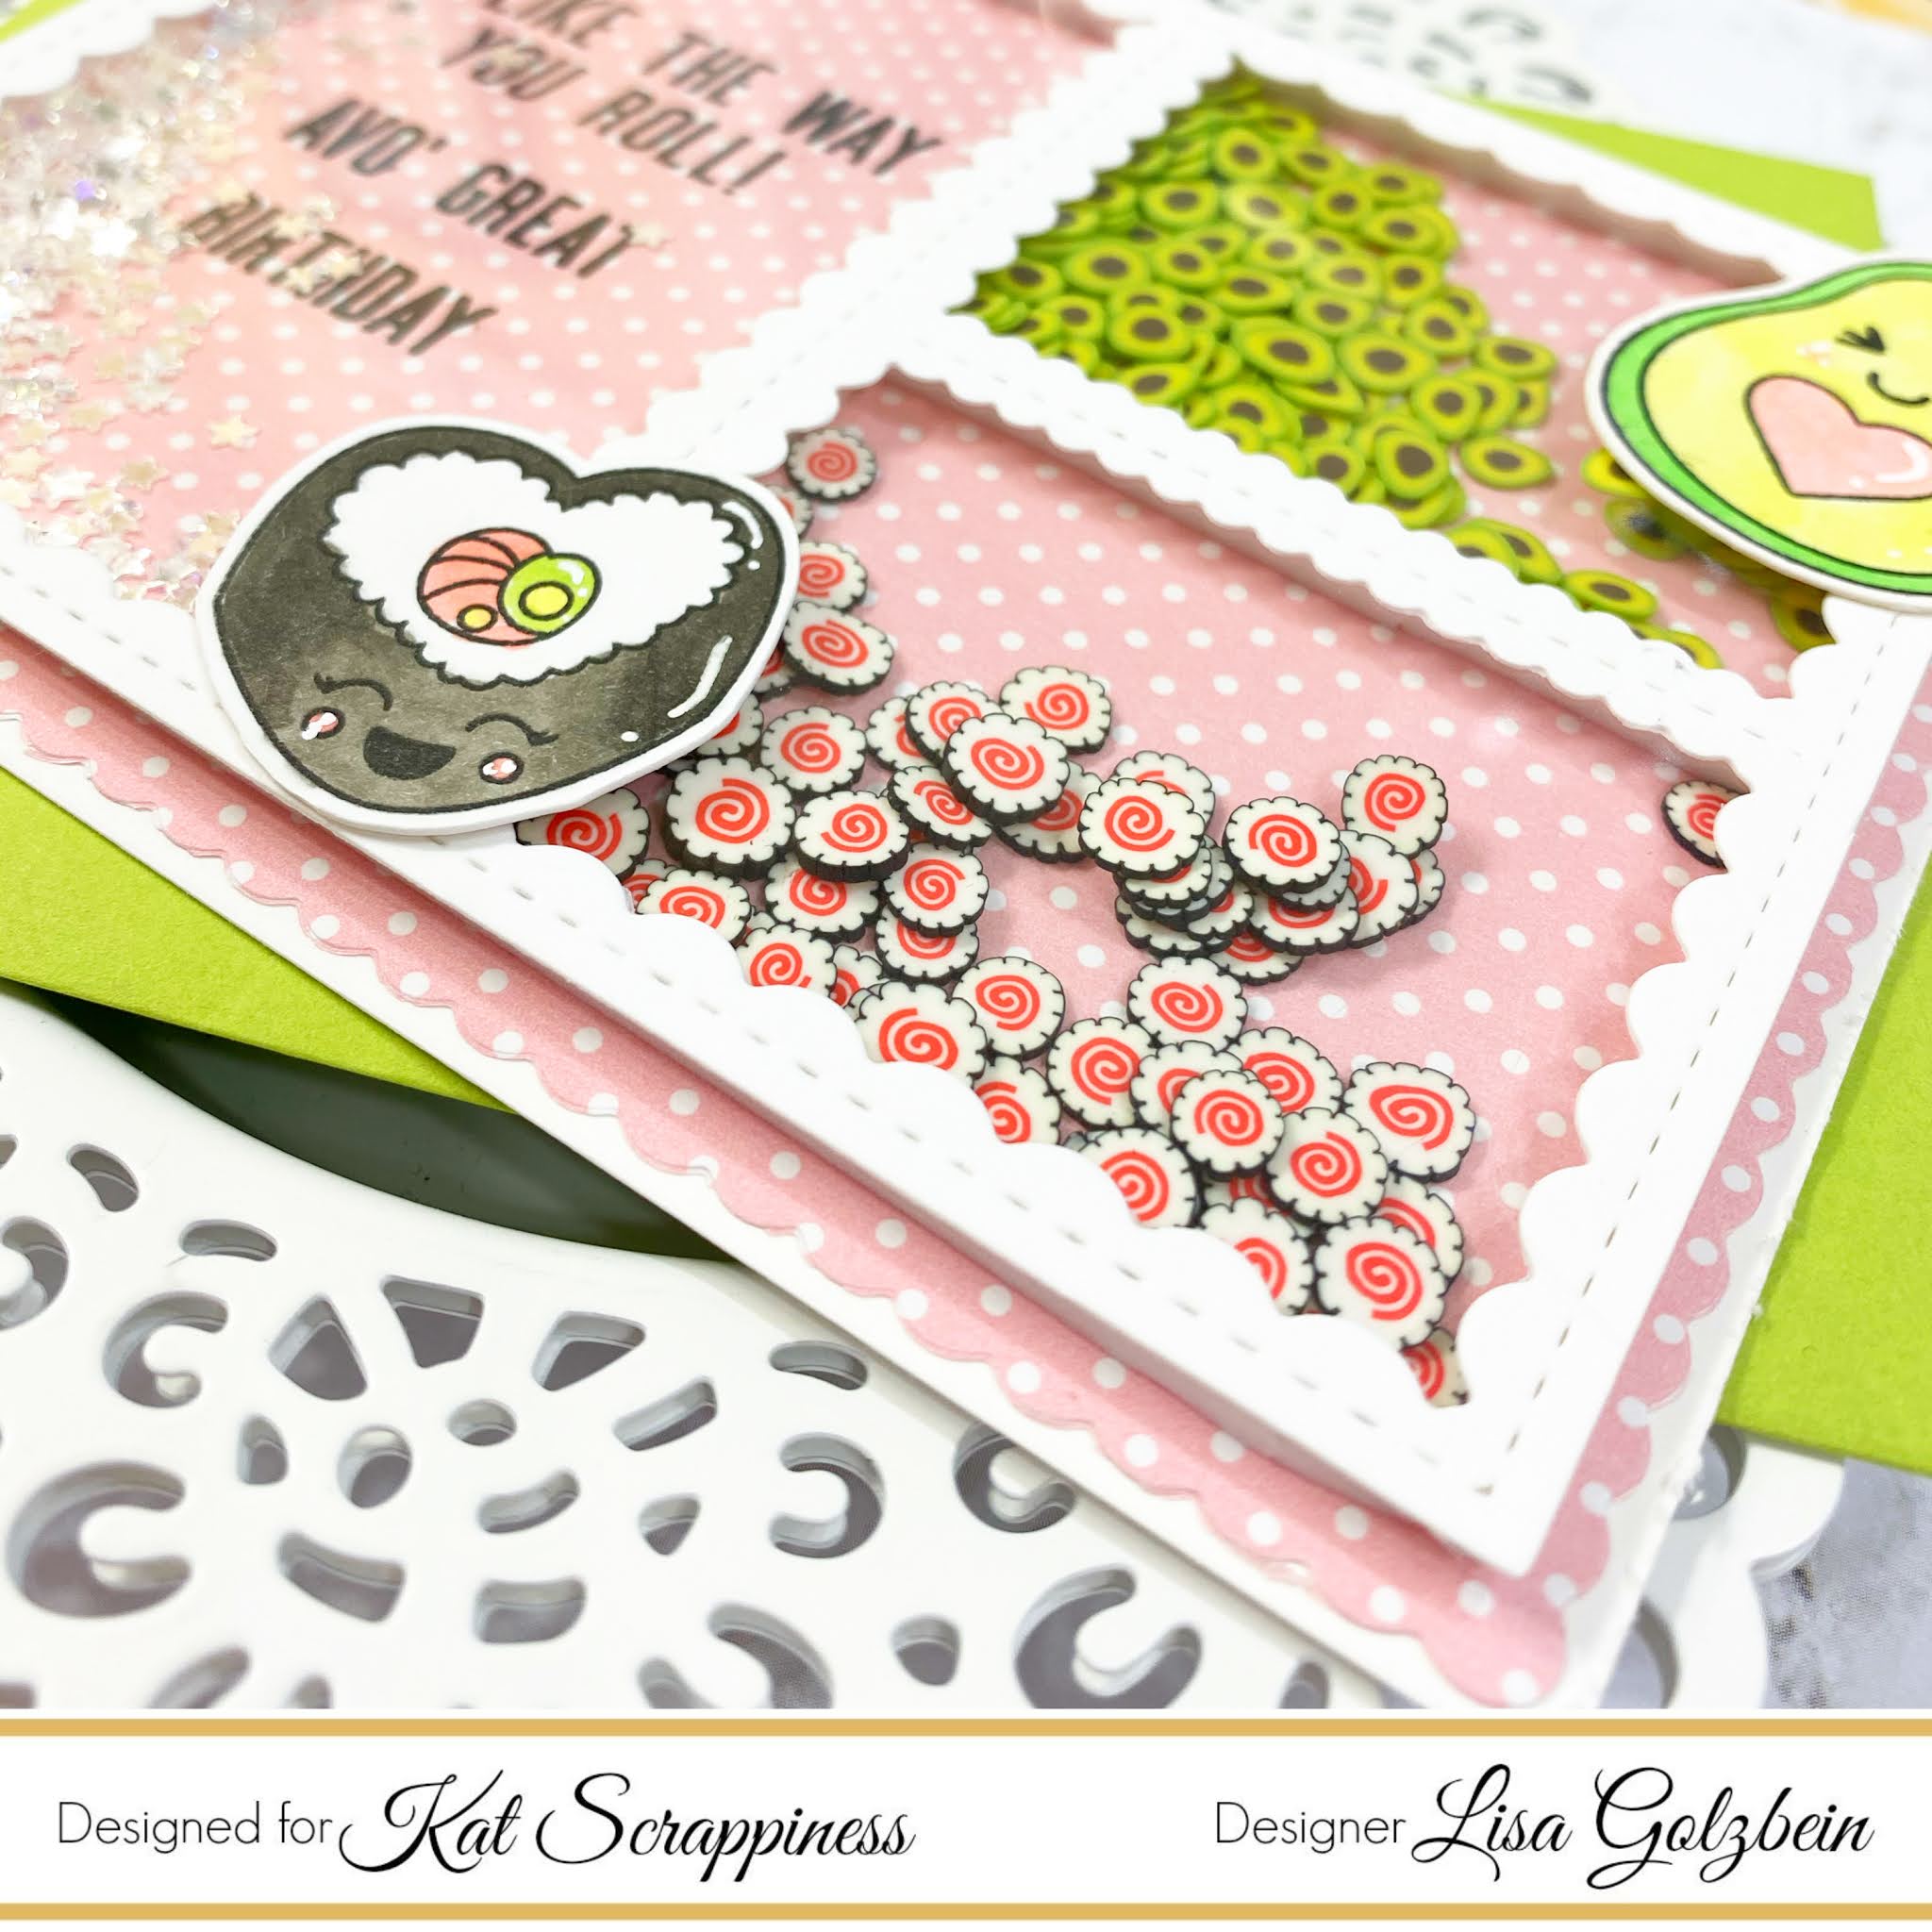
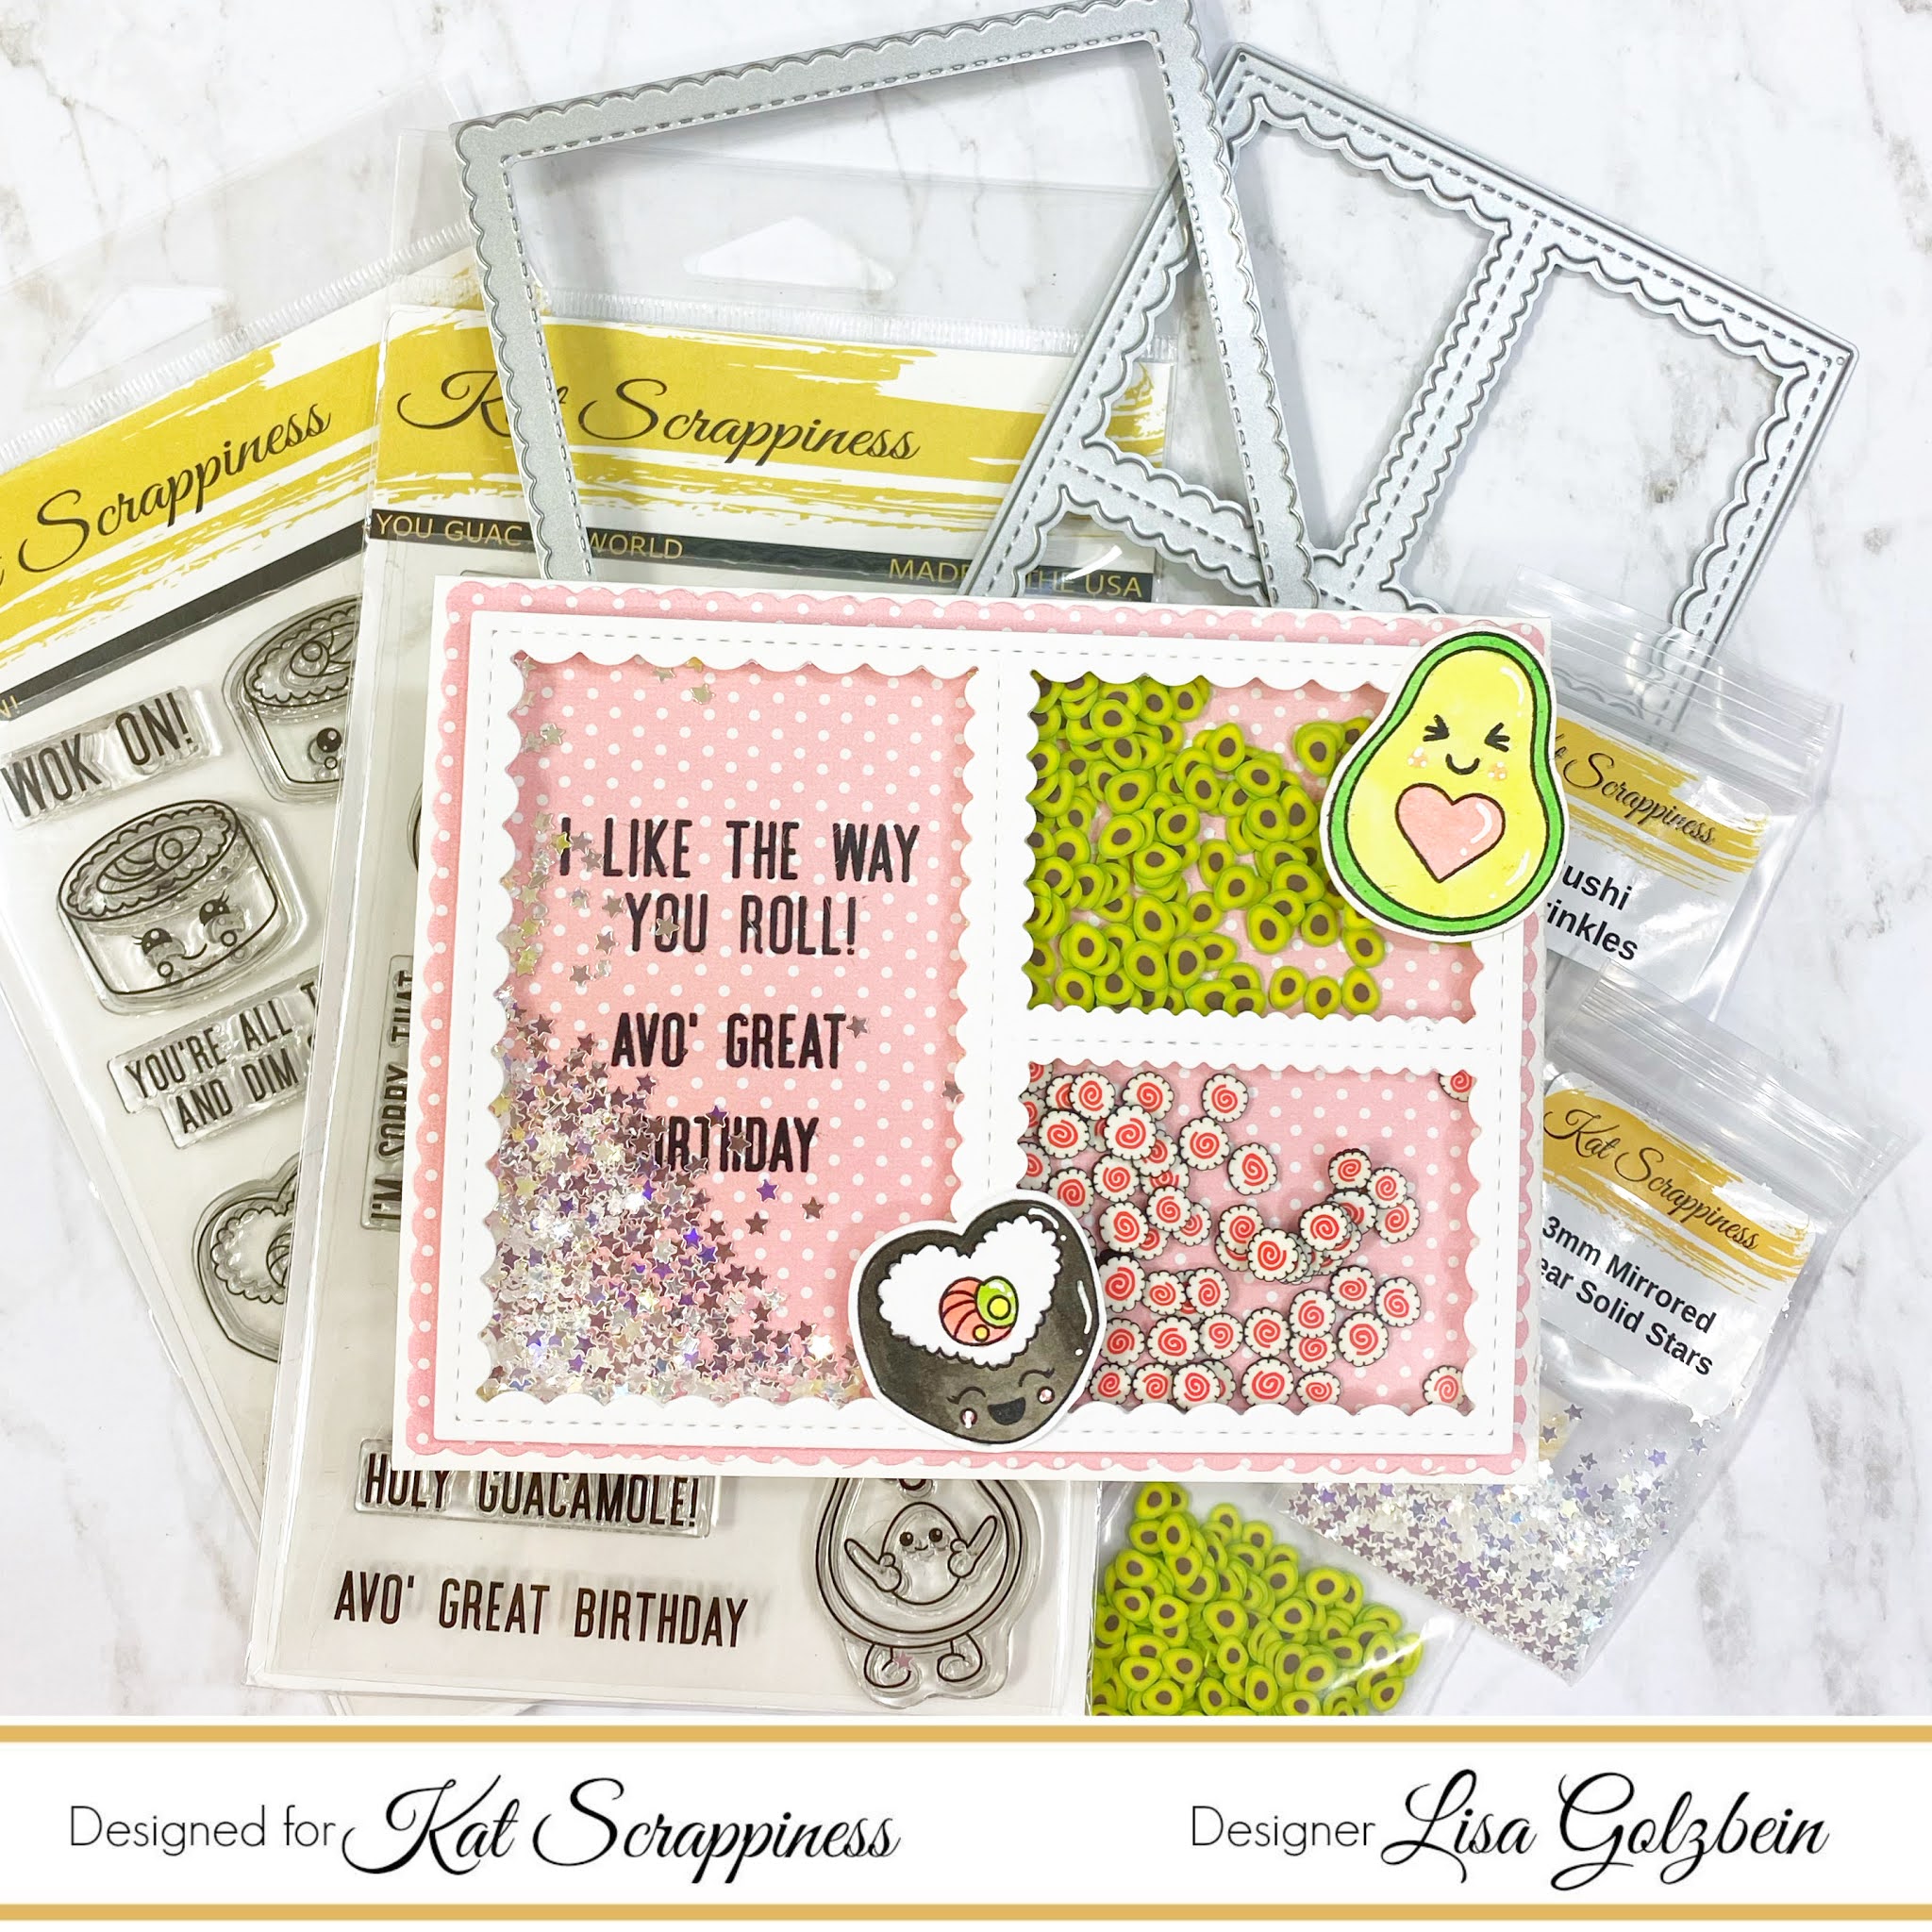
    To make this card I just applied distress ink over a craft mat and sprayed the ink with water. Then, I took the ink from the mat passing the watercolor paper over it. I let the paper dry naturally. In a while, I stamped the images from the sets Summer Gnome and Summer Gnome Add On onto white card stock and colored the images with Illustrator Markers from Spectrum Noir. In addition, I fussy cut the images with scissors and the sentiment with a Stitched Strip Sentiment Die.

    I placed the second large size of the Double Stitched Nesting Slimline Dies  over the inked background piece and die cut it with my big shot. I pasted the large piece directly over the card base and the small piece using crafty foam tape.

    Then, I arranged all my pieces with dual tip glue pen and crafty foam tape.

    AFTER COFFEE CARD!

    For my second card, I am using the fabulous Coffee Time Background Die. First, I inked the white layer with four different colors of Distress Ink. Then, I passed the inked layer through the big shot and I took care of remove the layer from the die because I wanted to keep the negative parts of the cups designs that are on the center of the die in the same place. After removed the layer, I secured the cups with washi tape behind.

    I pasted the die cut layer over a brown card base using crafty foam tape. Then, I stamped one of the coffee images included in the stamp set Let’s Get Caffeinated and stamped a white piece of card stock. In addition, I die cut this piece with one of the Embossed Edge Square Dies. To finalize, I created a mat with the next large embossed edge square die.

    GOOD NEWS!

    Now, I want to share with you a new product available at the store! All of us need this, the New Magnetic Die Try by Kat Scrappiness!

    I believe this is fabulous because we can keep our dies in when we are creating at the same time that we save time searching and money keeping the dies secured!

    Thank you for stopping by and keep in touch because very soon Kat Scrappiness Store will be having a new release of products.

    Martha Lucia

    Design Team Projects

    Happiness is Handmade

    Hello Friends Waleska here to share a very colorful slimline card today!


    CARD DETAILS:

    To create this card I started with the background, I used Oxide Inks in colors Picked Raspberry, Carved Pumpkin, Squeezed Lemonade, Twisted Citron and Broken China.

    I cut the largest frame from the Tri-Frame Slimline Dies with white cardstock.  I stamped a bunch of markers from the Crafters Gona Craft Stamp set and colored them with copic markers in rainbow order.

    I cut and adhere all the markers to the cardbase and glue the frame, I stamped the sentiment and put some sequins.  I used a black card base to finish this card.

    Thank you so much for stopping by today! Have a wonderful day! Keep on crafting!


    Waleska Galindo