Tag: Paper Crafts

  • FAREWELL SALE! Save big on your favorite crafty products!

    FAREWELL SALE! Save big on your favorite crafty products!

    Crafty Farewell Sale!


    Say farewell to some of our beloved products! We’re making room for exciting new arrivals by clearing out our shelves, and you’re invited to join the clearance party! 🎉

    This is your golden opportunity to snag incredible deals on items that are retiring or being discontinued from the Kat Scrappiness store. Trust us, you won’t want to miss out on these unprecedented discounts! Stock up on your favorite craft supplies and add some extra fun to your crafting adventures.

    Hurry, these discounts won’t last forever, and once they’re gone, they’re gone for good! Shop now and give your craft room the refresh it deserves!

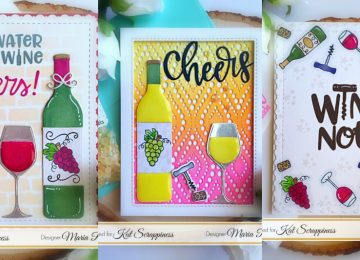
    Here are just a few of the products we are saying goodbye to!


  • Christmas In July Sale & FREE RAFFLE TICKETS!

    Christmas In July Sale & FREE RAFFLE TICKETS!

    Christmas in July Sale & Giveaway

    It’s Christmas in July at Kat Scrappiness!  Not only are we having a HUGE SALE but we are also having a RAFFLE TICKET GIVEAWAY!  Check this out!

    Throughout the rest of July, you can save 20% on EVERYTHING in the Christmas/Hanukkah category using code:  JULYXMAS  and….

    Each order placed in the month of July will receive a FREE RAFFLE TICKET!  To make things even more fun, all orders over $50 (before shipping) will receive ANOTHER FREE RAFFLE TICKET!

    So you have multiple chances to win some of the great prizes being offered by Kat Scrappiness!  (Prizes listed below)

    How it works

    All raffle tickets come with a number at the top and bottom of the ticket.  When you receive your ticket(s), the top portion will have been torn off.  Don’t worry,, that’s for us to put in the drawing box.  You will need to hold onto your ticket until the drawing which will be on August 10th.  We will do the drawing live on Facebook but don’t worry, if you can’t watch the live drawing, we will give you 72 hours to respond.  If we draw your number, you win!  We will also post all the winners here on the blog as well as on our Facebook page.

    Prizes:

    1. Metal Die Snips – Valued at $6.49
    2. Wonky Wavy Stitched Oval Die Set – Valued at $14.99
    3. Punny Snacks Stamp Set – Valued at $14.99
    4. Stitched Fancy Scalloped Square Die Set – Valued at $14.99
    5. Cheat Day Stamp Set – Valued at $14.99
    6. Double Stitched Oval Dies – Valued at $14.99
    7. Wonky Wavy Circle Dies – Valued at $14.99
    8. Sequin and Sprinkle – Your Choice – Valued at a minimum of $15.00
    9. Toil & Trouble Layered Stamp Set & Coordinating Dies – Valued at $17.99
    10. Stitched Snowflake Swirl Border Backdrop Die  – Valued at $19.99
    11. Wine Not Stamp and Dies – Valued at $20.00
    12. Crafter’s Essentials II Die Set – Valued at $24.99
    13. Crafter’s Essentials FALL Die Set – Valued at $24.99
    14. Condensed Uppercase Alphabet Dies – Valued at $36.99

    And the Grand Prize Winner will receive:

    A Gift Card in the Amount of $50.00 at the Kat Scrappiness Store.

    Fine Print:

    Raffle tickets will be sent out with every order placed between July 17, 2019 and July 31, 2019.  The drawing will be held live on Facebook on August 10, 2019 at 11am PST.  Winners will be announced during the video, as well as on our Facebook Page and our Blog.  Winners will have 72 hours to claim their prize.  We apologize but due to shipping costs, this promotion is only open for US customers only.

    So what are you waiting for?  Hurry on over to the Kat Scrappiness store

    to save 20% on all your holiday items and get your free Raffle Ticket(s)!

    Kat Scrappiness.com

  • February Release Day 2 – Mandala Die and Mandala Frame

    February Release Day 2 – Mandala Die and Mandala Frame

    Good morning Kat Scrappiness fans!  Are you ready for Day 2 of the February reveals?  For our projects today the design team is showcasing the Mandala Die with the Mandala Frame.  These dies will either go perfectly well together, layered or used on its own.   We also have a giveaway everyday during the release so scroll down at the end of the blog post to find out how you can WIN these dies.


    Mandala Die


    Mandala Frame


    Here are some samples created by the design team:


    CAREN BARTHOLOMEW


    Caren inked up the background with some distress oxide inks and die cut another piece of some white card stock using the Mandala die.  She adhered this piece on top of her inked background and stamped her sentiment using the same ink for a seamless look. Simple and elegant!


    In this card, Caren used the Mandala die as a stencil and inked up the card stock with some distress oxide inks.  She finished her design by adding the sentiment script  “Hello Friend” from the shop.


    LISA GOLZBEIN


    Lisa had cut the Mandala Frame with a light blue card stock.  She die-cut the Mandala die using some white card stock and adhered both on her card base.  She colored a cute critter and used the Hello from the “Hello My Crafty Friend” sentiment script die.  How adorable is this card?


    For Lisa’s second project, she used both the Mandala Frame and Mandala dies again and added the coffee cup image from the Let’s Get Caffeinated stamp set.  She also used some Brown Jewels to finish her design.


    For Lisa’s third card, she created a square card using the Mandala die and adhered the “love” sentiment using the I Love You Shadow dies, just released last month.


    MARIA RUSSELL


    I used the Mandala die as a decorative background for my card.  Even though it is not the focal point, the die-cut pieces really stood out on this card.  I die-cut the Mandala die twice with some white card stock and adhered them onto a light beige card base.  I stamped the flowers with different lawn fawn inks available at the shop and die cut using the coordinating dies.  I heat-embossed the sentiment with white embossing powder and die-cut the globe using the dies.  The stamp set I used is called Globe Greetings from Concord & 9th.  I finished my design by adding some Pink Sparkling Jewels from the shop.  Here’s a closer look:


    I die-cut the Mandala frame on some white card stock and adhered this piece on a blue card base.  I stamped my celestial background on another piece of Neenah solar white card stock with some Lawn Fawn inks and die-cut this piece using the Cross Stitched Circle frame die.  I adhered this piece in the middle of the Mandala frame and finished my design by adding my critters and Sparkling clear jewels from the shop.  I didn’t think this card needed a sentiment in the front.  Here’s a closer look:


    MARTHA GOMEZ


    Martha created this beautiful card using both the Mandala Die and the Mandala Frame.  She inked up her background using distress oxide inks.  She die-cut the Mandala Frame from some white card stock and adhered this piece on her inked background.  Martha inked up another piece of card stock and die-cut this piece with the Mandala die.  She adhered this piece on her card.  She finished her design by stamping her sentiment on the Stitched Sentiment Strip die.  What a beautiful card, Martha!


    PRISCILLA JOSEPH


    Priscilla had die-cut the Mandala die and used another die from Papertrey Ink to make it look like the moon.  This card is so beautiful and unique!  She also used the “Love You to the Moon and Back” sentiment strip die and finished her design with some sequin mixes from the shop.  Here’s a closer look:


    Priscilla created two birthday-themed card for her second and third project using the Mandala Frame die and Mandala die.  She also used the Happy Birthday script sentiment die with some Superhero Star Sprinkles Embellishment to finish the card design.   Priscilla, you outdid yourself this month with all of your projects!  Wow!


    TINA GUIGUI DORNBAUM


    Tina created this beautiful and elegant card by coloring some Yupo paper with alcohol inks and die cut the same with the Mandala frame die.  She adhered this piece on a white card base and die cut the Mandala frame die with white card stock.  She finished the design by adding her sentiment using the stitched sentiment strip die.


    HOW TO WIN:

    WOULD YOU LIKE TO WIN THE MANDALA DIE AND THE MANDALA FRAME?  Leave a comment everyday during the reveals in the comments section below for a chance to win the die.  Deadline to leave a comment is on Friday, February 8, 2019.  Winners will be announced on the blog on Saturday, February 9, 2019.  I hope you love the projects as much as I do.   The dies are available for purchase now


    Mandala Frame: http://bit.ly/2MT4aYq

    Mandala Die: http://bit.ly/2MQBFe2


  • Wishing You Peace, Love & Joy by Maria

    Wishing You Peace, Love & Joy by Maria

    Hello everyone!  Maria here on the blog today.  Have you joined our Blog Hop to benefit the Coffee Oasis Youth Program?  Collection is currently open and all you have to do is make a winter-themed project and link it on the site, or leave comments on each participants blog and you will also have a chance to WIN!  Simple as that!


    For my card today, I am showcasing the new Stitched Snowflake Swirl Border Background die and other products available at the shop.   I started out by die-cutting a piece of some Bristol smooth white card stock using the Stitched Snowflake Swirl Border Background die.  I inked up this piece with Spun Sugar and Antique Linen distress oxide inks with my mini-ink blending tool.


    Using the Holiday Style stamp set from Sunny Studio Stamps, I stamped the pine boughs first, then positioned the silver bell ornament and stamped it with different gray and black inks.  I also stamped it with some Encore silver pigment ink.  I die-cut a piece of red  bow using a die-set from Lawn Fawn and adhered it onto the top of the ornament.  I also stamped the sentiment using Versafine Onyx Black ink and Lawn Fawn Lobster ink.  I added the Sparkling Clear jewels using my Crystal Katana jewel picker.


    Here’s my card:


    I absolutely LOVE the stitching details made by the die.  It is so beautiful in person.  I also LOVE the jewels that are available at the shop but the sparkling clear ones are my favorite.  Here’s a little close-up:


    In my opinion, Kat Scrappiness makes the most beautiful and affordable dies.  I can’t even pick a favorite because I love them all!  Please tell us which one is your favorite die from the shop.


    I hope you like my card today.  The supplies I used are listed and linked below.  Don’t forget to use my coupon code “MARIA10” for 10% off your order.  Thank you for stopping by and happy crafting!


    ———–SUPPLIES———-


  • It’s Beginning to Look a Sloth Like Christmas

    It’s Beginning to Look a Sloth Like Christmas


    Hello my crafty friends!  I hope you all had a wonderful Thanksgiving holiday!  I meant to post on November 23rd but due to my current move and travel schedule, I was not able to organize the post so I apologize for that.  Before I begin, I wanted to let you all know that Cyber Monday is 25% off!  Please use coupon code “MONDAY25”  Hurry and order your favorites before they are gone!


    It’s Maria here with you today I am back with this cute Christmas card, showcasing the Foliage Frame Die, the Slothy Christmas stamp set and matching die by Newton’s Nook and other products available at the shop.


    I started by stamping my images on Neenah solar white card stock and colored the images in with my Copic markers.  I die-cut the images using the coordinating dies.  I also die-cut another piece of Neenah solar white card stock using the Foliage Frame die set.  This die is so beautiful!


    I cut an A2-size piece of Bristol smooth white card stock and inked up this background with some Tumbled Glass and Spun Sugar distress oxide inks, using my mini-ink blending tool.  I put a few drops of my Vintage Photo distress re-inker onto an acrylic block and added a few drops of water then used my watercolor brush to splatter some color onto my colored background.  I adhered this piece onto my card base.


    I added some foam adhesive on the frame to give it a little bit of a dimension.  To finish my design, I adhered my colored images onto the card and covered the Santa hat with some stardust stickles.  Here’s a little close-up:


    Don’t you just LOVE this new Foliage Frame die?  Also the sloth is so cute with that little mouse!  I really love how this card turned out.


    I hope you like my Christmas card today.  Please visit Kat Scrappiness today to order all of the supplies I used.  They are listed and linked below. Don’t forget to take advantage of the Cyber Monday sale using coupon code “MONDAY25” for 25% off your order!


    ———SUPPLIES————


  • There’s Snow One Like You!

    There’s Snow One Like You!

    Hello my crafty peeps! Maria here with you today and I’m back with a Christmas card, showcasing the Merry Critters stamp set.  I LOVE this stamp set so much and I just couldn’t wait to play with it.


    I started by stamping my images on Neenah solar white card stock and colored them in with my Copic markers.  The little yellow bird reminds me so much of tweety!   Here’s what the stamp set look like:


    Since this stamp set didn’t come with coordinating dies, I die-cut the images using my Brother Scan N Cut 2.


    I inked up my background with some distress oxide inks.  I ahve been loving the Tumbled Glass and Spun Sugar color combination lately!  It gives the perfect wintery-sky!  Here’s my card:


    I used some white glittered card stock as well to create my snow hill.  I think this card turned out so cute.  Here’s a little close-up:


    I hope you like my project today.  The supplies I used are listed and linked blow.  Please consider supporting me by clicking on those links.  Don’t forget to use my coupon code “MARIA10” for 10% off your order.  Have an amazing day!


    ——–SUPPLIES———-


  • Wine Cards with the September Release by Maria

    Wine Cards with the September Release by Maria

    Hello Kat Scrappiness fans! Maria here with you today with some simple cards featuring the new Peacock Backdrop die, the Wine Not stamp set and the Wine Not Custom craft dies.


    For my first card, I started out by die-cutting the Peacock Backdrop die some Bristol smooth white card stock.  I inked up this piece with some squeezed lemonade, spiced marmalade and picked raspberry distress oxide inks with my mini ink blending tool.  I set this piece aside to dry while I worked on die-cutting the Wine Not Custom craft dies.  I used Neenah smooth white card stock to color the bottle with my Copic markers and used a silver card stock for the wine glass.  I added glossy accents to make it look more realistic.   I also die-cut a frame by using the double stitched rectangle die and the stitched rectangle die.  Here’s the first card:


    I adorned my card with some images from a stamp set by Newton’s Nook and also added the beautiful Champagne jewels.  I love the new jewels collection from the shop.  They are available in a variety of colors.  Here’s another look:


    For my second card, I die-cut the pieces again with some Neenah solar white card stock and colored the die-cut pieces with my Copic markers.  I inked up an A2 size piece of some Bristol smooth white card stock with a stencil from my stash.   I stamped the sentiment from the Wine Not stamp set.  Here’s my second card:


    To finish the design, I also added the cheers sentiment from my stash and the tiny bow is from a die-set by Lawn Fawn.  Here’s another look:


    For my third card, I wanted to create something simple just using the Wine Not stamp set.  I die-cut a piece of some Neenah solar white card stock with the Stitched Fancy Scalloped rectangle die.  I colored the images in with my Copic markers.  To finish my design, I stamped the sentiment using Versafine Vintage Sepia ink.

    I hope you like my cards today.  Which one is your favorite?  The supplies I used are listed and linked below.  Don’t forget to use my coupon code “MARIA10” for 10% off your order at the shop.  Have a nice day!

    ———–SUPPLIES————


  • Missing You Card by Maria

    Missing You Card by Maria

    It feels like it’s been ages ago since I last posted on this blog (or maybe it’s the jet lag talking) but Maria here with you today to share this very simple shaker card, showcasing the Stitched Diagonal Backdrop die with the Missing You Brush Script Word & Sentiment die, the Fab Flowers 4×6 Stamp Set by Lawn Fawn and the Fab Flowers Dies with some Pretty Pink Jewels and Hearts of White Sequin mix.


    I stamped my images with some Lawn Fawn inks using my Tim Holtz stamping platform.  I die-cut the images with its coordinating dies.


    I die-cut another piece of some Neenah 110 lb. card stock using the new Stitched Diagonal Backdrop die.   This die cuts like butter and is perfect for shaker cards!


    I adhered my acetate onto the die-cut and added foam adhesive to create the well for my shaker card.  I poured the Hearts of White Sequin Mix on my card base and positioned it to make it easier for me to adhere my shaker well on top of the card base.


    I also die-cut the “Missing You” Brush Script Word and Sentiment die twice on some black and white card stock.  Since the card has mostly white on it, I wanted to create a shadow behind the Missing You script die so that it stands out, without overwhelming the design of the card.  I adhered this piece on top of the acetate.  Here’s what the card looks like:


    I just love this card design.  I think all the elements I used for this card just complimented each other.  Here’s a little close-up:


    The new Hearts of White Sequin Mix is so beautiful, I cannot wait to order more from the shop.  Also, don’t you just love the stitching details on the die-cut?  I am in-love with this design.


    I hope you like my shaker card today.  The supplies I used are listed and linked below.  Please don’t forget to use my coupon code “MARIA10” for 10% off your order at the shop.  While you’re there, don’t forget to check out the sales and specials going on.  I hope you have a wonderful day and happy crafting!


    ————-SUPPLIES———-


  • I Craft Therefore I Hoard

    I Craft Therefore I Hoard

    Hello my crafty friends! I hope you are all having a great week so far. Maria here with you today and I am back to share with you two card samples showcasing the new Crafter’s Gonna Craft stamp set, with the new Stitched Scalloped Collage Frame Die.


    I have been super busy traveling for the last few weeks that I don’t have a step-by-step instruction for you.  If you are a card maker or a scrapbooker, you would have figured out how I made the cards already but I apologize if you are a beginner.  Please know that once I am back on a regular schedule, I will have a step-by-step tutorial or even a YouTube video. I promise!  Here’s my first simple, one-layer card:


    This new stamp set is a must-have for any paper crafter!  Here’s another look:


    My second card just cracks me up!  If you are a crafter, I am sure you can relate with the sentiment.


    Isn’t it true though?  I am such a hoarder.  I collect anything and everything that I can use for a future project, it drives my husband nuts!  I didn’t realize how much hoarding I’ve been doing until it was time to pack up most of my craft supplies to move it all back to my home in Florida, USA.


    I also LOVE the new sparkling jewels at the shop.  They come in different colors but my favorite is the clear, sparkling one that I used on my project.  I prefer adhering it flat-side up and I think it gives more shine.


    I hope you like my projects today.  Please don’t forget to check out the August release by Kat Scrappiness.  The new dies are must-haves for sure!  Don’t forget to use my coupon code “MARIA10” for 10% off your order.  Also, don’t forget to check out the Lawn Fawn items that are currently on sale at the shop for 20% off by using code “LAWNFAWN”.  It is only valid until August 12th.  Have an amazing day and happy crafting!


    ——SUPPLIES—–


  • Father’s Day Card with Dad’s Tools

    Father’s Day Card with Dad’s Tools

    Hello my crafty friends, Maria here with you today on the blog!  I hope you are all having a great week so far.  Father’s Day is fast approaching and it is time to honor all the AMAZING dads out there.  The new Dad’s tools – 6×8 Layered stamp setis perfect for this type of occasion, or you can even make just-because cards.  It doesn’t always just have to be for one day out of the year.  I know if my Dad were here, I probably would make him a card at least once a month.

    I started out by stamping my images on Neenah solar white card stock, using my Tim Holtz Tonic Stamp Platform.  I think it is a must-have tool for stamping layered images.  Since this stamp set did not have matching dies, I used my Brother Scan N Cut2 to die-cut the images.

    I used the biggest of my Cross Stitched Rectangle dieto die-cut the blue patterned paper taken from the Gotta Have Gingham Petite Paper Pack 6×6 by Lawn Fawn.  I then used the third piece of the Cross Stitched Rectangle dieto die-cut a piece of silver card stock. I placed this card stock onto my We R Memory Keepers embossing folder and run it through my die-cutting machine to emboss this piece.

    I adhered my blue patterned paper onto my card base and then layered the embossed silver cardstock on top for my foreground.  On another piece of white card stock, I die-cut the word Dad with the Uppercase Condensed Alphabet Dies.  To give it some dimension, I used my foam adhesive to adhere the word Dad onto my card.

    I stamped the sentiment on a black card stock with my Versa-mark ink and used my white embossing powder then set it using my heating tool.  I also adhered the hammer and screwdriver images from the stamp set.  I finished the design by adhering my blue enamel dots on the four corners of my silver card stock embossed piece.  Here’s the card.


    KatScrapDadsToools1


    I honestly struggle with masculine cards so designing this was a bit of a challenge for me.  However, I love how this turned out.  Here’s a close-up look:


    KatScrapDadstools1A


    I hope you got inspired today.  Don’t forget to use my coupon code “MARIA10” for 10% off your order at the shop.  The supplies I used are listed and linked below.  Have a wonderful day!

     ———–SUPPLIES———-


    https://linkdeli.com/widget.js?1525091912704