Hello my crafty friends!
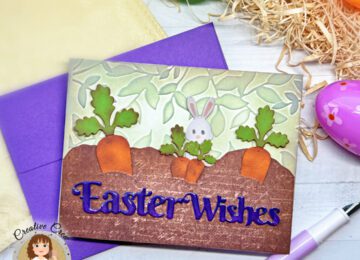
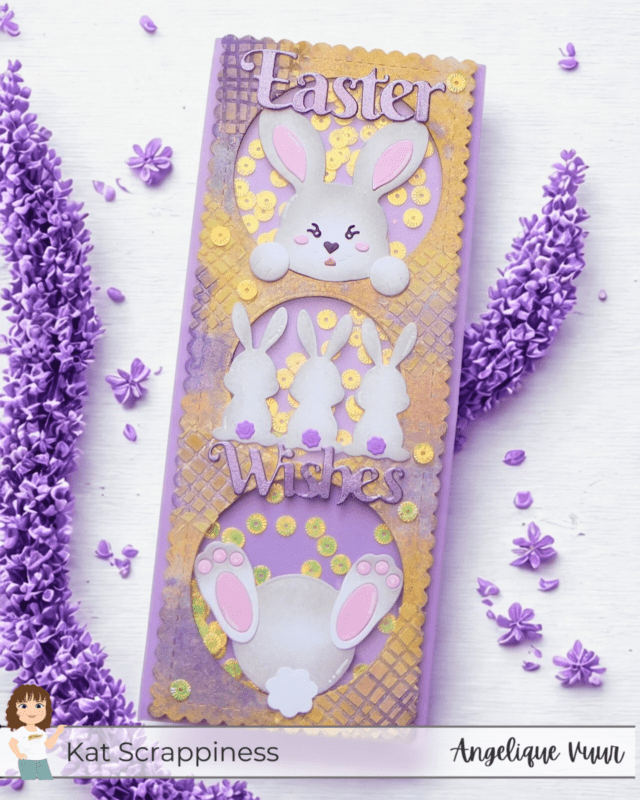
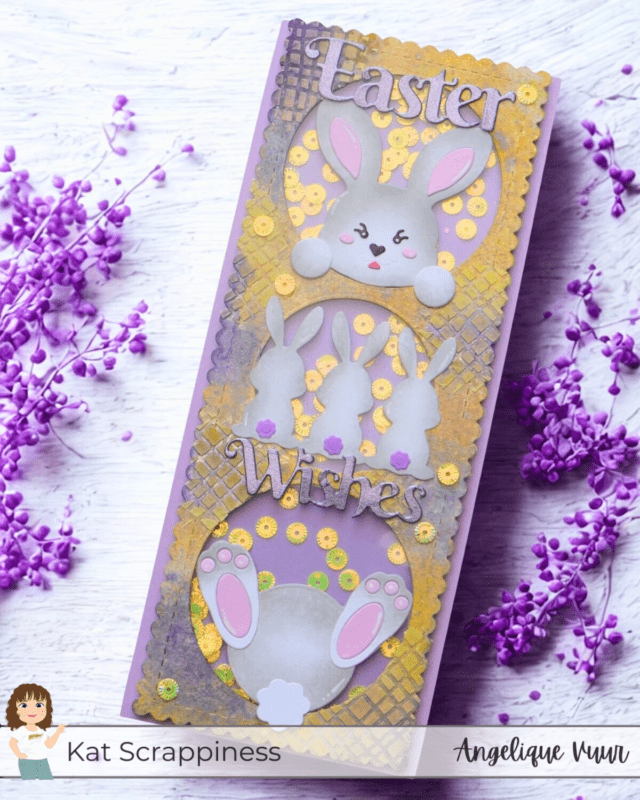
Angelique here with a new handmade card tutorial. Today I’m excited to share my first Easter card, a playful slimline shaker card created with the beautiful products from Kat Scrappiness. This Easter card combines die cutting, ink blending, mixed media texture, and of course… lots of shaker sparkle!
This card measures 3.5 x 8.5 inches, making it the perfect slimline size for building a fun vertical scene.
So let’s hop on!
Card Details
-
Card size: 3,5 by 8,5 inch
-
White card base
-
Lilac mat: 3,5 by 8,5 inch
-
White background panel watercolor paper: 3 1/4 by 8 1/4 inch scalloped
Kat Scrappiness Products Used
Step-by-Step Card Tutorial
1. Card Base & Front Panel
I started with a white card base sized 3.5 x 8.5 inches.
From lilac cardstock, I cut another panel in the same size to serve as the back of the shaker.
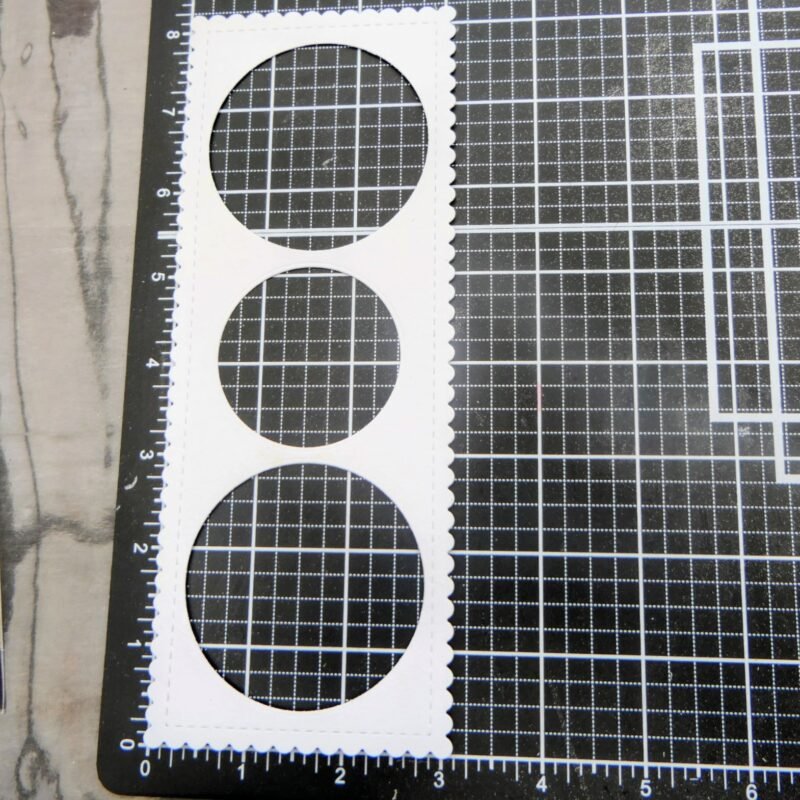
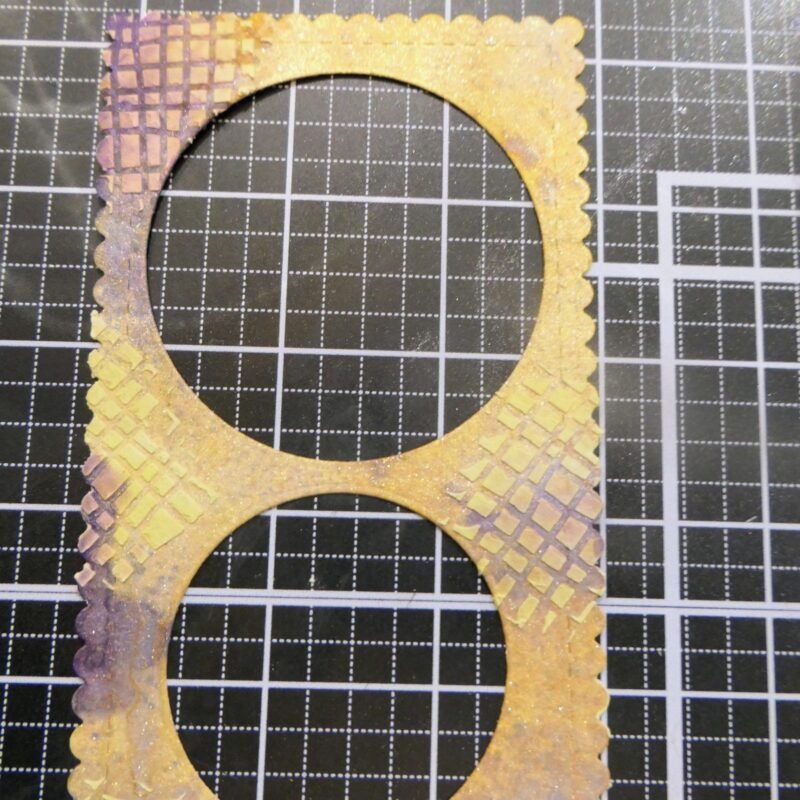
Using watercolor paper, I die cut the largest Stitched Scalloped Slimline Dies for the front panel.
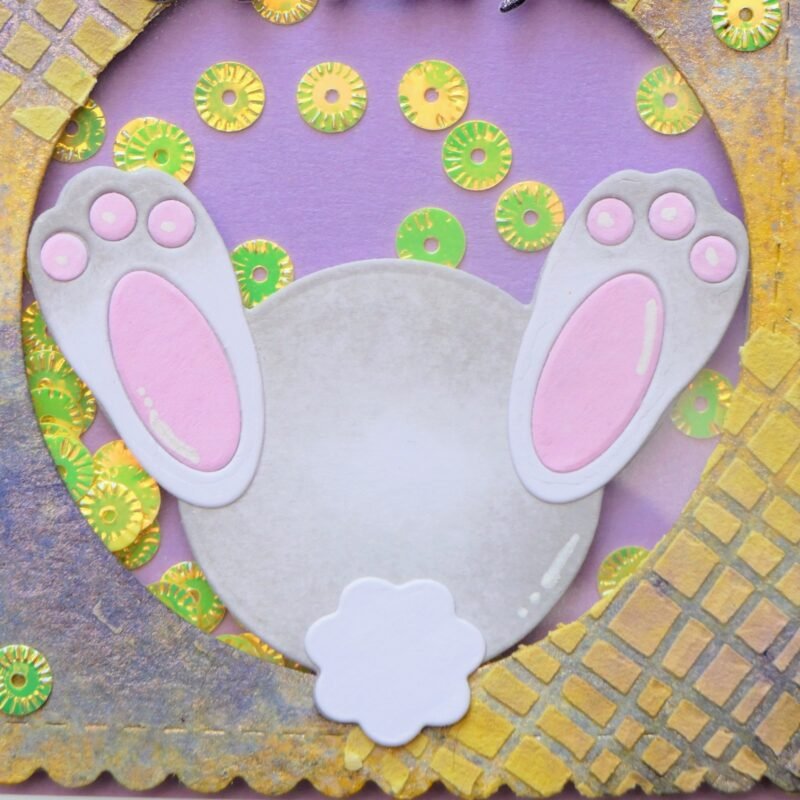
Next, I used the Never Ending Circle Craft Dies to create three shaker windows — one at the top, one at the bottom, and a slightly smaller circle in the center. This layout gives the design a playful stacked look.
I also die cut acetate using the same slimline die to fit perfectly behind the front panel.
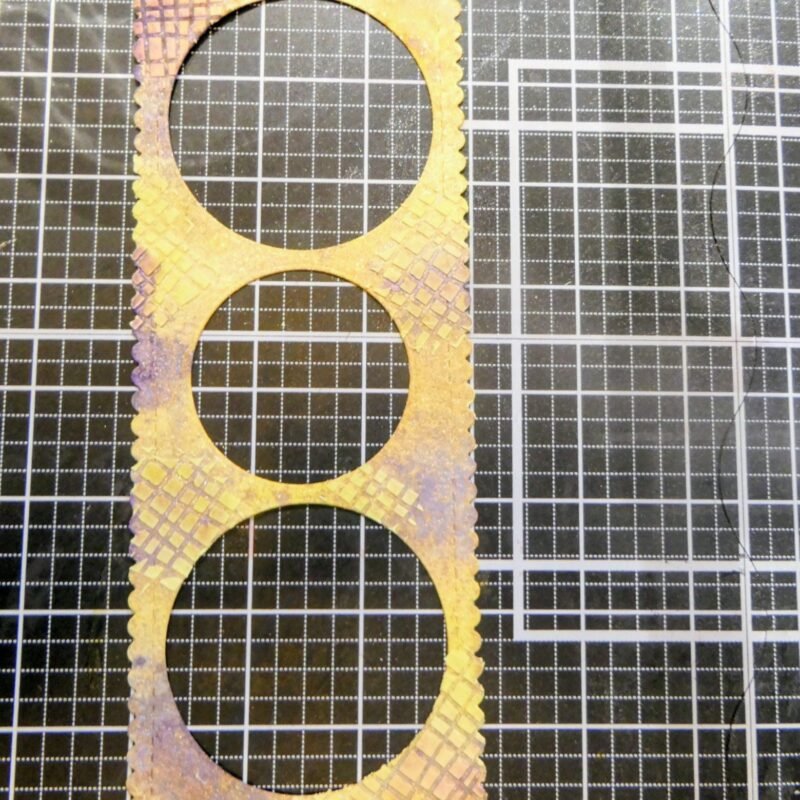
2. Mixed Media Background
Now for the fun part!
I lightly sprayed the watercolor panel with water and added spray colors in layers:
-
Yellow first
-
Light purple
-
Darker purple
Make sure to dry in between layers to avoid muddy colors.
When I was satisfied, I added beautiful shimmer using Tim Holtz Distress Spritz in Squeezed Lemonade.
To add texture, I mixed a small amount of white paste with some yellow ink to create a soft yellow tone. Using the Burlap Background 6×6 Stencil, I applied the paste in several areas for extra dimension and interest.
This step gives the card a subtle mixed media look while keeping it soft and spring-like.
3. Die Cutting & Coloring the Bunnies
I die cut all elements from the Peeking Bunny & Bunny Butt Craft Dies from white cardstock.
The eyes and nose were die cut from black cardstock.
For the trio of bunnies in the center, I used the row of bunnies from the Easter Wishes and a Bushel of Bunnies Craft Dies.
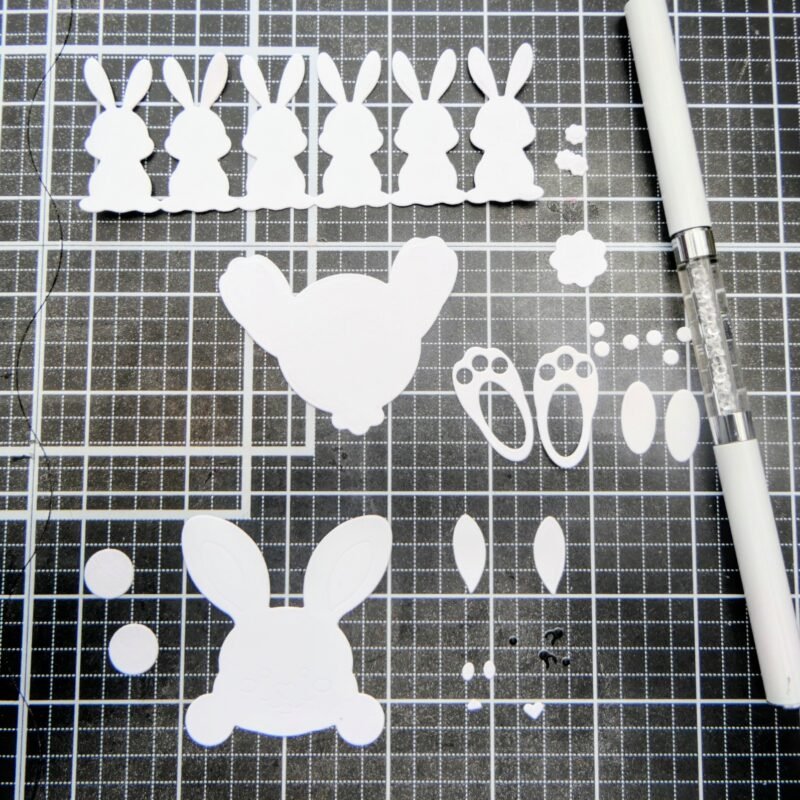
The sentiment “Easter Wishes” was die cut from purple pearl paper for a soft shine.
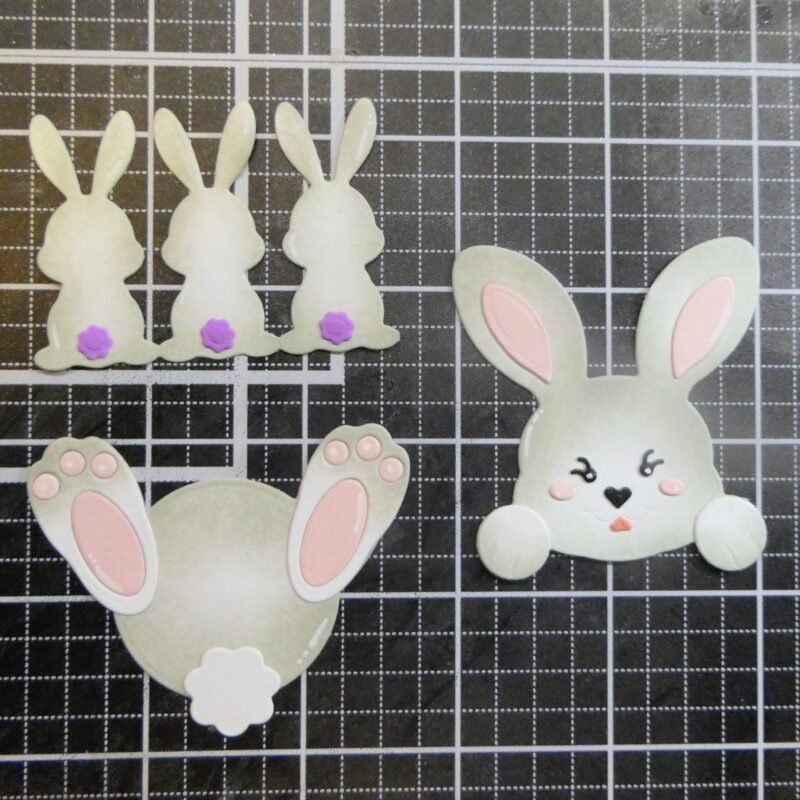
Coloring Details:
-
Bunnies blended grey (darker at the edges, lighter to the center) using Kat Scrappiness blending brushes
-
Inner ears & paws: soft pink
-
Tongue: light red
-
Small bunny tails: lilac
-
Large bunny tail: white
-
Highlights added with Nuvo White Gel Pen
4. Assembling the Shaker
I adhered the acetate behind the front panel using strong double-sided tape.
Foam tape was added around the edges and between the circle openings to create three separate shaker pockets. I used anti-static powder to prevent the sequins from sticking.
Each pocket was filled with the Yellow Pinwheel Sequin Mix, and the lilac cardstock panel was adhered to seal the shaker.
Finally, the completed shaker panel was attached to the white card base.
5. Finishing Touches
The bunnies were adhered onto each circle window:
-
Peeking bunny on top
-
Trio in the center
-
Bunny butt at the bottom
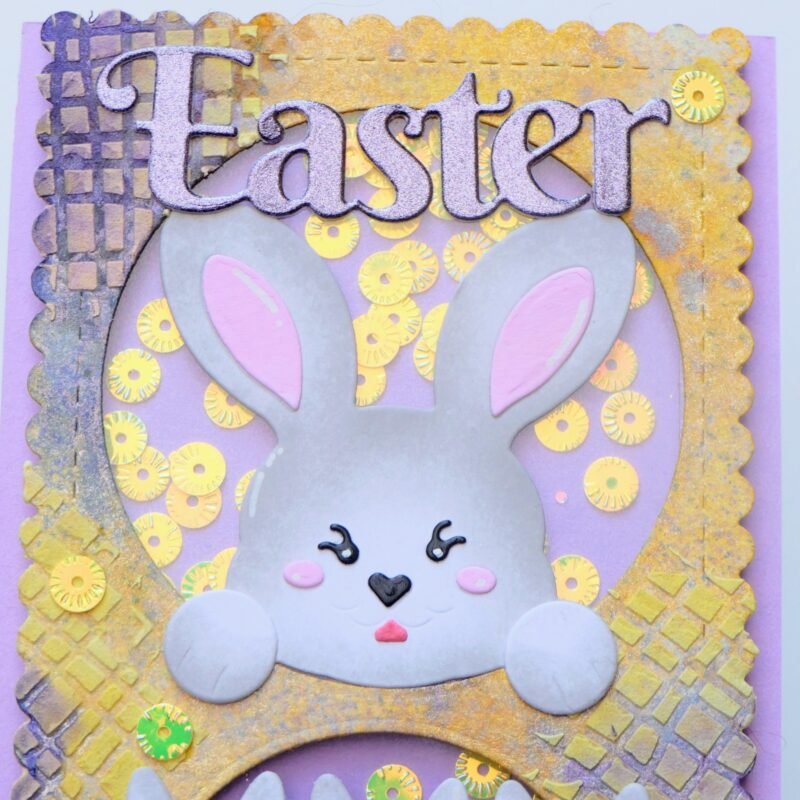
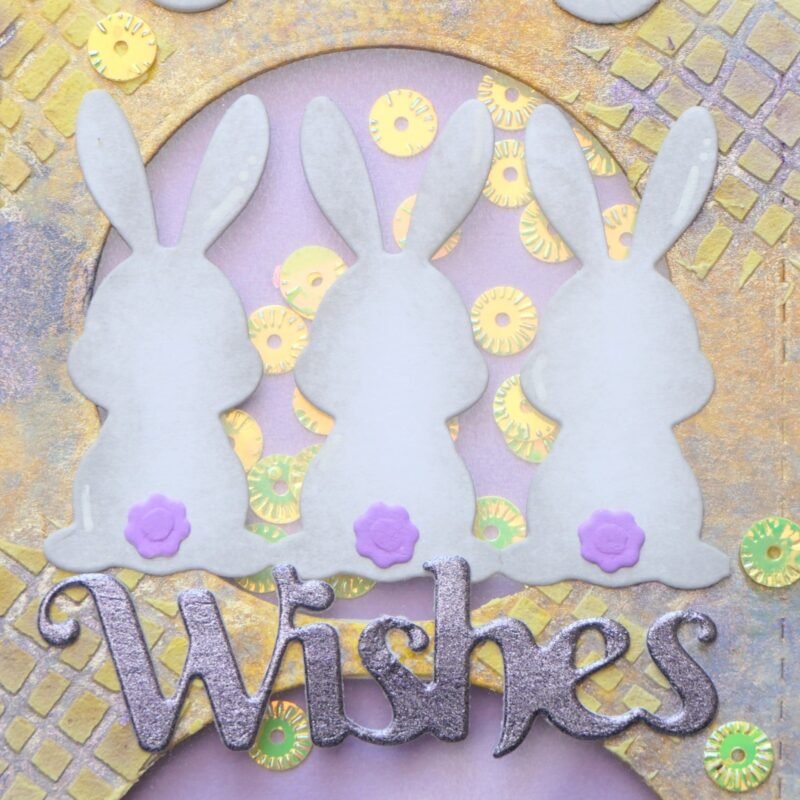
The sentiment was added, and I finished the card with a few extra sequins on the front for added sparkle and dimension.
And that completes this card.
Final Thoughts
This Easter slimline shaker card was such a joy to create. The combination of soft spring colors, texture, and playful bunny elements makes it perfect for sending cheerful Easter wishes.
I hope this tutorial inspires you to create your own slimline shaker card, whether it is an Easter card or anything else.
Thank you so much for stopping by, and don’t forget to check out What’s New at Kat Scrappiness for even more crafty inspiration!
Until next time — happy crafting!
Hugs,
Angelique 💗