Tag: double stitched circle dies

  • You Are a 24 Karat FRIEND!

    You Are a 24 Karat FRIEND!

    Happy Wednesday Friends!

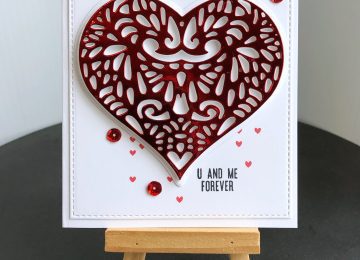
    Sheri here today with a card featuring the NEW Hippity Hoppity Bunnies and Hippity Hoppity Sentiment stamp sets from the Hop Into Easter Release! I kept the design simple and just added few layers that included some dry embossing and a strip of pattern paper from the Easter On Parade paper pack.

    Steps to Create Card:

    • Create a White Top Fold Card Base: 4 1/4″ x 5 1/2″ (4 1/4″ x 11″, scored at 5 1/2″).
    • Cut a White 4 1/4″ x 5 1/2″ panel and use the Pink & Main Easter Egg Stencil to dry emboss the panel for a faux embossed look. You will need to follow your die cut machines recommended sandwich. (For example I use a Vegabond 2 with a platform with 2 tabs from my old Sizzix: Open platform to tab 1, cutting pad, Stencil, Paper, Silicone Rubber Mat & Impressions Pad).
    • Trim embossed panel down to 4″ x 5 1/4″ using the Double Stitched Rectangle die set.
    • Cut Orange Strip: 1 3/4″ x 5 1/4″ (used Gina K Sweet Mango card stock).
    • Cut Carrot Pattern Paper Strip: 1 5/8″ x 5 1/4″ from the Easter on Parade paper pack.
    • Cut a White 2 1/2″ Circle using the Double Stitched Circle die set.
    • Cut a Green (Gina K Jelly Bean Green) 2 1/2″ Circle using the Double Stitched Circle die set. Then take the Slimline Grass Boarder die and trim towards the bottom to create the grass. For added texture I added a little ink blending with Gina K Grass Green ink.
    • Stamp the bunny from the Hippity Hoppity Bunnies stamp set and color. I stamped with alcohol friendly ink and used copic markers to color. There are no coordinating dies at this time so I fussy cut the image out.
    • Stamp sentiment from the Hippity Hoppity Sentiment stamp set in lower right corner. I used a Misti tool to get a perfect stamping as I had to stamp more than once with the embossing.
    • Assemble card.
    • For embellishment I added a few Olive Green Pearl Mix.

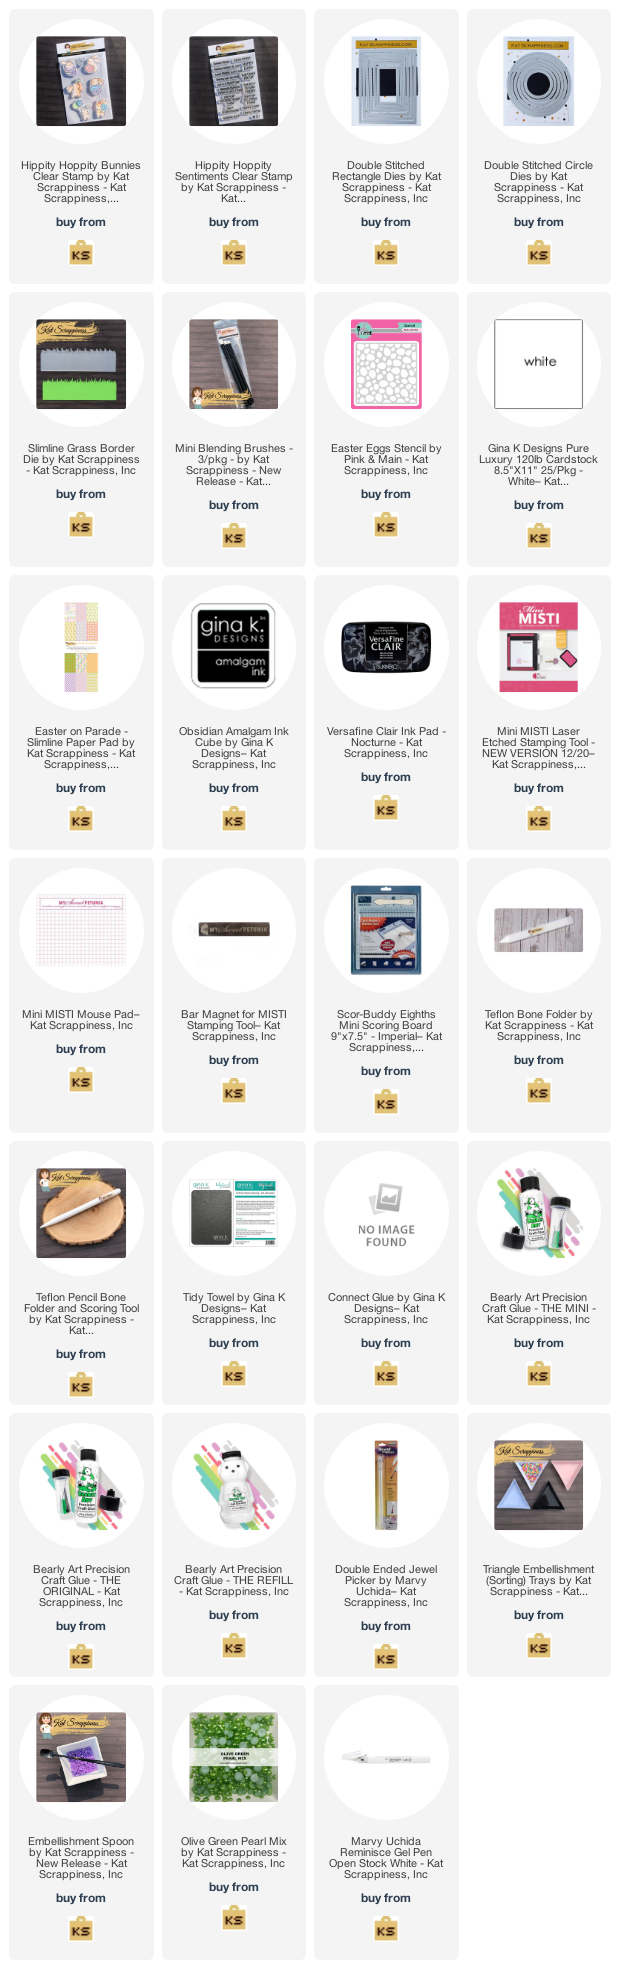
    Here’s a list of the supplies I used from the store.

    Affiliate links are used at no additional cost to you. Thank you so much for your support!


    Happy Stamping!!


  • I Miss You

    I Miss You

    Hello Crafty Friends!  It’s Caren here back with another card using one of the cute Quokka stamp sets!

    Card Details

    • Cut a piece of white card stock 4×5 1/4
    • Use a the double stitched circle dies from Kat Scrappiness to cut a circle out of the white panel
    • Ink blend using light yellow and green ink onto a piece of white card stock big enough to cover the circle cut out
    • Cut and color the Quokka from the Quokka’n Up stamp set with Copic markers
    • Layer the ink blended circle behind the white panel using foam dimensional adhesive
    • Adhere Quokka and additional flowers within the circle
    • Die cut speech bubble and ink blend with green ink
    • Stamp sentiment from Quokka’n Up stamp set onto speech bubble and adhere to panel
    • Add coordinating strips of patterned paper to panel
    • Adhere panel to card base

    Don’t forget to check back tomorrow – there is a new release featuring some great dies and pearls of many colors!

    Thanks for stopping by!

    – – –– – –– – –– – –– – –– – –– – –– – –– – –– – –– – –– – –– – –– – –– – –– – –– – –– – –– – –– – –– – –– –

    Here is a link to the Kat Scrappiness shop and direct links for products I used on today’s cards.

    – – – SUPPLIES for today’s project– – – – – – – – – – – – – – – – – – – – – – – – – – – – – – – – – – – – – – –

  • 3 Cards 1 Kit Using Botany Spring

    3 Cards 1 Kit Using Botany Spring

    Hi Everyone, it’s Tina here. Did you see the new kits in the shop? I made 3 cards using the Botany Spring Kit. It is a very pretty kit. In the video I refer to one of the embellishments as brads but it is actually Flair Buttons. They look like brads but without the mechanism in the back. Below is a process video showing you what is in the kit as well as how I made the 3 cards.

    YouTube Process Video

    After making these cards there was still plenty of papers and embellishments left to make many more. Below is a link to all the products used. Thank you for stopping by and have a wonderful day.

    Products Used:

    https://linkdeli.com/widget.js?1559654439292

  • Belated Birthday Card

    Belated Birthday Card

    Hi Everyone, it’s Tina here. Today I have a card to share with you using the new Stewart The Sloth Stamp Set along with some Kat Scrappiness classics. Below are the steps to create your own card.

    Step 1 – Trim White Cardstock to 8 1/2″ x 5 1/2″, score at 4 1/4″ and fold in half for a vertical side fold card.

    Step 2 – Diecut Double Stitched Rectangles and Double Stitched Circles using Patterned Paper to create a frame. I used Fawn Lawn Spring Fling. Adhere the frame using foam tape. Diecut Double Stitched Circles using Patterned Paper for the background in the center. Adhere to card using Nuvo Deluxe Adhesive.

    Step 3 – Stamp Stewart the Sloth image using Gina K Amalgam Ink. Color in using alcohol markers. I used Spectrum Noir Colouring System. Adhere to card using foam tape.

    Step 4 – Diecut Stitched Fishtail Banner using Patterned Paper (x2). I used Fawn Lawn Spring Fling. Stamp Stewart The Sloth sentiment on top of the diecut using Versafine Onyx Black Ink. Trim off the edges and adhere to 2nd banner using foam tape. Adhere the banner to card using Nuvo Deluxe Adhesive.

    Step 5 – Optional – Adhere Mystical Leaves Sprinkles using collage medium and a Crystal Katana.

    This card can be used for many occasions by changing the sentiment and patterned paper. Right now there is a sale going on celebrating 5 years. To receive 20% off your order use code: 5YEARS at checkout. Some exclusions Apply. Below is a link to all the products used. Thank you for stopping by and have a wonderful day.


    Products Used:

    https://linkdeli.com/widget.js?1559654439292

  • Rainbow Card with Video

    Rainbow Card with Video

    Welcome back to the blog Kat Scrappiness fans!

    It’s Lisa here with you today and I have a fun card to share

    with you using the newest Cloud Backdrop Die from the April Release.

    This die puts the cutest stitched clouds into your background

    without actually cutting them out.

    I thought what better to go with clouds than a fun and colorful rainbow.

    What do you do if you don’t have a rainbow die?

    Well you improvise, right…

    I used the Double Stitched Circle Dies to make my bright rainbow

    for this card and I added some fun clouds from the He Is Risen Dies .

    I used a sentiment from the Lawn Fawn Wavy Sayings stamp set

    and stamped it onto one of the clouds in Versafine Black Onyx Ink.

    I thought it would be cute to add some shiny rain drops to the card

    so I used an old teardrop punch from my stash and punched out

    5 raindrops to match my rainbow. I wanted to give them a shiny

    appearance so I added Gina K Crystalline Drops to each one of them.

    I filmed a video to show you just how I made my rainbow from the

    Double Stitched Circle Dies and you can watch it here or on YouTube.

    [youtube https://www.youtube.com/watch?v=Ai5G7ZBkyS4]

    Thanks so much for joining me and as always you can use my code LISA10

    and save 10% on your order in the Kat Scrappiness store!

    Have a great day, I already am!

    ?Lisa?

  • Medallion Coverplate Card

    Medallion Coverplate Card

    Happy Tuesday Kat Scrappiness fans!
    It’s Lisa here on the blog today and I’ve got a new card to share with you!
    Today is a special day on the blog because it is day 1 of of the New Releases
    and not only are we releasing some fabulous new dies
    but there is a GIVEAWAY as well!
    The newest die in our collection being released today is called the
    This intricate die will quickly become a favorite of yours and I’ve
    done some watercoloring with gold accents using this new die.
    Here is the card I made and I will walk you through the process I used to make it.
    Step 1:  First I took Salty Ocean and Lucky Clover Distress Ink and I “smooshed” them
    down onto my Tim Holtz glass media mat and then sprayed them with water.
     Next I cut a piece of watercolor paper down just slightly larger than the
    Medallion Coverplate die and laid it into the ink, moving it around to
    spread the ink all over the paper.  I dried it with my heat gun and
    then pressed it down again into the ink to cover the paper.
    Step 2: Once I was happy with the background pattern I did some ink splattering
    with the Gansai Tambi Starry Colors in gold all over the background with a
    large fan brush. It added a really nice shine to the panel!
    Step 3: When the entire panel was dry I took it over to my die cut machine and
    used the Medallion Coverplate die to cut it out.
    Step 4: Because the die is so intricate I used Elmer’s spray adhesive to mist
    the back of the panel so I could adhere it to my white card front. This technique
    works very well on dies with lots of intricate cuts.
    Step 5: Now that the panel was done and adhered to the card, the final step
    was to stamp the sentiment.  I stamped an older Happy Birthday stamp from
    my stash on to some vellum with Delicata Gold Ink and heat embossed it with
    I cut out the sentiment with the smallest die from the Double Stitched Circles Dies.
    Step 6: I added the vellum circle to the middle of the Medallion Coverplate panel
    with some liquid adhesive making sure to only get the glue behind the letters so
    it wouldn’t show through.
    I really love how the watercoloring came out so randomly all over the coverplate and the
    gold paint gives it a very elegant look!
    I hope you enjoyed seeing the process I used to make this card!
    Thank you so much for joining me today and I hope you’ll check out
    all of the new releases in the shop over the next few days!
    Don’t forget about the giveaway on the blog as well!
    If you use my code Lisa10 you can save 10% on your order anytime!
    Have a great day, I already am!
  • Lacy Layered Heart Madness

    Lacy Layered Heart Madness

    Hi Everyone, it’s Tina here. I have 5 cards to share with you today using the new Lacy Layered Heart Dies. I sort of went crazy lol. This die is so versatile and below you will see the possibilities are endless. This post will be a little long and I will give brief descriptions on how I created each one. All cards are A2 size (5 1/2″ x 4 1/4″). So let’s get started.

    For this card I diecut the Lacy Layered Heart Die (pattern) will foil cardstock and fun foam, the solid with white cardstock. I adhered the foil diecut on top of the fun foam and adhered it to the solid white diecut. I diecut the Double Stitched Rectangles using white cardstock. I added the sentiment from the Say It With Hearts stamp set and stamped mini hearts before adhering the whole panel to a card front. For some added interest I adhered sequins.

    For this card I used the pattern paper from American Crafts Loves Me 6×6. I diecut a Double Stitched Rectangles using white cardstock and adhered to the card front. I diecut Lacy Layered Heart the solid using patterned paper and adhered to the card front. I diecut Double Stitched Squares using the pattern paper which included a sentiment and adhered to the card. I diecut Stitched Sentiment Strip using the patterned paper and adhere to card. For added interest I adhered some Heart Sprinkles.

    For this card I embossed a piece of white cardstock and diecut it with the Double Stitched Rectangles die and adhered it to the card front using foam tape. Using a scrap piece of cardstock I added Distress Oxide Inks and diecut it using the Lacy Layered Heart solid and white cardstock for the pattern. I adhered both to the card. I diecut I Love You Shadow colored for the shadow and white for the sentiment. I adhered both to the card stock. I kept this one clean but you could add some Crystal Nuvo Drops Morning Dew for some added interest.

    For this card I used the Nuvo Glimmer Paste Moonstone with a Heart Stencil on white cardstock. Once dry I diecut it with the Double Stitched Rectangles and adhered it to the card front. I diecut the Lacy Layered Heart solid and pattern using red cardstock and adhered it to the right edge of card. I trimmed off the excess.  I stamped and colored an image and adhered it using foam tape. I diecut some little hearts and covered them with Crystal Nuvo Drops Morning Dew. I stamped the sentiment from the Say It With Hearts Stamp Set.

    For my last card I used the Life Changing Brushes to create a soft pastel background. I diecut it with the Double Stitched Rectangles and adhered it to the card front landscape. I diecut the Lacy Layered Heart pattern in white cardstock and adhered over the inked background. I inked on a scrap piece of cardstock one of the colors from my background and stamped the sentiment from the Say It With Hearts using versamark and heat embossing. I adhered it to the card using foam tape.

    I hope you enjoyed the many ways you can use the Lacy Layered Heart dies. You can also use it as a stencil or dry emboss it in your diecut machine. Below is a link to all the products used. Thank you for stopping by and have a wonderful day!

    Products Used:

    https://linkdeli.com/widget.js?1547805645855

  • Gate Fold Card

    Good morning, crafters!  Thank you for joining me today for my gate fold card project featuring some brand new items from Kat Scrappiness.  In this card I used the Wine Not stamp set, the Wine Not dies, the Peacock Backdrop die, and one of the Double Stitched Circle dies.  Let’s go ahead and walk through the steps I used to make this card project.


    The first step was to create an ink-blended background panel.  I used one of my favorite color combinations of Distress Ink in Picked Raspberry, Peacock Feathers, and Seedless Preserves.  Although my edges aren’t perfectly smooth and flawless, I will be die cutting this piece so I know that the imperfections will disappear 🙂  I also spritzed just a bit of water on it because I love the look of it and simply couldn’t resist!  Once the panel was completely dry, I ran it through my Big Shot with the Peacock Backdrop die, and then cut the panel lengthwise into two equal pieces.


    The second step was to create my gate fold card base, which is very easy to do.  I simply cut an 8.5×11″ piece of card stock in half so that I have an 8.5×5.5″ piece.  Then I scored a line at 2 1/8″ and another at 6 3/8.”  You could also score once at 2 1/8″, rotate your piece around and score again at the same measurement – whichever you prefer.  The idea is that you will have two flaps that fold over the front and meet neatly in the middle.  I then attached the two ink blended panels from step one to the outside of the gate flaps.


    For the focal piece, I cut a circle of the same color card stock with one of the Double Stitched Circle dies.  These dies are awesome – I particularly love the fact that you get a stitched line around the circle piece, and it also leaves behind a stitched line on the base piece (I save all of these to use in future projects.)  I also cut a strip of card stock to 8.5×1.5″ which will fold around the card and be secured in the middle with this stitched circle.  This will be my belly band to slide over the completed card and hold the gate closed.


    I used the Wine Not dies to cut out a little wine bottle, a wine glass, and the piece that makes the wine inside the glass.  I just love these cute dies!  They’re also a nice size – bigger than many other brands, which makes things SO much easier.  I really hate fiddling with itsy bitsy pieces!


    I decided to do some more ink blending on these pieces, and I am SO thrilled with how they turned out!  I used the same Distress Inks in Seedless Preserves and Peacock Feathers, but only brushed against one edge and let it fade away to white.  This gives such a soft look, especially against the more vibrant background panel and rich card stock color.  I gave these pieces a moment to dry so they wouldn’t smudge, then attached them flat to my stitched circle.  The circle was then attached to my belly band piece, and I made sure to check my spacing by sliding the band on and off my card base.  You want your band to be fitted, but loose enough to slide easily.


    Whenever I used a colored card base, I like to insert a white panel on the card interior.  I also decided to put my sentiment stamp from the Wine Not stamp set on this piece, using the same Peacock Feathers ink.  Did you notice that the “i” in “wine” is a little wine bottle?  Love this!!


    And here is my finished card!  I am very happy with this one, and will have to send it to one of my wine-loving friends.  I will also have to spend some serious time making backgrounds with the Peacock Backdrop die – it is absolutely gorgeous.  If you ever struggle with what to do on a card front, I highly recommend that you get this die for yourself 🙂  I have included a shopping link below for the Kat Scrappiness website, and remember to use your discount code “CYNTHIA10” to save 10% off your entire purchase.  See you next time with more Kat Scrappiness goodness!

    Kat Scrappiness website


  • “You’re Too Sweet” Card

    “You’re Too Sweet” Card

    Hello, crafters!  Today I will be sharing a card with you that I made using the new “Punny Snacks” stamp set.  This stamp set is full of adorable food images and funny sentiments to go with them.  I chose to use the ice cream cone and put the You’re Too Sweet sentiment with it.  I am a big fan of creating my own custom backgrounds, and the ice cream stamp is the perfect size to use for this.  I cut a panel of white card stock to 4×5.25″ and stamped the images repeatedly in a random pattern, using VersaFine Onyx Black ink.  This is my favorite black ink to use, and it lends itself beautifully to heat embossing (I used Ranger Clear powder for this project.)

    There are many different ways to color your card projects, but I decided to do a little watercoloring with my aqua brush and some Zig markers.  With only 2 shades of brown and 1 pink, I was able to get some pretty shading because of the water added with my brush.

    Once my background panel was done, I used the Kat Scrappiness Double Stitched Circle Dies to create a focal piece.  The great part about these dies is that you get a stitched detail on the piece you cut out (in this case my polka dot paper), and stitched detailing around the edge of the cut-out (my custom background.)  To give the background just a bit more pizzazz I decided to dry emboss it with one of my embossing folders (I used polka dots, but any uniform pattern would do.)

    For my focal piece, I stamped the ice cream cone and put the sentiment beneath it, again using VersaFine ink and Clear embossing powder.  I added a watercolored ice cream cone with some foam tape so that it would really stand out against the polka dot paper.  These images are really easy to cut out by hand!

    Finally, I popped up the focal piece with some foam tape and placed it over the circle opening of my background panel.  And there it is, my finished card!  I hope that you enjoyed this project and will give it a try for yourself.  If you’d like to watch a video of the full creation of this card, I’ve included a link below.  See you all soon!


    “You’re Too Sweet” process video


  • Owl Nuvo Mousse Tag with Angeline

    Owl Nuvo Mousse Tag with Angeline

    Hi my dear scrappy friends. Angeline here to share with you a tag I made using the brand new Kat Scrappiness Cute Layered Owl die. I also have a NEW VIDEO to show you how I made this tag step-by-step at the end of this post 🙂

    I first cut out the tag using Kat Scrappiness Stitched Scalloped Nesting tags die (I am using the largest size here). Then it’s time to color it up! 🙂 I grabbed my Nuvo Mousse [Indian Gold, Aquamarine, Pink Peony] , a Dylusions stencil [Shattered] and a stencil brush to dab the mousse onto my tag. What I like about these mousse is, they are so pretty in color and it dries fairly quickly!

    Then I assembled the pieces from the Kat Scrappiness Cute Layered Owl dieand blinged up the owl using lots of Nuvo Drops [colors listed in the supply list below]. I stamped the THANKS banner from the Hero Arts Thank You Messages stamp set, and fussy cut it. I also cut out the circle from Kat Scrappiness Double Stitched Circle die.

    Here is the process video on how I made this tag:

    Here is the list of supplies I used to make this card. For all the supplies linked, you can get it from Kat Scrappiness store. Do remember to use my code “Angeline10” to get 10% off your order! ? Happy shopping.

    ▬▬▬▬▬★ S U P P L I E S ★▬▬▬▬▬

    Kat Scrappiness Cute Layered Owl die

    Kat Scrappiness Stitched Scalloped Nesting tags die

    Kat Scrappiness Double Stitched Circle die

    Kat Scrappiness Sequin [Light Woodgrain]

    Nuvo Mousse [Indian Gold, Aquamarine, Pink Peony]

    Hero Arts Thank You Messages stamp set

    Nuvo Jewel Drops [Orange Marmalade]

    Nuvo Crystal & Glitter Drops [Sugared Almond, Apple Green, Aquatic Mist]

    Ranger Enamel Accents [Glacier White]

    Ranger Glossy Accents

    Dylusions stencil [Shattered]

    Stencil brush

    White cardstock

    Patterned Papers

    Foam Adhesive

    Aleene’s Quick dry glue

    Altenew Dye Ink [Jet Black]

    SaveSaveSaveSaveSaveSave

    SaveSave