Tag: Christmas Tree Coverplate die

  • Glitter Christmas Tree Card

    Glitter Christmas Tree Card

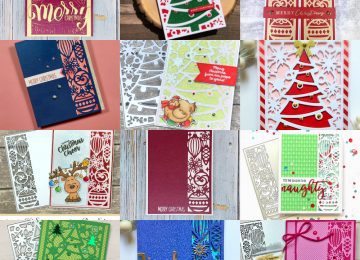
    Hi Everyone, it’s Tina here. I have one last Holiday card to share with you using the Christmas Tree Coverplate die with a fun technique. Below are the steps to create your own Holiday card.

    Step 1 – Trim White Cardstock to 8 1/2′ x 5 1/2″, score at 4 1/4″ and fold in half for a vertical side fold card. (A2)

    Step 2 – Diecut Christmas Tree Coverplate using White Cardstock (x3). Adhere all 3 layers together using Nuvo Deluxe Adhesive. Trace the outline of the Tree on Metallic Kraft Cardstock. Trim it out adhere to the bottom of the Christmas Tree diecuts. Adhere the entire panel to the card front using Nuvo Deluxe Adhesive. (If you don’t want to fussy cut you could always trim the Metallic Kraft Cardstock to cover the entire diecut.)

    Step 3 – Apply Nuvo Crystal Drops Morning Dew inside of the Tree only. While it is still wet sprinkle Glitter Powder. This will allow the glitter to stick to the Crystal Drops. Let dry.

    Step 4 – Diecut Merry Christmas With Shadow Die (only the word Merry) using Metallic Kraft Cardstock. Adhere to the card using Nuvo Deluxe Adhesive.

    Step 5 – For added interest and sparkle adhere White Diamond Sequins on the areas that has a ornament using a Crystal Katana and Collage Medium.

    There is a 30% off sale going on (no code needed) ending December 31st to be able to get all Christmas, Hannakah, Halloween and Thanksgiving Categories. Below is a link to all the products used. Thank you for stopping by and wishing you all a very Happy Near Year!
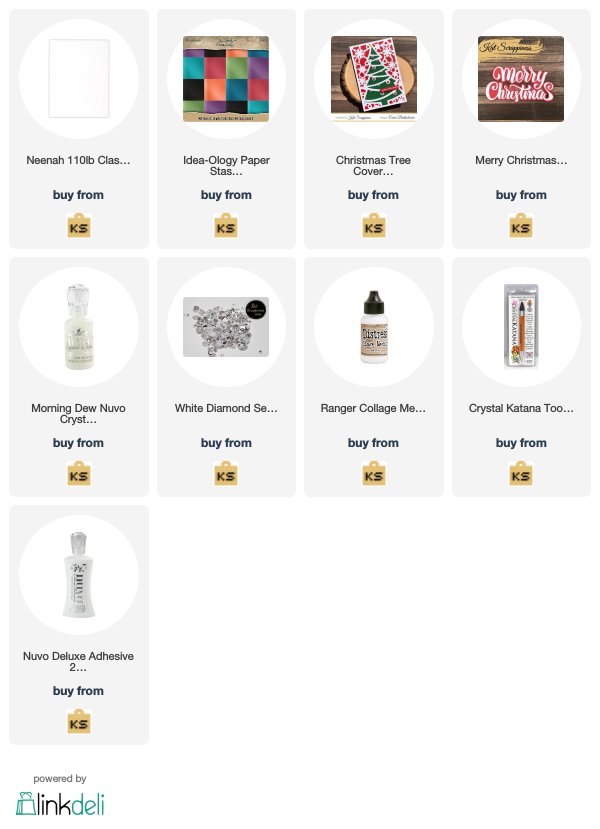
    Products Used:

    https://linkdeli.com/widget.js?1559654439292

  • Copper and Gold | Holiday Cards in Metallics

    Copper and Gold | Holiday Cards in Metallics

    Hi Everyone, it’s Priscilla here. Today I have two more holiday cards, this time though, glowing in metallic colors – one in copper, one in gold. Let’s get started!


    My first card uses the new Kat Scrappiness “Ornament Strip Cover Plate Die.” This die lends itself to formal and boldly designed cards, for sure!


    I die cut the front of the card using this new Cover Plate die and some black glimmer card stock from my stash. This die cuts “like butter,” by the way, even through a heavy card stock  such as this. I backed the opening with copper metallic card stock. Next I stamped the “Merry Christmas” sentiment from Kat‘s “Merry Critters” stamp set with clear embossing ink onto one of the Kat Scrappiness “Stitched Sentiments Dies” before heat setting it with copper embossing powder. A few of the copper sequins from the “Going Batty” sequin mix were the finishing touch.


    My second cards features the new Kat Scrappiness “Christmas Tree Cover Plate Die” .  This die creates an instant card just by its size!

    I again used some black glimmer card stock from my stash and die cut the front of the card using Kat’s new “Christmas Tree Cover Plate Die . I adhered this Christmas tree die cut over a layer of gold mirror glossy card stock. Similar to my first card, I stamped the “Merry Christmas” sentiment from Kat‘s “Merry Critters” stamp set with clear embossing inkonto one of the Kat Scrappiness “Stitched Sentiments Dies” before heat setting it with gold embossing powder. A few“Gold Jewels” finished this card.

    Thank you so much for stopping by! Don’t forget to check out what’s NEW in Kat’s Shop, and follow my blog and Instagram for more “Kat Scrappiness Amazingness”!

    Priscilla ?❄

    The supplies I used are listed and linked below.

    SUPPLIES

  • Modern Christmas by Martha Lucia

    Hello Kat Scrappiness friends, Martha Lucia here with you! I have two Modern Christmas Cards. My first card was made with the negative pieces of the Christmas Tree Cover Plate. If you want to see the origin of this pieces, you can click here.

    Modern Christmas Cards

    I die cut the Christmas Tree Cover Plate onto Gold Glitter Sheet and before to move the die cut piece from the die, I pasted double sided foam tape over the large pieces and added a dot of glue over the small pieces. I placed the card base over the back side of the die and press it onto the die to transfer all the negative pieces.

    Christmas Cover Plates

    To finalize the card, I added a stamped sentiment and some flat sequins from the Golden Anniversary Sequins and some small greens from the Sparkling Wintergreen Mix, both from the Kat Scrappiness Collection.

    Modern Christmas Cards

    My next project is a colorful Christmas card that I made using the Merry Christmas Word Sentiment Shadow Die. The card base of my card is Call Me Clover Card stock. I cut a second layer using the same color of card stock and from it, I die cut the Shadow piece of the Merry Christmas Word Sentiment Shadow Die. Then I embossed this layer with a classic dotted embossing folder. I pasted the layer over the card base using double sided foam tape.

    Modern Christmas Cards

    I die cut the Merry Christmas Word using silver dotted glitter from Tim Holz and paste it trough the window created on the top layer. To finalize the card, I just added  two stamped images that I create with the Merry Critters Stamp set from Kat Scrappiness and colored with Spectrum Noir Illustrator Markers.

    Thank you for stopping by and see you soon with more Christmas Inspiration.

  • Holidays in Blues and Grays

    Holidays in Blues and Grays

    Hi Everyone, it’s Priscilla here. Today I have two holiday cards with a “not-your-ordinary” color scheme. Blue and gray for the Holidays? Why not? Let’s get started!

    For this first card, I used the just-released “Christmas Tree Coverplate” die from Kat Scrappiness. Such a beautiful die and so easy to craft with! I die cut the “Christmas Tree Coverplate” out of steel gray card stock and then backed it with with a new-to-me acetate I got from Kat‘s shop, the Crafter’s Companion “Luxury Snowfall Acetate.” No need to add snow – it’s already printed on the acetate! Perfect for all those upcoming winter cards!


    I mounted this top layer over a baby blue card stock layer and then adhered everything to an A2 card base. I layered the “Happy Holidays” die sentiment with blue and white card stock, adhered it to the front, and then added a few Kat Scrappiness “White Snowflake Sprinkles” on the tree. Done, and so easy!


    For my second card, I used the “Pine Tree/ Icicle Duo Border Die” from Kat Scrappiness.

    This border die is like having two dies in one because when used upright, it cuts out a Pine Tree Border, and when flipped around, it creates an icicle border!

    For my card I used the die to create an icicle border, adding it to the top of a evergreen stenciled background. I used the Newton’s Nook Designs “Evergreen Stencil” and white pigment ink over blue-gray card stock to create my wintery backdrop. The white deer and snowy slope are from Kat’s “Crafters Essentials – Winter Dies”, and the silver embossed “warm winter wishes” is from the Lawn Fawn “Winter Scripty Sentiments.” Kat‘s “Sparkling Clear Jewels” completed this card.


    Thank you so much for stopping by! Don’t forget to check out what’s NEW in Kat’s Shop, and follow my blog and Instagram for more “Kat Scrappiness Amazingness”!

    Priscilla ?❄?

    The supplies I used are listed and linked below.

    SUPPLIES

  • KS November Release – Day 1 – Christmas Coverplates

    KS November Release – Day 1 – Christmas Coverplates

    Before I proceed with the release post, I’d like to apologize as I have completely missed to announce the winner of our last Shaker Kit mid-month release.  I have moved houses and took a much-needed break from DT duties.  Please forgive me for this late announcement.  The winner of the shaker kit is BECCA Y.  Please email Kathleen at winners@katscrappiness.com to claim 3 shaker kits of your choice.


    Now for the best part, it is Day 1 of our November release and we have a lot to show you!   For today’s release, we are showcasing  two Christmas dies – the Ornament Strip Coverplate and the Christmas Tree Coverplate.  We also have a GIVEAWAY so please scroll through at the end of this post to find out how you can WIN.


    We have a lot of samples to show you today, including a video by our YT DT members so let’s get started.


    ADAM KARLE


    Adam created a unique design by die-cutting the Ornament Strip Coverplate die twice and creating a gatefold card.


    CAREN BARTHOLOMEW


    Such a  beautiful Christmas card by Caren using traditional Christmas colors and the jewels she added just gave it some festive touch.


    Simple and classy!


    DAWN SOTO (YT TEAM)


    I absolutely LOVE the samples that Dawn created this month.  Please be sure to check out our YT channel throughout the month as Dawn will be showing you how she made both cards.


    JO THOMPSON (YT TEAM)


    Jo has a special treat for you today with her process video of how she made her card:


    MARIA RUSSELL


    MARTHA GOMEZ


    Martha created some stunning designs using both dies.  Wait until you see the other samples she created.  You will be seeing them all throughout the month.


    MEGHAN KENNIHAN


    I just adore this Fuschia pink and red color combo on Meghan’s card.  She also added some jewels to give it a festive touch.


    PRISCILLA JOSEPH


    Priscilla created two beautiful Christmas cards using the new dies and some older sentiment dies from the shop, as well as the snowflake sprinkles.


    TINA DORNBAUM

    Tina used her Crafter’s Companion Foil Press to foil the Christmas Tree Coverplate die.    She added the “merry” sentiment using the new Merry Christmas sentiment with shadow die that you will be seeing tomorrow.  Such a classy design.


    Would you like to win the new dies we showcased today?   We will choose TWO winnersOne lucky winner will win the Christmas Tree Coverplate die and one lucky winner will win the Ornament Strip Coverplate die.
    Here’s how to win:
    Leave a comment on this blog post and tell us what project or projects inspired you today.  You have until November 7th to leave a comment.  Winners will be announced on November 8, 2019All winners should send an email to: winners@katscrappiness.com to claim their prize within 48 hours.


    ———–SUPPLIES———–