It’s the sale of the year! 🎉
Kat Scrappiness is dropping a BETTER than Black Friday Sale — yes, better than the real thing! 😱
30% OFF the entire store, one day only: November 21st!
Grab your wants, needs, and crafty must-haves before they’re gone!

It’s the sale of the year! 🎉
Kat Scrappiness is dropping a BETTER than Black Friday Sale — yes, better than the real thing! 😱
30% OFF the entire store, one day only: November 21st!
Grab your wants, needs, and crafty must-haves before they’re gone!

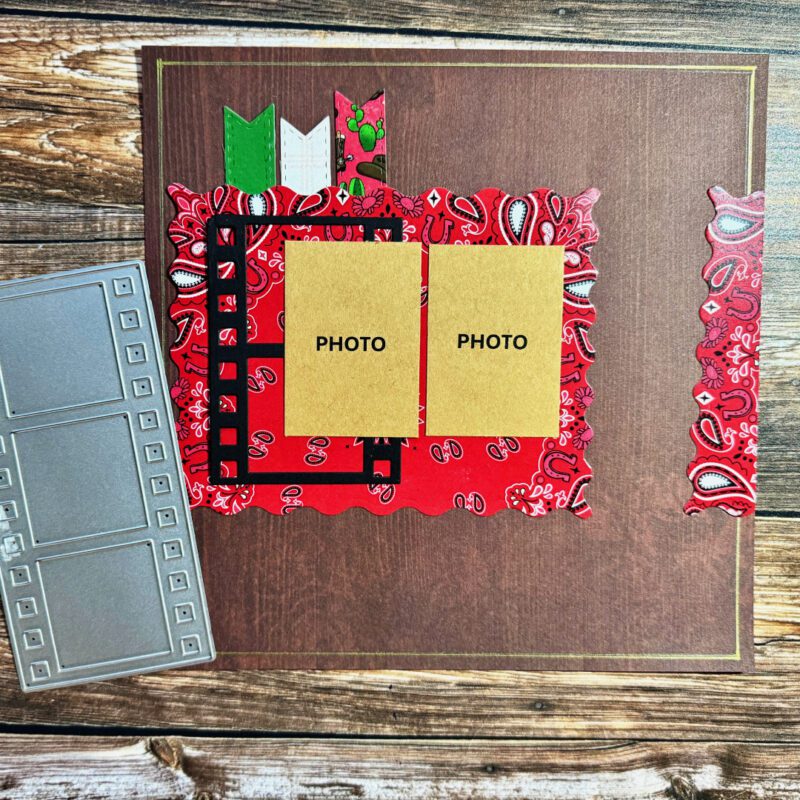

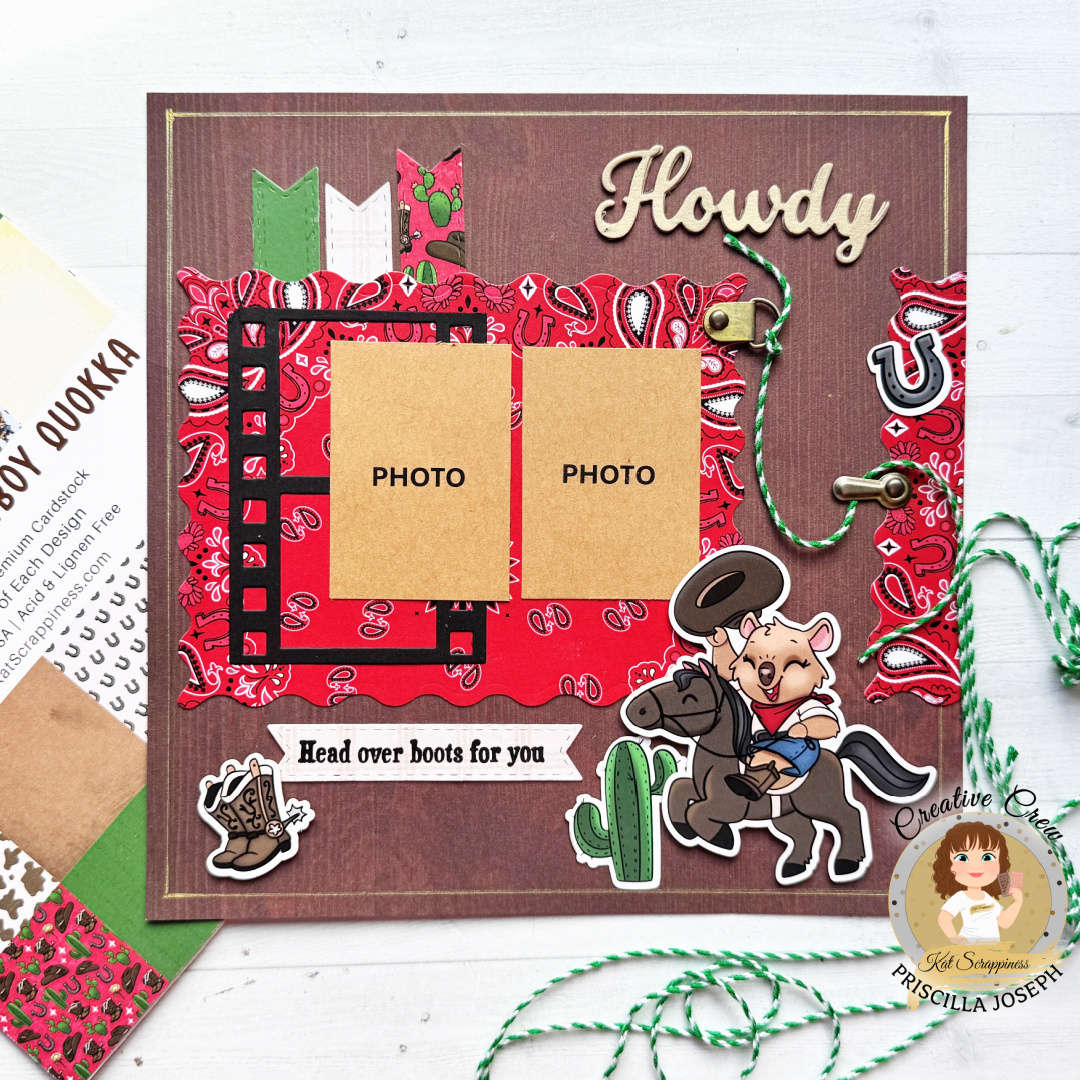
Here is the finished one-page layout:
Don’t forget to check out what’s NEW in Kat’s Shop, and follow my blog, Instagram, and Facebook for more “Kat Scrappiness Amazingness”!
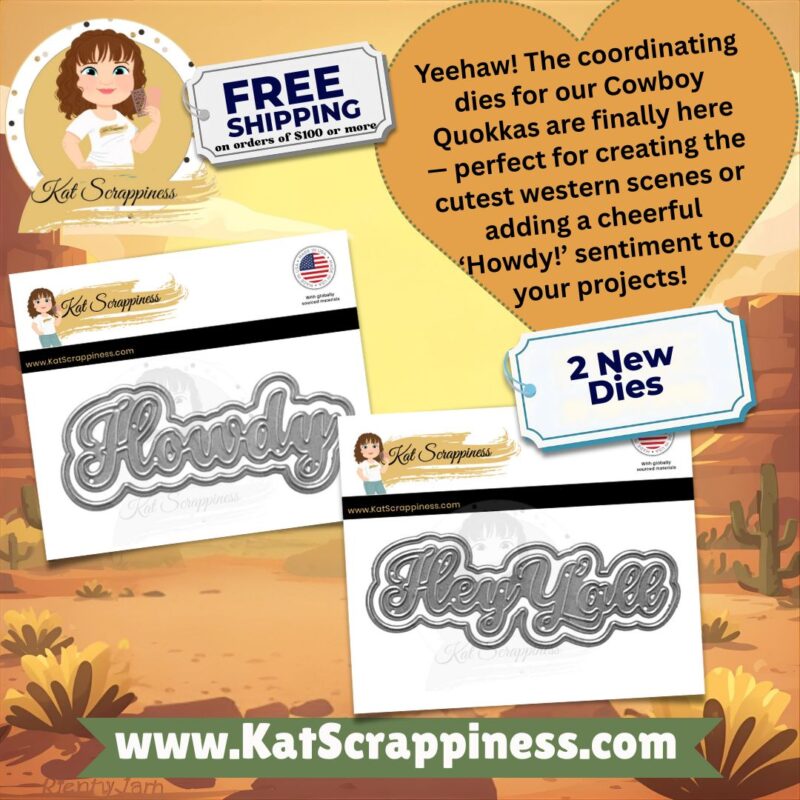
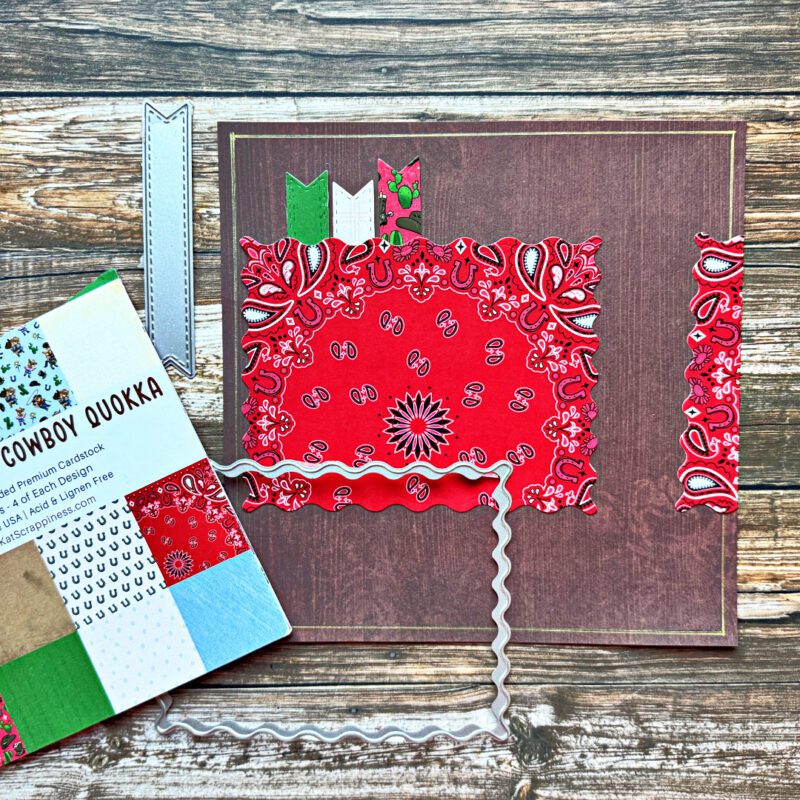
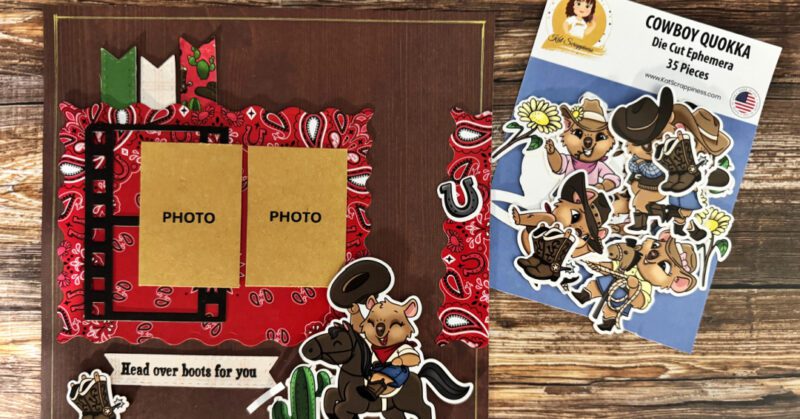
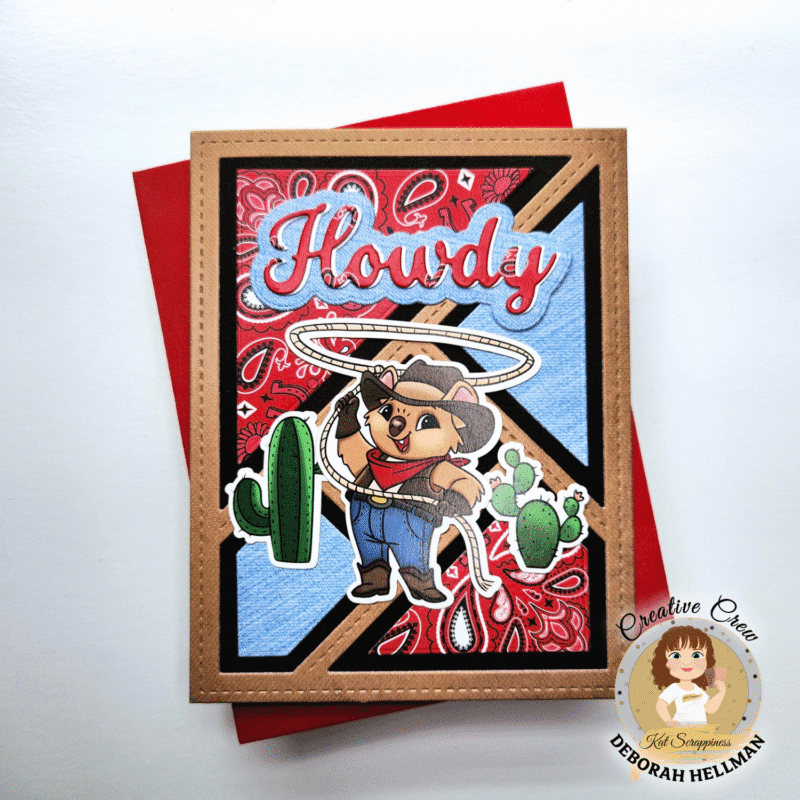
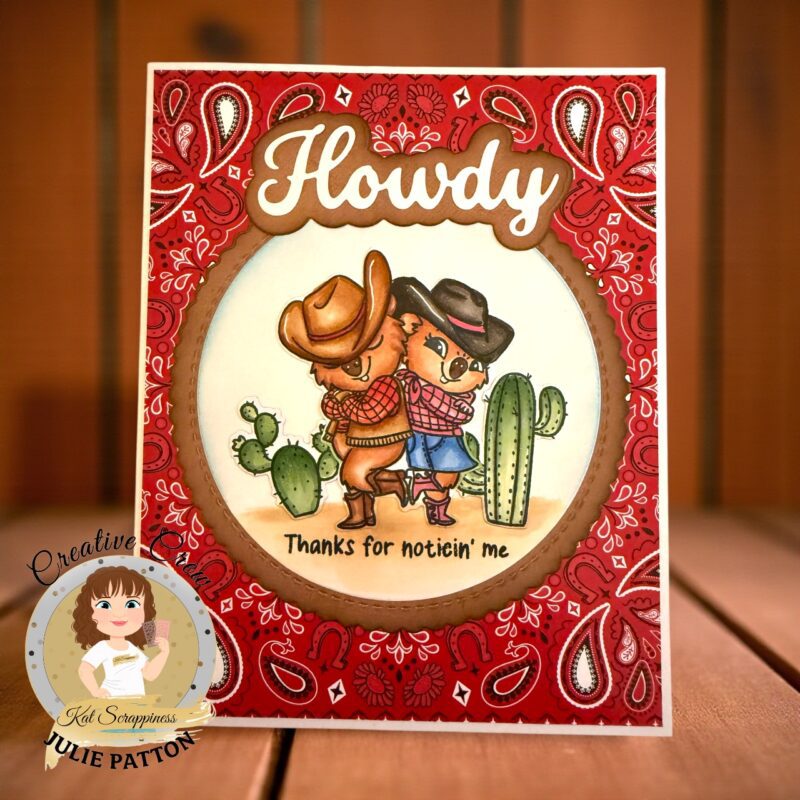
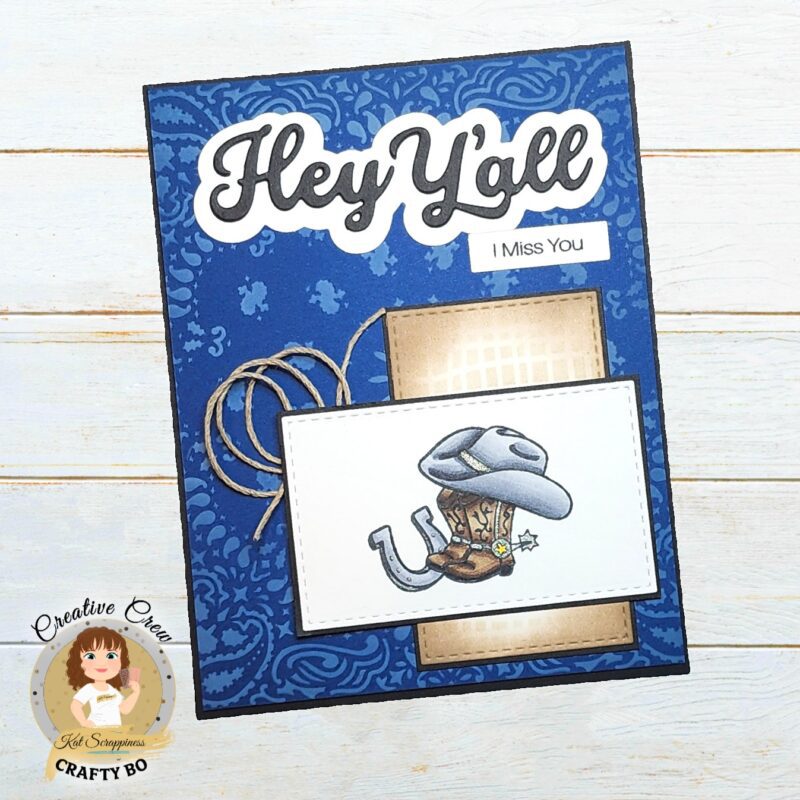
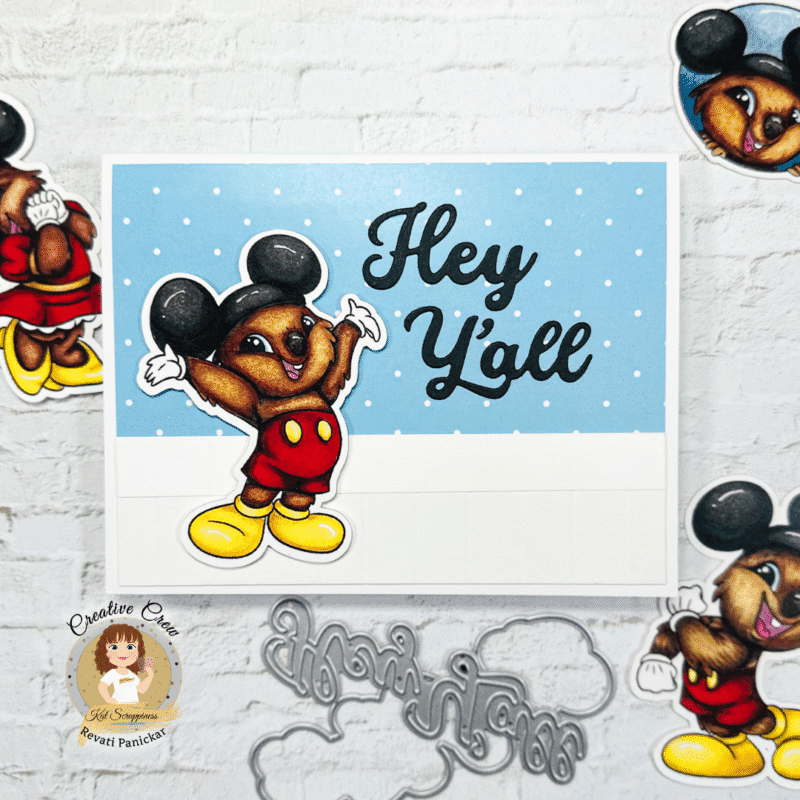
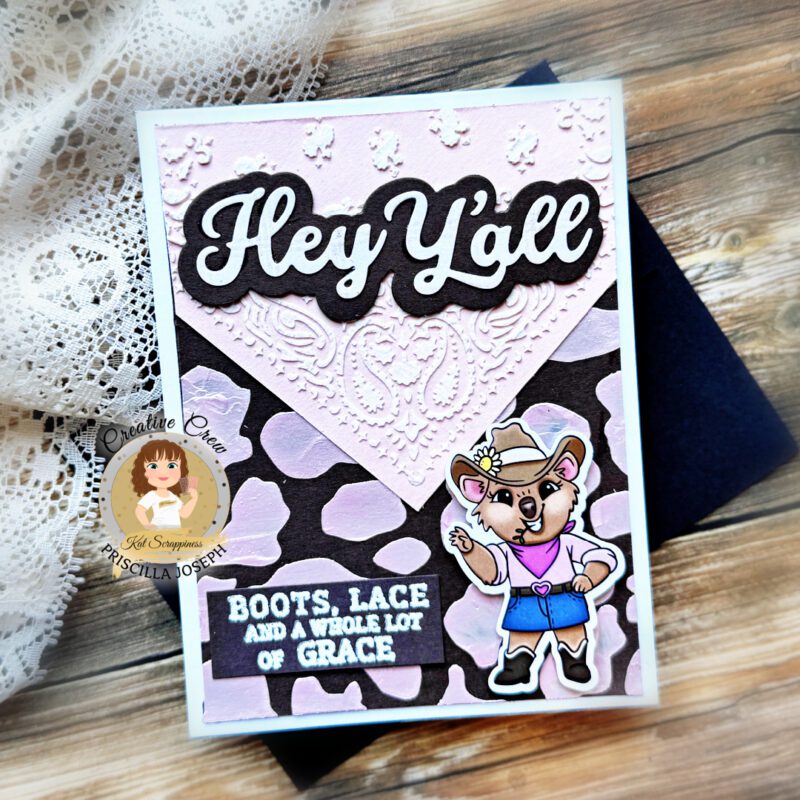
We have 2 new die-cuts that are the perfect addition to our Cowboy Quokkas at Kat Scrappiness. Get THEM HERE.
 |
 |
 |
 |
 |
 |
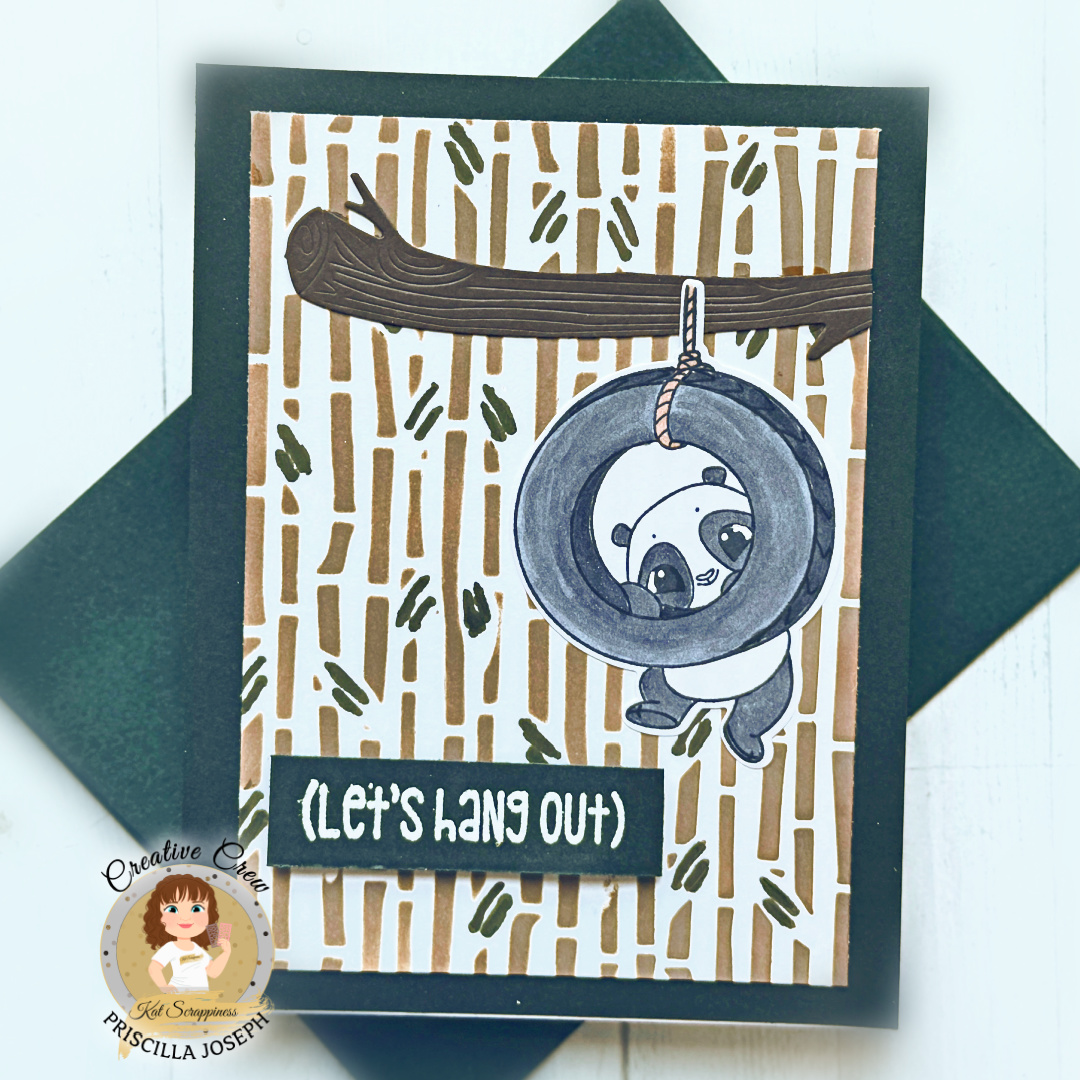
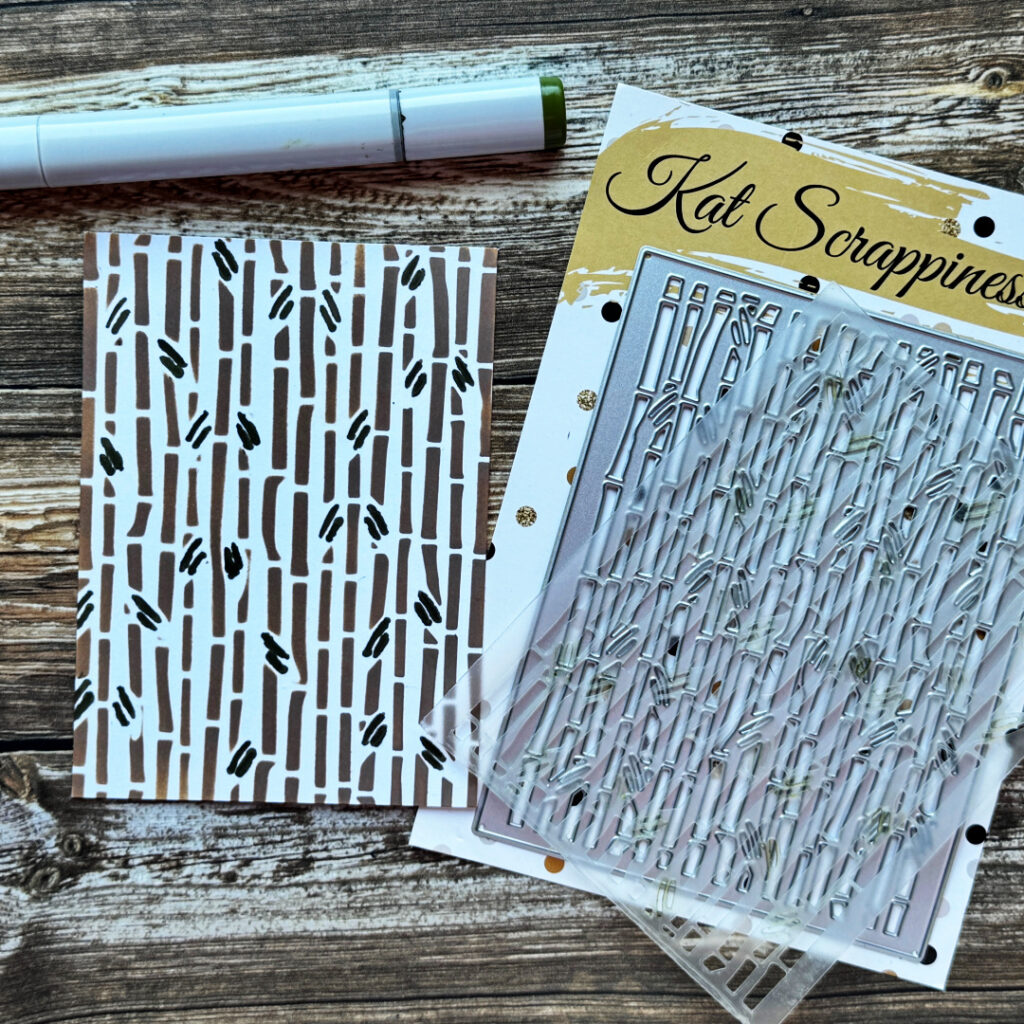
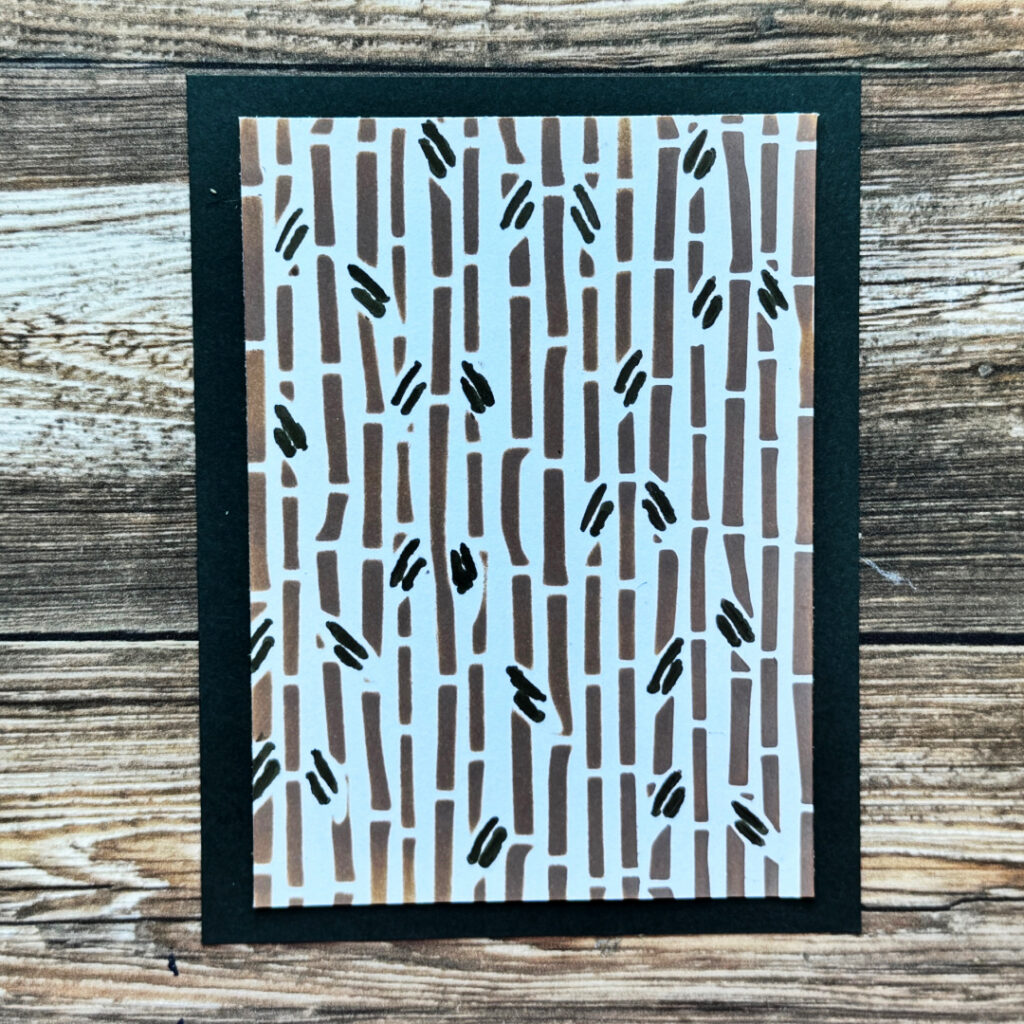
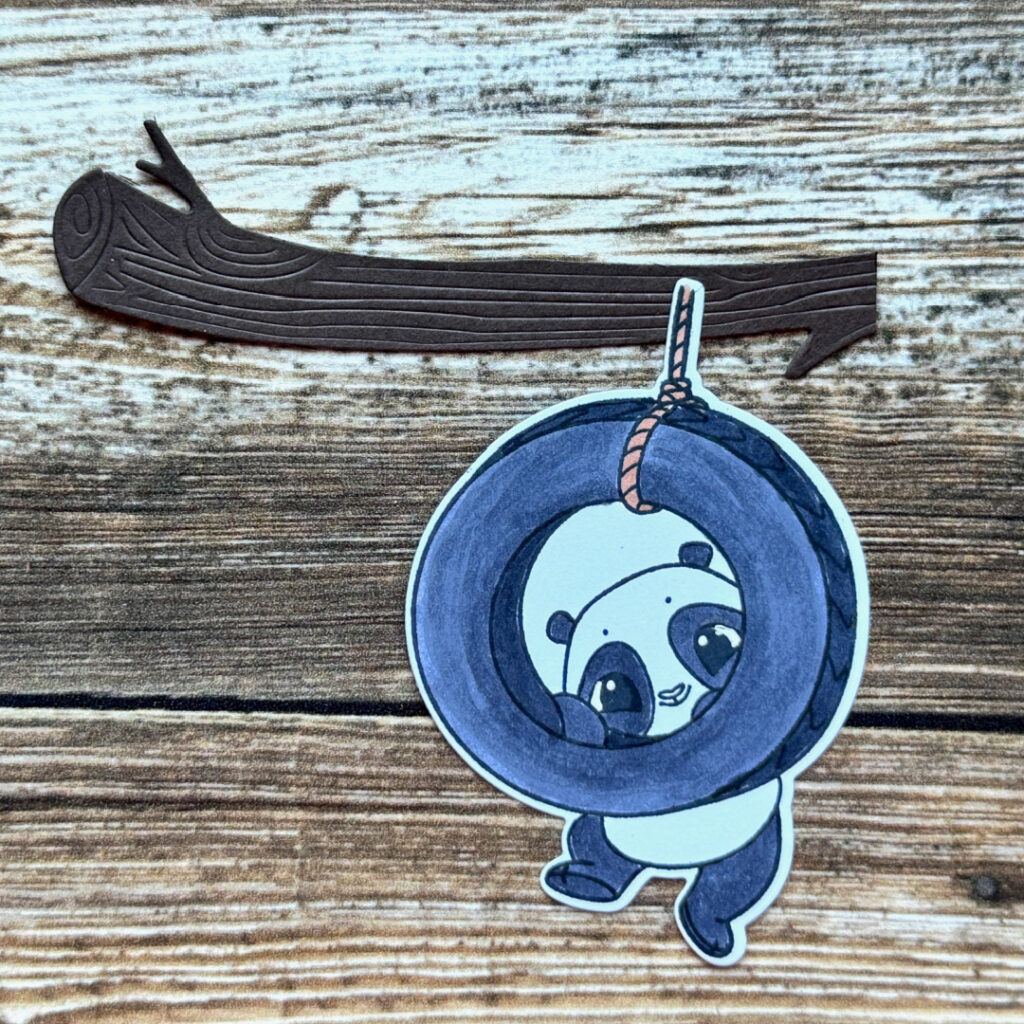
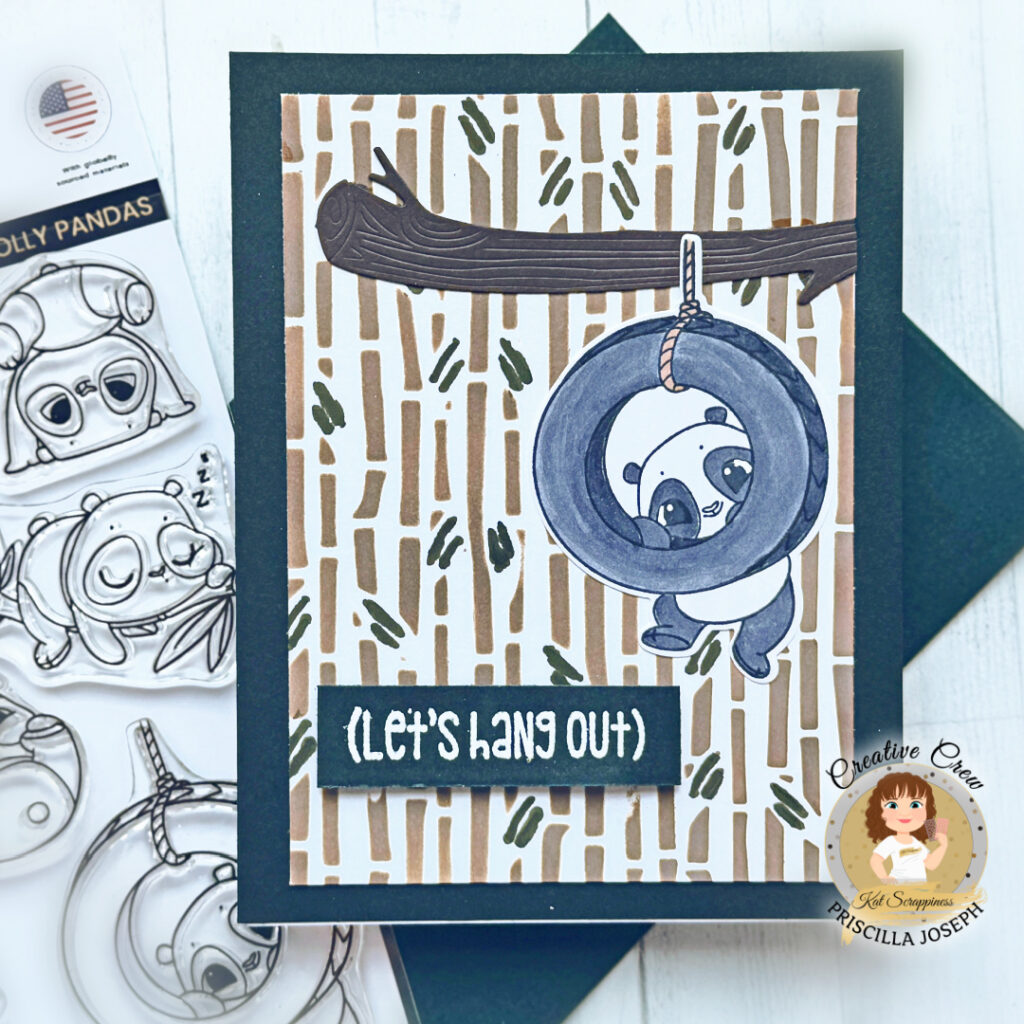
Hello Crafty Friends! Priscilla here from Nubble Light Designs, sharing a playful and pun-filled card featuring the new“Rolly Polly” stamp and die set from Kat Scrappiness! This adorable panda is having the time of his life swinging from a tire on a sturdy branch, surrounded by a hand-colored bamboo background created using the “Bamboo Background Craft Die” as a D.I.Y. stencil. The charming sentiment, “Let’s Hang Out,” ties it all together for a lighthearted design that’s perfect for spreading smiles and a little panda cheer!
Don’t forget to check out what’s NEW in Kat’s Shop, and follow my blog, Instagram, and Facebook for more “Kat Scrappiness Amazingness”!
Hello, my crafty friends!
Angelique here with a brand-new Christmas card blog for you!
As promised, it’s another festive one — but this time, a little bit different. I’m sharing three Christmas cards that look similar at first glance, yet each one has its own creative twist.
For all three cards, I used the same main die sets and created my backgrounds by embossing with a die. I’ll show you several ways to step it up (or keep it simple!) depending on how much time you want to spend.
* On card one, I cut everything from white cardstock and did all the ink blending myself.
* For card two, I used colored cardstock, but still added a touch of ink blending.
* And card three is the easiest version — made with colored and glitter cardstock for quick sparkle and shine.
Each card also has its own finishing touch, so you’ll see how easy it is to adapt one design to different levels of detail.
This blog is a bit longer than usual, but I hope you’ll enjoy it! So sit back, grab your favorite drink, and let’s get crafty together.
🧰 Kat Scrappiness Supplies Used:
Stained Glass Poinsettia Window Craft Die – used on all three cards
Small Poinsettia Craft Dies – featured on Card 2 and Card 3
Large Poinsettia Craft Dies – featured on Card 1
Christmas Foliage Craft Dies – used across all cards
Festive Christmas Arrangement Craft Dies – used across all cards
Christmas Baubles Craft Dies – used across all cards
Christmas Wreath Craft Die – featured on Card 3
Merry Christmas Chipboard Embellishments – used on Card 1 and 2
Crystal AB Rhinestone Mix – finishing touch on Card 1
Ruby Red Rhinestone Mix – finishing touch on Card 2
🗒 Card Details
The background for all three cards is made with the Stained Glass Poinsettia Window Craft Die, an A2-sized die.
You can keep it as an A2 card or place a colored mat behind it and adhere it to an A7 base — like I did.
It’s purely a matter of preference! If you prefer an A2 card, just skip the mat and attach your embossed panel directly to an A2 card base.
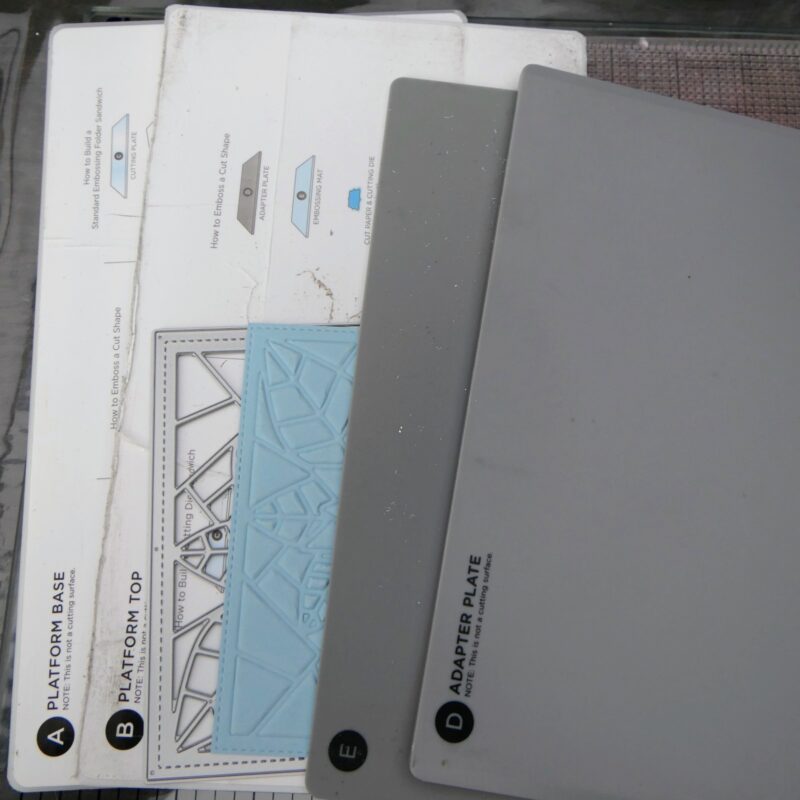
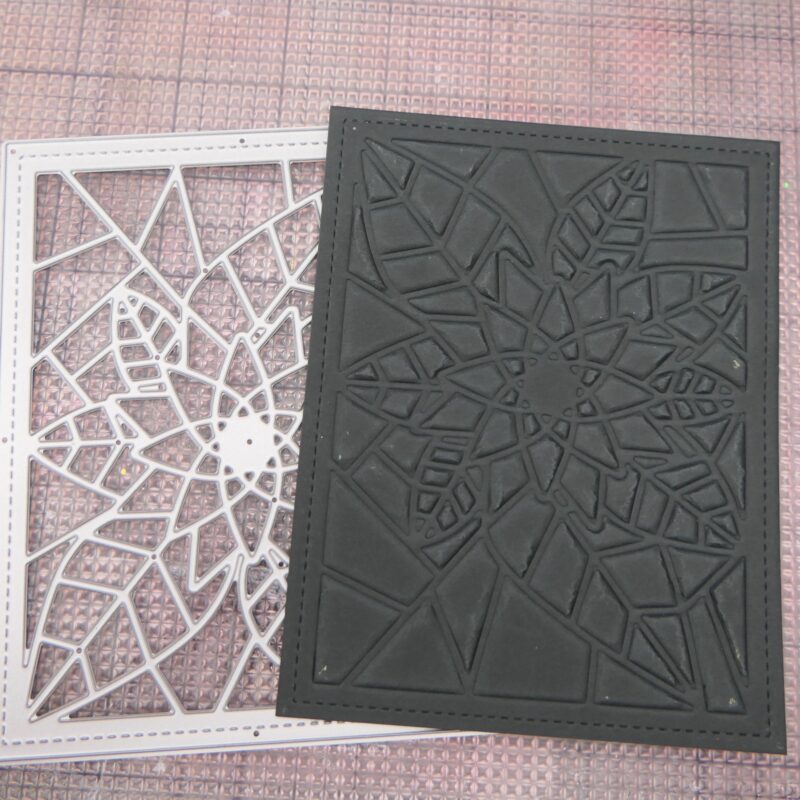
To create the backgrounds, I used the die to emboss instead of cut. This technique gives a beautiful, deep impression, as you can see in the photo. I made three embossed backgrounds — red for Card 1, black for Card 2, and blue for Card 3. Keeping it simple but striking!
Look in the instructions of your die cutting machine which sandwich to use, on the photo you see what I used, I have a Spellbinders.
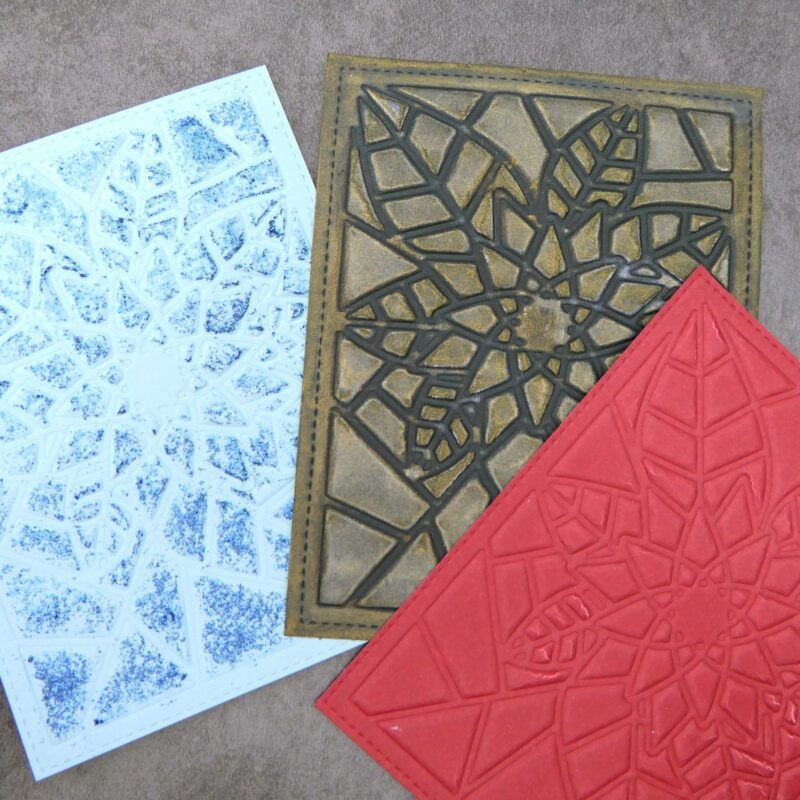
These embossed panels already look amazing as they are, but you can easily step them up for extra texture and shine.
Here are a few fun ideas to try:
Swipe white or metallic ink gently over the raised design.
Use embossing ink over the top and heat-emboss it for a glossy finish.
Apply metallic mousse or glitter paste for sparkle and dimension.
Try a touch of glitter paint for shimmer.
There are so many possibilities — just go with what fits your style or what you feel like experimenting with!
Here’s what I did on each card:
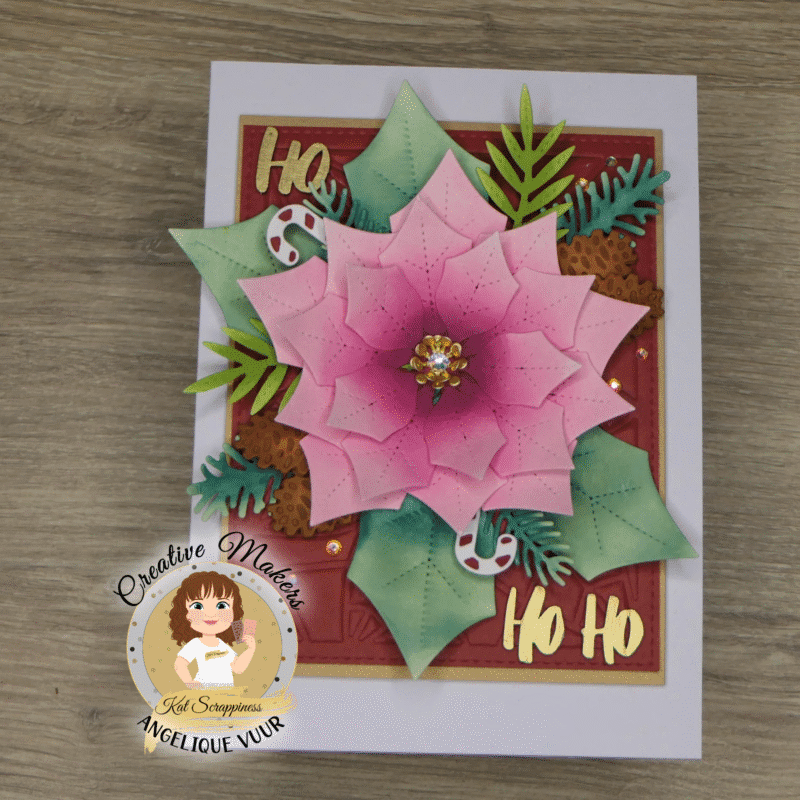
Card 1: Kept the red embossed background as it was.
Card 2: Swiped the black embossed panel first with white ink, heat-set it, then lightly went over it with gold ink.
Card 3: Applied blue glitter mousse, giving the background a beautiful shimmering finish.
Now that we have three gorgeous backgrounds, let’s turn them into cards!

I started with Neenah Solar White cardstock and die-cut all the pieces:
Large Poinsettia once, Leaves (two together) and Hearts twice
Two largest sprigs from the Christmas Foliage Craft Dies
Small pine sprigs and four little pinecones from the Festive Christmas Arrangement Craft Dies
Three candy cane shapes from the Christmas Baubles Craft Dies
Then came the fun part: ink-blending!
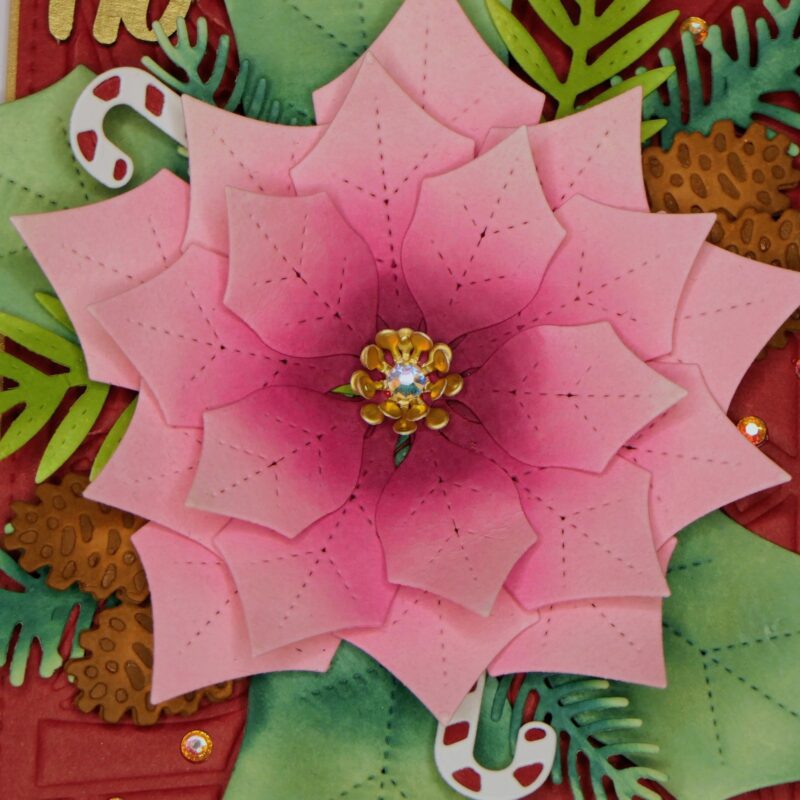
For the Poinsettia, I used three shades of pink from light to dark toward the center
Hearts colored with a gold marker And I Used one big Rhinestone from the Chrystal AB Rhinestonemix in the heart of the poinsettia.
Foliage in different green tints for a natural, varied look
Pinecones layered in dark brown (bottom) and lighter brown (top)
Candy canes in white and red
From the Merry Christmas Chipboard Embellishments, I chose “HO HO HO” and colored it with a gold marker to match the Poinsettia hearts.
Finally, I arranged all the pieces on my embossed red background. Everything was adhered with glue, except the pinecones, which I popped up with foamtape for dimension.
Optional: add a gold pearlescent mat behind the project and mount on an A7 card base for a polished finish.
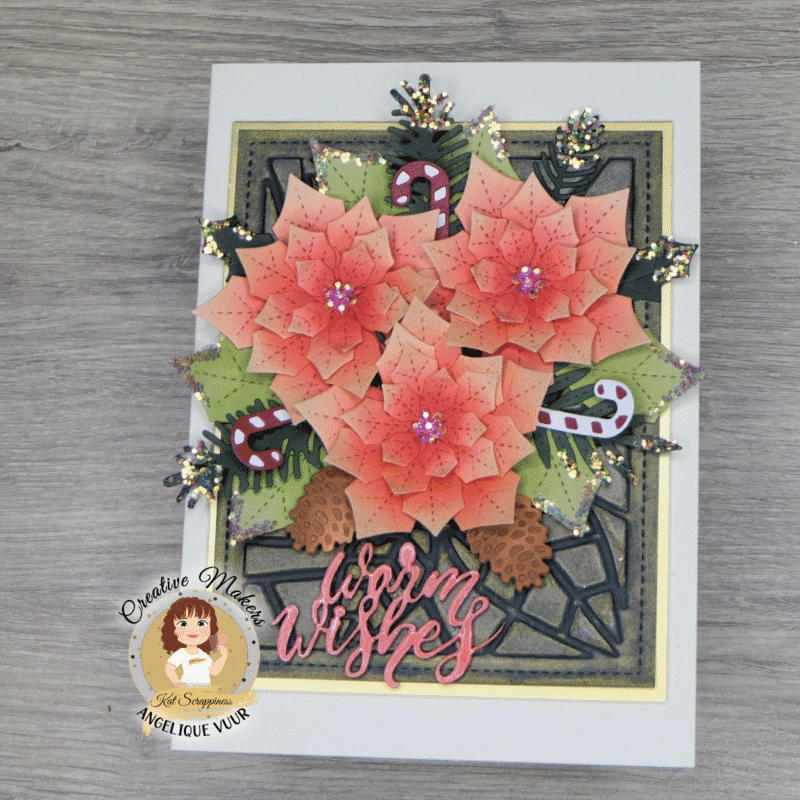
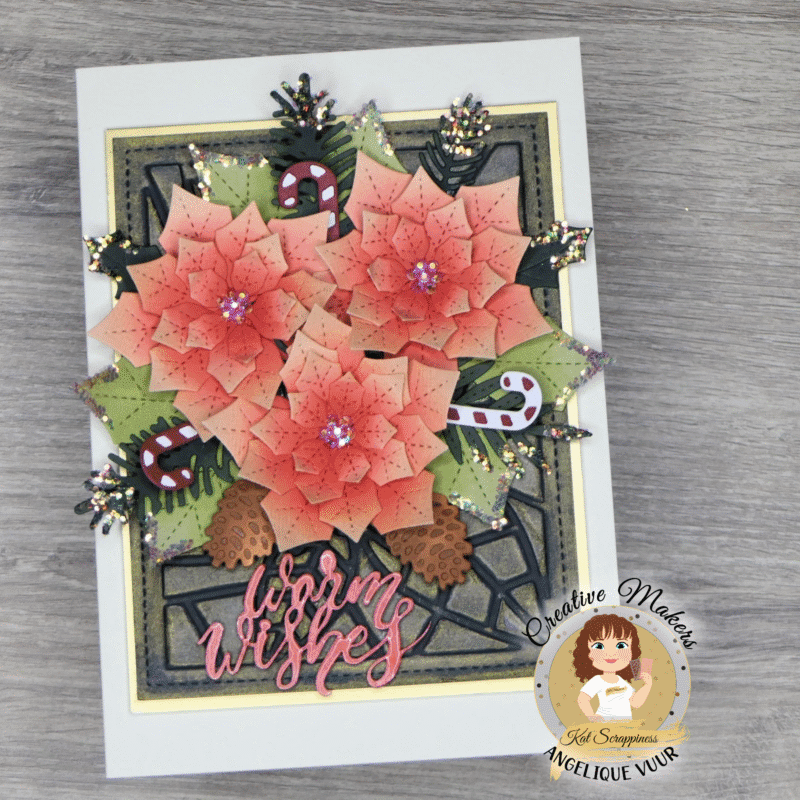
For this card, I worked with light pink cardstock for the flowers, green cardstocks for the foliage and added a touch of shimmer with rhinestones and glitter.
Here’s what I used:
Three small Poinsettias cut from light pink cardstock
Three candy canes in classic white and red cardstock
Two pinecones cut from white cardstock and ink-blended
Greenery in varied shades of green cardstock:
Two largest twigs from the Christmas Foliage Craft Dies
Two holly leaves from the Christmas Baubles Craft Dies
Two small pine sprigs from the Festive Christmas Arrangement Craft Dies
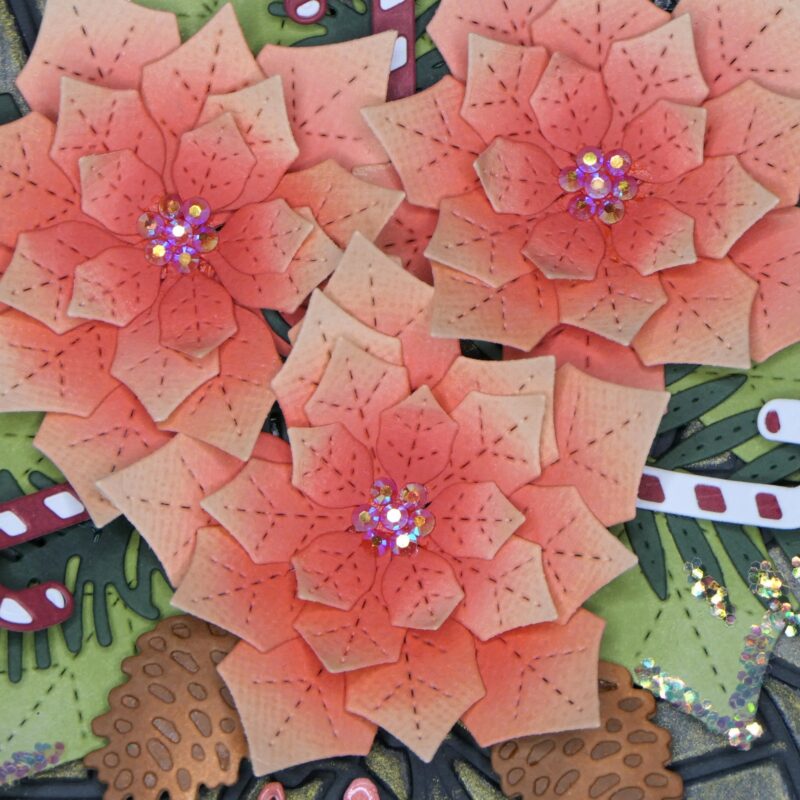
The Poinsettias I inkblended partly, leaving the tips of the petals as is. I used a rouge and soft red to give the Poinsettias more definition. The hearts were filled with Ruby Red Rhinestone Mix, using seven of the smallest stones per flower for sparkle.
From the Merry Christmas Chipboard Embellishments, I selected “Warm Wishes”, ink-blended it with soft red, and added Glossy Accents for shine.
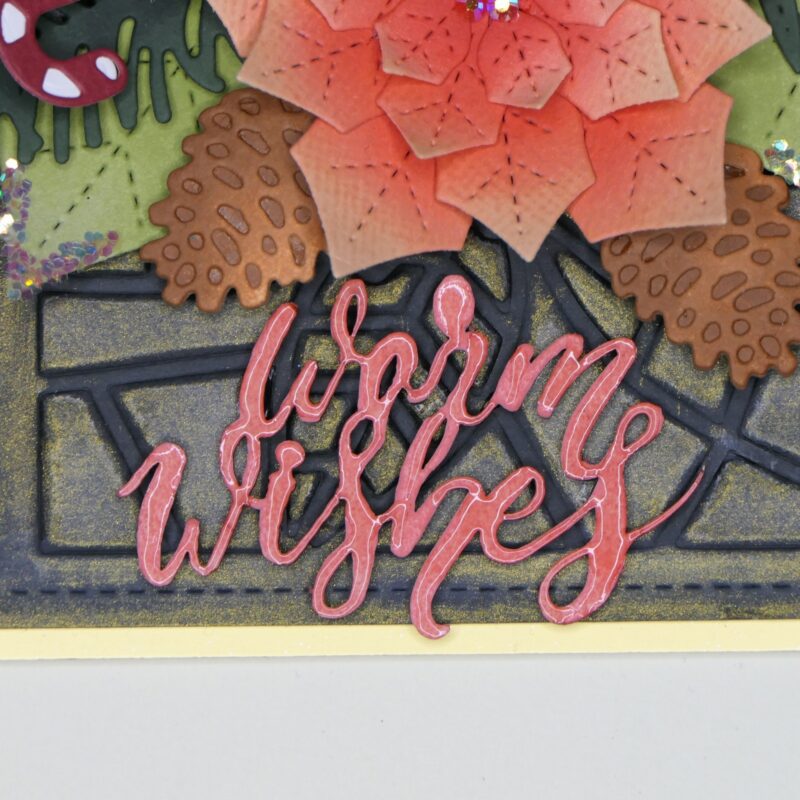
For a finishing touch, I added thin stripes of Glossy Accents on the foliage and sprinkled glitter over it, giving the card an extra festive sparkle.
Optional: add a gold brushed mat behind the project and mount on an A7 card base for a polished finish.
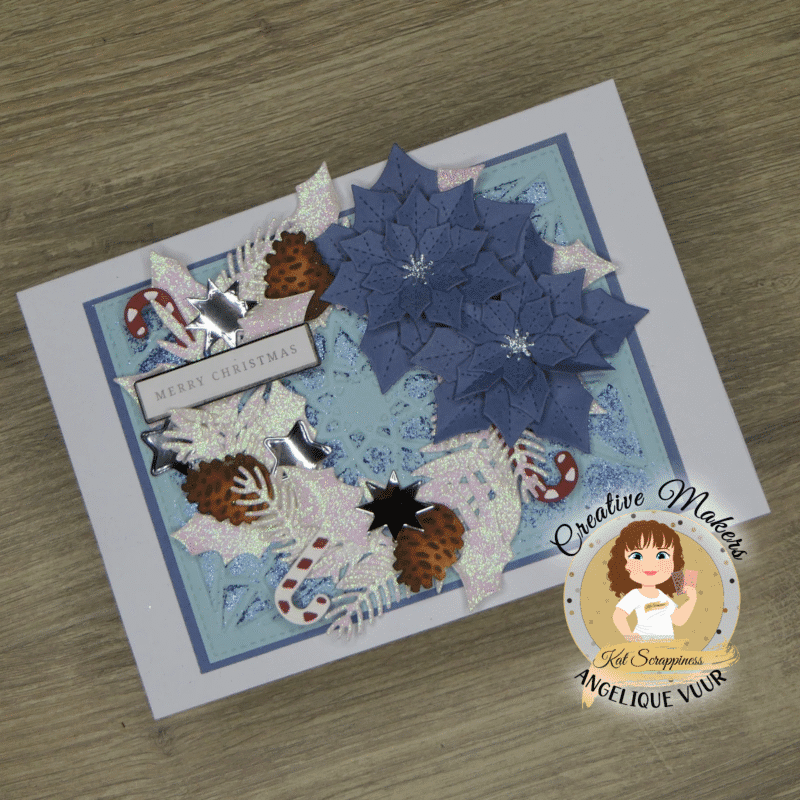
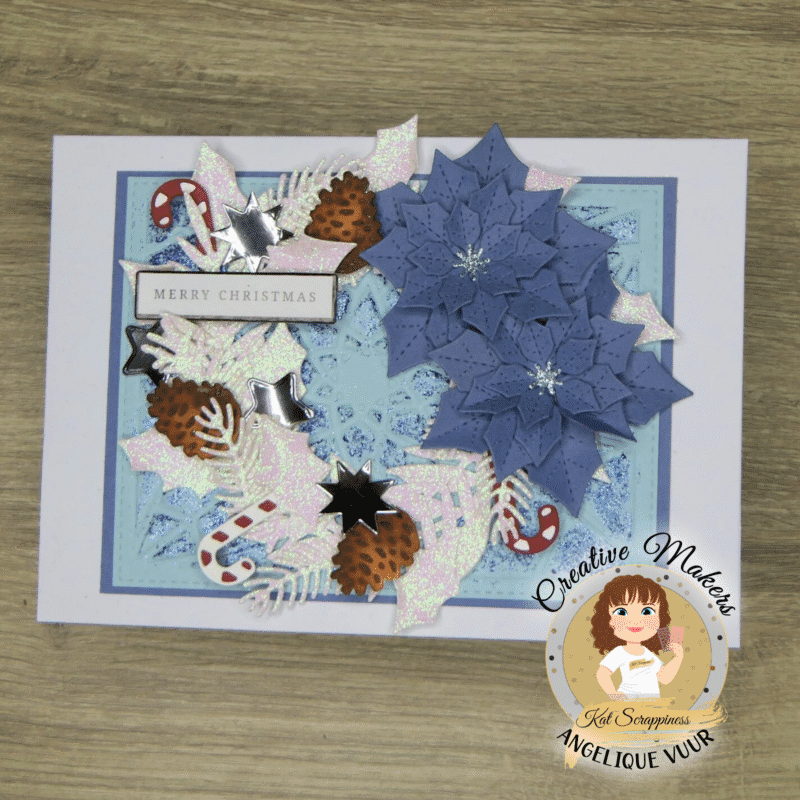
For the blue background, I kept things simple and sparkly. I die-cut two small poinsettias from blue cardstock and didn’t ink-blend them. The hearts were cut from light blue glitter cardstock for that extra shine. The Poinsettias I folded slightly different then the poinsettias of the two other cards.
From white glitter cardstock, I die-cut:
One wreath from the Christmas Wreath Craft Die
Three of the two largest sprigs from the Christmas Foliage Craft Dies
Eight small pine sprigs from the Festive Christmas Arrangement Craft Dies
Ten holly leaves from the Christmas Baubles Craft Dies
I also cut three classic red-and-white candy canes and three pinecones from white cardstock, ink-blended like before. To add a little sparkle, I cut four little stars from silver mirror cardstock.
A small sentiment from my stash finished the design.
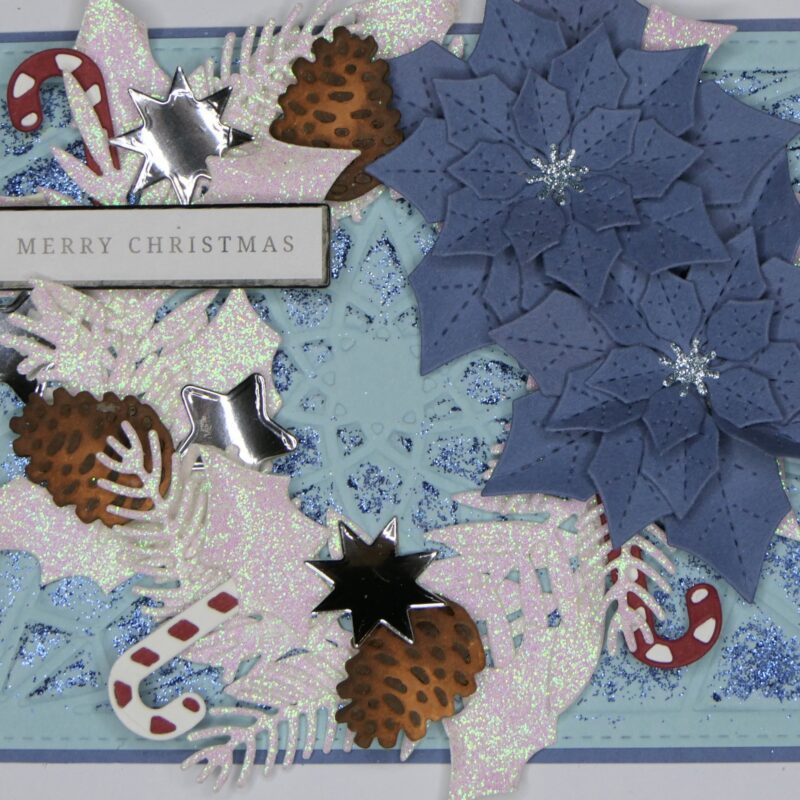
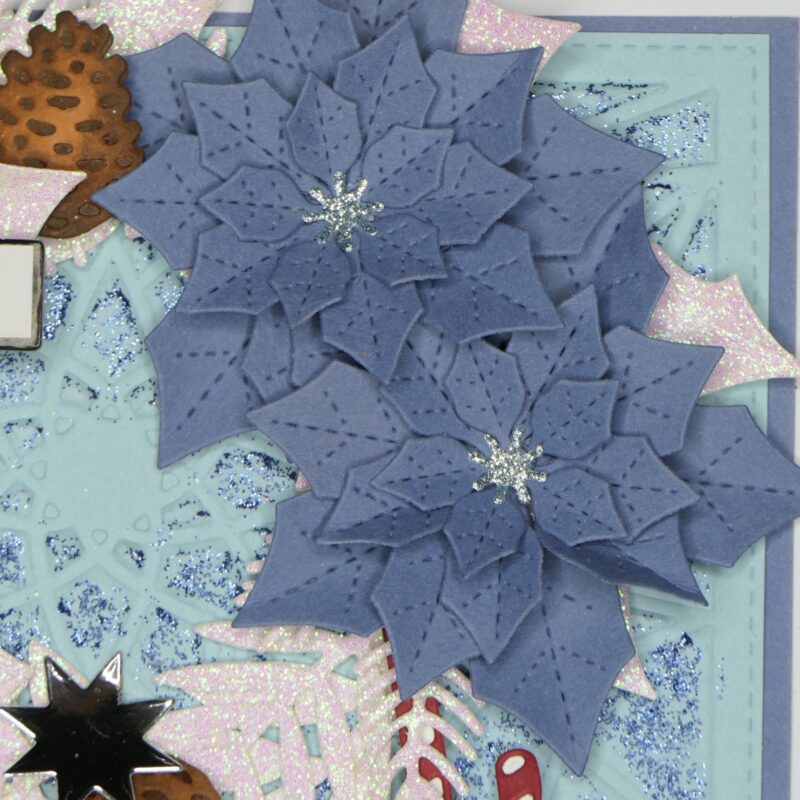
For assembly, I arranged everything in a wreath form, starting with the wreath itself and giving it more texture and shape with the loose foliage. The two poinsettias are placed slightly to the right, next to each other, and the rest of the elements are distributed evenly around the wreath.
Optional: mat the finished design with blue cardstock (matching the poinsettias) and adhere to an A7 cardbase. The foliage already has plenty of glitter, so I didn’t add any extra embellishments.
And there you have it – three festive cards, each with its own vibe and level of crafting fun! From fully handmade to quick sparkle, there’s a little something for every mood and moment.
Thanks so much for stopping by and reading my blog!
I hope these ideas help you create your Christmas cards with less stress and more joy.
I’ll be back soon with more festive inspiration!
Don’t forget to check out What’s NEW in Kat’s Shop for more crafty amazingness!
Hugs,
Angelique 👼
Double the fun, double the hops! 🐼💚
We’ve got two HOPS to celebrate this release — and yes, GIVEAWAYS are part of the party!
Start hopping here 👇
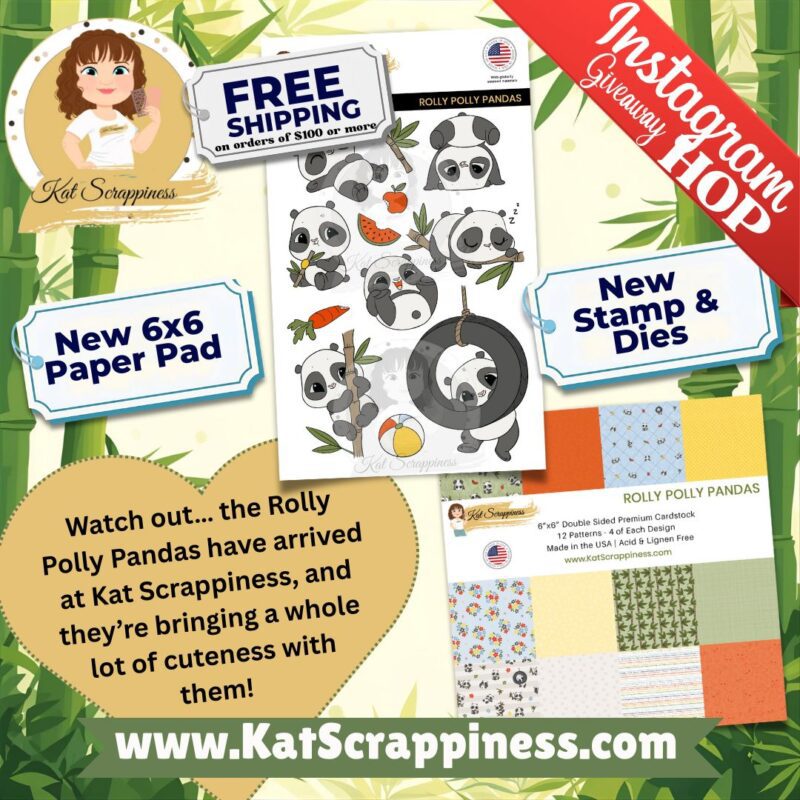
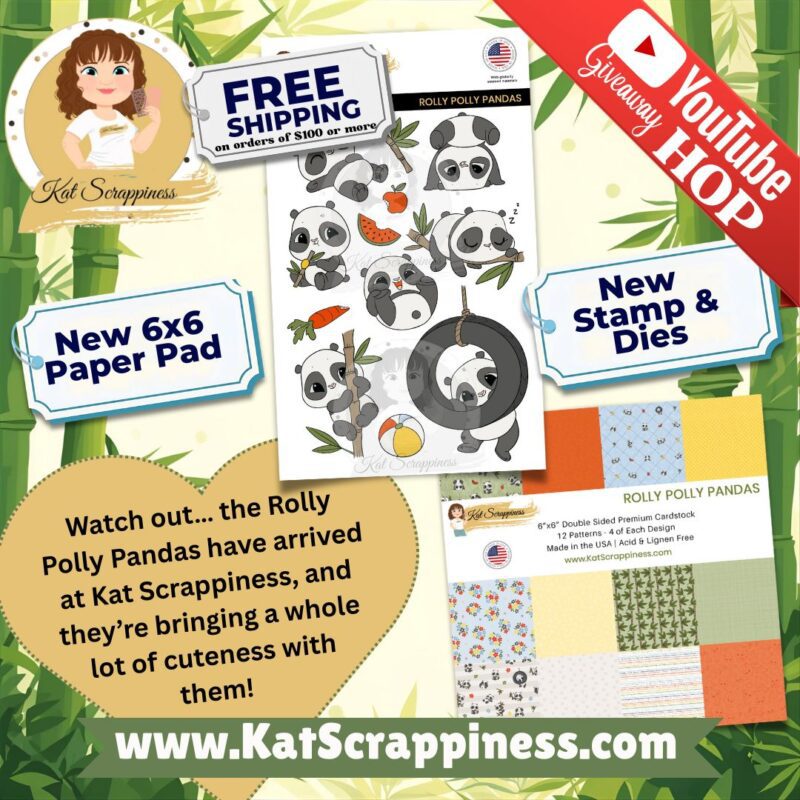
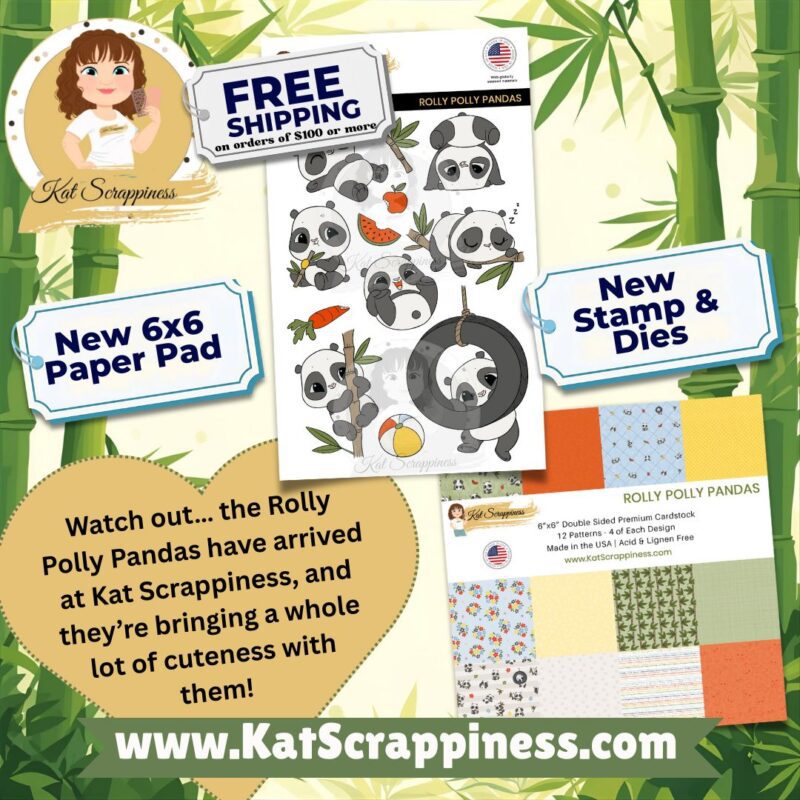
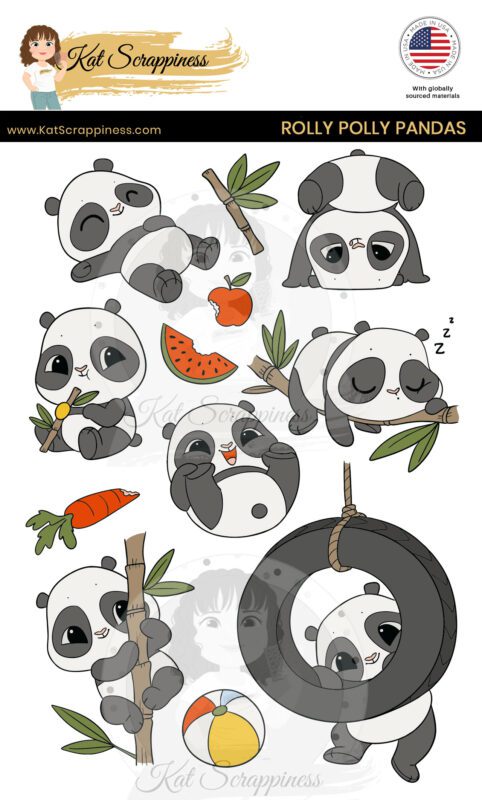
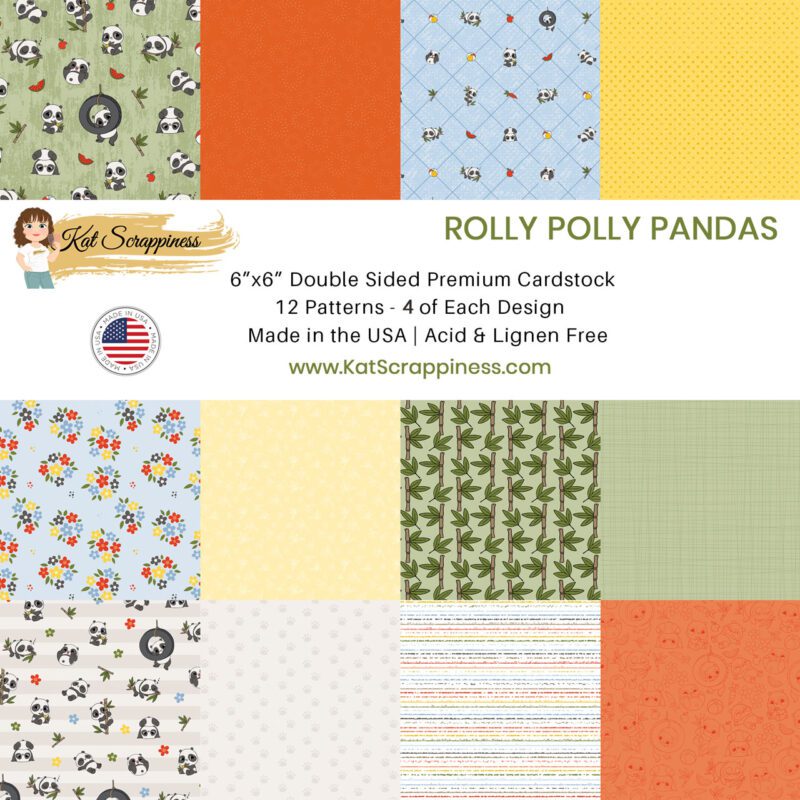
They’ve rolled right into our hearts! 💚 Meet the Rolly Polly Pandas, the newest release from Kat Scrappiness. This set includes stamps, coordinating dies, and premium 6×6 cardstock — everything you need to create the most playful panda scenes ever! Get THEM HERE.