Follow:
    Design Team Projects

    Stitched and Layered Dies – Snowman, Gingerbread Man, Christmas Tree

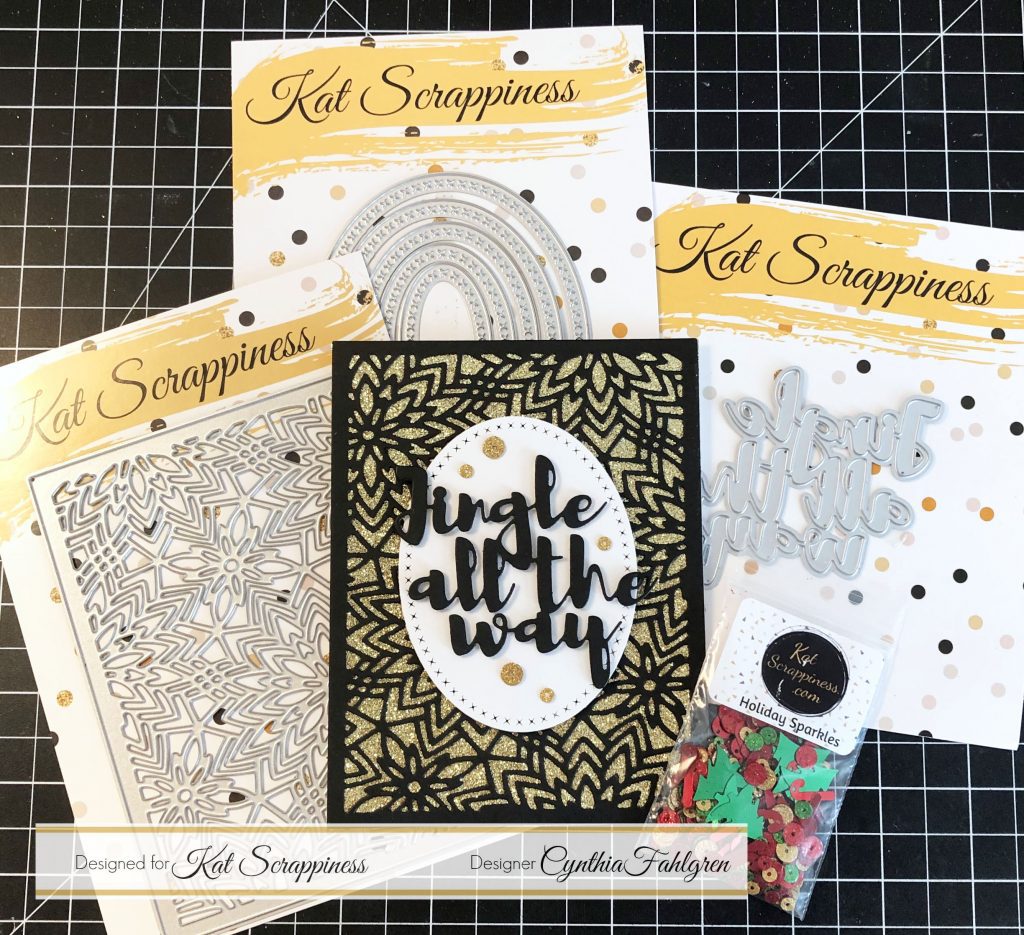
    Hi everyone!  I have three cards for you today that feature some older Christmas dies from Kat Scrappiness that are super cute.  I also use a ton of other great Kat Scrappiness products.

    My first card features the Stitched and Layered Snowman die.  For his buttons, I used the red glitter sequins from the Holiday Sparkles sequin mix.  The candy cane I added to the snowman’s hat is from the same sequin mix.  I used foam squares to adhere the snowman to piece of pattern paper I cut out using the Stitched Scalloped Oval dies.  The sentiment for this card is from the Merry Critters stamp set.

    The second card I created uses the cute Design a Gingerbread Man die.  For the buttons on the gingerbread man, I used the glittery green sequins from the Sparkling Wintergreen sequin mix.  I used foam squares to adhere the gingerbread man to piece of pattern paper I cut out using the Stitched Scalloped Rectangle dies.

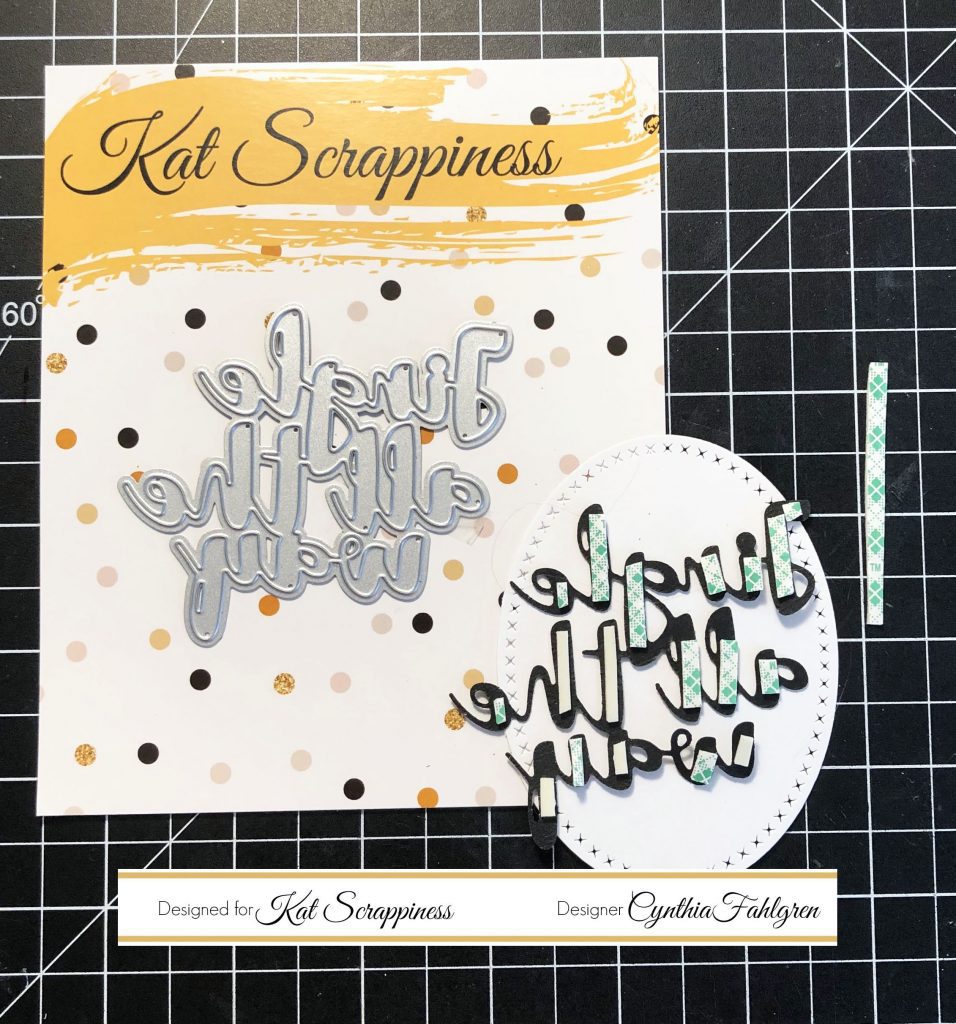
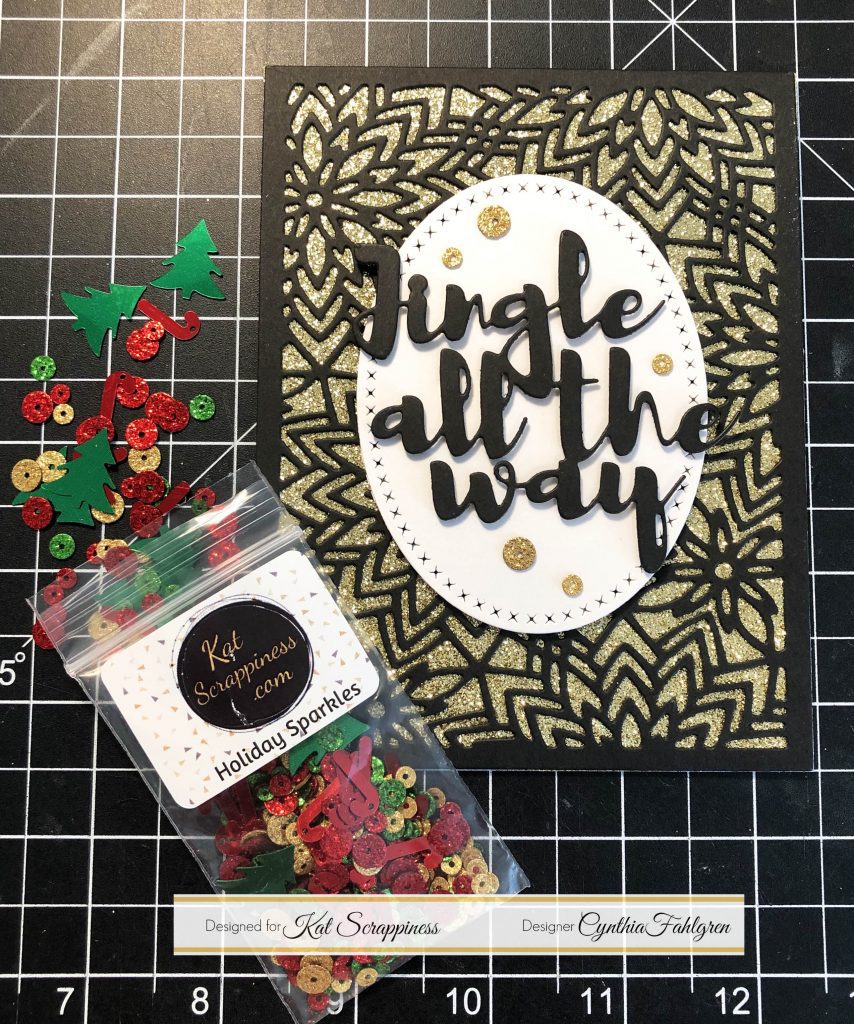
    For my final card, I cut the Stitched and Layered Christmas tree out of some green pattern paper.  I then used the same die set to cut out the bows, star, and tree trunk out of colored card stock.  I arranged the bows on the tree and added green sequins from the Holiday Fun sequin mix to finished the decorations on the tree.  I cut out the word Christmas from the Merry Christmas Brush Script Sentiment die out of some red glitter paper.  For this card, the Merry from that die was too big for what I wanted.  So instead, I used one of the Stitched Fishtail banner dies and heat embossed the word Merry from the Merry Critters stamp set.


    – – –– – –– – –– – –– – –– – –– – –– – –– – –– – –– – –– – –– – –– – –– – –– – –– – –– – –– – –– – –– – –– –

    Use code caren10 for a 10% discount in the Kat Scrappiness shop.

    Thanks for stopping by and happy stamping!

    – – – SUPPLIES for today’s project– – – – – – – – – – – – – – – – – – – – – – – – – – – – – – – – – – – – – – –

    Snowman Card

    Gingerbread Man Card

    Christmas Tree Card

    Design Team Projects

    Holiday Cards With Crafter Essentials Winter Dies

    Hi Everyone, it’s Tina here. Today I have a couple of holiday cards to share with you using the new Crafters Essentials Winter dies. You can make those last minute cards with these dies and use some fancy cardstock to give it that extra festive feel. Below I will show you the steps to create these cards using Foiled Cardstock and Glitter Cardstock. Please note that it is extremely hard to photograph the Foiled Card but it is stunning in real life.

    Card #1 using Foiled Cardstock

    Step 1 – Trim White Cardstock to 8 1/2″ x 5 1/2″, score at 4 1/4″ and fold in half for a horizontal side fold card. (A2)

    Step 2 – Diecut Crafters Essentials Winter using Teal Foiled Cardstock for background, Green Foiled Cardstock for trees, and Silver Foiled Cardstock for hills. Adhere background and bottom layered hill using Nuvo Deluxe Adhesive glue. Adhere the trees using Nuvo Deluxe Adhesive glue.

    Step 3 – Stamp Merry Critters sentiment to the top layer of hill created from step 2 using Versamark. Use an anti static powder tool before you stamp. Sprinkle White Embossing Powder and remove the excess. Heat set it with a heat tool. Adhere the top layer hill using Nuvo Deluxe Adhesive glue.

    Card #2 using Glitter Cardstock

    Step 1 – Trim White Cardstock to 8 1/2″ x 5 1/2″, score at 4 1/4″ and fold in half for a horizontal side fold card. (A2)

    Step 2 – Diecut Crafters Essentials Winter using Soft Blue Cardstock for background, Green Cardstock for trees, and Silver Glitter Cardstock for hills. Adhere all diecuts using Nuvo Deluxe Adhesive glue.

    Step 3 – Stamp Merry Critters sentiment just above the hill on the left side 2 using Versamark. Use an anti static powder tool before you stamp. I shaped the sentiment to follow the shape of the hill. Sprinkle White Embossing Powder and remove the excess. Heat set it with a heat tool.

    I hope you enjoyed today’s cards. You can try other versions of these cards by using patterned paper Christmas themed. To receive 10% off your order use code: TINA10 at checkout. Below is a link to all the products used. Thank you for stopping by and have a wonderful day.

    Products Used:
    https://linkdeli.com/widget.js?1543923411530

    Design Team Projects

    Christmas Tags

    It’s Lisa here with you today on the blog and I have

    some simple gift tags to share with you.

    The one thing everyone seems to need this time of year

    is gift tags, and lots of them!

    I used the new Winter Crafter’s Essentials Dies, the

    Merry Christmas Sentiment Die and the Jolly Sentiment Die

    to make 9 different tags in quite a few different patterns.

    I started with the Stitched Scalloped Nesting Tag Dies as

    a base for all of the tags.

    I made 3 simple tags using some buffalo plaid patterned paper.

    I made 4 more using some inlaid die cutting and layering.

    And finally I made 2 tags that have extra embellishments for a little more interest.

    One of my favorite dies to use is the Jolly Sentiment Die 

    because I can cut out the 2 L’s and I have the word “Joy”

    in a beautiful script font.

    Here are all the tags hanging from a mini tree, they look cute as ornaments as well.

    If you’re in need of a quick tag or something with a little

    more pizazz than I think you’ll find some inspiration with

    one of the tags I’ve created.

    You can get really creative depending on the colors and patterns you choose.

    I hope I’ve inspired you to go and make some gift tags today!

    You know you’re going to need them soon!

    You can save 10% on your purchase if you use code Lisa10.

    Have a great day everyone, I already am!

    ?Lisa ?

    Design Team Projects

    Having Fun with the New Kat Scrappiness “Crafters Essentials-Winter” Dies

    Hey guys! I’m back again as a guest designer in December for Kat Scrappiness. Today I am playing with the recently released “Crafters Essentials-Winter”die set. As usual, I lost track of time and just kept making cards. LOL! I was trying everything with this die set — from Distress Oxide blending with them, to mixing bold patterned papers, to adding “snow” accents. There are so many possibilities for crafting with these dies.  The set includes:

    • A2 sized “Cut & Emboss” Stitched Snowflake Swirl Background Die
    • Two stitched snow drifts/hills
    • One die with three pine/Christmas trees
    • One deer die

    I hope you’ll enjoy seeing what I made with this die set.


    For my first card, I created a soft winter (green) scene using patterned papers and a sage green ink.


    I die cut and embossed the background using the snowflake background die, and lightly sponged “Bundled Sage” Distress Oxide inkover it, the pine trees, and the gingham checked snow drifts. Using the deer die with white card stock, I created an environmentally friendly “Rudolph, the Green-Nosed Reindeer” for the card front and then white heat-embossed “’tis the season” from Lawn Fawn‘s “Winter Scripty Sentiments” stamp set on the gingham snow drift. Snowflake sequins from Kat‘s “Snow Flurries mix were the finishing touch.


    For my second card, I created a moon-lit scene using Distress Oxide ink in “Stormy Sky,” a “Snow Marker,”and “Sparkle Sheer Shimmer Spritz Spray.


    I die cut the background from the Kat Scrappiness“Stitched Snowflake Swirl Border Backdrop Die”and sponged “Faded Jeans”and “Chipped Sapphire”Distress Oxide inks over it. The “Merry Christmas” sentiment is also from the Lawn Fawn‘s “Winter Scripty Sentiments” stamp set.


    The third card in a similar moon-lit scene, but this time using blue and purple Distress Oxide inks and card stocks.


    Note: I created the snow drifts by running white card stock through my “Big Shot” with the “Cut & Emboss” Stitched Snowflake Swirl Background Die and then running that die cut piece through again using the stitched snow drift die. The “happy holidays” sentiment is again from the Lawn Fawn‘s “Winter Scripty Sentiments” stamp set. I sprinkled the Kat Scrappiness “Sugarplum Fairies”sequin mix across the night sky for the finishing touch.


    My final card is a bit “out of the box” in that I created a winter scene using a boldly colored patterned paper collection.


    Pairing these papers with the“Crafters Essentials-Winter “dies showcases just how versatile this set is. Again the “season’s greetings” sentiment is from the Lawn Fawn stamp set. Well, that’s all until next time . . . The supplies I used are listed and linked below.  Please don’t forget to use my coupon code “Priscilla10” for 10% off your order at the shop.


    HAPPY HOLIDAYS AND HAPPY CRAFTING!
    Priscilla


    SUPPLIES USED

    Design Team Projects

    Snowman with Ice Cream Card by Jess Crafts

    Hello crafty friends! I wanted to try something a bit different and create a card that would work for Christmas, but still could be sent after Christmas in case I lost track of time in getting all my cards out. So I decided to use the Kat Scrappiness Stitched and Layered Snowman with the Winter Essentials dies. I have a full video tutorial for the card that you can watch below or on YouTube.

    [youtube https://www.youtube.com/watch?v=s-XTjia65-Y]

    I decided it would be fun to have my snowman hold something and I was really excited to use the new Kat Scrappiness sprinkles (not edible of course!). I decided to combine the sprinkles with Nuvo mousse. Kat has a ton of beautiful colors in the shop and it looks great as icing, ice cream, and even whipped cream.  The Crafter’s Essentials Winter die set was a perfect simple background and my sentiment with from Merry Critters. The whole thing is finished off with teal jewels. FInally, if you haven’t yet, check out the details for joining the Kat Scrappiness Coffee Oasis Charity Blog Hop.


    https://linkdeli.com/widget.js?1543485996431

    News

    November Challenge Winners

    Hi everyone!

    I wanted to take a moment to congratulate our Challenge Winners from November.

    As as some of you may or may not know, each month we host two different challenges.

    Our monthly challenge is where you can upload your projects or creations all month long. We always have a different theme to follow. Last month’s theme was Pumpkin Patch. This month’s theme is WINTER WONDERLAND!! Who is excited?! At the end of the month all who have shared their projects in the challenge are entered to win a gift certificate to Kat Scrappiness!

    We have another challenge each month called Share to Win. This challenge is where you share your projects and hauls on social media and tag Kat Scrappiness. This enters you to win a gift certificate to Kat Scrappiness at the end of the month.

    So with all of that being said please help me congratulate our two winners!!

    Share to Win Challenge- Antonious Maximus
    November Monthly Challenge- Meghan Kennihan

    Thank you to everyone who played along and please join us again this month for our Winter Wonderland Monthly Challenge and our Share to Win Challenge!! Both of these challenges can be found right here on the blog! You can also click on the links above and it will take you to each challenge.

    Also make sure to join our Facebook Group and follow us on Instagram so you can get access to sneak peeks, special sales and so much more!

    For those of you who celebrate Hanukkah, Happy Hanukkah!

    Happy Holidays to everyone!

    Have a great day!

    Design Team Projects

    Jingle Card featuring Fancy Floral Die

    Hello again, everyone!  This is Cynthia with my final Design Team project for the month of November.  I used the lovely new Kat Scrappiness Fancy Floral Coverplate Die and the “Holiday Sparkles” Sequin Mix, along with the Jingle All The Way Brush Script Word Die, and one of the Cross Stitched Oval Dies to create my card.  Let’s go ahead and start looking at the steps I used for this project.

    My first step was to select my card stocks.  I knew I wanted to cut the Fancy Floral die in Black, with something colorful/exciting behind it.  I decided to bring out some of my treasured Gold glitter card stock, which I love so much that I tend to hoard and never actually use!  But if any backdrop die deserves the best, I think this one is it 🙂  I attached the Gold paper flat to my white card base, then added the Fancy Floral piece on top with some paste adhesive.  This gorgeous die measures 4.25 x 5.5″ so it will perfectly fit your standard A2 sized cards.


    Next, I cut out the Jingle All The Way Brush Script die in Black, and then cut one of the Cross Stitched Ovals in White.  I love the elegant simplicity that black and white have, like a handsome man in a dapper tuxedo.  Also, I didn’t want anything flashy that would either clash with or override the glittery gold background.  I wanted to mention also that this fabulous script die cuts out all in one piece – even the dot on the letter “i.”  If only you knew how much wasted time I’ve spent chasing tiny dots around my work table, you would understand the depth of my joy!


    To add a touch of dimension, I cut some narrow strips of foam tape and added bits to the back of the script die.  Because of the wider strokes in the lettering, there were plenty of places I could easily attach the tape.  Once I’d removed the release paper bits, I pressed the words onto my oval, centering them the best I could.  I like the look of some overhang, so just a few edges extend beyond the oval.  You may or may not want to cut yourself a larger oval for your own card.  I also added a few large foam dots to the backside of the oval to give this piece a tiny bit of lift as well.  Because the foam dots and tape are quite thin, this didn’t add too much bulk.


    As my final finishing touch, I couldn’t resist dipping into this fabulous “Holiday Sparkles” Sequin Mix.  I love the rich, traditional Christmas colors, the fun shapes, and also the glittery pieces.  I decided to only use the gold glitter sequins for my card, but really any of the colors would have been lovely.  They were very easy to attach with just some dots of paste adhesive, and their flatness is actually helpful for keeping them intact.  If you haven’t tried any sequins mixes with the flat pieces, go ahead and grab some from Kat’s huge selection.  I think you’re going to fall in love with them like I have 🙂


    So that is my finished card!  There are so many things I love about this one, and it’s all due to that incredible backdrop die.  You can really take this one through all the seasons, and totally change the look of it just by your color choices.  I hope that this card has inspired you to try out these new products, all of which are available now at Kat Scrappiness.  I’ve included a shopping link below for you, and don’t forget to use my coupon code “CYNTHIA10.”  When you enter this code at checkout, you will receive 10% off your entire purchase, including brand new items!  Thank you again for joining me today, and I will be back again in December with more Kat Scrappiness goodness 🙂


    Kat Scrappiness Shop