Hello Kat Scrappiness fans, it’s Lisa from Oh So Cute By Lisa and today I’m shakin’ it up on the blog!
Kat Scrappiness has the most awesome shaker kits and they are super easy to use!
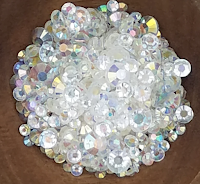
For my card today I used the Star/Splat Shaker Dimension Set and I filled it with some Party Confetti Sprinkles and some Sparkling Clear Jewels. There are lots of shaker kits available in the shop, here is a list of some of the newer ones:
Dog House Paw Print Baby Bottle Onesie Teddy Bear
Large Cloud Small Cloud Television Beach Ball Hot Air Balloon Balloon Car Large Diamond Small Diamond
Here is a look at the Shaker Kit, Sprinkles and Jewels on my card:
This card was a lot of fun to make and super easy!
I’ll walk you through the steps involved in putting it together.
———————————————————————————–
I started with a kraft card base and I decided to make a smaller card than usual so that the shaker would be the main focus on the card. My card measures 3 1/2″ x 10″ and is scored at the 5″ mark so my completed card is 3 1/2″ x 5″.
Step 1 – Adhere shaker foam base (included in kit) to front of card using
Nuvo Deluxe adhesive and give it a minute or two to dry.
Step 2 – NOW COMES THE FUN PART! Add your shaker bits into the well created by the foam. You can choose whatever you want and lucky for you Kat has a TON of sprinkles, sequins, confetti and other fun bits to make your shaker card SHAKE! I chose the Party Confetti Sprinkles and Sparkling Clear Jewels for my card. Make sure you don’t add too much so you’ll be able to shake those bits!
Step 3 – Prepare die cut top frame. I traced the die cut star frame in the kit on to patterned paper and cut it out. I used a piece of patterned paper from the Honey Bee Over the Rainbow paper pack. If you don’t want to fussy cut your shape you could paint the frame or use markers on it or even do some heat embossing like I did on this card → Diamond Shaker Card.
Step 4 – Once your frame looks the way you want it to you can glue the acetate sheet included in the kit to the back of the frame. Now glue your frame to your foam base. I used Nuvo Deluxe adhesive and it worked perfectly.
That’s it! 4 EASY steps to a super cute shaker card!
You can decorate the rest of the card however you want but the shaker portion is quick and easy. I used the Lawn Fawn Lucky Stars stamp set and heat embossed the sentiment on to black paper using a VersaMark Clear Embossing Pad and some Ranger Super Fine White embossing powder. Since I was using white embossing powder on black paper I made sure to prep my paper with the Inkadinkado Embossing Magic Pad first so I would only have powder melting on my stamped words. I also did some extra accents on my card using a White Gelly Roll Pen size 10. I also die cut 2 small stars from the Lawn Fawn Puffy Star Stackables out of black paper and made white dash lines with my Gelly Roll pen to decorate the large star.
To clean my stamps I always use the Lawn Fawn Stamp Shammy and I store it in the Lawn Fawn Stamp Shammy Case so it’s contained and ready to go.
Here’s another look at the card with some of the supplies I used:
This card was a blast to make and shaker cards are my all time favorite cards to make!
Thanks so much for joining me today, head over to Kat Scrappiness and check out all of the amazing shaker kits and embellishments to fill them with!
Have a great day, I already am!
? Lisa ?


No Comments