Tag: white jewels

  • Quokka Love ❤️

    Quokka Love ❤️

    Hello everyone, it’s Lisa from Oh So Cute By Lisa here with you today! I hope you’re having a good day, if not than just take a look at my card and it should brighten it up! That cute little animal is called a Quokka and it is known as the world’s happiest animal! If you’re interested in learning a little bit more about this adorable little marsupial, you can read this POST where I went into a little more detail.

    The Quokka is the main character of the brand new

    stamp set from Kat Scrappiness called Quokka’n Up!

    This Quokka a selfie loving animal and will add the cute to your cards and projects!

    For my card today I did some watercoloring on a beautiful rose themed background.
    I used the Stitched Scalloped Border dies to cut some white card stock for the top and bottom of my card.
    I thought they framed the roses beautifully and toned down the busy pattern. Once I had the two scalloped panels glued down I tucked my cute little Quokka into the bottom panel and added the sentiments to the top and bottom of the card. To finish it off I added some fun bling to the sentiments by adding a trail of White Jewels and a single sweet Red Heart Sprinkle.
    To make placing my embellishments easier I used the brand new Embellishment Pick Up Tool and Triangle Embellishment Tray recently released by Kat Scrappiness.  No more embellishments all over my desk and on the floor and the pick up tool makes placement a breeze!
    I hope you enjoyed my card today and I hope you’ll check out all of the fun crafty goodness over at
    Kat Scrappiness! New products are arriving frequently and the signature line of Kat Scrappiness stamps, dies, embellishments, patterned paper and tools is expanding quickly!
    Don’t forget to follow
    Kat Scrappiness on all
    social media platforms to be alerted to new releases, sales and giveaways!
    Have a great day, I already am!

  • Peacock Backdrop Thank You Card

    Peacock Backdrop Thank You Card

    Hello it’s Lisa and today I am up on the Kat Scrappiness blog with a card using some old and new products from the KS store! I made a thank you card because you can never have too many of those! One of my favorite techniques is ink blending and especially in rainbow colors! I just love to make an ink blended rainbow and then cut a pattern out of it.  Here’s the short and sweet on how I made my card.

    I started with a base of Bristol Smooth cardstock and did some ink blending with some Distress inks in rainbow colors.  I die cut the rainbow panel using the Peacock Backdrop Die. I love how the peacock pattern showed up really well through the rainbow colors!

    I cut the rainbow panel down to a smaller rectangle size so I could layer it on to another piece of cardstock.  I embossed another panel with some larger polka dots and adhered the rainbow panel to that.

    The last step was to die cut the Thank You Brush Script Word Die out of white paper and lay that on top of the rainbow panel. I decorated the entire card with Pink Heart Droplets, Blue Heart Droplets

    and White Jewels for some extra sparkle!

    Here’s another pic with all of the supplies pictured:

    I love how this card came out and I love the pattern in the Peacock Backdrop Die! I hope this gave you some new ideas about using your cover dies!

    That’s all for today, don’t forget to follow Kat Scrappiness on all

    social media platforms to be alerted to new release, sales and giveaways!

    Kat Scrappiness Shop

    Kat Scrappiness Blog

    Kat Scrappiness FB Fan Page

    Kat Scrappiness Instagram

    Kat Scrappiness YouTube Channel

    The clearance sale is still going on Kat Scrappiness. 

    There are lots of goodies there for terrific prices.

    Thanks for joining me today!

    Have a great day, I already am!

    Lisa  ?

  • Ornament Strip Cards

    Ornament Strip Cards

    Hi Everyone, it’s Tina here. Whether you want a clean and simple card or more the Ornament Strip Coverplate die has you covered. Below you will see two totally different looks using this die.

    Full Card

    Step 1 – Trim White Cardstock to 8 1/2″ x 5 1/2″, score at 4 1/4″ and fold in half for a vertical side fold card. (A2)

    Step 2 – Diecut Ornament Strip Coverplate 3 times using White Cardstock. Stamp or use a stencil on the left side of the diecut using Versamark. (You only need to do this on the top layer panel only) Sprinkle Gold Embossing Powder and remove the excess. Heat set it with a heat tool. Adhere all 3 layers using Nuvo Deluxe Adhesive with the embossed layer on top.

    Step 3 – Trim Metallic Kraft Cardstock and adhere in back of the ornaments only. (You can adhere the entire right panel if you want.) Apply Crystal Nuvo Drops Morning Dew inside the areas of the ornaments. While wet sprinkle glitter. Let dry.

    Step 4 – Diecut Merry Christmas (only Merry) twice. One using Black Cardstock and the other using Glitter Cardstock.Adhere to card using Nuvo Deluxe Adhesive.

    Step 5 – For added interest and sparkle randomly adhere White Diamond Sequins using a Crystal Katana and Collage Medium.

    Clean And Simple Card

    Step 1 – Trim White Cardstock to 8 1/2″ x 5 1/2″, score at 4 1/4″ and fold in half for a vertical side fold card. (A2)

    Step 2 – Diecut Ornament Stripe Coverplate using Red Mirror Cardstock. Adhere to card using Nuvo Deluxe Adhesive.

    Step 3 – Stamp Merry Critters sentiment using Versamark. Sprinkle White Embossing Powder and remove the excess. Heat set it with a heat tool.

    Step 4 – For added interest and sparkle randomly adhere White Jewels using a Crystal Katana  and collage medium.

    Both looks are elegant but the clean and simple takes little time if you want to mass produce. Just change the colors. Below is a link to all the products used. Thank you for stopping by and have a wonderful day.

    Products Used:


    https://linkdeli.com/widget.js?1559654439292

  • Happy Birthday – One Layer Card

    Happy Birthday – One Layer Card

    Hi crafters!  Hope everyone is having a great weekend.  We finally have a little bit of cooler weather here in Oklahoma, so I’m trying to enjoy it.

    I have a cute, one layer card for you today that features the small butterfly stamp from the Stewart the Sloth stamp set.

    I stamped the butterfly image from Stewart the Sloth stamp set five times, colored them with Copic markers, and cut them out.  I then used blender brushes and distress ink in coordinating colors directly on my card base so that there would be a glow behind each of the butterflies.

    I stamped my sentiment at the bottom of the card with VersaFine Onyx Black ink.  I adhered the butterflies with dimensional adhesive and added white jewels to finish the card.

    Thanks for stopping by and happy stamping!  Here is a link to the Kat Scrappiness shop and direct links for products used on this card are below.

    – – – Kat Scrappiness products – – – – – – – – – – – – – – – – – – – – – – – – – – – – – – – – –

  • Happy Birthday – Flower Sprinkles

    Happy Birthday – Flower Sprinkles

    Hi, hope everyone is enjoying their weekend.  I have a fun shaker card for you today that uses 9 different products from Kat Scrappiness!

    I started by inking a background using a stencil and three different colors of distress ink.  I then used the Stitched Rectangle dies from Kat Scrappiness to cut out the panel.  On that panel, I die cut the two flowers using the Stitched Scalloped Circle dies.  For the flower stems, I used one of the stitched dies from Crafters Essentials 1 set.

    For the shaker part of my card, I used the purple, blue, and pink flower sprinkles.  I cut out a banner using the Stitched Fishtail Banner dies and stamped and heat embossed my sentiment.  I attached that to my panel using foam adhesive.

    To finish off the card, I added yellow jewels to the center of my flowers and randomly placed white jewels on the card.

    Thanks for stopping by and happy stamping!  Here is a link to the Kat Scrappiness shop and direct links for products used on this card are below.

    – – – Kat Scrappiness products – – – – – – – – – – – – – – – – – – – – – – – – – – – – – – – – –

  • Eat Sleep Craft Repeat….

    Eat Sleep Craft Repeat….

    Hello everybody! Today I am excited to share another quick and easy card tutorial with you all using some amazing Kat Scrappiness products. This month Kat Scrappiness released some amazing new products and I really just can’t get enough of the new stamp set “Crafters Gonna Craft”. So let’s get started…

    To begin, I created my card base, which is an A6 sized card (4 1/2″ x 6 1/4″) using 110lb. white Recollections card stock. I then cut down a piece of black card stock to measure 4 3/8″ x 6 1/8″ and then cut down another piece of white card stock to measure 4 2/8″ x 6″. These will be my card mats.

    I then used the Condensed Uppercase Alphabet Dies by Kat Scrappiness to spell out the word “REPEAT” and die cut the letters out of Doodlebug Design Inc. classic double-sided card stock.

    Using the Crafters Gonna Craft 4″ x 6″ Clear Stamp Set by Kat Scrappiness, I stamped my sentiment, “Eat Sleep Craft” on to the white card mat using Memento Tuxedo Black Dye Ink. I then took the two “scribbled lines” stamps from the set and stamped them in various spots throughout the card mat using six different colored ink cubes from Hero Arts which I had in my stash from a kit that I had received from them.

    After I was satisfied with my stamp placement, I used Nuvo Delexe Adhesive to adhere the die cut letters to the bottom portion of my card mat.

    I then adhered the mats onto the card base, but I wasn’t done yet. It is a crafty card, and in my opinion, a crafty card is nowhere near complete without some type of added embellishment or bling. So of course I reached for some White Jewels by Kat Scrappiness and adhered them throughout the card using Nuvo Deluxe Adhesive.

    And there you have it….. another completed crafty card using amazing and fun new products from Kat Scrappiness.

    I hope that you enjoyed this quick tutorial that I put together for you today and it has inspired you to create some of your own crafty cards as well.  A list of the supplies and products I used are listed below for your reference. Please remember, when shopping at the Kat Scrappiness Store, use Code: Jana10 at checkout to receive 10% off of your order. Thank you for stopping by and as always…. Have a Fabulously Crafty Day!!!

    Products & Supplies Used:

    110lb. ReCollections White Card Stock (Card Base)

    65lb. ReCollections Black and White Card Stock (Card Mats)

    Doodlebug Designs Inc. Double-Sided Cardstock – 3080 Meadow

    Condensed Uppercase Alphabet Dies by Kat Scrappiness

    Crafters Gonna Craft 4″ x 6″ Clear Stamp Set by Kat Scrappiness

    Memento Tuxedo Black Dye Ink Pad

    Various Hero Art Ink Cubes

    White Jewels by Kat Scrappiness

    Nuvo Deluxe Adhesive 200N

  • “Happiness Is Handmade” Card

    Good morning, crafters!  Cynthia here with another blog post featuring some brand new items from Kat Scrappiness.  Today’s card was made with the Stitched Diagonal Backdrop die, the Crafters Gonna Craft stamp set, and some White Jewels.  So let’s roll up our sleeves and get started.


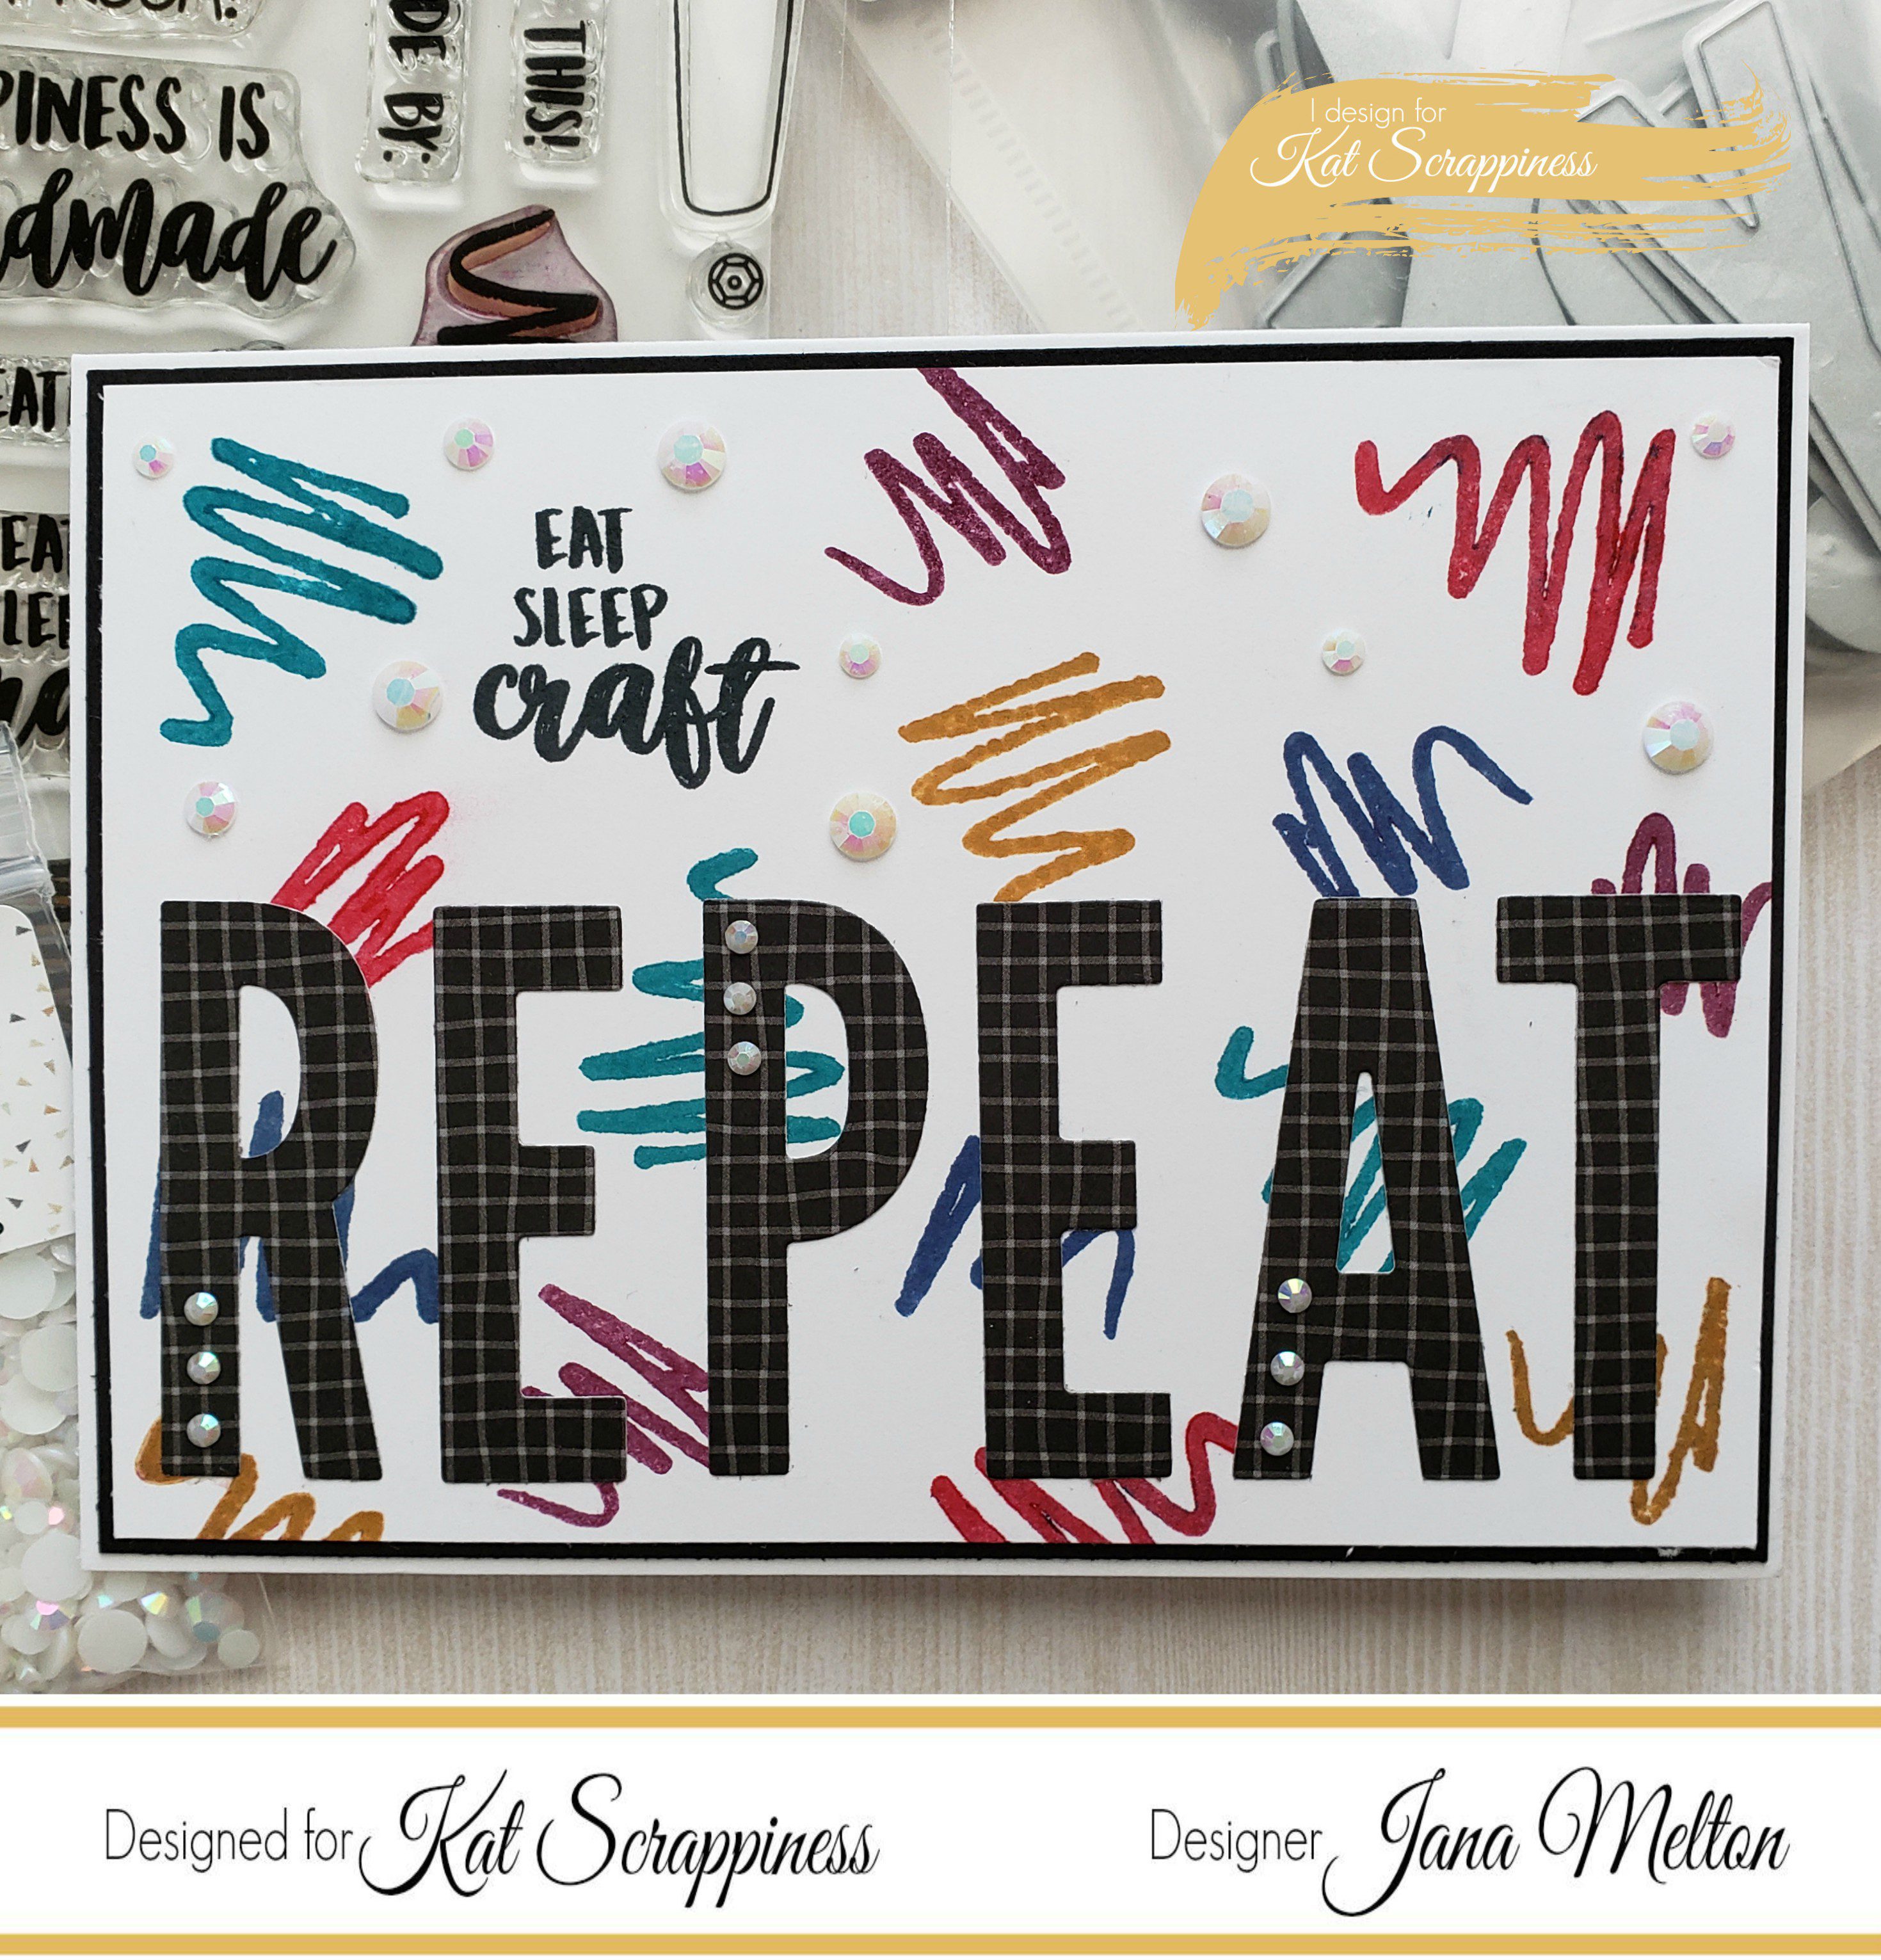
    The first step was to create a background using the stamp set.  I used a piece of smooth white card stock and stamped with my Memento Black ink.  I knew I’d be coloring with my alcohol markers, and the Memento ink won’t smudge.  I stamped the scissors first, carefully repeating the image several times.  Then I brought in the pencil stamp and added more of these, since they were smaller.  I turned the stamp so that some images show the point of the pencil, and other images show the eraser.  I then stamped the marker stamp, making sure to keep the nib end in the image.  Then all I had to do was scatter the medium sequin stamp all around the main images, filling in the white spaces as evenly as I could.  By starting with the big images, filling in with the small, and keeping the angles true, you can easily create a custom background that doesn’t look jumbled or messy 🙂


    Now it’s time to color!  I decided to use my Copic Sketch markers, but anything you prefer will work just as well.  I kept the colors pretty simple, using only two shades for each color, although I did use three different blues to give the sequins some dimension.  I also used a light, warm grey marker to create shadows around each image.  This doesn’t take much time, but has a big impact in bringing your images to life!  If you don’t have a grey marker, it’s also good to use a grey pencil to add the shadows.


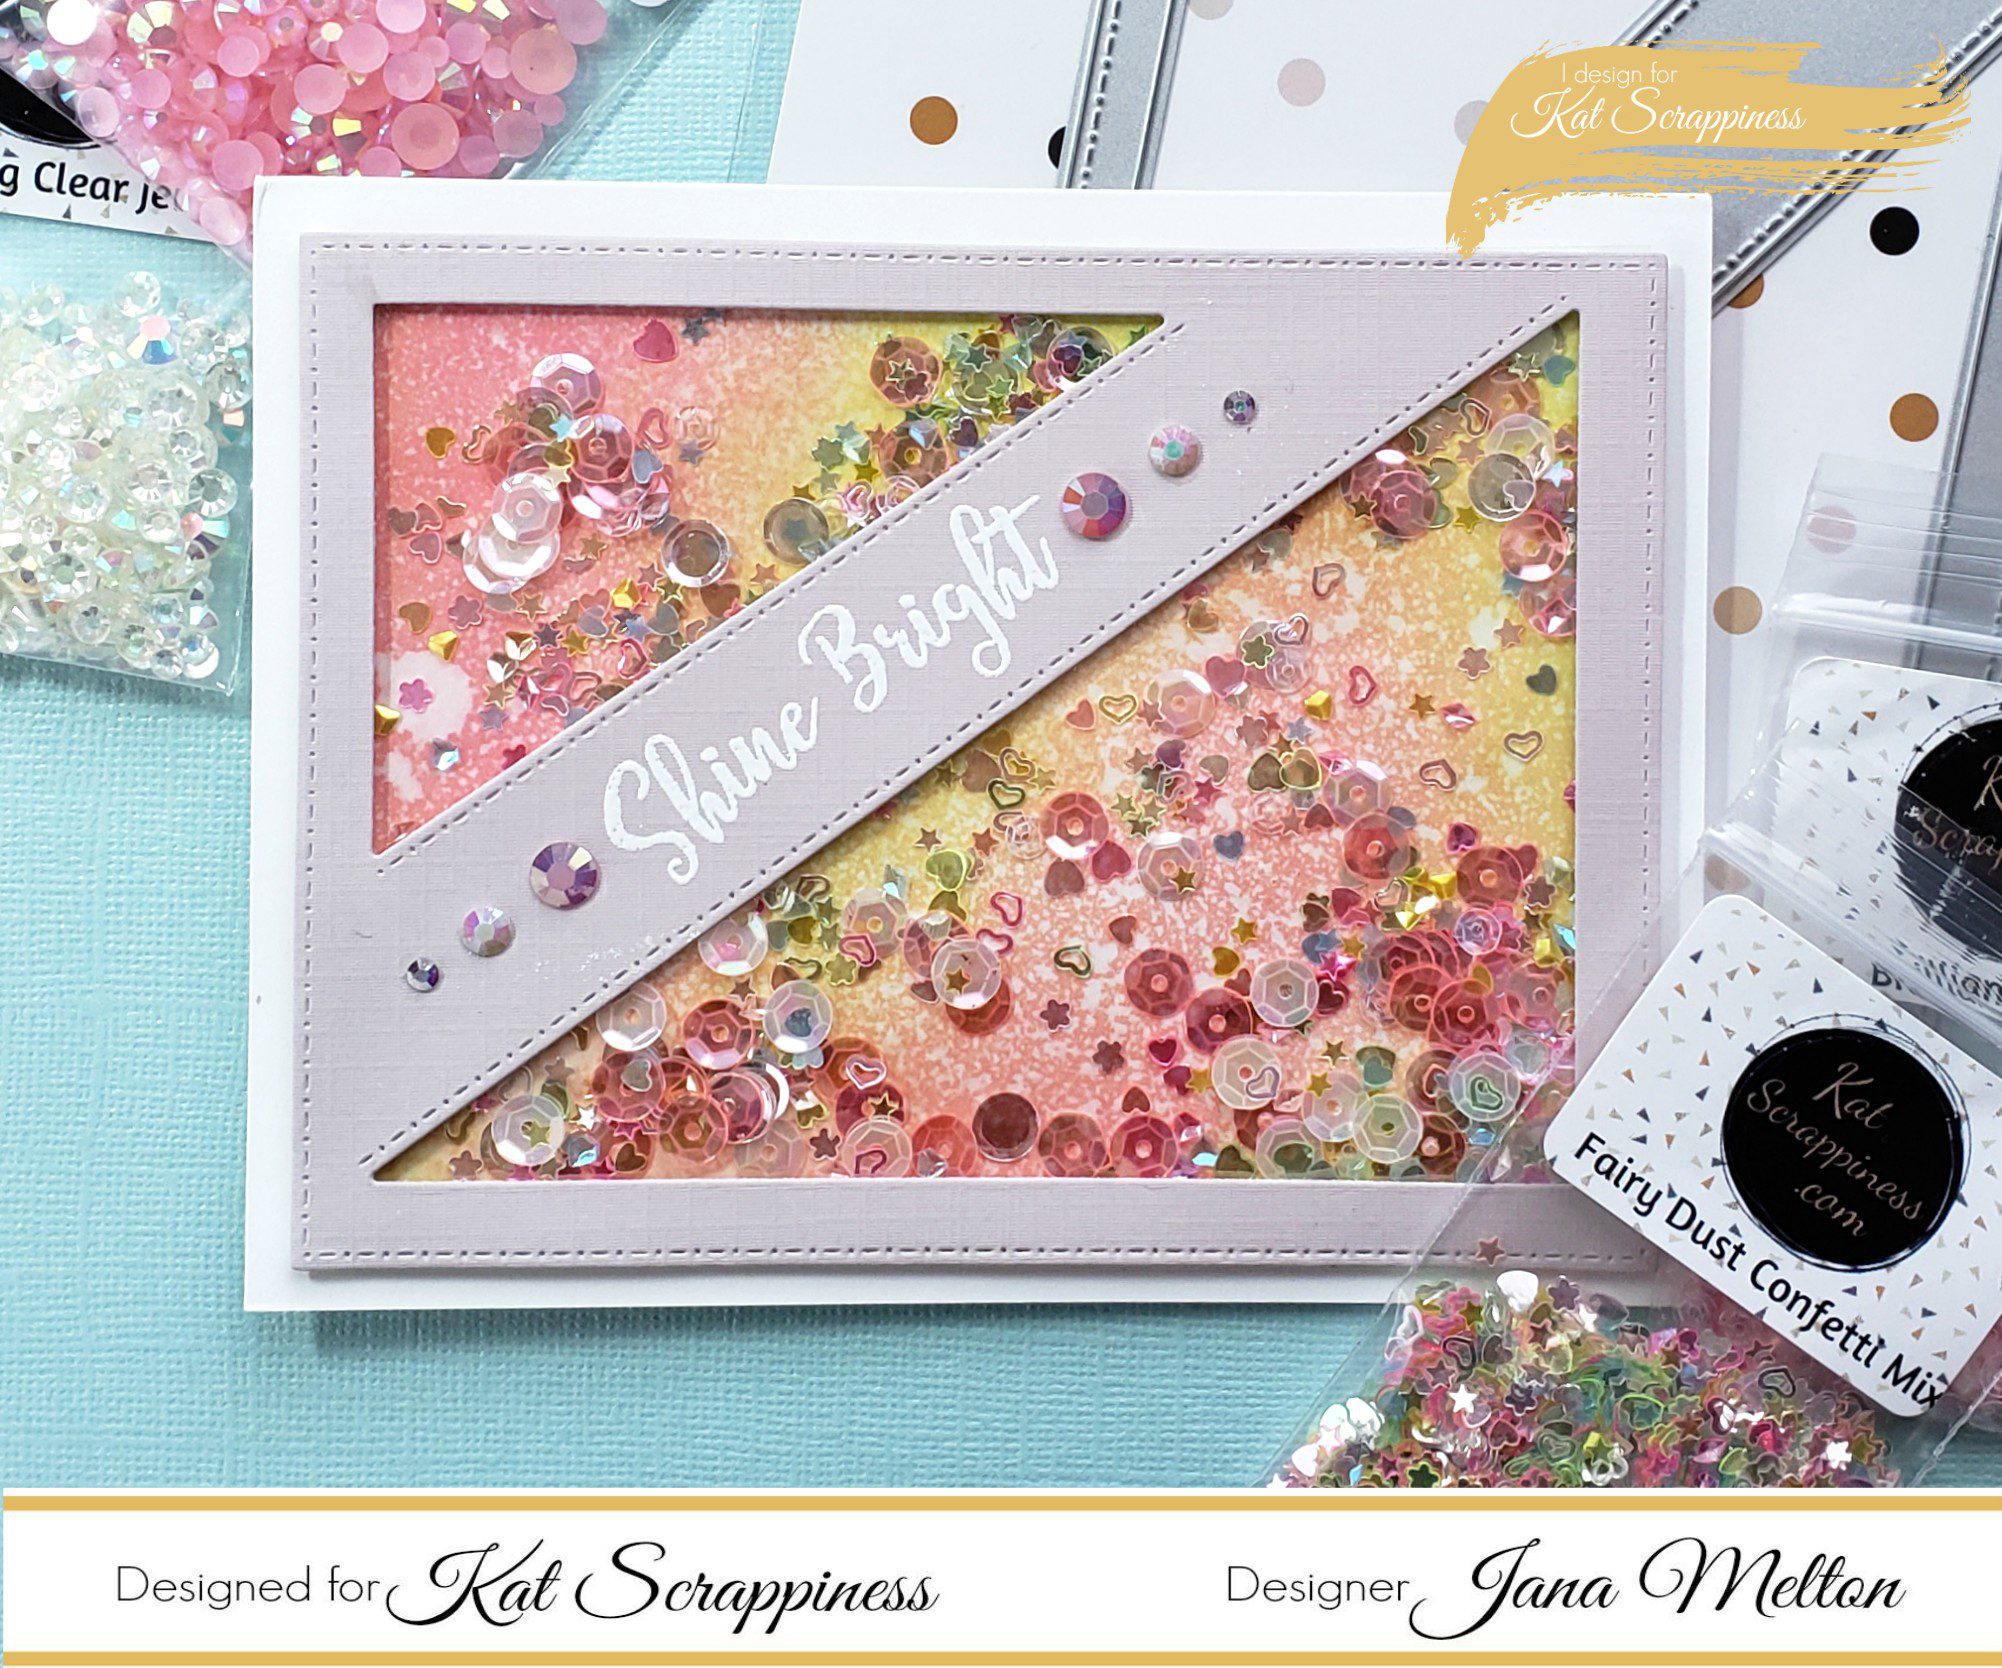
    I found a very nice green card stock in my paper supply and used it to mat my background piece.  Then I used the Stitched Diagonal Backdrop die and cut out a piece of heavyweight black card stock.  I absolutely love the size of this big die, and there are tons of different ways to use it!  You can put two different papers in each triangle, turn one of the triangles into a shaker, put an image in one and a sentiment in the other, or lots of other things.  I love that the triangles are also large enough to really show off all the stamping I did – it would be a shame to cover it all up, don’t you think?


    Before I attach my diagonal panel down to my project, I needed to add my sentiment.  I prefer to heat emboss when the card stock is still separate in case the heat causes some warping.  Whenever you come across a stacked sentiment stamp like this one, you can stamp it all in one line with some simple masking.  I just used a bit of washi tape to cover some of the words while I stamped the others, then reversed the process to finish the sentiment.  I used White embossing powder which really pops against that intense black card stock.


    I attached the diagonal piece flat to the card front with some strong adhesive tape, centering it carefully over the green mat layer.  This card would have also looked good had I popped up the black piece with foam tape – I was probably too lazy to get up and find my roll of foam tape!  Haha!  The very last little detail I added was just three of the gorgeous White Jewels that are also new in Kat’s shop.  These jewels are amazing!  They all have a gorgeous iridescent sparkle to them, each one is perfectly faceted to reflect the light, and there are four or five different sizes in every bag.  I can’t recommend them highly enough!


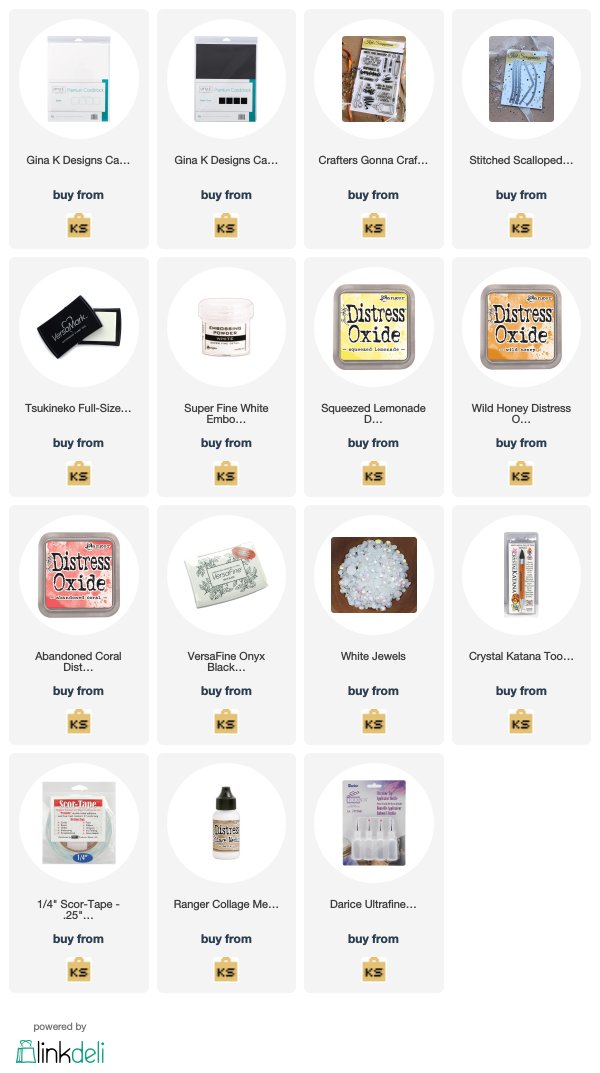
    And that is today’s finished card project.  I really hope that you had fun reading over this blog and that it inspired you to try out these new items for yourself.  Even as I was doing the stamping I was thinking of at least three other cards I wanted to design, using those fabulous images in different combinations.  The stamp set, the die, and the jewels (which come in six different colors) are all available now in the shop.  Follow the link below to get started, and don’t forget to use my discount code “CYNTHIA10” to receive 10% off your entire order.  Thanks for looking, and happy crafting!

    Kat Scrappiness Shop


  • “Shine Bright” Shaker Card

    “Shine Bright” Shaker Card

    Hello everybody! Design Team Member Jana stopping in today to share a quick tutorial on how I created a beautiful yet simple shaker card using some amazing newly released products from the Kat Scrappiness store.

    The first step was to create my card mat which would also serve as my background scene of my shaker card. To do this, I used a piece of 110lb. Neenah Solar White cardstock and taped it down to my craft mat using some Purple Tape (as seen below) to keep it in place. Using my blending tool, I applied Twisted Citron and Worn Lipstick Distress Oxide Inks by Tim Holtz in no particular fashion to the paper. Once I was happy with the lay down of the ink, I spritzed some water over top and dabbed off the excess to achieve the look you see below. I then set it off to the side to dry.

    While my inked up paper was drying, I moved on to my die cutting. I die cut a piece of textured cardstock from the ReCollections “Mermazing” Paper Pad using the newly released Stitched Diagonal Backdrop Die by Kat Scrappiness.

    I knew that I wanted my sentiment to be stamped across the thick diagonal portion of the die cut, so I stamped my sentiment, “Shine Bright” (from a Hero Arts My Monthly Hero Kit that I had received awhile back) using VersaMark Clear Embossing Ink and then heat embossed it with White Embossing Powder by Hero Arts.

    Once my inked up background was dried, I cut it down to measure approximately 3 6/8″ x 5″. I also cut a piece of Acetate measuring the same dimensions. I adhered the acetate to the back side of my die cut using Nuvo Deluxe Adhesive. Once dried, I applied some foam tape over that in order to form my shaker pockets. I adhered the inked background mat to my card base using some double sided adhesive tape.

    Now for the FUN part……. I combined three different sequin mixes from Kat Scrappiness to use as my shaker elements: Fairy Dust Confetti Mix, Brilliant Blush Sequin Mix and the 6mm Sparkling Clear Solid Confetti Mix. I then removed the backing of the foam tape on my die cut and carefully adhered it over the sequins onto the mat to form my completed shaker. These sequins are absolutely gorgeous and as you can see below, they compliment each other and work perfectly together.

    And of course, we are not done just yet, LOL! I had to add one element to my shaker card…..jewels! Again, I used a combination of the Pretty Pink Jewels, Sparkling Clear Jewels and the White Jewels and adhered them onto both sides of my sentiment using Nuvo Deluxe Adhesive.

    And now our shaker card is complete!!!!

    I hope that you have enjoyed this quick shaker card tutorial today and will stop back again soon for more inspiration, tutorials and project ideas that the super talented Kat Scrappiness Design Team has ready for you.  All of the products and supplies I have used for this project are listed below (most with links). Remember that when visiting the Kat Scrappiness Store, use code: Jana10 at checkout to receive 10% off of your order. Thank you again for visiting and as always….. Have a Fabulously Crafty Day!!!

    Product & Supply List:

    110lb. Neenah Solar White Cardstock

    Textured Cardstock from ReCollections “Mermazing” Paper Pad

    Twisted Citron Distress Oxide Ink Pad by Tim Holtz

    Worn Lipstick Distress Oxide Ink Pad by Tim Holtz

    Stitched Diagonal Backdrop Die by Kat Scrappiness

    Tsukineko Full Size VersaMark Clear Embossing Ink Pad

    Hero Arts – My Monthly Hero Kit 6X8 Clear Stamp Set (August 2017)

    Foam Tape

    Double-sided Adhesive Tape

    Hero Arts White Embossing Powder

    Heat Resistant Acetate

    Fairy Dust Confetti Mix – Sequins – Shaker Card Fillers

    Brilliant Blush Sequin Mix – Shaker Card Fillers

    6mm Sparkling Clear Solid Confetti Mix – Sequins – Shaker Card Fillers

    Pretty Pink Jewels by Kat Scrappiness

    White Jewels by Kat Scrappiness

    Removeable Purple Tape by iCraft

    Nuvo Deluxe Adhesive 200N


  • Crafters Gonna Craft Cards

    Crafters Gonna Craft Cards

    Hi Everyone, It’s Tina here. Today I have 3 cards to share with you using the Crafters Gonna Craft Stamp set. It is such a fun stamp set that I found myself making cards one after another. Below you will find the steps to replicate these cards.

    Card with Distress Oxide Background

    • Step 1 – Trim White Cardstock to 8 1/2″ x 5 1/2″, score at 4 1/4″ and fold in half for a vertical side fold card. (A2)
    • Step 2 – Trim Black Cardstock to 4″ x 5 1/4″ and adhere to card front using Clear Double Sided Adhesive.
    • Step 3 – Trim White Cardstock to 4 1/4″ x 5 1/2″. Stamp Crafters Gonna Craft using Versamark Ink. Sprinkle White Embossing Powder and heat set it with a heat tool.
    • Step 4 – Apply Distress Oxide Ink starting at bottom darkest to lightest going towards the top. (I used Squeezed Lemonade, Wild Honey & Abandoned Coral.)
    • Step 5 – Diecut Stitched Scalloped Border Die using the background created at the top. Adhere to card using Clear Double Sided Adhesive.
    • Step 6 – Adhere White Jewels using Collage Medium. The Crystal Katana is a great tool to pick up the jewels and place them.

    Cards One Layer

    • Step 1 – Trim White Cardstock to 8 1/2″ x 5 1/2″, score at 4 1/4″ and fold in half for a vertical side fold card. (A2)
    • Step 2 – Stamp Crafters Gonna Craft directly on the card front using Versafine Onyx Black Ink. Color one above the sentiment or color all. I colored one and stamped in color the brush stroke.
    • Step 3 – Optional – Add Sequins for interest.

    The Crafters Gonna Craft stamp set is such a versatile stamp set. You can have so much fun making your own backgrounds on a one layer card or adding a layer as the examples I have shown you. Below is a list of all products used. To receive 10% off your order use code TINA10 at checkout. Thank you for stopping by and have a wonderful day.

    Products Used:

    https://linkdeli.com/widget.js?1533216656914