Tag: watercolor

  • Stitched Hearts and Watercolor!

    Stitched Hearts and Watercolor!

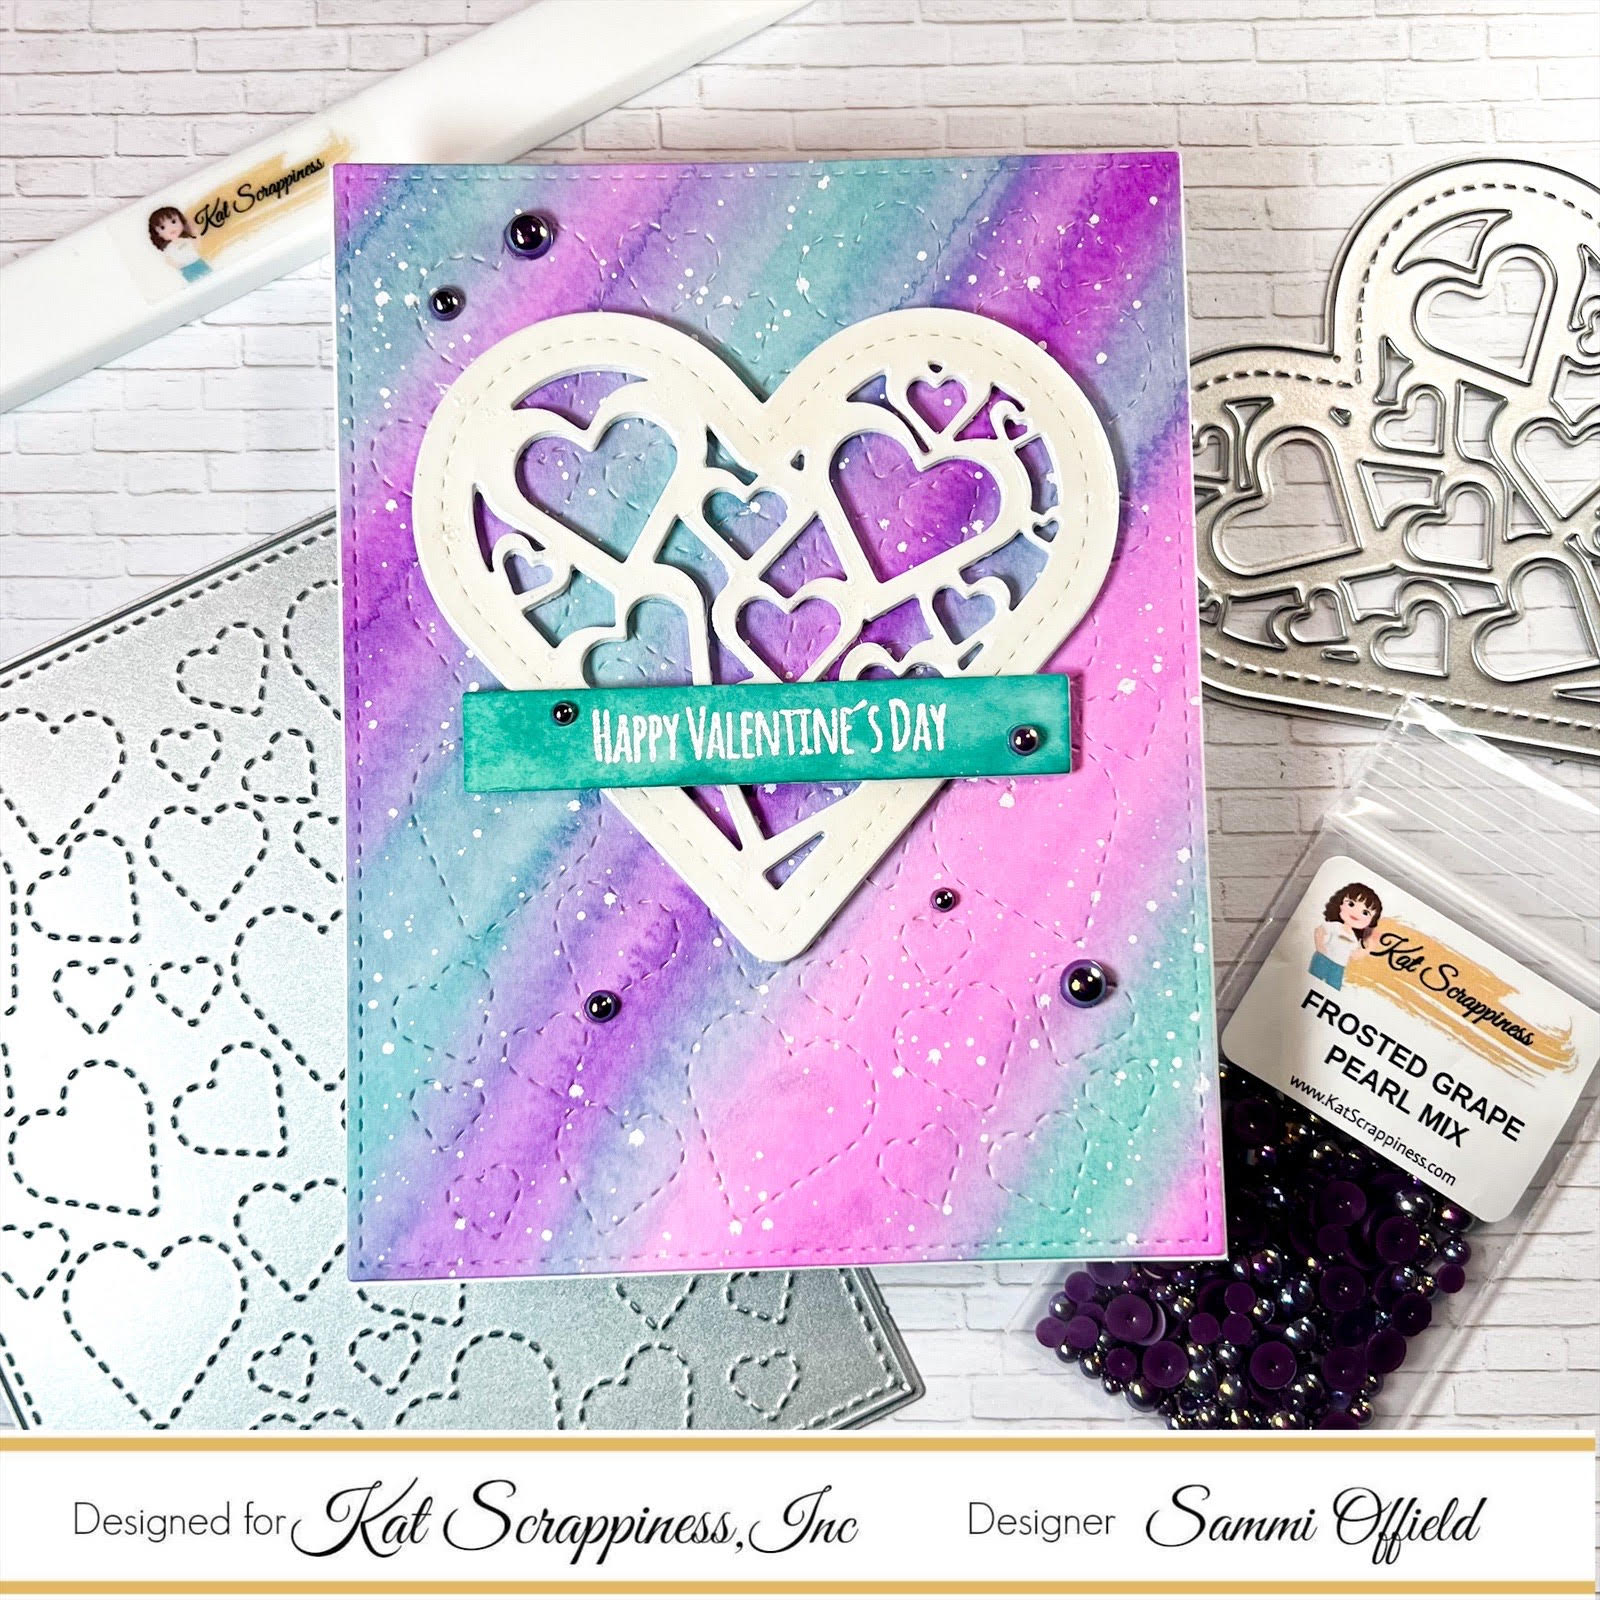
    Happy Saturday crafty friends!!! Sammi here to show you a fun card for Valentine’s Day using the NEW Stitched Hearts Coverplate Die from the new Valentine’s Day release. If you have not checked out the new release, you are missing out! It is AMAZING! To make this card, here is what I did:

    1. I cut out the background using the Stitched Hearts Coverplate die on some watercolor paper. Then using some Distress ink, I watercolored the watercolor paper with ink and water using a water brush. I stamped some ink on my glass media mat and used the water in my water brush to color the paper. I then added some white splatter.
    2. I then cut out the heart using one of the hearts from the Hearts of Love Shaker dies and 110lb Neenah cardstock three times and glued them on top of each other to add dimension. I then added some Glossy Accents to make the heart shiny.
    3. I then cut out the sentiment strip using the Kat Scrappiness Sentiment Strip dies and heat embossed the Happy Valentine’s Day from the Quokka Valentines Stamp Set with white embossing powder after I inked the sentiment strip with some Distress Ink.
    4. I then glued the white heart onto the card panel using Bearly Art Glue and then glued the sentiment on top of the white heart.
    5. After adding some Frosted Grape Pearl Mix embellishments, I glued the card panel onto a card base.

    I like non-traditional colors for a Valentine’s Day card and I like how this one turned out. I LOVE this color combo so much! Thanks for stopping by and I hope you have a great day!

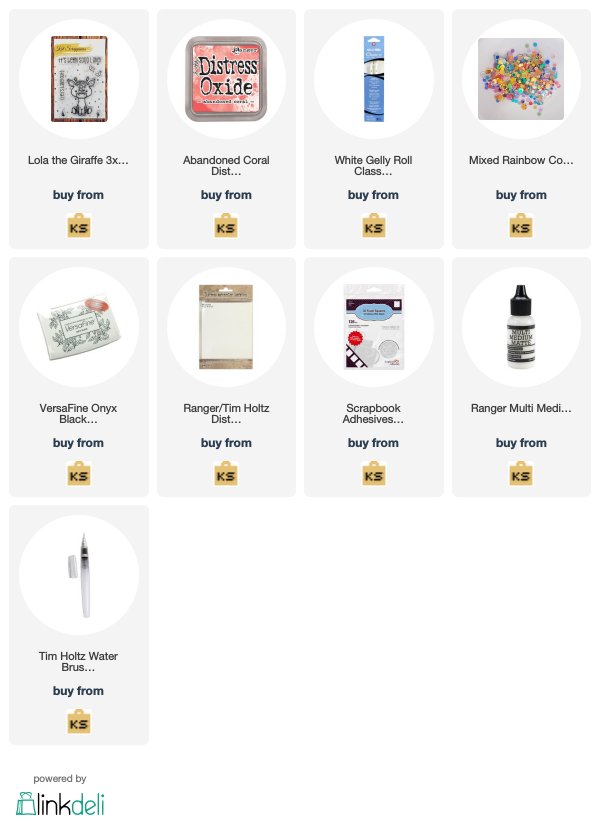
    Here is what I used for this card:

    Stitched Hearts Coverplate Die by Kat Scrappiness – Kat Scrappiness, Inc
    Hearts of Love Shaker Card Dies by Kat Scrappiness – Kat Scrappiness, Inc
    Valentine Quokka Stamp Set by Kat Scrappiness – Kat Scrappiness, Inc
    Frosted Grape Pearl Mix by Kat Scrappiness – Kat Scrappiness, Inc
    Ranger Glossy Accents .5oz – Kat Scrappiness, Inc
    Ranger Glossy Accents 2oz – Kat Scrappiness, Inc
    Bearly Art Precision Craft Glue – THE ORIGINAL – Kat Scrappiness, Inc

    https://www.katscrappiness.com/products/neenah-110lb-classic-crest-cardstock-8-5×11-25-pack?keyword=white%20cardstock


  • Shaker Cards in different sizes

    Shaker Cards in different sizes

    Hello Kat Scrappiness fans! Martha Lucia here with you. Today I have two fun projects to share with you. I am featuring some of the new Sprinkles in combination with  some of my favorites die cuts and the new acetate sheets.

    Square Shaker Card

    My first project is a square shaker card. The base of my card is basic black card stock and the second layer is piece of designer paper.  I die cut two zig zag stitched square dies onto watercolor paper and made a faux watercolor technique over both pieces, using the Double Ended Markers from Leisure Arts and Ink Potion No. 9 over my craft mat. I let the square pieces dry naturally.

    Square Shaker Card

    With a perforated flap die from my stash, I die cut the window on the front panel and decorated it with some imagines from the stamp set Mother’s Day Love from Joy Clair Stamps. I colored the stamped images with Spectrum Noir Alcohol Markers and pasted a piece of grass that I die cut onto olive green cardstock with one of the dies included on the He is Risen die cuts from Kat Scrappiness.

    Square Shaker Card

    To create the window of my square shaker card, I used one of the new acetate sheets from Kat Scrappiness and the Little Piggy Sprinkes in combination with the Blue Kiwaii Cloud Sprinkles. OMG, you have to see the collection of sprinkles, they are amazing and with exclusive designs.

    Square Shaker Card

    My second card is a regular size card. I love Christmas and the new release of sprinkles include several christmas designs that are perfect for this season.

    This card features the Mandala Frame die and I just die cut a circle with the Never Ending Circle Dies on the center to let see the Christmas Candy Sprinkles. For the background I used Gold/Gold Starstruck Rinea Foiled Paper, this add the shiny touch to my card .I used the circle that I die cut from the center of the Mandala Frame to stamp two images included on the stamp set Dog Gone Christmas from Joy Clair. I colored the Christmas dog with Spectrum Noir Alcohol Markers.

    Thank you for stopping by and If I have inspired you, please use the links below to get these cute products!

    SUPPLIES:

    I’m listing the products I used below. Click on the link to go directly to the product. Where available I use compensated affiliate links which means if you make a purchase I receive a small commission at no extra cost to you. Thank you so much for your support!

    Little Piggie Sprinkles
    Little Piggie Sprinkles
    Shop at:
    KS
    Blue Kuwaii Cloud Sprinkles
    Blue Kuwaii Cloud Sprinkles
    Shop at:
    KS
    Christmas Candy Sprinkles
    Christmas Candy Sprinkles
    Shop at:
    KS
    A2 Acetate Sheets of 25 Package
    A2 Acetate Sheets of 25 Package
    Shop at:
    KS
    A2 Acetate Sheets of 25 Package
    A2 Acetate Sheets of 25 Package
    Shop at:
    KS
    Zig Zag Squares Dies
    Zig Zag Squares Dies
    Shop at:
    KS
    He is Risen Dies by Kat Scrappiness
    He is Risen Dies by Kat Scrappiness
    Shop at:
    KS
    Mandala Frame
    Mandala Frame
    Shop at:
    KS
    Never Ending Circles Dies
    Never Ending Circles Dies
    Shop at:
    KS
    Make Art Stay-tion All in One
    Make Art Stay-tion All in One
    Shop at:
    KS
    Double sided foam Tape or Dimensionals
    Double sided foam Tape or Dimensionals
    Shop at:
    KS | OTS
    Memento Tuxedo Black Ink
    Memento Tuxedo Black Ink
    Shop at:
    CB& S | KS | SB
    Therm-o-web Icraft Purple Tape 1.5 inc
    Therm-o-web Icraft Purple Tape 1.5 inc
    Shop at:
    KS | OTS | SB | HS
    Therm-o-web Icraft Purple Tape 0.5 inc
    Therm-o-web Icraft Purple Tape 0.5 inc
    Shop at:
    KS | OTS | SB | HS
  • Watercolor Mandala Card with Video

    Watercolor Mandala Card with Video

    Good morning Kat Scrappiness fans, it’s Lisa here with you today

    and I have a card I’d like to share with you using one of the newest dies in the store!

    It’s called the Mandala die and it cuts a beautiful intricate pattern

    into your project. Today I’ve used a water coloring technique called ink smooshing

    (yes it’s a thing)?

    I used 3 different color distress inks:

    Salty Ocean

    Peacock Feathers

    and

    Lucky Clover

    This technique is easy and fun to do and you can get beautiful

    results every time! There are so many color combinations you

    could use depending on your favorite colors.

    Here is a video I made to show you the ink smooshing technique.

    You can watch it here or on YouTube.

    [youtube https://www.youtube.com/watch?v=6dPHZ6Q0wlU]


    Thanks so much for joining me today. I hope you’ll give this technique a try! It’s lots of fun and it looks beautiful with minimal effort.  Don’t forget to use my code Lisa10 to save 10% on your order anytime!

    Have a great day, I already am!

    ?Lisa?

  • Lola the Giraffe Card – Jo Herbert

    Lola the Giraffe Card – Jo Herbert

    Hi All, my name is Jo and I am super excited to be joining Kat Scrappiness as a Guest designer this month.

    Iam a paper crafter from the Sunshine Coast Queensland, Australia. Mum of 3, wife and Instagram addict. 
    My style is always evolving as I get too tempted with current trends and new products. 
    Card making and scrap booking has been such an important part of my life for so many years now and I have thoroughly enjoyed seeing where it has taken me.
    From the early years of plenty of colour and bold embellishments, my style has changed and developed over the years with me and I now believe I am more about embracing white space and bringing the card to life with small pops of colour. 

    I have made some some fun cards that I will show case with lots of Kat Scrapiness goodies over the the next couple of weeks.

    For today’s card I have use the adorable “Lola the Giraffe” stampset AND the very exciting new Crafters Essentials 2 die set.

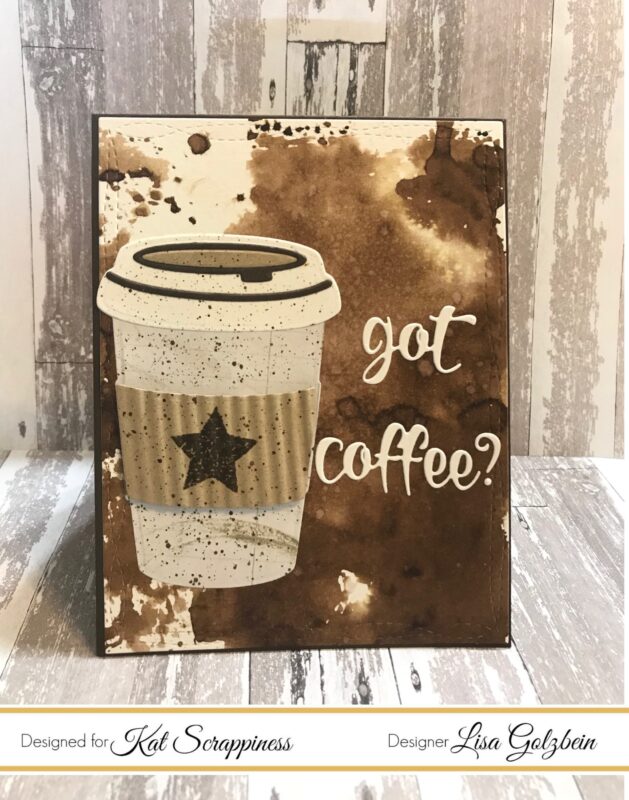
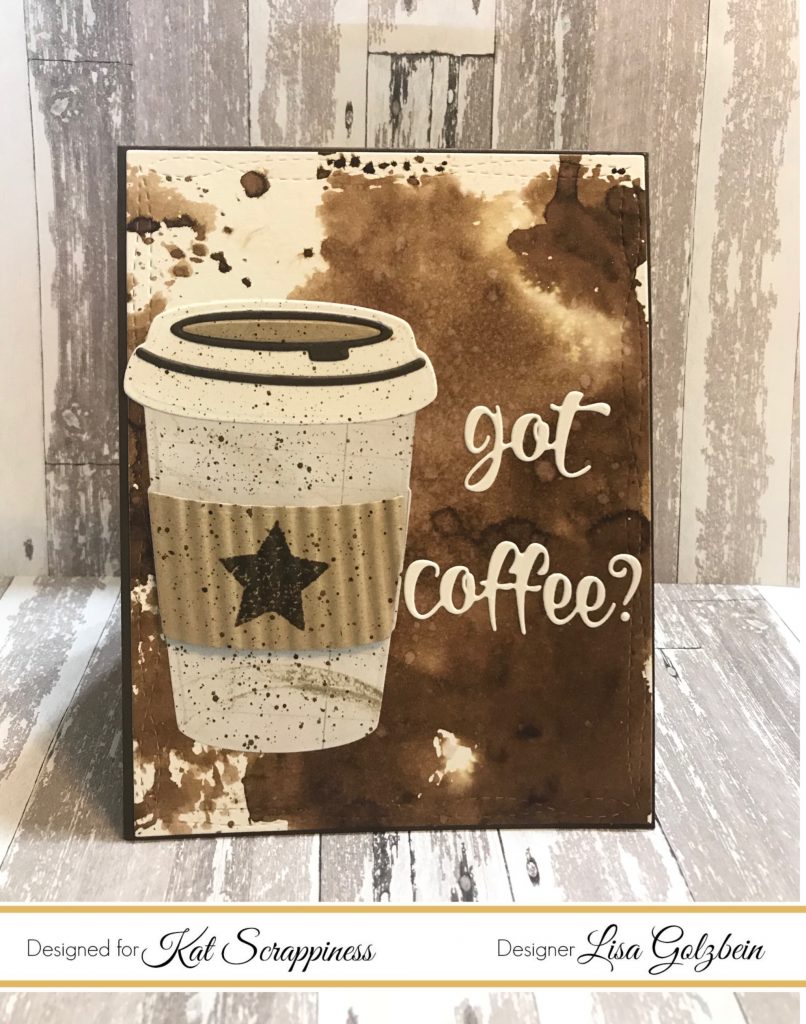
    Here is how I made my card –

    1. Ink blend with Distress Inks Ripe Persimmon, Abandoned Coral and Mustard Seeds on white cardstock then die cut with the largest background die, banner and chevrons.
    2. Die cut with white cardstock with the largest die. I love the stitching detail around the edges that also die cuts out chevrons on the right hand side. I have adhered this down with tombow mono liquid on the white top folding card base.
    3. I have used foam tape that I have cut up in small pieces to fit inside each chevron then I placed the ink blended die cuts of each chevron on the foam.
    4. I have stamped Lola the Giraffe with Versafine Onyx Black ink on white watercolour cardstock and coloured in with Derwent Watercolouring pencils. I then fussy cut out the giraffe and foam mounted on the banner die. I added some last minute detail to Lola with a white sharpie adding freckles on her check and highlighting the ears and feet.
    5. I stamped the sentiment with Abandoned Coral Distress Oxide Ink on a the thin strip of banner die cut then adhered down on the card panel.
    6. To finish the card off I added some confetti sequins.

    To watch me make this card I have created a you tube of my process.

    I hope you enjoyed today’s card tutorial. Don’t forget to check back in for another fun blog post. I’d love for you to visit me and stay in touch.

    Facebook: https://goo.gl/8cXyWz

    Instagram: https://goo.gl/WfBn1D

    Blog: https://joherbertsite.wordpress.com/

    You Tube Channel: https://goo.gl/BUh9Kd

    Thanks Kat Scrappiness for asking for having me along for asking me to Guest Design this month.

    https://linkdeli.com/widget.js?1529409693472


  • Crazy Bird

    Crazy Bird

    Good morning everyone!

    It’s my turn today on the blog and I’ve got a fun card to share with you.  This month Kat released a great new die called the Wood Grain Framed Diamond Wire and it really is a unique die that can be used in so many different ways.  Make sure to check out the other projects by the DT members to see how they have used this fun die.

    Today I decided to use the die as an interesting background and a place to showcase my crazy bird and computer generated sentiment.

    I started by stamping my Tim Holtz Crazy Bird on to some watercolor paper with Versafine Onyx black ink and coloring him with 2 colors of distress ink.  I rubbed some Squeezed Lemonade and Peacock Feathers on to an acrylic block and I used my water brush to pick up the ink and color my bird.

    After I was happy with the results I hand cut him out and put him aside to dry.

    Next I die cut the Wood Grain Framed Diamond Wire die out of some black cardstock and adhered a piece of black striped patterned paper behind it.  I really love the look of the wire die over the striped paper.  It adds to the “crazy” look on the birds face.

    I glued the wire die with the patterned paper to an A2 sized white card base with some

    Nuvo Deluxe Adhesive.

    For this card I wanted to add a sentiment with a crazy font so I generated a sentiment from my computer and hand cut it out.  I trimmed down the words into 6 different strips and inked the edges of each strip with some Black Soot distress ink.

    The only thing left to do was to pop up my bird and sentiment strips up on some foam tape.

    I love how this card turned out and the Wood Grain Framed Diamond Wire die

    gives it such a unique look.

    Thanks for joining me today, make sure to check out these great products in the shop and don’t forget to use code Lisa10 to get 10% off your order at checkout!

    All products will be linked below.

    Have a great day, I already am!

    ?Lisa ?

    Products Used:

  • Got Coffee?

    Got Coffee?


    Welcome back Kat Scrappiness fans!  It’s Lisa and I’m back today to share a cup of coffee with you.  If you’ve already had your morning cup, pour another and relax.  This month Kat has come out with an awesome new Layered Coffee Cup Die and I’m in love!  I’m a big fan of all coffee themed projects.  I’m not a huge coffee drinker but since I work night shift at the hospital I do find myself reaching for it at 3 and 4 in the morning to stay awake.  If the truth be told I just enjoy a little coffee in my half and half…. heh heh heh.

    Ok enough coffee talk, on to the card.  I wanted this card to have a “coffee stained” background so of course I reached for my Ground Espresso colored Distress Ink pad and  I “smooshed” (technical crafty term) some ink onto a piece of acetate and then sprayed it with water.  When the ink was moving around I placed the acetate onto a piece of watercolor paper and the results were gorgeous!  I then assembled my coffee cup out of various colors of card stock and patterned paper.

    Here is a very handy instruction sheet to show you how to assemble the pieces from the die.

    For the coffee cozy section of the die I used kraft cardstock and I stamped a star from the new Kat Scrappiness Swatches stamp set.  After that I ran the cozy through my paper crimper to give it a realistic look with some dimension and I added it to the cup with some foam tape.  When the coffee cup was fully assembled I added some paint splatter with the Ground Espresso color to the whole cup.  I just love the added interest paint splatter gives to any project!

    For my sentiment I used the new Kat Scrappiness “Got Coffee?” die and added it to the side of the card.  This sentiment is awesome and uses a fun whimsical font that is perfect for any coffee themed card.

    For this next card I used just the word “coffee” and cut it out 3 times in different colors for a fun look.  I painted the coffee cup with a pink pearlescent color from the Kuretake Gansai Pearl colors watercolor set and I added a heart to the cozy from the “Swatches” stamp set and heat embossed it with Ranger Gold powder.  I placed it on a diamond embossed background and added some fun

    Kat Scrappiness Barbie sequins for a feminine touch.

    Such a different look with the same die!

    If you added the sentiment “Wanna” above this die, it would make a cute card for a friend inviting them to get together over coffee reading “Wanna Get Coffee?”

    This coffee cup die makes it easy to create an eye catching card in no time!

    Make sure to stay tuned this month to the blog to see what my talented fellow design team members have come up with for this die and all of the other new release stamps and dies!  You’ll be glad you did!

    That’s all for today, I am glad you stopped by and I hope you have a great day crafty friends!

    I already am!

    Lisa

    Supplies used on Coffee cards:

    Be sure to use code: Lisa10 to get 10% off of your purchase at checkout!

    Layered Coffee Cup Die

    Got Coffee Word Die

    Swatches Stamp Set

    Barbie Sequin Mix

    Ground Espresso Distress Ink

    Kuretake Gansai Pearl Watercolors

    Ranger Gold Embossing Powder

  • Egg-cited For Easter

    Hi Kat Scrappiness fans!  It’s Lisa and I’m up on the blog today to bring you another fun card using an awesome stamp and die set from “Your Next Stamp”.  This stamp set is called “So Egg-citing” and there are cute matching dies.  It features the most adorable egg carton to put some little chickies and eggs into.  Since Easter is on Sunday I thought it would be fun to make a cute Easter card featuring that cute carton with some sweet baby chicks inside.

    I started out by stamping all the images I wanted to color and place on my card.  I colored them with my Zig Clean Color Brush Markers and blended them out for a watercolor look.

    After the coloring was done I used the matching dies to cut out my cute little chickies and eggs.

    Next I stamped the egg carton image with Versafine Onyx Black ink and heat embossed it with Hero Arts Clear Embossing Powder so that I could watercolor it with my Pearl Colors by Kuretake Gansai Tambi.  This technique seals the black ink preventing it from smearing when it gets wet. I just love the pearlescent shine of these paints.

    Next I worked on the sentiment.  For this card I used one of my favorite techniques for die cutting letters.  I love to make a beautiful watercolor backgrounds and die cut letters out of it.  It gives them a very random and pretty pattern.  The Kat Scrappiness Condensed Lowercase Alphabet Dies were perfect for this technique.  I used my Pearl Colors by Kuretake Gansai Tambi again and I took some watercolor paper and randomly painted 4 different pastel colors.  The result was a very pretty pastel background from which I cut my letters out for a very bold sentiment.

    Next I cut out a piece of cardstock with the Kat Scrappiness Rectangle Stitched Dies and ran the panel through my die cut machine with a wood grain embossing folder for some dimension and texture.  I adhered the wood grain panel to a standard card base and glued my letters down.  After gluing my chicks and eggs down inside the egg carton I popped it up over the letters with some foam tape for added dimension.  I added a few more chicks and eggs to the letters for some fun and finished the card off with some Kat Scrappiness Rainbow Splash and Barbie sequins. And of course no card is complete without some sparkle and shimmer so I took my Spectrum Noir Sparkle Marker to add some glittery goodness to my chicks and eggs.

    I hope you enjoyed today’s card and I hope you’ll try cutting some alphabet dies from some handmade watercolor or painted cardstock!  All supplies linked below.  Check out KatScrappiness.com to find the supplies used to make this card and lots of other crafty goodness!  Don’t forget to use code Lisa10 to save 10% off of your total purchase at checkout!

    Have a great day everyone!

    I already am!

    ?Lisa?


    Supplies used:

    Barbie Sequin Mix – Shaker Card Fillers

    Clear Overlay Sparkle Markers by Spectrum Noir

    Condensed Lowercase Alphabet Dies by Kat Scrappiness

    Hero Arts Ultra Fine Clear Embossing Powder

    Kat Scrappiness Stitched Postage Stamp Edge Rectangle Dies

    Rainbow Splash Sequin Mix – Shaker Card Fillers

    Pearl Colors – Kuretake Gansai Tambi 6 Color Set

    VersaFine Onyx Black Pigment Ink Pad

    Your Next Stamp So EGG-Citing Stamp Set

    Your Next Stamp So EGG-Citing Dies

  • Circle Shaker Card with Angeline

    Circle Shaker Card with Angeline

    Hi! Angeline here to share with you a fun circle shaker card with a few magic ingredients: Sequins, Unicorns and Glitter! 🙂

    I first painted the background with some Prima watercolors. Then I put some of Kat Scrappiness Sequins [Lilac Skies and Snowflake Kisses] in the middle of the card, place an acetate over it to seal it in. This way, it doesn’t create much bulk but still you get the fun element of “shaking” the card 🙂 I then covered the acetate using the largest circle I cut from Gina Marie Designs Stitched Scalloped Circle Frame die.

    Then I stamped with Memento Tuxedo Black Dye Ink, colored with Copic markers and fussy cut the Gerda Steiner Moody Unicorns. I decided to add some Nuvo Glitter drop [White Blizzard] to the unicorns’ hair coz seriously — unicorns are just magical! 🙂

    Then it’s all done!

    Hope you enjoyed this fun circle shaker card I made and do try it out yourself! 🙂

    ▬▬▬▬▬★ S U P P L I E S ★▬▬▬▬▬

    Kat Scrappiness Sequins [Lilac Skies and Snowflake Kisses]

    Gerda Steiner Moody Unicorns

    Gina Marie Designs Stitched Scalloped Circle Frame die

    Nuvo Glitter drop [White Blizzard]

    Memento Tuxedo Black Dye Ink

    Acetate
    Copic markers
    White cardstock
    Foam Adhesive
    Glue Tape
    Prima Watercolor Confections [Pastel Dreams]

  • Unicorn Color Burst with Angeline

    Unicorn Color Burst with Angeline

    Hi. Angeline here to share with you a fun card I made today using the Gerda Steiner Moody Unicorns stamp set and Ken Oliver Liquid Metals Color Burst Precious Alloys

    For the background, I was inspired by Maremi SmallArt to draw some circles and paint using some watercolors. I wanted a rainbow burst of colors and some glimmer to it, so I used the Ken Oliver Liquid Metals Color Burst Precious Alloys which is actually liquid watercolors in metallic colors. SO MUCH FUN! I painted the background using my Tim Holtz Water Brush (Detailer brush nib)

    Then for the unicorns, I stamped them with Memento Tuxedo Black Dye Ink onto some white cardstock and colored them with my Copic markers. Then I fussy cut them, popped some foam adhesive to it and adhered it to my card. I finished the card off by stamping the “Surprise” sentiment with VersaFine Onyx Black Pigment Ink Pad

    Here is the process video (step-by-step) on how I made this fun Unicorn Color Burst card

    ▬▬▬▬▬★ S U P P L I E S ★▬▬▬▬▬

    Gerda Steiner Moody Unicorns

    Ken Oliver Liquid Metals Color Burst Precious Alloys

    Tim Holtz Water Brush (Detailer brush nib)

    VersaFine Onyx Black Pigment Ink Pad

    Memento Tuxedo Black Dye Ink

    Acrylic Block
    Copic markers
    Foam adhesive
    White cardstock
    Watercolor cardstock
    Ranger Heat Tool
    Painters Tape

  • Summer Themed Birthday Card

    Summer Themed Birthday Card

    Hey, stampers! Kevin here sharing a super CAS, yet colorful, birthday card. Even though it is snowing today up here in Minnesota my mind is on SUMMER. So I created this card with palm trees, pineapples, and bright bold colors in mind. I also love mixing older stamp sets with new products, so here’s how I used an older Lawn Fawn stamp set with some new paper from Echo Park!


    I started by adding a strip of patterned paper from Echo Park’s Summer Fun paper pad to a white card base. Then on a separate panel I added some Distress Ink using a water brush. I chose two shades of yellow that matched the stripes  in the Summer Fun paper. Then I stamped out a flamingo from Lawn Fawn’s Flamingo Together and used some more Distress Inks to watercolor it. After die cutting the flamingo I popped it over the water colored area and added a bold sentiment from Mudra’s Purely Labeled Sentiments stamp set with more foam dots.

    These CAS cards are perfect for spring/summer birthdays. Feel free to leave a comment and ask any questions you have about this cool summer project! Have a great day!