Tag: Stitched Flags Die Set

  • Quokka: The Happiest Animal in the World

    Quokka: The Happiest Animal in the World

    Hi Crafty Friends,
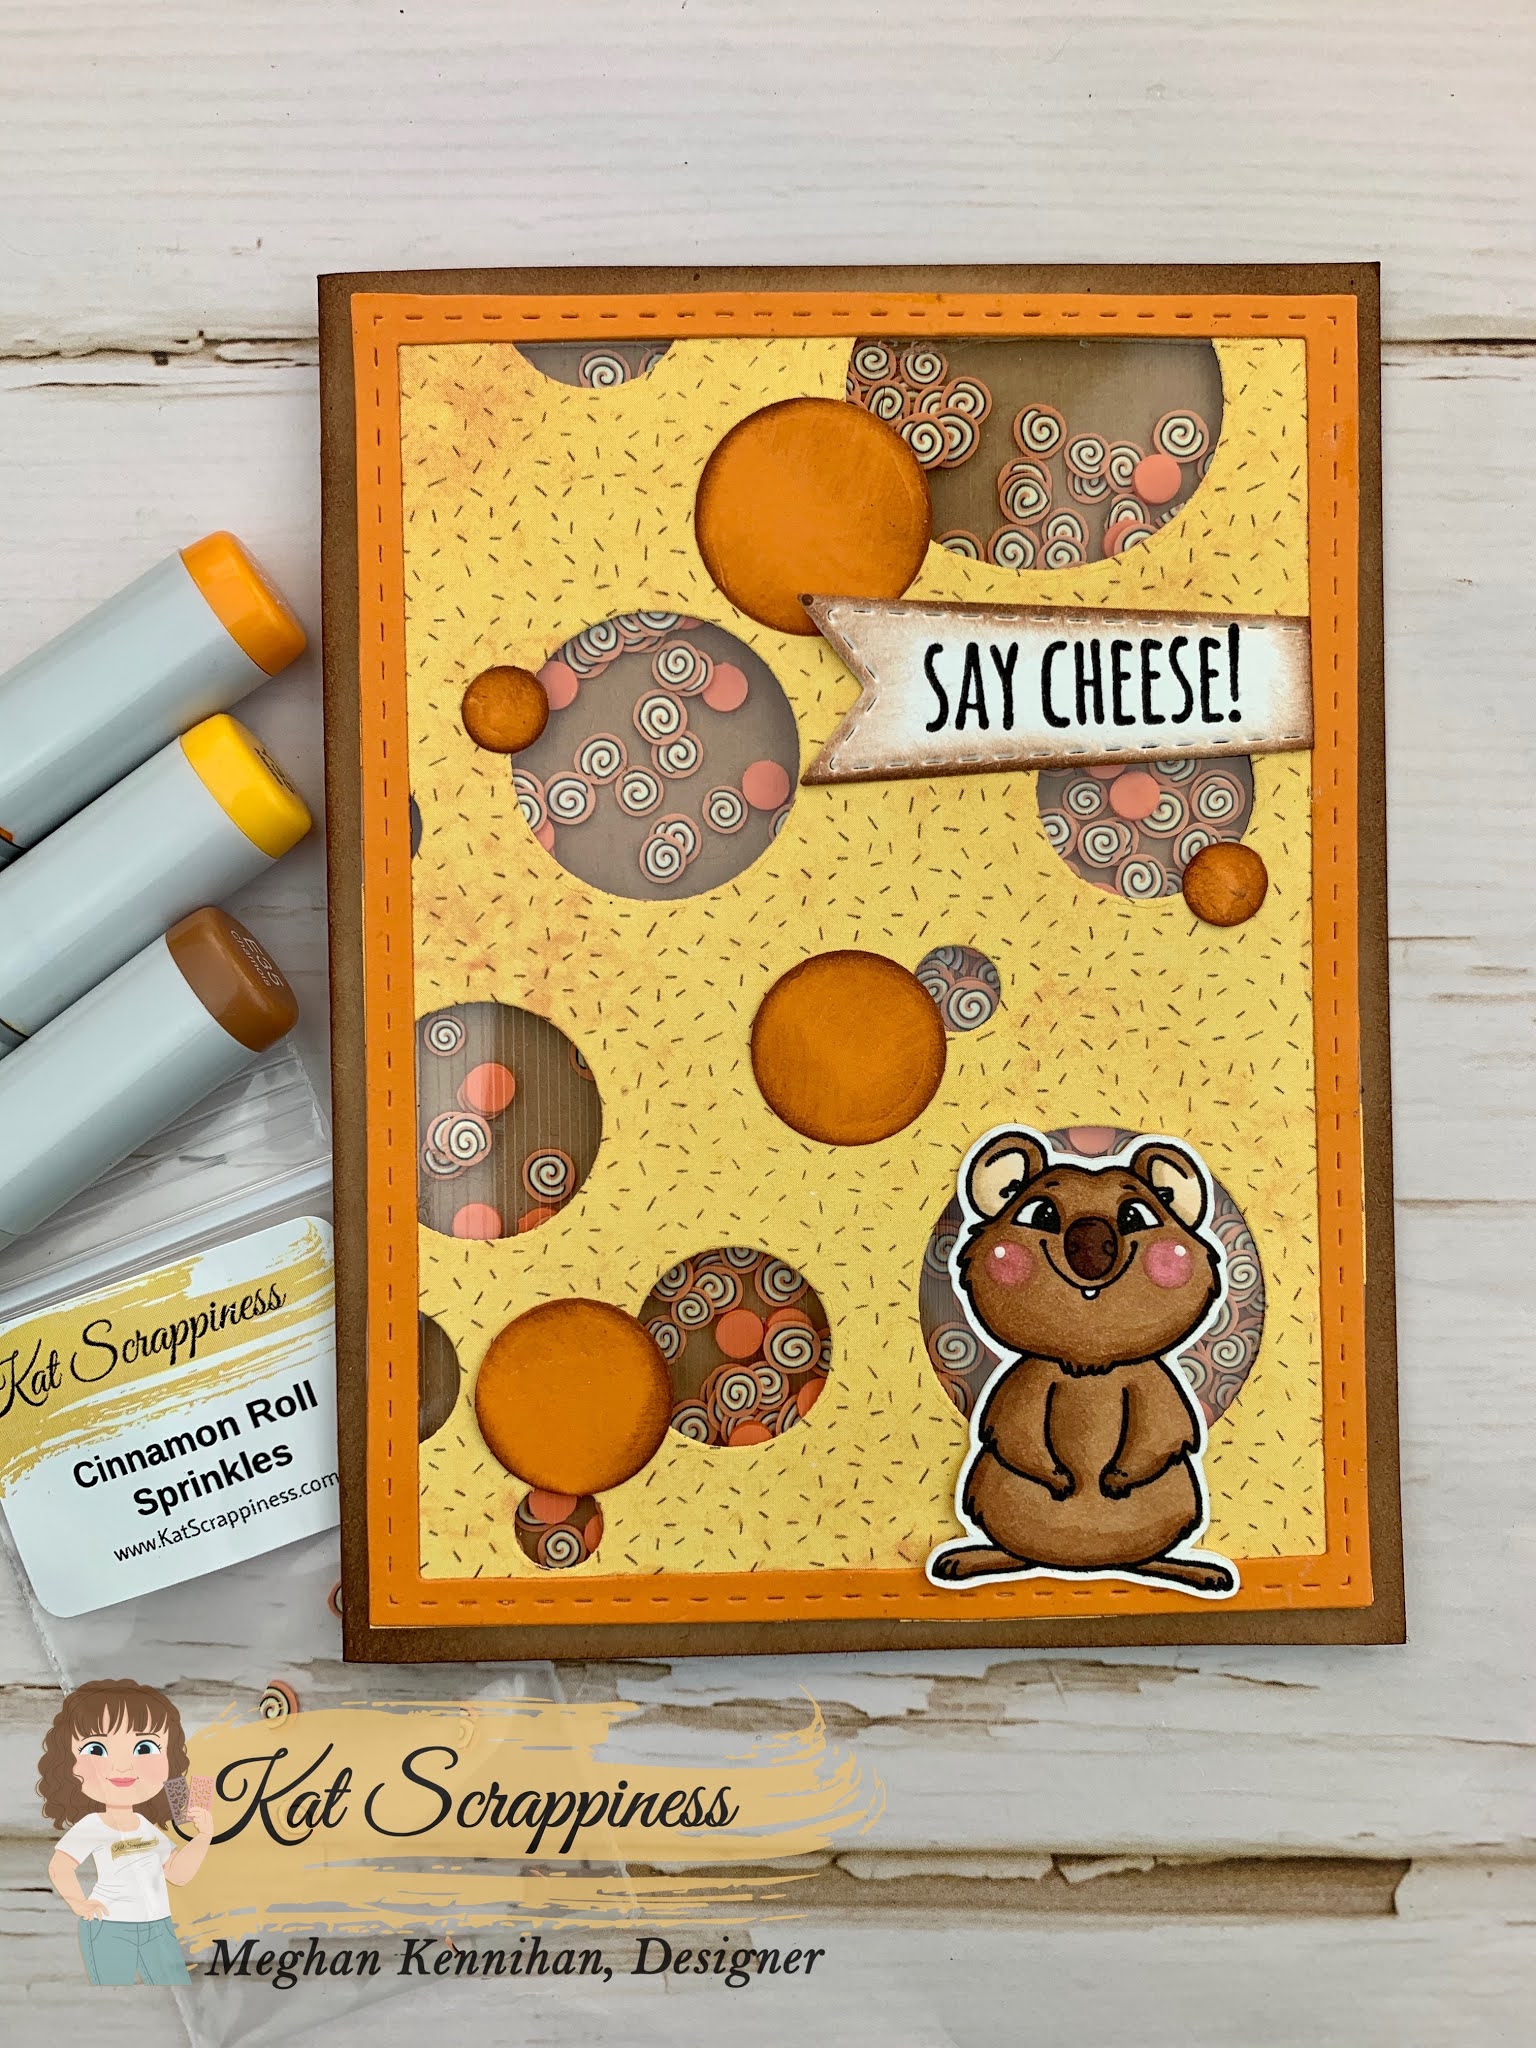
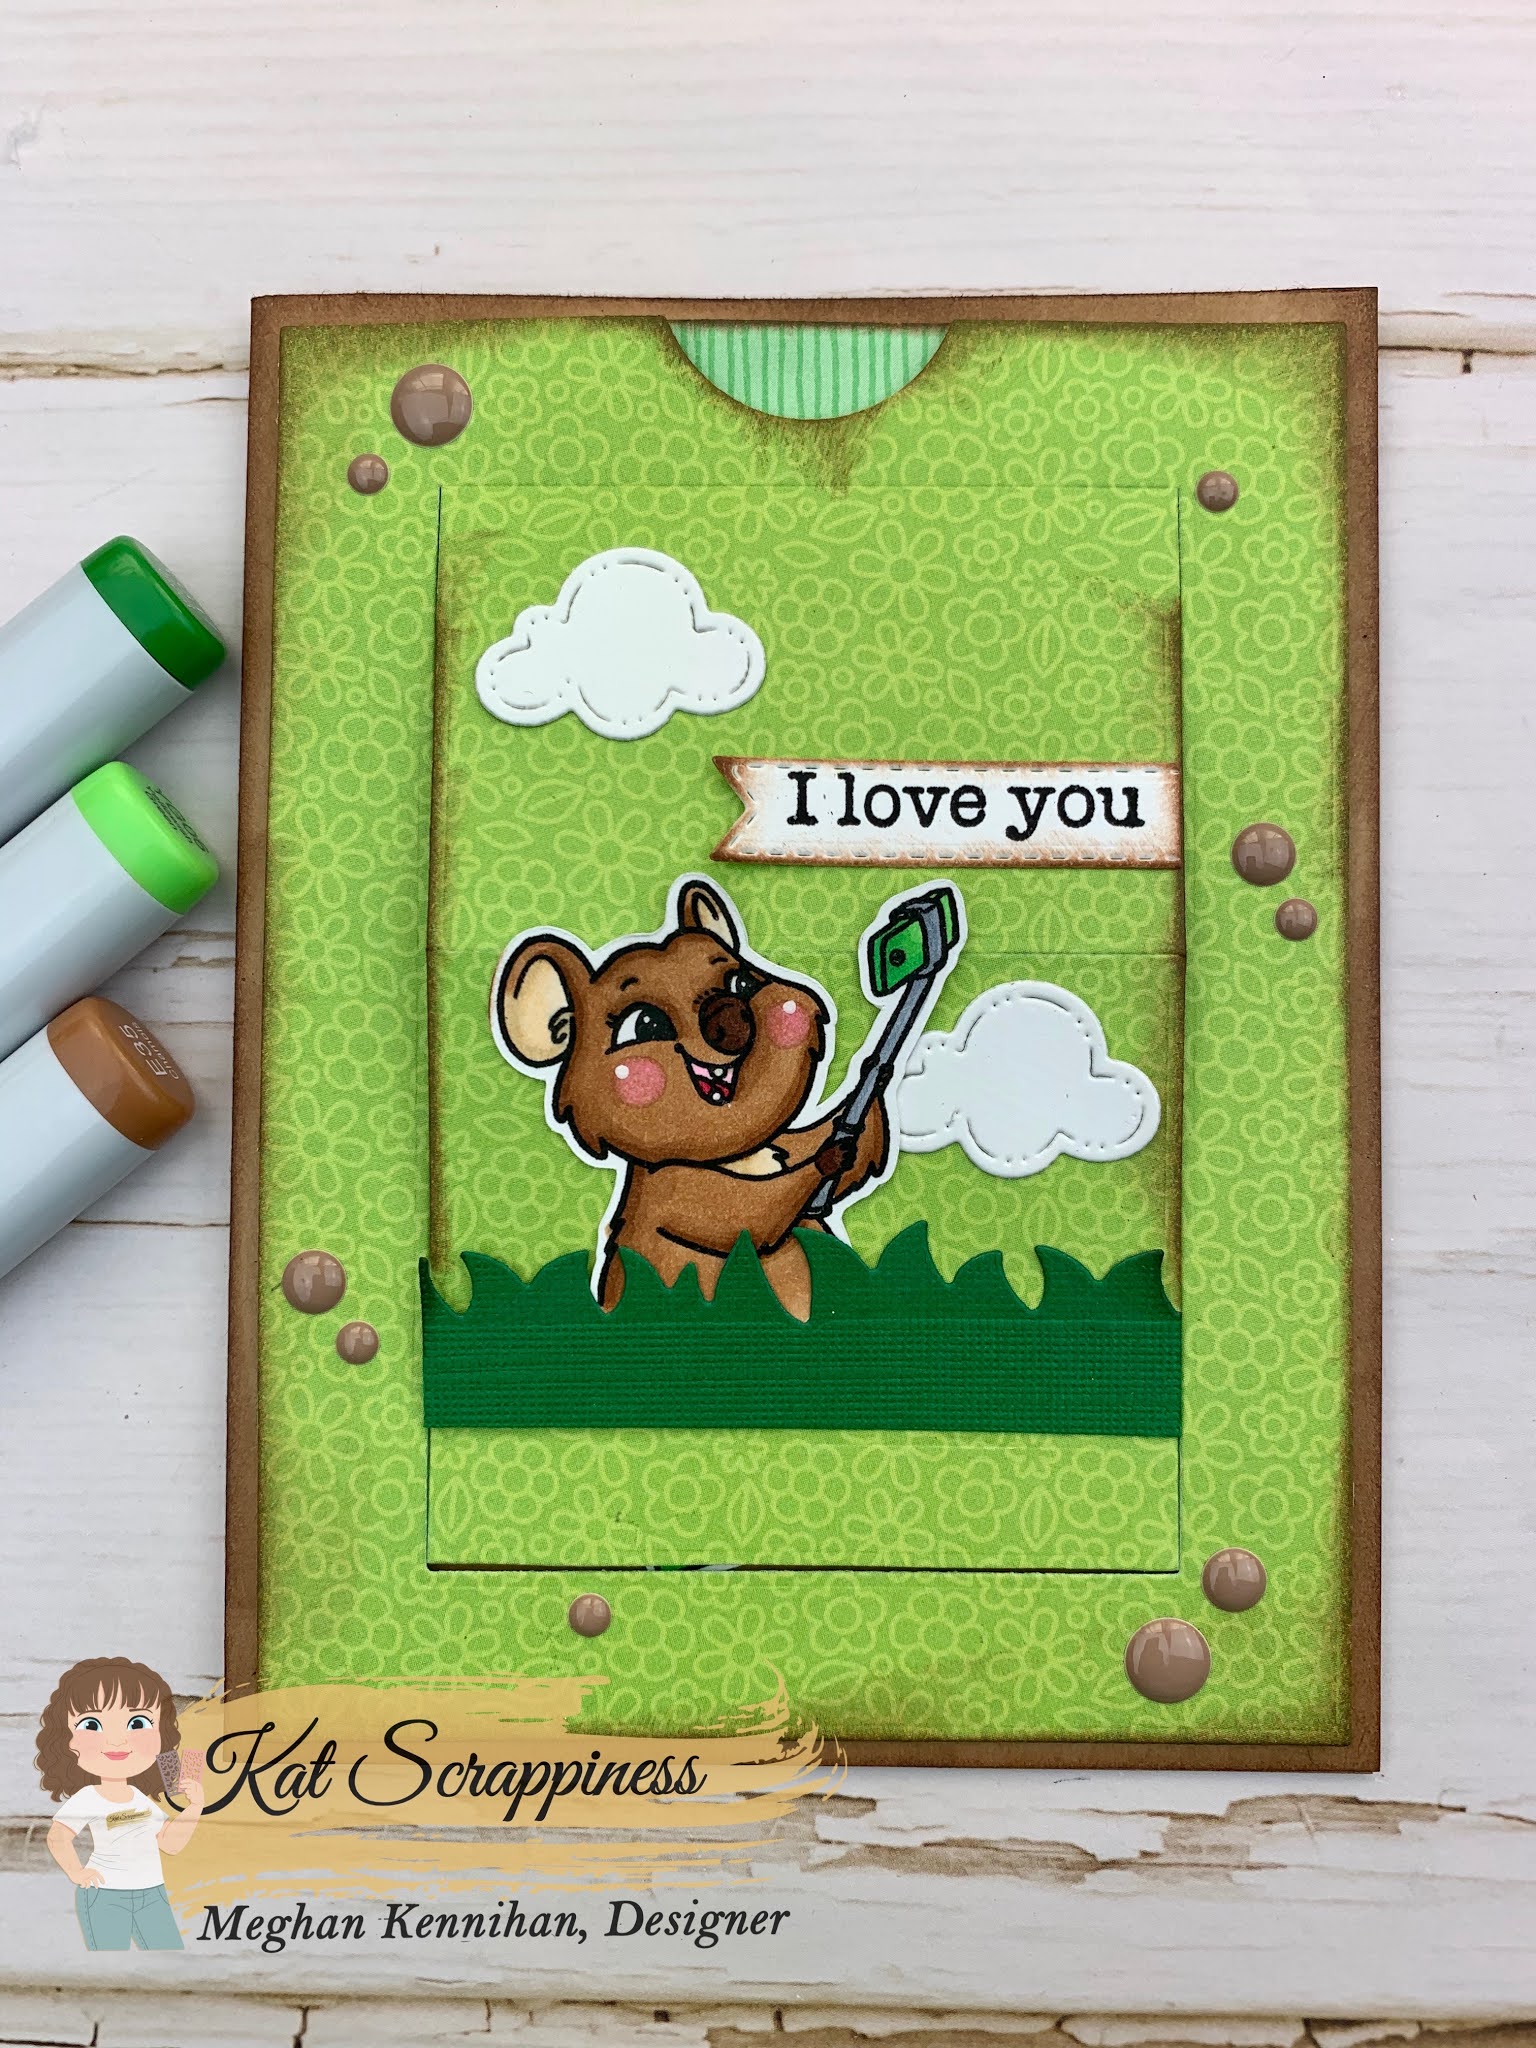
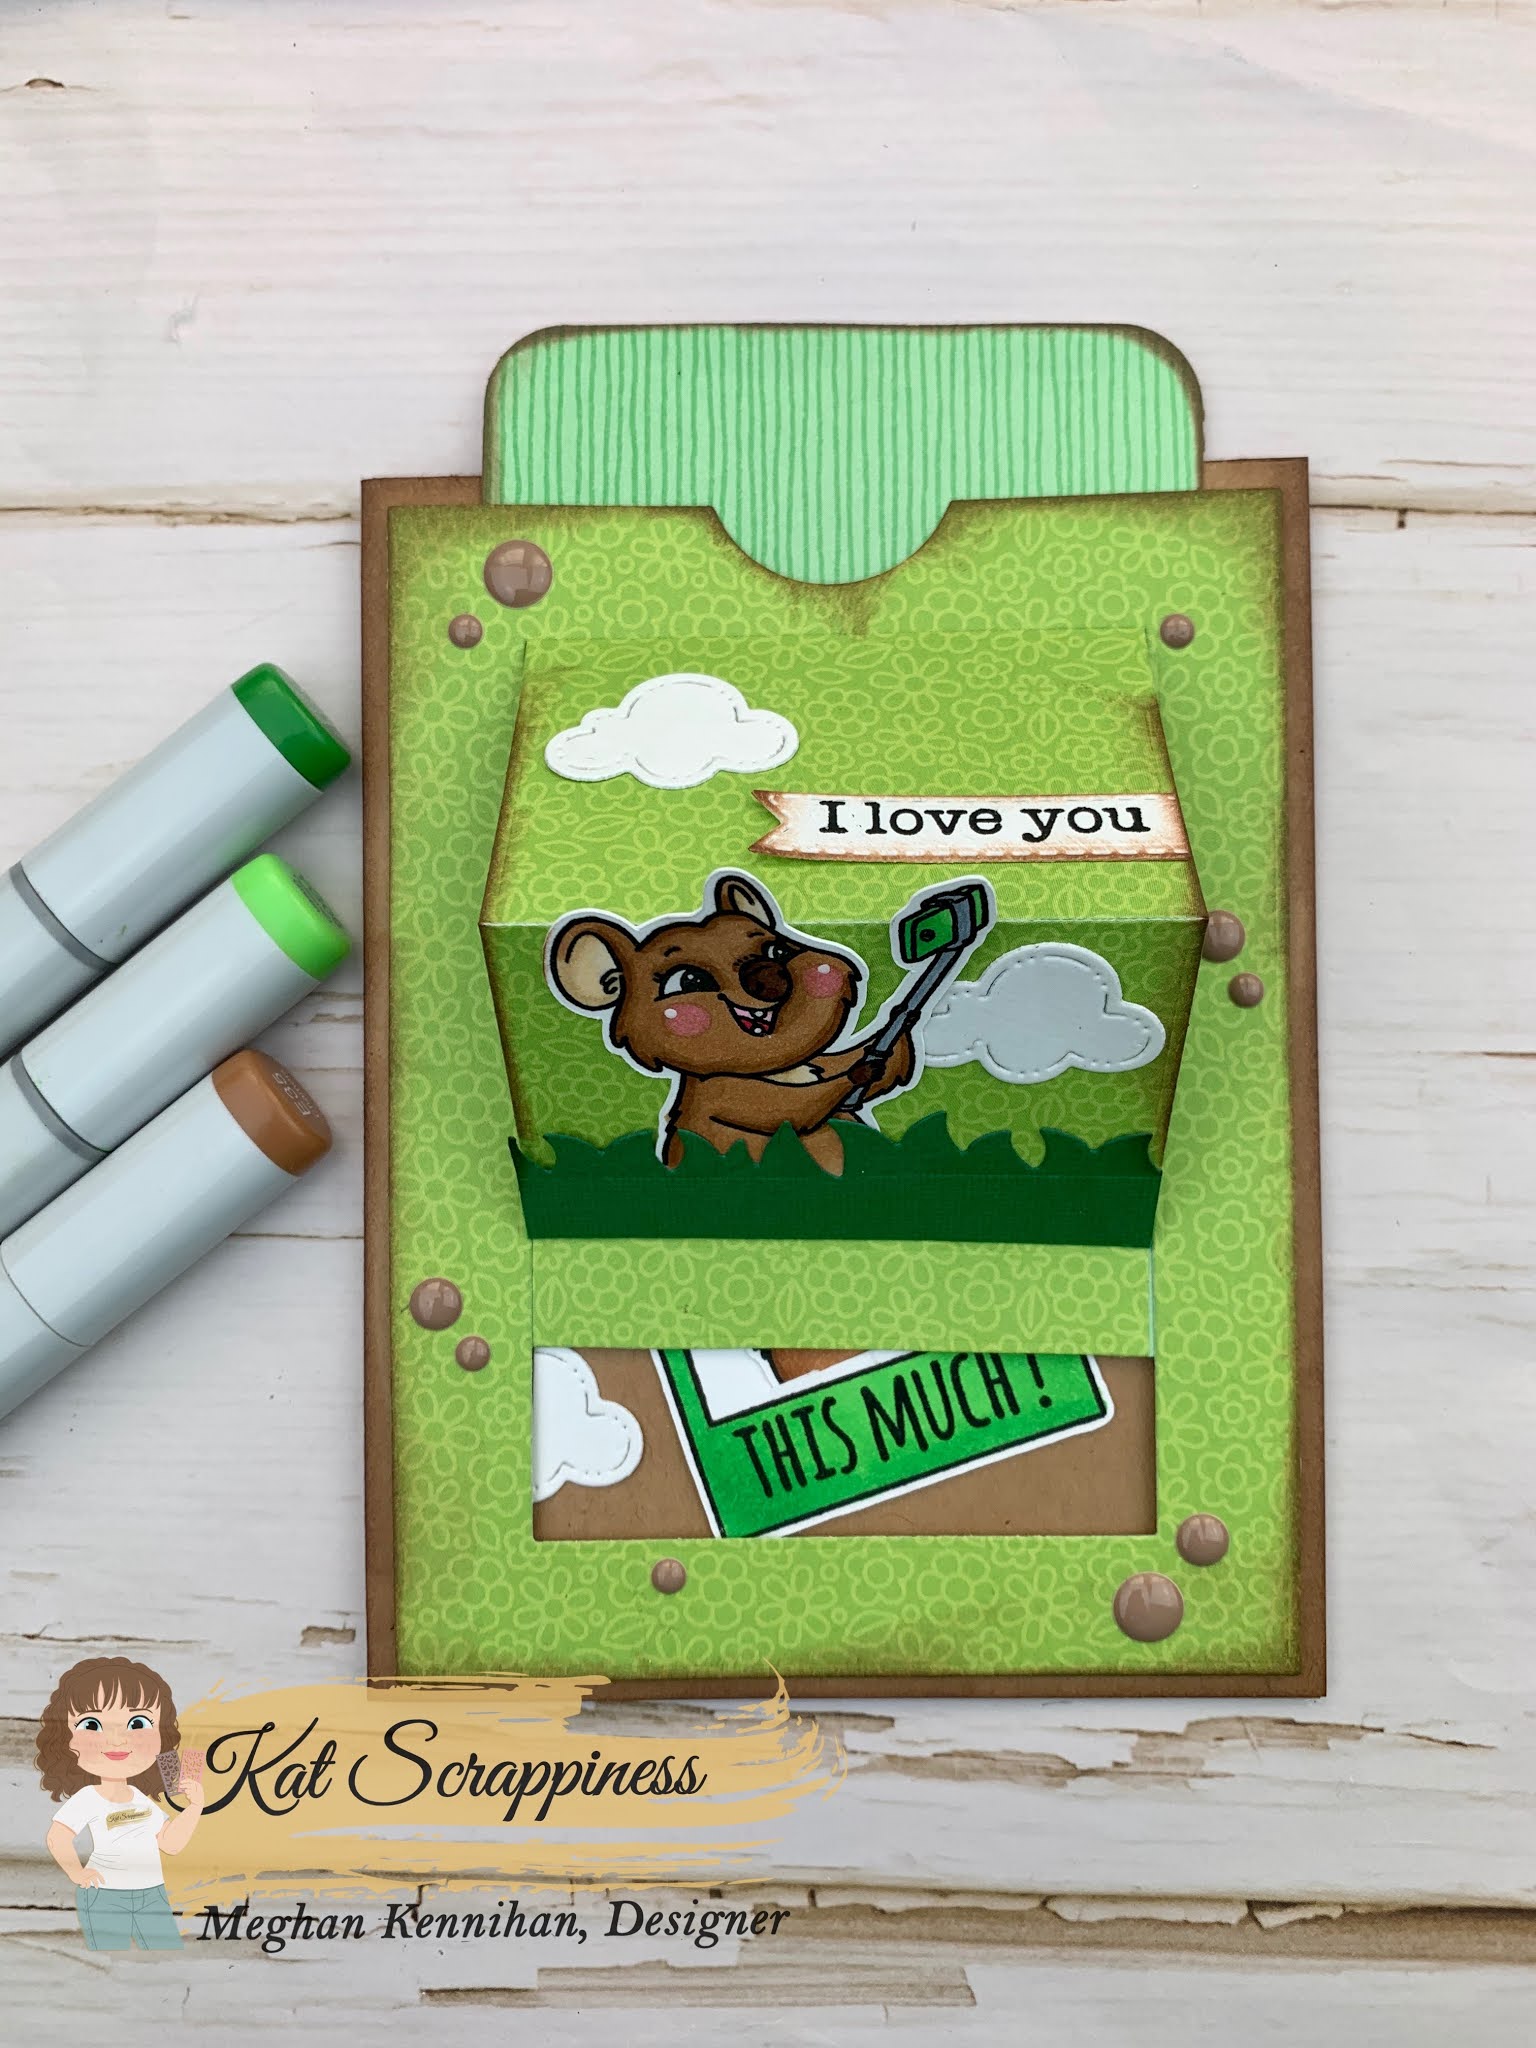
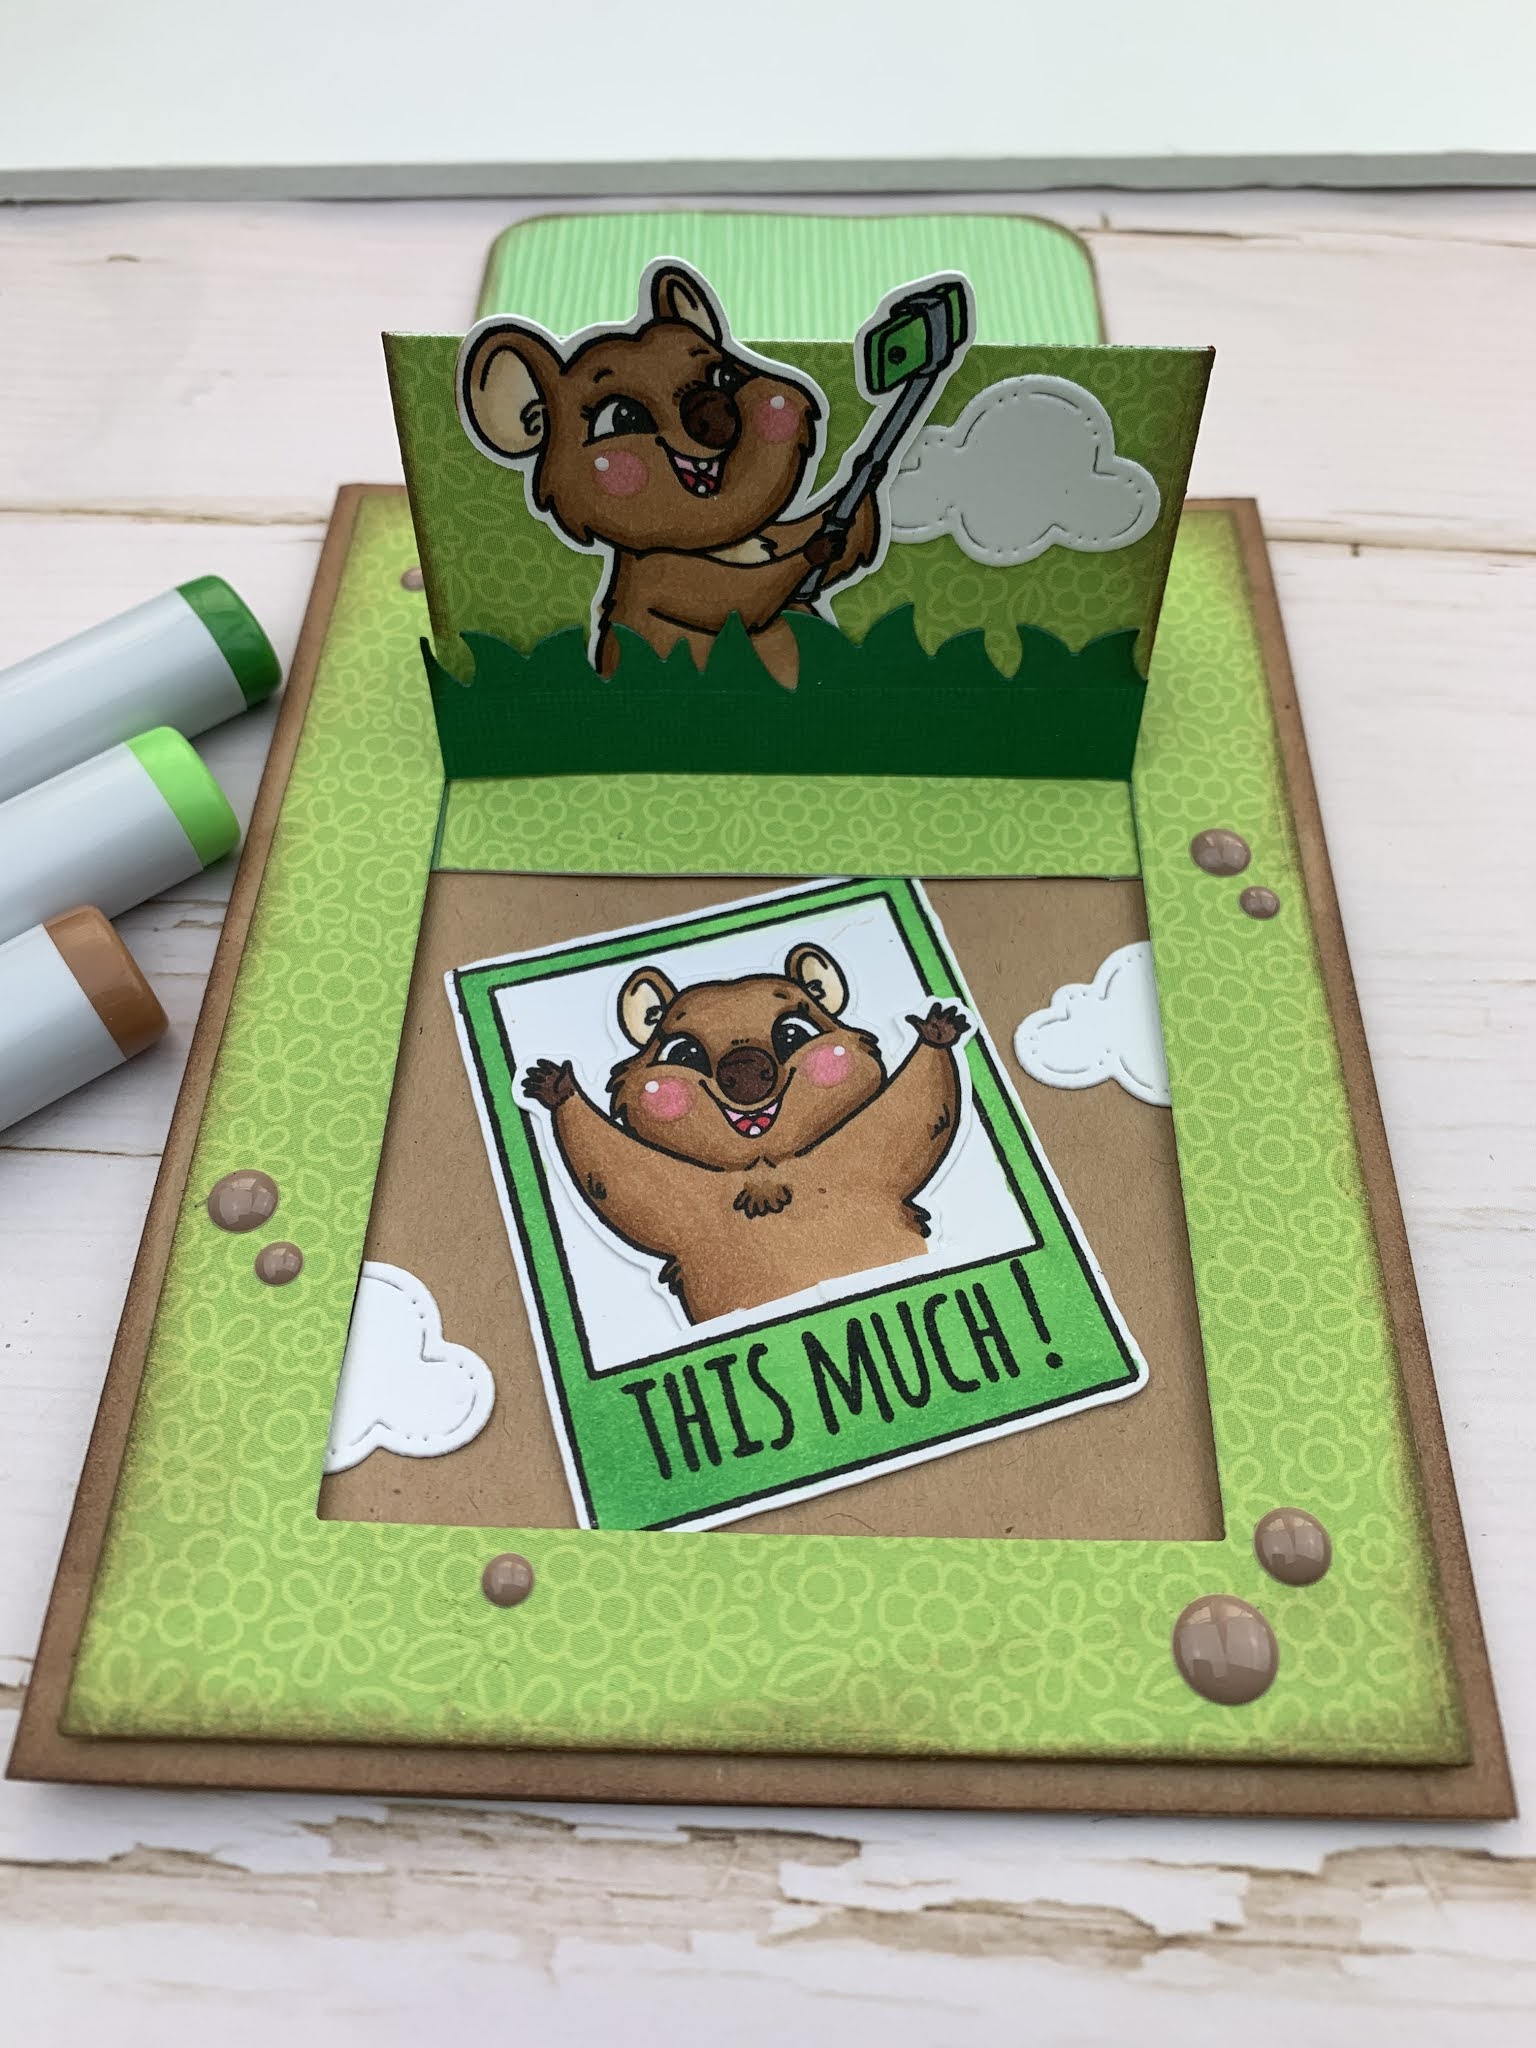
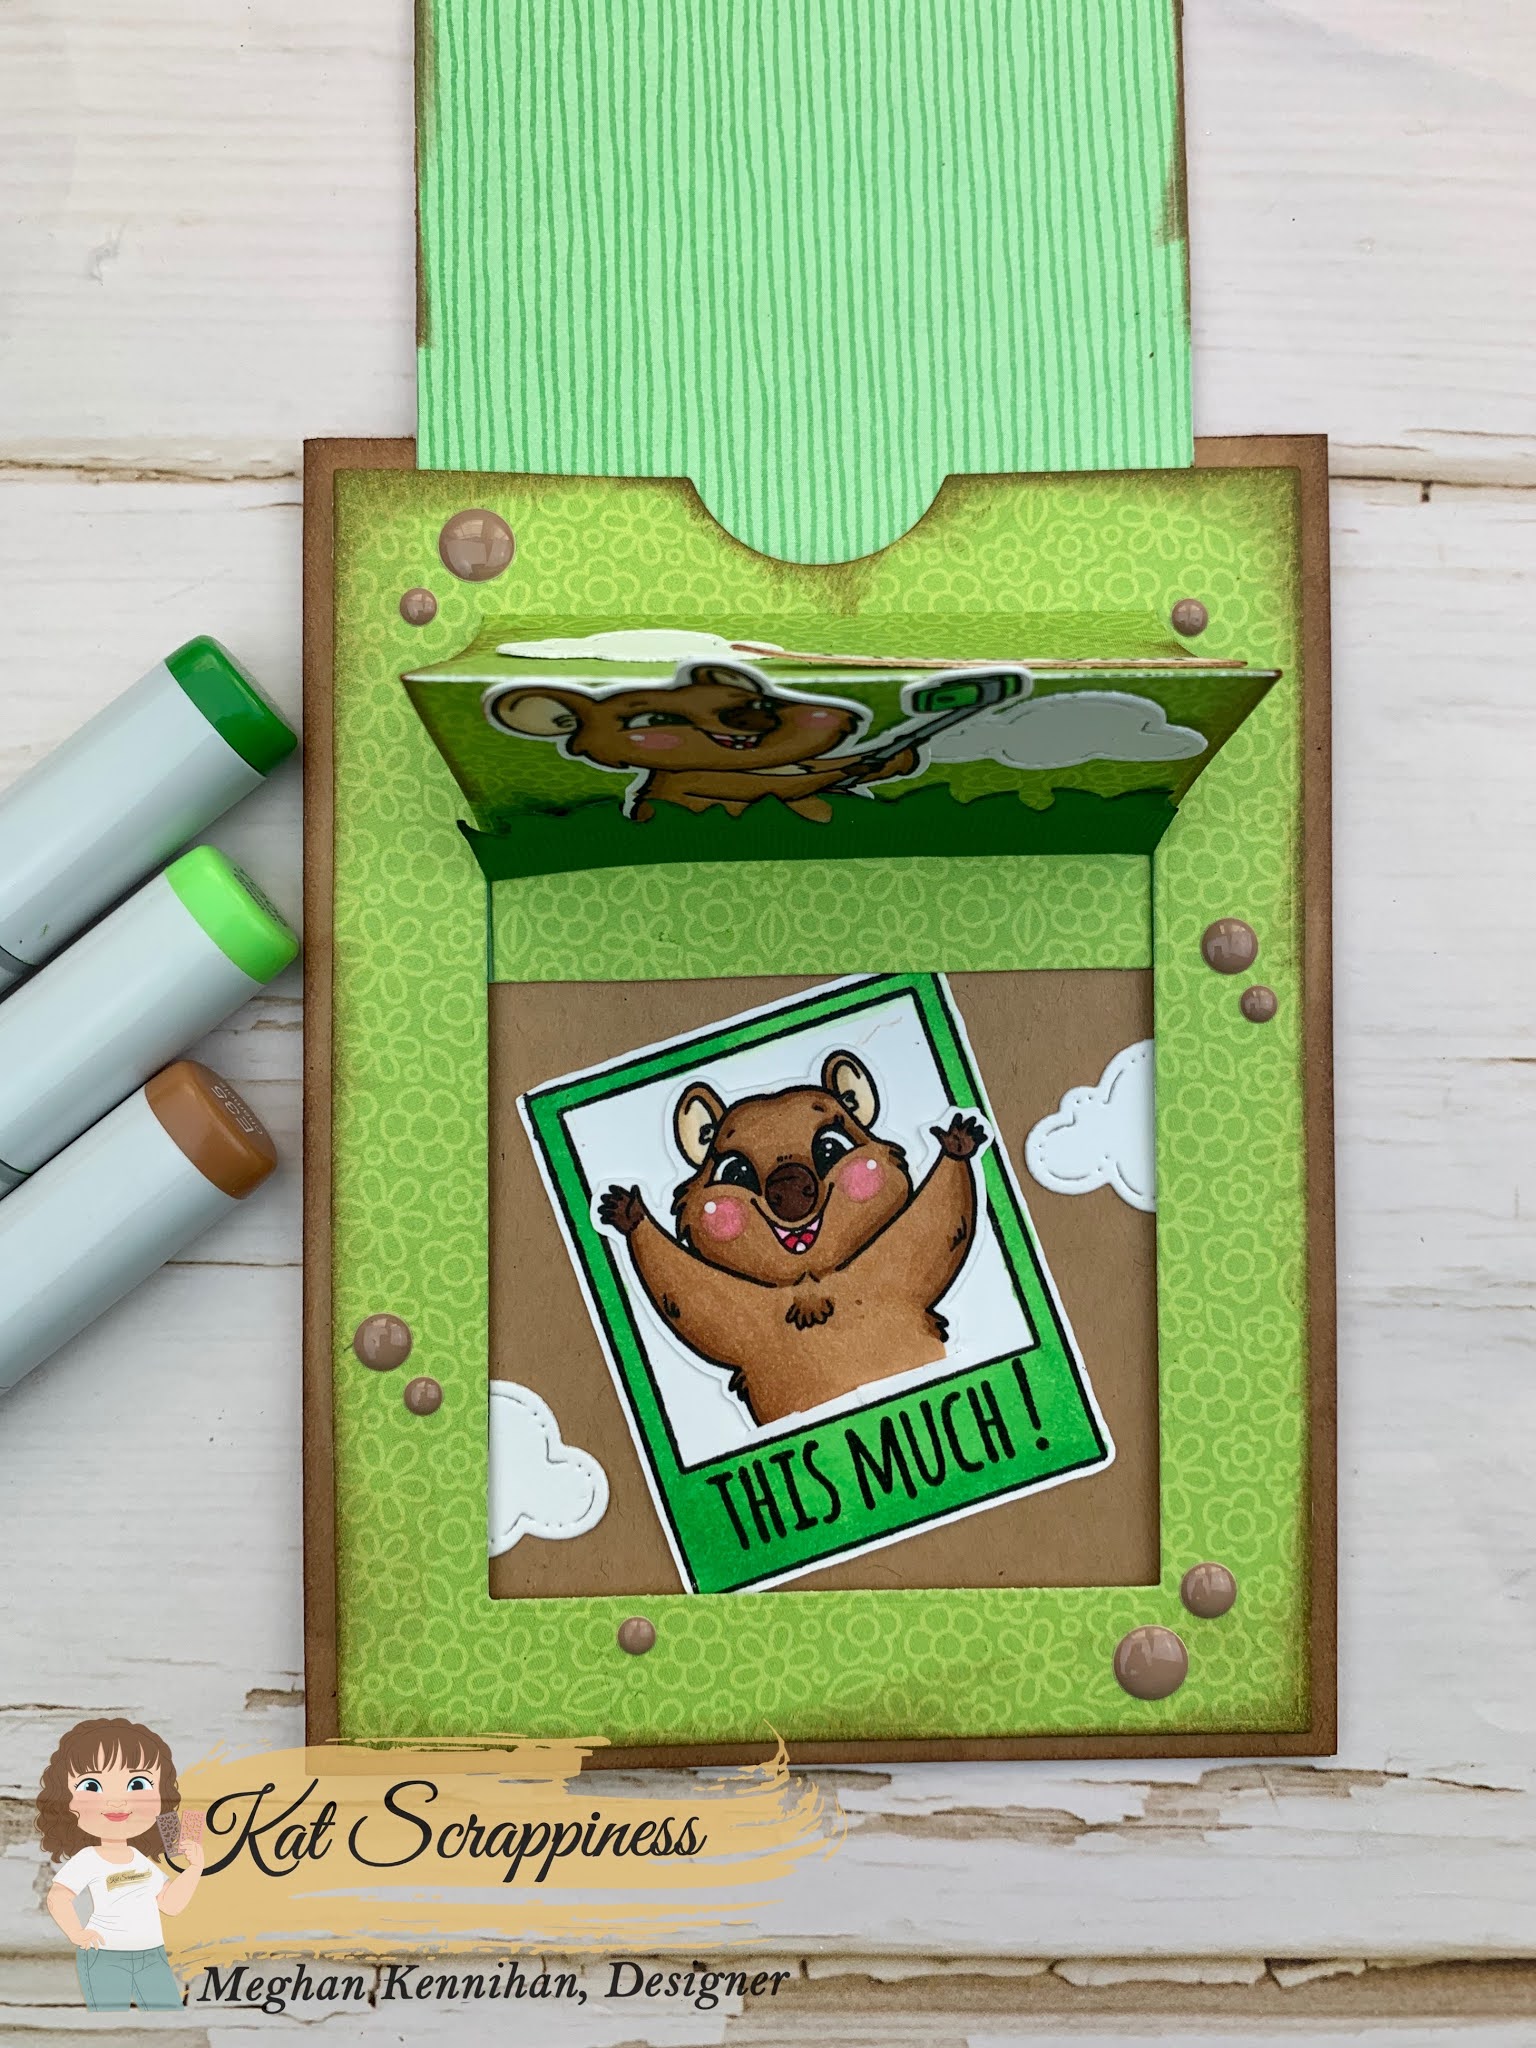
    Do you know what the HAPPIEST ANIMAL in the world is? It’s the Quokka! I had never heard of it until Kat Scrappiness made this darling stamp! It can be found in Australia and it’s the CUTEST! I am showing off two interactive cards featuring the Quokka’n Up Stamp Set, one is a slider and the other is a shaker that looks like cheese!

    Make Crafty Friends Q & A:
    Q: Have you ever heard of a Quokka? If you have, have you ever seen one?
    A: Me? No.

    Card #1: Say Cheese Quokka

    Please use the links below to buy your goodies!

    Supplies:
    Kat Scrappiness Quokka’n Up Stamp Set
    Kat Scrappiness Stitched Rectangle Die
    Kat Scrappiness Cinnamon Roll Sprinkles
    Kat Scrappiness Orange Confetti Sprinkles
    Kat Scrappiness Stitched Flag Dies
    Kat Scrappiness Acetate Sheets

    Card #2: Quokka Slider Surprise (head to my blog to see it in action)

    Don’t forget to subscribe, follow, and comment on my blog for your chance to win my October Prize (see right panel) and for more giveaways and inspiration follow me on Instagram @MadeByMeghanK

    Supplies:
    Kat Scrappiness Quokka’n Up Stamp Set

  • No Calorie Valentine ?

    No Calorie Valentine ?

    Good morning crafty peeps! It’s Lisa here with you today and I have a Valentine’s Day project to share with you that has no calories! Kat Scrappiness has all the supplies to create this sweet treat pocket and best of all….. it’s calorie free!

    I have to give credit to my daughter Taylor, it was her idea to make it calorie free! After my treat pocket was assembled I told her that I needed to buy a candy bar to slip in as a prop for the picture. That’s when she reminded me that Kat has a cute stamp set with a chocolate bar in it. It was an AHA moment and so the no calorie Valentine idea was born!

    Card Recipe

    1) I started with a piece of kraft card stock

    measuring approximately 8.5″ x 4.25″ and scored it on the 8.5″ side down the middle. That left me with a square pocket.

    2) I embossed the whole piece of paper with a burlap embossing folder and then I used a scalloped edge punch to give the top front edge a fancy finish. 

    3) Next I took the Floral Heart Die and die cut it out of the front of the pocket. I then adhered a pink piece of card stock behind the front panel and glued the Floral Heart Die back in the space where it had been cut from.

    4) Next I put double sided tape on the two outer edges to form a pocket.

    5) I cut the Sweet Word and Sentiment die from silver foil and adhered it to the bottom right of the pocket.

    6) The sweet little xoxo sentiment from the  Say it With Hearts stamp set was the perfect size to stamp on to the smallest Stitched Flags die. I punched a tiny hole in the flag and tied it on to some pink twine for the top of the pocket. I added some Pretty Pink Jewels around the heart as well!

    7) The last step was to stamp out 3 no calorie chocolate bars to stick inside my pocket. The Layered Chocolate Bar stamp set was the perfect set for this! I just love how realistic the wrapper looks with silver embossing powder!

     And there you have it folks! A no calorie Valentine with all of the SWEET and none of those pesky calories!

    Thanks so much for joining me today and I hope you’ll check out these great products from Kat and make yourself a little treat (calories or no calories)

    Don’t forget to follow Kat Scrappiness on all

    social media platforms to be alerted to new releases, sales and giveaways!

    Have a great day, I already am!

    ? Lisa

  • Rainbow Polka Dot Flags Card

    Rainbow Polka Dot Flags Card

    Hi Everyone, it’s Tina here today. The new Stitched Flags dies from Kat Scrappiness are so much fun to play with. Once I selected my rainbow colors for my Stitched Flags I created a simple matching rainbow background using the Distress Oxide Inks. My card is also using the Wonky Wavy Stitched Rectangles Die and Everyday Brush Strokes stamp set for the sentiment. Below you will find the easy steps to replicate this card.

    • Step 1 – Trim White Cardstock to 8 1/2″ x 5 1/2″, score at 4 1/4″, fold in half for a horizontal side fold card (A2)
    • Step 2 – Trim White Cardstock to 4 1/4″ x 5 1/2″. Apply Distress Oxide ink directly to cardstock using a mini blending tool. I applied 5 colors to create a rainbow. The colors I used are Squeezed Lemonade, Twisted Citron, Salty Ocean, Picked Raspberry & Wilted Violet. I sprayed some water to create an oxidized effect. Once dry Diecut Wonky Wavy Stitched Rectangles to the background.
    • Step 3 – Apply anti static powder to the bottom left of the Distress Oxide Ink background. Stamp Everyday Brush Stroke sentiment stamp using Versamark Ink. Sprinkle White Embossing Powder, remove the excess then heat set it with a heat tool. Adhere the background to card using Scor-Tape.
    • Step 4 – Diecut Stitched Flags using Polka Dot Patterned Paper in five colors and 3 sizes each color. Adhere the largest Stitched Flag first using Scor-Tape, then middle size and then small size on top. You may want to layer them first before adhering to figure out the placement.

    I hope you enjoyed today’s card. This card can be used for any occasion by changing the colors and/or sentiment. All products used are linked below. Thanks for stopping by and have a wonderful day!

    Kat Scrappiness Products Used:


    https://linkdeli.com/widget.js?1525438185447

  • Mother’s Day cards featuring Stitched Flags Dies by Kat Scrappiness

    1. Hello crafty friends!! I hope that everybody enjoyed and had a fabulous Mother’s Day! I am up on the Kat Scrappiness blog today and wanted to share two cards that I had created for Mother’s Day using some amazing Kat Scrappiness products, including one of our newest dies just released this month, the Stitched Flags Dies.  What an amazing and versatile die set this is. The Stitched Flag die set comes complete with seven flag dies all in different sizes, allowing endless possibilities for all of your crafting needs.

    To begin, I die cut several flags using four different sized flag dies from the newly released Stitched Flag Die Set by Kat Scrappiness. I also die cut the words, “Mom” and “Aunt” using the Uppercase Condensed Alphabet Dies by Kat Scrappiness.

    To make the process of adding each flag to my card, I ran each one through my Xyron sticker maker to ensure that the back side of each flag was completely covered with adhesive.

    Next I began to adhere the flags in a pattern.  I started off by placing the first flag in the center of the card and continued adding the remaining flags, from the center outwards towards the end of the card, making sure that the edge of each flag was inline with the top crease of the card and the tails of each flag met slightly.

    I then started placing the next layer of flags over the first layer, overlapping in them so that you could still see some of the pattern on the flags. These flags ended up overlapping the edges of my card. I used scissors to cut off the excess.

    I continued in this manner, placing the flags over the previous layers going from largest to smallest.

    Once my flags were completely adhered, I added the words, “Mom and “Aunt” to each card. To finish off each card, I added some of the 3mm Peach Solid Heart Confetti from Kat Scrappiness to each. I put a single heart on each of the smallest green flags and also added some to a few of the letters just to bring it all together.

    And that now completes my Mother’s Day cards. I hope that you enjoyed this quick Mother’s Day card tutorial. You can find a list of all the materials used in these projects down below. Most supplies used may be purchased at the Kat Scrappiness Shop and you can receive a 10% discount at check out by using the Code: Jana10

    Thank you for visiting and have a fabulously crafty day!!!

    Supplies and Materials Used: