Tag: Star Fusion Coverplate

  • Sending Love Mini Slimline Card

    Sending Love Mini Slimline Card

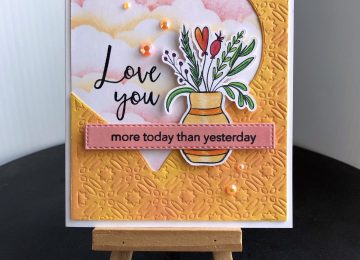
    Hi everyone, it’s Tina here. I love creating stencils from Background dies. I used the Star Fusion Coverplate with the Valentine Quokka Stamps, Mini Slimline Distressed Edge die, and the Condensed Alpha dies to create this sending love card. Below are the steps to create your own card.

    Step 1 – Trim White Cardstock to 7” x 6”, score at 3 1/2” and fold in half for a horizontal top fold card. (Mini Slimline)

    Step 2 – Diecut Star Fusion Coverplate using White Cardstock. This will be used as a stencil. Place on top of a White panel measuring 3 1/2” x 6”. Apply Distress Oxide Ink. I used Worn Lipstick.

    Step 3 – Diecut Mini Slimline Distressed Edge using the panel created from Step 2. Apply Distress Oxide Ink to the edges. I used Aged Mahogany.

    Step 4 – Diecut the word Love using Condensed Uppercase for L and Condensed Lowercase for V and E leaving a space where the O would be. Adhere the panel to the card front using Bearly Art Precision Glue. Adhere the letters back into the negative space using Foam Tape.

    Step 5 – Stamp Valentine Quokka (Image) using Versafine Onyx Black Ink on White Cardstock. Color in image. I used Prismacolor Pencils with gambol. Diecut it using the matching die and adhere to card where the O would be using Foam Tape.

    Step 6 – For added interest diecut little hearts you may have in your stash and adhere to card using Glossy Accents. Or adhere Heart Enamel or whatever you have in your stash.

    This card can be used for several occasions such as Anniversary, Just Because, etc. Below you will find the link to all products used. Thank you for stopping by and Happy Crafting!

    Products Used:
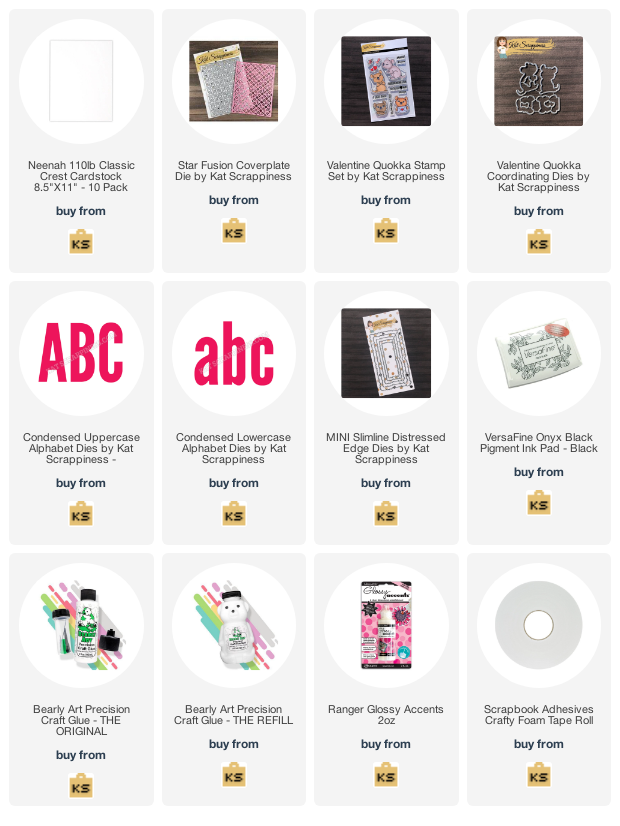
    https://linkdeli.com/widget.js?id=f5e8378456858c916708

  • Quick Cards using Coverplate Dies

    Quick Cards using Coverplate Dies

    Happy Monday everyone!  It’s Caren on the Kat Scrappiness blog today with some fun and quick cards coverplate and alphabet dies from Kat Scrappiness.

    My first card uses the Fancy Floral coverplate die.  I die cut it our of white card stock and adhered it to a piece of pink glitter card stock.  I then die cut my letters for Hello using the Condensed Lowercase Alpha dies from gray card stock.  I lined them up how I wanted them on the card and used foam adhesive to adhere them to my panel.

    For my second card, I die cut the Star Fusion Coverplate die from white card stock.  I blended five different Distress Oxide inks (in rainbow order) for the back panel.  I used the same Condensed Lowercase Alpha dies to cut out the word Thanks from gray card stock.  I then adhered them to my panel using foam adhesive.


    – – –– – –– – –– – –– – –– – –– – –– – –– – –– – –– – –– – –– – –– – –– – –– – –– – –– – –– – –– – –– – –– –

    Thanks for stopping by and happy stamping!  Here is a link to the Kat Scrappiness shop and direct links for products I used on today’s card are below.  There are a couple of sales going on now in the shop – clearance (40-60% off items including distress oxides) and President’s day sale (15% off with code PRESIDENT2020).

    – – – SUPPLIES for today’s project– – – – – – – – – – – – – – – – – – – – – – – – – – – – – – – – – – – – – – –

  • Love You More Today Than Yesterday

    Love You More Today Than Yesterday

    Hi Everyone, it’s Tina here. I have a card to share with you using the Star Fusion Coverplate. It is a beautiful die and today I will be using it to emboss my background. Below you will find the steps to create your own embossed star fusion background card.

    Step 1 – Trim White Cardstock to 8 1/2” x 5 1/2”, score at 4 1/4” and fold in half for a vertical side fold card. (A2)

    Step 2 – Create clouds to the front of card base.

    Step 3 – Trim Yellow Cardstock to 4 1/4” x 5 1/2”. Dry emboss Star Fusion Coverplate in your diecutting machine using an embossing pad and sandwich according to your machine’s manual. Using an ink applicator apply Distress Oxide Ink Spiced Marmalade lightly. For a subtle blend.

    Step 4 – Diecut Heart using Background from Step 2. Adhere to card using Nuvo Deluxe Adhesive.

    Step 5 – Stamp sentiment on card front using Versafine Onyx Black Ink.

    Step 6 – Stamp Happy Fall Y’All image using Versafine Onyx Black Ink on White Cardstock. Color image using colored pencils and gamsol. Fussy cut the image out and adhere to card using foam tape.

    Step 7 – Stamp sentiment on scrap piece of cardstock using Versafine Onyx Black Ink. Diecut sentiment using Stitched Sentiment Strips and adhere to card using foam tape at the edges overlapping the flower image.

    Step 8 – For added interest adhere Orange Jewels using a Crystal Katana and collage medium.

    This card can be used for any occasion by changing the shape, colors and sentiment. Below you will find a link to all the products used. Today and tomorrow there is a huge Spring Sale so be sure to use code: CLEAN19 at checkout to receive 20% off your order. After the 7th use code: TINA10 at checkout to receive 10% off your order. Thank you for stopping by and have a wonderful day!

    Products Used:
    https://linkdeli.com/widget.js?1552642647875

  • Hoppy Easter – Star Fusion Coverplate

    Hoppy Easter – Star Fusion Coverplate

    Now that Valentine’s Day is past us, I’m focusing on Easter/Spring cards.  I lean toward bright colors, so using soft colors for these types of cards is a good change for me.

    For today’s card, I’m using the new Star Fusion Coverplate from Kat Scrappiness as my focal point. I die cut it from some striped pink and while patterned paper from my stash.  I adhered this to a piece of kraft cardstock.  I sprayed the kraft cardstock with shimmer mist to give it some extra shine.

    I cut a Stitched Scalloped circle out of white cardstock and a piece of green patterned paper.  I then cut the green piece with one of the Fancy Scalloped border dies.  I adhered the two pieces together and popped it up on the right side of the card with dimensional adhesive.  I then cut of the portion that was hanging off the card.  I colored the cute little rabbit and carrot from the Lawn Fawn Hoppy Easter set with Copic markets and adhered it the the scalloped circle with Nuvo adhesive.

    For the sentiment piece, I used one of the Stitched Sentiment dies.  I heat embossed my sentiment from the Lawn Fawn Hoppy Easter set using white embossing power and adhered it to the card using dimensional adhesive.

    – – –– – –– – –– – –– – –– – –– – –– – –– – –– – –– – –– – –– – –– – –– – –– – –– – –– – –– – –– – –– – –– –

    Use code caren10 for a 10% discount in the Kat Scrappiness shop.

    Thanks for stopping by and happy stamping!

    – – – SUPPLIES for today’s project– – – – – – – – – – – – – – – – – – – – – – – – – – – – – – – – – – – – – – –

  • February Release Winners

    February Release Winners

    Hello Kat Scrappiness fans! Maria here on the blog with you today. On behalf of the Kat Scrappiness Design Team, I just wanted to say thank you so much for all the wonderful comments. We appreciate your support more than you’ll ever know!

    Here are the February release winners, chosen through random.org.

    Day 1 – Medallion Coverplate – Becca Yahrling

    Day 2 – Mandala Frame – Nancy Carroll
    Mandala Die – Elaine D.

    Day 3 – Star Fusion Coverplate – Phyllis Zimmerman


    Please contact Kathleen Driggers at katscrappiness@hotmail.com for your mailing address.

    We can’t wait to see you next month for the March release! Don’t be sad if you didn’t win this time. There will be more to follow and everyone will always have a chance to win.

    Have a great weekend and happy crafting!