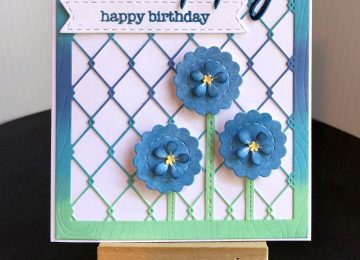
Hi Everyone, it’s Tina here. We are now August and with it are the new Kat Scrappiness dies and stamp set. Today I am using the new Stitched Diagonal Backdrop Die along with the Crafters Essentials II and the Everyday Brush Stokes Stamp set. Below you will find the steps to replicate this card.

- Step 1 – Trim White Cardstock to 8 1/2″ x 5 1/2″, score at 4 1/4″ and fold in half for a horizontal side fold card. (A2)
- Step 2 – Trim Patterned Paper to 5 3/8″ x 4 1/8″ and adhere to card using Clear Double Sided Adhesive Tape.
- Step 3 – Diecut Stitched Diagonal Backdrop using Patterned Paper. Trim and adhere Patterned Paper to the backside. Adhere entire panel to the card front using Clear Double Sided Adhesive Tape.
- Step 4 – Diecut Crafters Essentials II using Black Cardstock (the Stitched Fishtail Banner).
- Step 5 – Stamp Everyday Brush Strokes Sentiment on the diecut from Step 4 using Versamark Ink. Sprinkle Gold Embossing Powder and heat set with a heat tool. Adhere to card using Clear Double Sided Adhesive Tape.
- Step 6 – Diecut Crafters Essentials using Patterned Paper (Starburst) and adhere to card using Clear Double Sided Adhesive Tape.
- Step 7 – Optional – Using a Crystal Katana adhere Pastel Pop Sequin Mix using Collage Medium.


This card can be used for any occasion by changing the Patterned Paper, colors and/or sentiment. To receive 10% off your order at Kat Scrappiness used code: TINA10 at checkout. Below is a link to all products used. Thanks for stopping by and have a wonderful day.
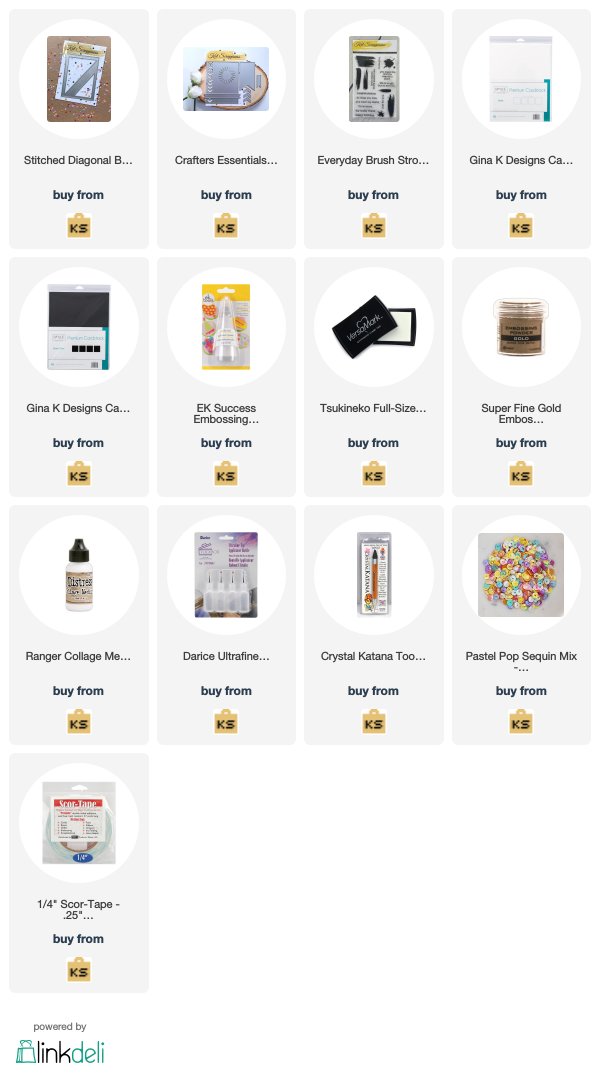
Kat Scrappiness Products Used:
https://linkdeli.com/widget.js?1533216656914