Hello crafty friends!! Nora here with my last post on the blog. I have had a fabulous time on the Kat Scrappiness Design Team and will miss it immensely. The Kat Scrappiness Products are amazing and so fun to work with.
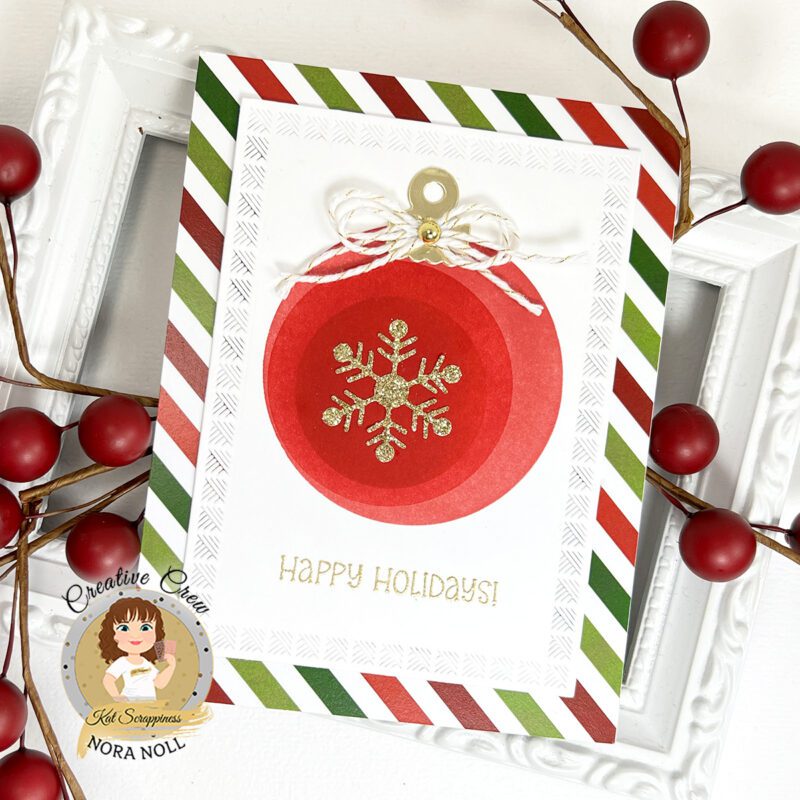
Today my card is a holiday card that I created using some of the Winter Release and some previously released Kat Scrappiness products. I designed an ornament by creating my own stencils with the Kat Scrappiness Never Ending Circles Dies. I paired this stenciled ornament with a snowflake from the Kat Scrappiness Snowflake Trio Dies and an ornament top from the older Kat Scrappiness Christmas Shaker Ornament Dies. I like to look at my dies and use them in other ways to stretch them.

Here is how I created this card:
Cut a piece of the striped paper from the Kat Scrappiness Reindeer Games 6×6 Paper Pad into a 4 1/4″ by 5 1/2″ piece. Adhere it over an A2, top folding card base.
Using three different size circles from the KS Never Ending Circle Dies, cut a stencil out of scrap cardstock. Starting with the largest circle, stencil with red ink onto a piece of white cardstock. Repeat the stenciling with the next two circle stencils using a slightly different red ink on each circle.
Stamp and heat emboss with gold embossing powder the “Happy Holidays” sentiment from the Kat Scrappiness Reindeer Games Sentiment Stamp Set.
Die cut the white panel with a Kat Scrappiness Nesting Deco Frames Die and adhere it to the middle of the card base.
Add the snowflake that was die cut using the Kat Scrappiness Snowflake Trio Dies out of gold glitter paper. Adhere this to the center of the stenciled ornament.

Die cut an ornament topper out of gold paper using the Kat Scrappiness Christmas Shaker Ornament Dies. Adhere it to the top of the ornament.
Adhere some twine to the ornament hanger and add a gold pearl from the Kat Scrappiness Gold Pearl Mix. This completes the card!!
I want to thank everyone for taking the time to stop by today. Please be sure to pop back in to the Kat Scrappiness Blog to see some inspiration from other member of the Kat Scrappiness Creative Crew.
****All links in this post are affiliate links used at no extra cost to you.