Tag: Happy Birthday with shadow die

  • Happy Birthday!

    Happy Birthday!

    Hello everyone!

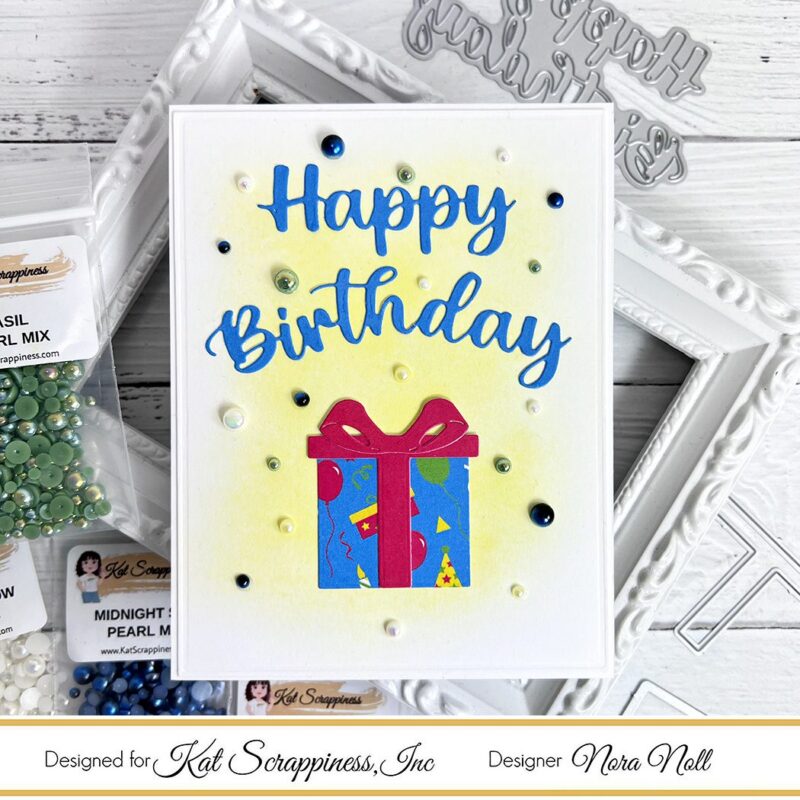
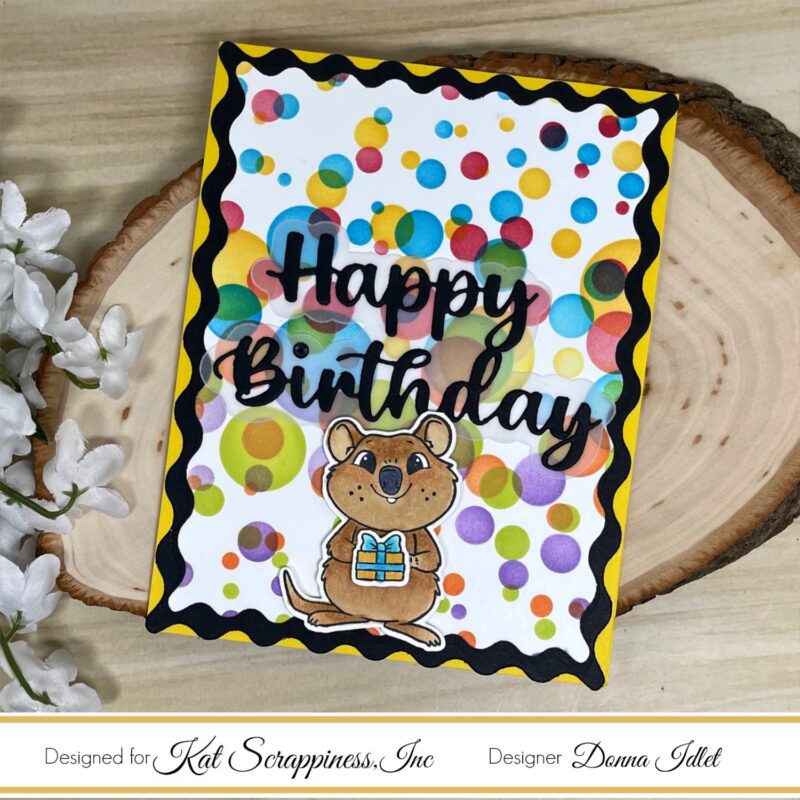
    It’s Donna Idlet here a fun and colorful Birthday card.  I am using the Layered Bubbles 6×6 Stencils for the background, The layers are die cut with the Embossed Edge Wavy Frame Dies and the cute Quokka is from the Everyday Quokka Stamp Set.

    Here is how I created the card.

    1. Card is an A2 size – 5 1/2 x 4 1/4 card base.

    2. Stenciled the background with the Layered Bubbles 6×6 Stencils using  KS Stencil & Ink Blending Brushes with multiple inks.

    3.  Die cut the layers using the Embossed Edge Wavy Frame Dies.

    4. Die cut the Happy Birthday word with Shadow die, using black cardstock and vellum for the shadow.

    5. Colored with alcohol markers, stamped and die cut the Quokka and gift from the Everyday Quokka Stamp Set.

    6. Assembled the card.

    Thank you so much for stopping by, please come back again soon.
    Here is a list of supplies I used on my card, Affiliate Links used at no additional cost. Thank you for your support.


    https://linkdeli.com/widget.js?id=f5e8378456858c916708

  • A Happy Birthday Card

    A Happy Birthday Card

    Hello everyone!! It is Nora here on the blog with a card where I combined the Kat Scrappiness new Birthday Essentials 6 x 8 Paper Pack, the new Happy Birthday w/ Shadow Die and the Birthday Essentials Die Set to create a fun birthday card.

    Card Directions:

    1. Using the largest of the Kat Scrappiness Embossed Edge Rectangle Die, die cut a piece of white cardstock. Ink blend yellow ink on the background and adhere to a white, A2 card base.
    2. Die cut the Kat Scrappiness Happy Birthday sentiment from a piece of blue paper contained in the Birthday Essentials 6×8 paper pack. Cut the sentiment apart and adhere to the top section of the card. Make sure you curve “birthday” to draw the eye in.
    3. The present was created by using the Birthday Essentials Dies and more pieces from the Birthday Essentials 6×8 paper pack. Adhere the present and ribbon together and then glue to the card front.
    4. My last step was to adhere a mix of Basil, Lemon Yellow, Marshmallow and Midnight Sky pearls randomly around the front of the card. I wanted it to look like confetti and tried to pull the colors I used from the paper on my card. This is my favorite part of the card!!

    This card may look simple but it was a ton of fun to create. I hope this inspires you to create your own birthday card!!

    Some affiliate links have been used at no extra cost to you. Below are the Supplies I used for this card:

  • Confetti Balloons Birthday Shaker Card

    Confetti Balloons Birthday Shaker Card

    Hello crafty friends!

    It’s Alicia a.k.a. Crafty Al here to share a look at the FUN confetti balloon shaker card I made using some of the new products from Kat Scrappiness.

    I used balloons from the Birthday Essentials Dies to create the opening for my shaker windows in an embossed piece of cardstock. For the sentiment I used the Happy Birthday with Shadow dies and cut the words from gold foil cardstock and the shadow from vellum.

    For my shaker bits I used these cute and tiny gold star sequins.

    You can check out my video for the full process…

    Thanks for stopping by and I hope you enjoyed today’s card!

    Alicia / Crafty Al

    Related Products:

    Kat Scrappiness

          Birthday Essentials Dies: https://shrsl.com/3d6po

          Happy Birthday w/Shadow Dies: https://shrsl.com/3d6pp

          4mm Light Gold Solid Star Sequins: http://shrsl.com/3dsk5

          Triangle Embellishment Tray: http://shrsl.com/37sxh

          Embellishment Organizer: http://shrsl.com/37sxi

          A2 Acetate Sheets – 25 pk: http://shrsl.com/3caqt

       Art Glitter Glue: http://shrsl.com/37svl

    **Some links above are affiliate links. I link them up for your convenience and may receive a small commission, at no extra cost to you. I hope you will consider using the links if you decide to purchase the products I share. 🙂

  • Happy Birthday!

    Happy Birthday!

    Hello everyone!

    It’s Donna Idlet here sharing a slimline card I made using the newly released Birthday Essentials Dies, the Happy Birthday Sentiment die w/ Shadow and the 6×8 Birthday Essentials Paper Pad. The new Birthday release is so much fun!! I love the bright bold colors that makes a perfect birthday card.
    Here is my card for your inspiration:
    • Created a mini slimline card measuring 6″ x 3 1/2″ (6″ x 7″, scored at 3 1/2″).
    • Die cut the top layer with KS Mini Slimline Cross Stitched die.
    • Used a stencil to create the pattern in the background.  Used the KS Mini Slimline Card Set for the card base.
    • Used the pattern paper from the  6×8 Birthday Essentials Paper Pad to die cut the presents from the Birthday Essentials Die Set.  The solid card stock for the ribbon and bow is card stock from my stash.
    • Die cut the top layer from the KS mini slimline zig zag and the bottom layer I used the mini slimline Double Stitched Dies. Die cut the birthday hats from the Birthday Essentials Die Set, using a couple of patterns from the Birthday Essentials Paper Pad, assembled and added some clear nuvo drops to the blue hat and Diamond Stickles to the yellow hat.
    • Die cut the Happy Birthday w/Shadow Die using only the word Birthday with black card stock.
    • Stamped and heat embossed with white embossing powder Happy from the KS Koala-Ty Time stamp set (masked off the “Mother’s Day”).
    • Added some sprinkles from the Mixed Candy Sprinkles.
    • Assembled the card.

    Thank you so much for stopping by, I hope you have been inspired.

    Here is a list of supplies I used on my cards. Affiliate Links used at no additional cost. Thank you for your support.


    https://linkdeli.com/widget.js?id=f5e8378456858c916708