Tag: coffee time background die

  • I Need Some Coffee Right MEOW!

    I Need Some Coffee Right MEOW!

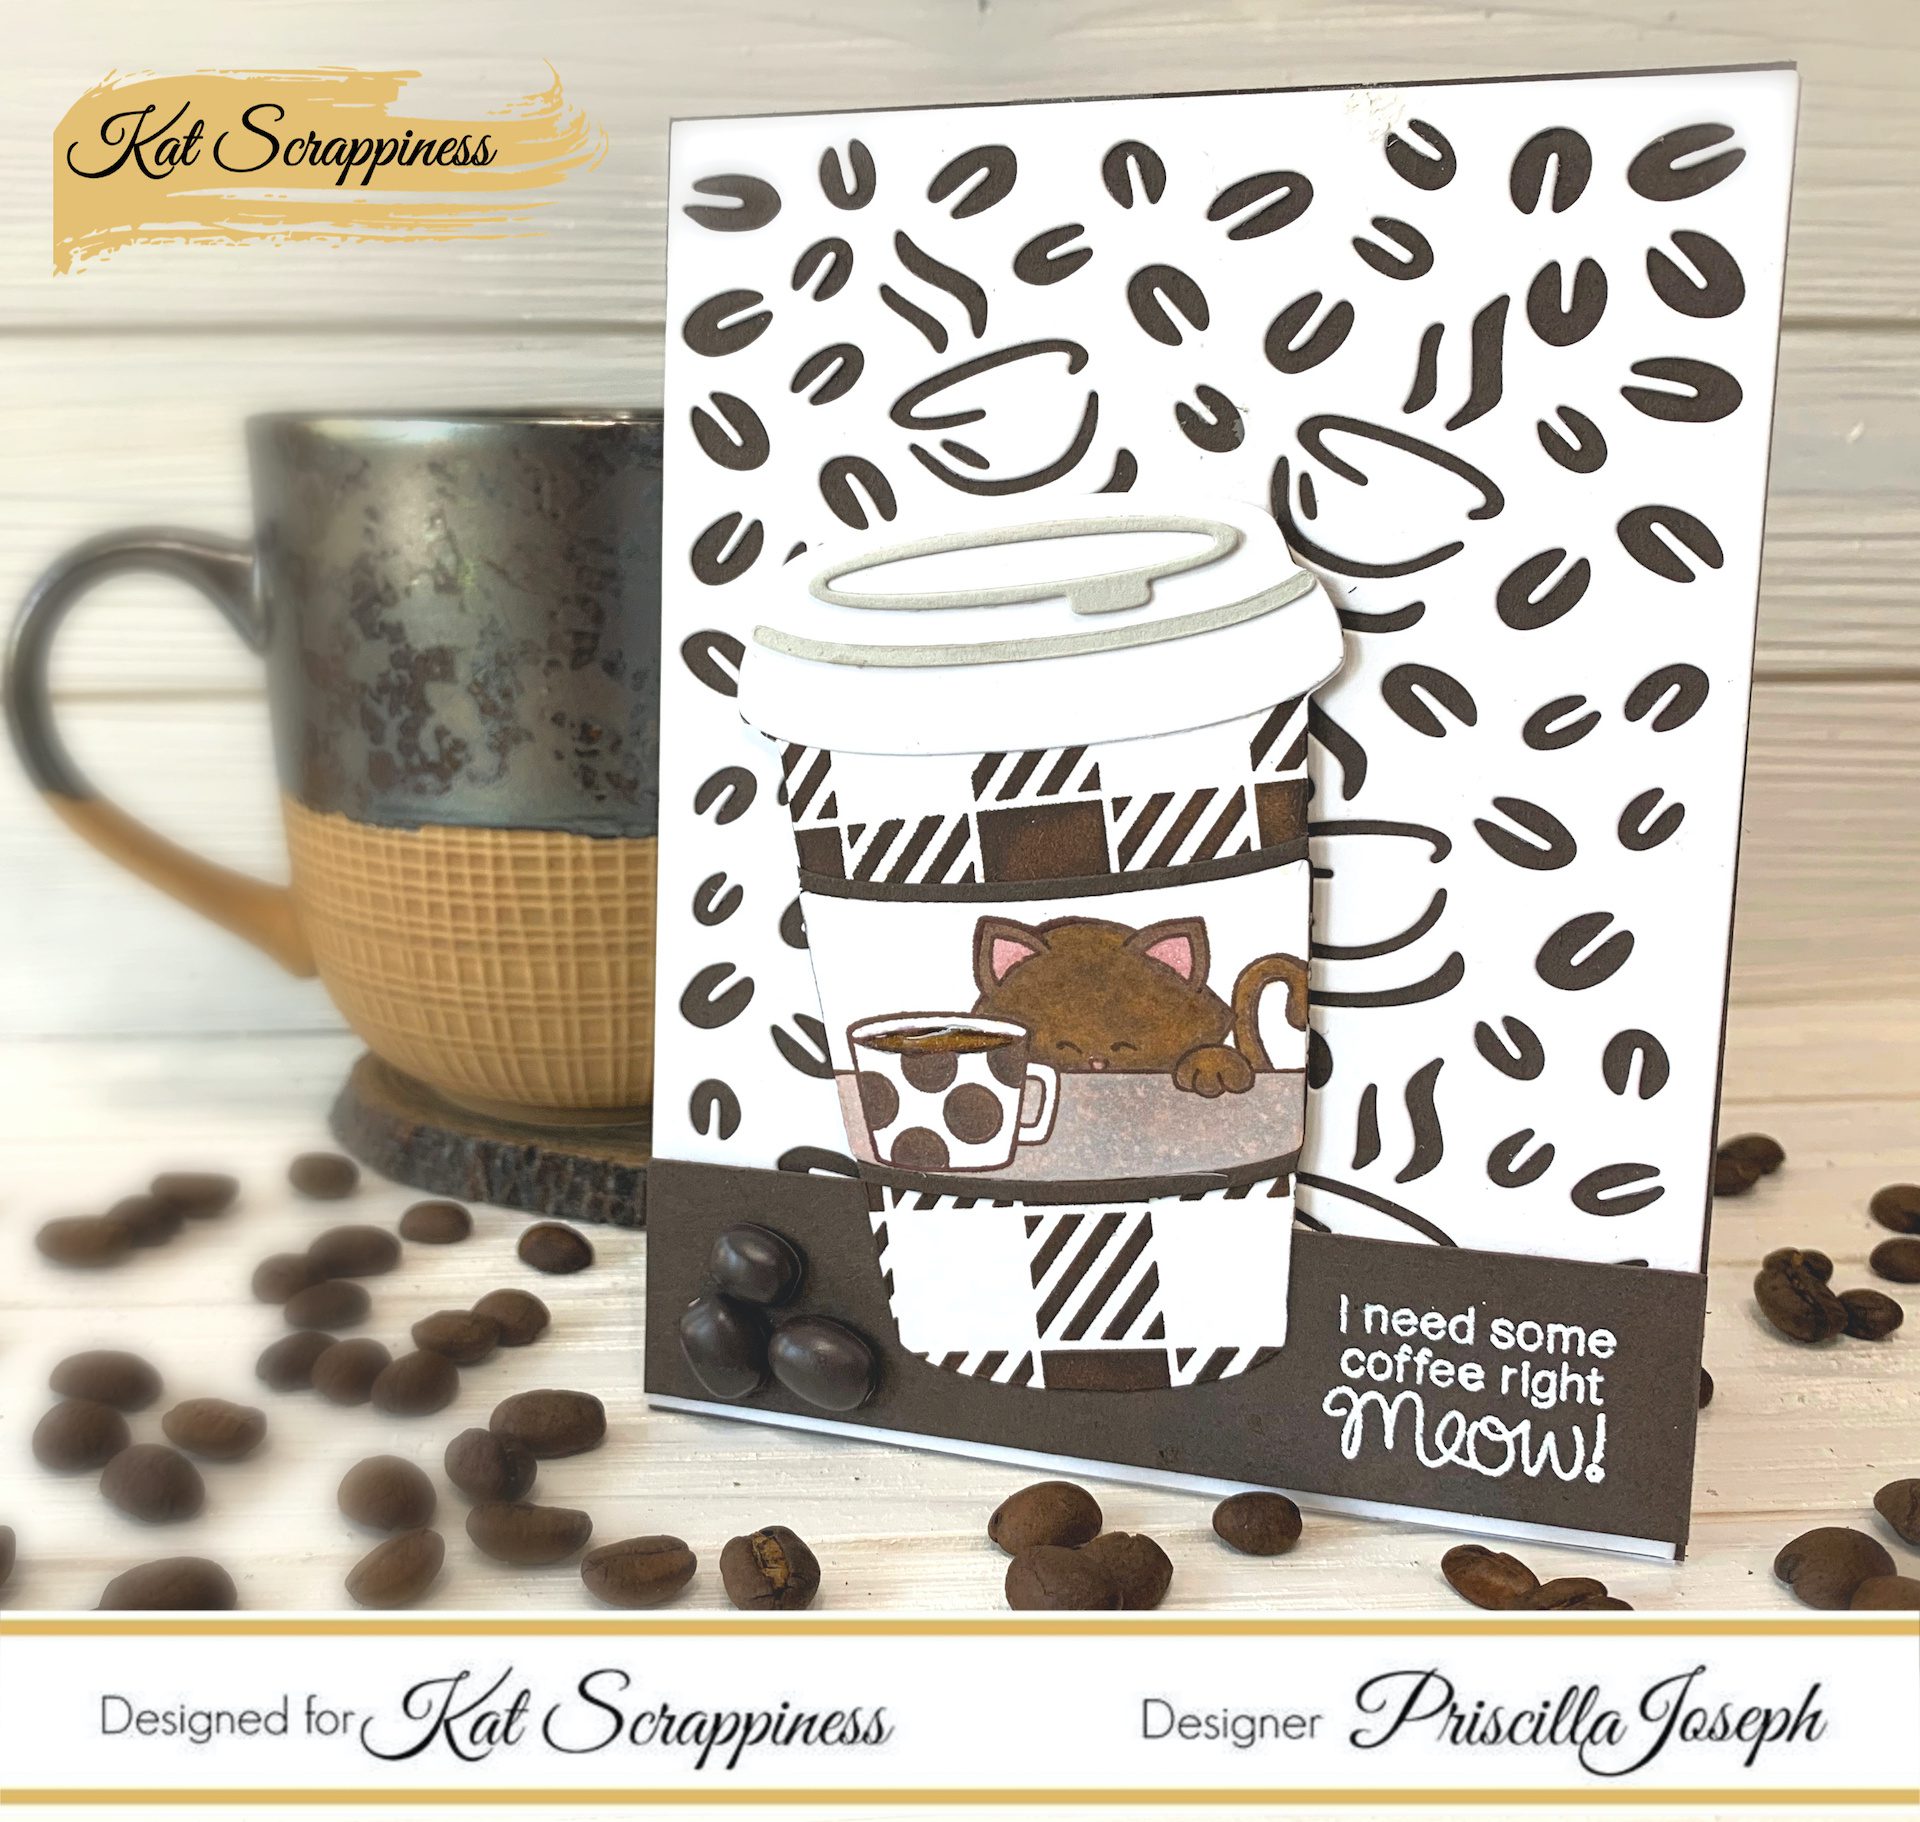
    Hi Everyone, it’s Priscilla here. Today I want to share a card I made for the Kat Scrappiness Blog  featuring the newly released “Coffee Time Background Die.”

    This full A2-sized background die is the perfect backdrop for any coffee-themed card. Plus I paired this die with another Kat Scrappiness coffee product – the “Layered Coffee Cup” die.

    To create this card, I followed these steps:

    1. Ran the “Coffee Time Background Die” through my Big Shot  using white card stock before adhering it to a brown A2 card base.
    2. Created the coffee cup using the “Layered Coffee Cup” die and then used brown ink with Newton’s Nook“Gingham Stencil” to color it.
    3. Stamped one of the images from the Newton’s Nook “Newton Loves Coffee” stamp set onto the coffee sleeve and colored it with Spectrum Noir markers before adhering it to the front of the cup.
    4. White heat embossed the sentiment from the stamp set onto a brown card stock strip and placed it at the bottom of the card.
    5. Adhered the finished coffee cup on the card front.
    6. Added 3 of the Kat Scrappiness “Coffee Beans” for a finishing touch.

    That’s it!


    Thank you so much for stopping by! Don’t forget to check out what’s NEW in Kat’s Shop, and follow my blog and Instagram for more “Kat Scrappiness Amazingness”!

    Stay Safe . . .

    Priscilla ??

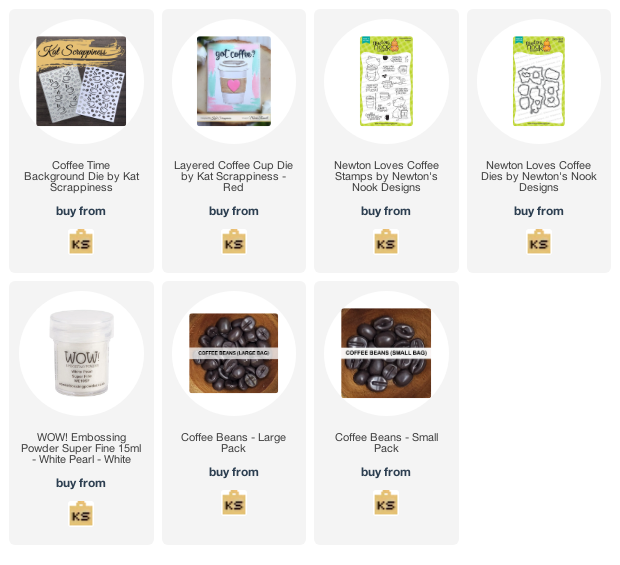
    The supplies I used are listed and linked below.

    SUPPLIES

  • Coffee & animal cards by Martha Lucia

    Coffee & animal cards by Martha Lucia

    Hello crafty friends, Martha Lucia here with you. Today I have two cute and different cards. These were made with the new dies included on the most recently release and I am sure you will love these.

    I love when I can use my products in different type of projects. To make the above card, I just die cut the Coffee Time Background Die in white card stock and pasted with crafty foam to a early expresso card base. Using crafty foam you can easily elevate the high of the cover plate and give to it more dimension.

    Then, I stamped in a separate piece of white card stock one of the sloths included on the stamp set Stewart the Sloth with Memento Tuxedo Black Ink. I colored the images with Illustrator Markers from Spectrum Noir using the colors RB1 & MB1, TN3, PP5 & MG4, CR3. With scissors I fussy cut the image and let it on a side for a while.

    I took a strip of white card stock and inked it with Ocean Blue Harmony Water Reactive Ink from Spectrum Noir. When the ink was totally dry, I partially stamped one of the sentiments included on the same stamp set, the Stewart the Sloth. To finalize the card, I arranged all the pieces with crafty foam tape on the lower part.

    My second card was created with Lola the Giraffe stamp set. I decided to make a slimline model and stamped four times the Giraffe in a row onto the top white layer of the card base. I colored each image with different tones of Sparkle Glimmer Pens from Spectrum Noir and stamped around of them some grass images included on the same stamp set, Lola the Giraffe.

    To embellish the card, I die cut a frame using the large size of the new Tri-Frame Slimline Dies onto designer paper and pasted directly over the stamped top layer. Additionally, I stamped one of the sentiments included on the same stamp set, Lola the Giraffe and die cut if with one Stitched Sentiment Strip Die.  As final touch a few Butterfly Sprinkles and Little Lady Bug Sprinkles for the amazing collection of embellishments available at Kat Scrappiness store.

    Thank you for stopping by!