Follow:
    Design Team Projects

    Perfect Love Cards

    Merry Christmas dear friends!!! Thank you for being with me today to celebrate the perfect love!

    I am featuring another die cut from Kat Scrappiness and you will love how I used a traditional Christmas Stocking die to create a baby card. I love when I can use the products in different ways and this is one of them.

    Perfect Love

    For my first card I used the Build a Stocking Christmas Die. It is a complete set of elements perfect to create a beautiful stocking or to turn it in a baby bottles. The process is simple – you only need to fold the upper part over the stocking and decorate it.

    Perfect Love

    I cut two stockings using using blushing bride card stock. It is also a stitched die cut so I just enhanced the stitches with a marker and embossed with an embossing folder. Then I cut the upper part of the die cut twice using decorated paper and pasted it directly over the fold. This die cut set include additional elements to work as decoration and I just cut the heart in whisper white and embossed it with the same embossing folder.

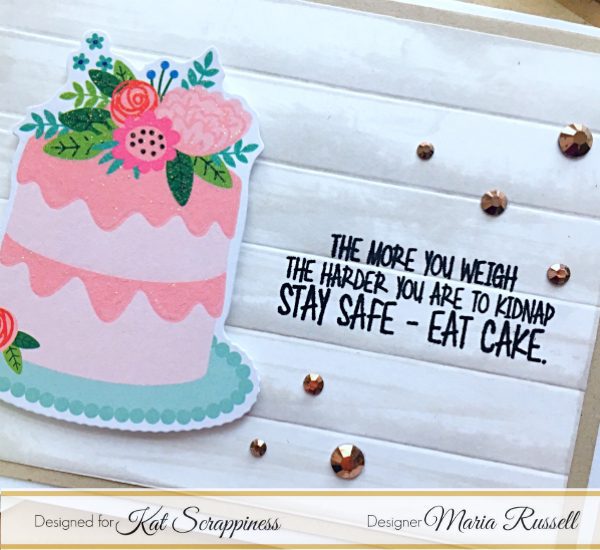
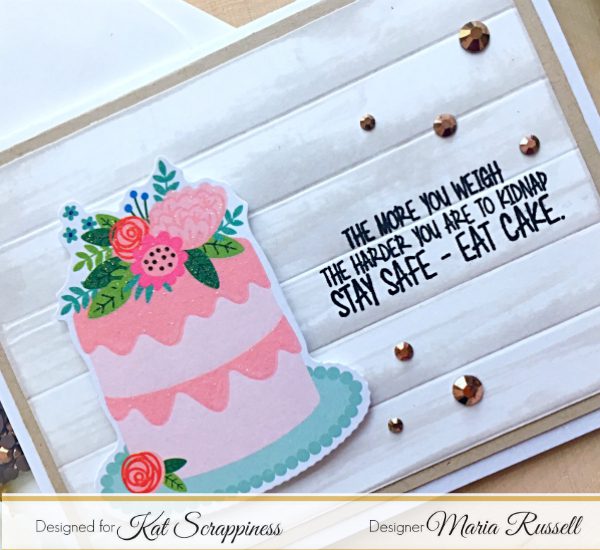
    The base of my card is Early Espresso, I love the combination of this color with blushing bride, and I added a second layer whisper white directly on top of the base card. I embossed this layer with a 3D embossing folder to make it more special. To finalize the decoration I just added a stamp sentiment that I stamped over whisper white card stock and cut with a small cross stitched rectangle from Gina Marie Designs.

    My second card is a Love & Hugs card that I made using the Foliage Frame die. I cut the card base in Sahara Sand card stock, the second layer in whisper white and the die cut layer in Sahara Sand again.

    Perfect Love

    Using distress oxides over inks, I sponged the color over the whisper white layer, mixing all the colors on the center of the card. Then I pasted the Foliage Frame directly over the inked layer and decorated it with some small white sequins included on the Golden Anniversary Sequin Mix package of Kat Scrappiness. I also added a few drops of Nuvo Morning Dew.

    Perfect Love

    I stamped a sentiment over a piece of sahara sand card stock using VersaMark and White Embossing Powder. I cut it and pasted with dimensional or double sided foam tape on the center of the card.

    Perfect Love

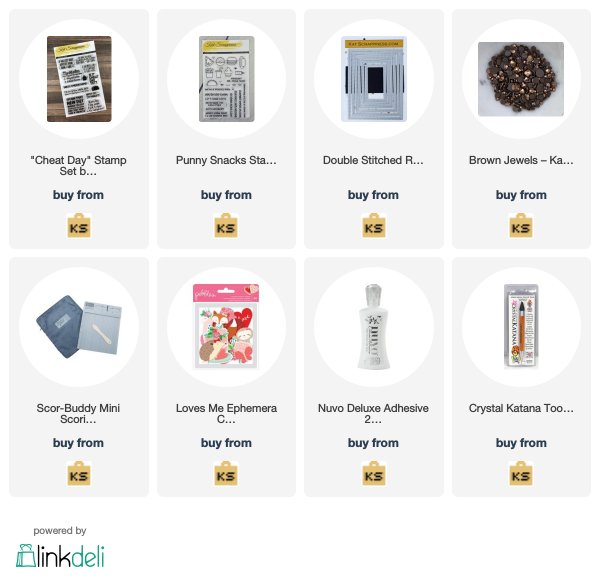
    You can find all the products that I used in these creations on Kat Scrappiness store. They have they own line of products plus hundreds of products in other brands. Just click here to enter to the fascinating world of paper lovers and don’t forget to share your creations with us.

    See you soon and enjoy your day with Jesus in your heart!

    Martha Lucia

    Design Team Projects

    Thank You – Crafters Essentials Winter Die set

    Merry Christmas Eve to all of you!!

    As of this post the  Crafters Essentials Winter dies by Kat Scrappiness is back in stock!!  I’ve created a winter themed Thank you card using Crafters Essentials Winter dies by Kat Scrappiness.  The trees, deer, and that background are all dies that are in the Crafters Essentials Winter die set by Kat Scrappiness.  I wanted to show you how to create a non-Christmas card using this die set.

    I added some shimmer to the trees using a Spectrum Noir Sparkle Marker.  I then added some chunky glitter to the bottom of the card to look like sparkly snow.  I found a small Thank You sentiment in my stash.  I stamped and heat embossed the sentiment on a Stitched Fishtail Banner by Kat Scrappiness.

    – – –– – –– – –– – –– – –– – –– – –– – –– – –– – –– – –– – –– – –– – –– – –– – –– – –– – –– – –– – –– – –– –

    Use code caren10 for a 10% discount in the Kat Scrappiness shop.

    Thanks for stopping by and happy stamping!

    – – – SUPPLIES for today’s project– – – – – – – – – – – – – – – – – – – – – – – – – – – – – – – – – – – – – – –

    Design Team Projects

    Funny Cards with Cheat Day Stamp Set

    Hello Kat Scrappiness fans! Maria here on the blog with you. Are you all excited to drink eggnog, eat some baked ham and candied yams?  I certainly am! I am back today to share with you two funny cards showcasing the Cheat Day stamp set, Punny Snacks stamp set, Brown Jewels, and the Double-Stiched Rectangle dies.


    For my first card below, I scored some A2-sized cream card stock using my Scor-Pal Scoring Board and inked the lines with some Fog ink.  I learned this technique from Dawn of W Plus 9 where she showed it on her YouTube video (thank you, Dawn!).  I adhered this piece onto my card base and stamped the sentiment with Versafine Onyx Black ink.


    I used the cake from the Loves Me Ephemera Cardstock die-cuts by Pebbles and adhered it onto my card with some foam tape.   I finished my design by adorning the card with some Brown Jewels.  This card is really simple but I love how it turned out.  Here’s a little close-up:


    Those brown jewels are so pretty.  I also love the ephemera packs that I purchased from the shop.  Here’s another look:


    For my second card, I scored another piece of A2-sized cream card stock and inked the lines again with some fog card stock.  I cut another piece of black card stock and die-cut the same using the double-stitched rectangle frames to create a frame.  I wanted this card to look like one of those Letterboards we all love.  I adhered this piece on the card with some foam tape.  I stamped my sentiment using some Versafine Onyx Black ink and adhered my colored images from the Punny Snacks stamp set.  Here’s my second card:


    I think the Cheat Day stamp set is hilarious and certainly a must-have to add to your stamp collection.   Here’s a little close-up:


    During the holidays, I don’t really watch what I eat and the sentiment on this card is exactly how I feel!    What about you guys?  Here’s another look:


    I hope you like my cards today.  Which one is your favorite?  The supplies I used are listed and linked below.  Before I go I just wanted to let you know that the Christmas and Hanukkah items in the shop are currently on sale.  Use coupon code “STUFFMYSTOCKING” FOR 20% off in this category.


    Thank you so much for stopping by.  I wish you all a very Merry Christmas and a Happy New Year!


    ———–SUPPLIES———–


    Design Team Projects

    Build-A-Stocking Gift Tags

    Hello, crafters!  I hope that all of you are having some fun this holiday season.  It can be extremely busy and stressful, but don’t forget to take a little break now and then to re-set and re-energize 🙂  Since crafting is such an integral part of my personal happiness, it was a pleasure to escape to my craft room and work up a little project to share with you today.  So sit back with your drink of choice (no judgement here!) and let’s dive into these Stocking Gift Tags.


    My first step was to do some die cutting with the wonderful Kat Scrappiness Build A Stocking Dies set.  I wanted a sturdy base, so I cut eight White stockings and then eight more in an assortment of greens and red.  I then selected four different Christmas themed patterned papers and cut out the “fabric” pieces two times for each paper.  I also cut some trees and hearts with the accent dies that come in the set.  I will use some of these in this project, and save the others for a future project.  I really love the size of all of these, as they are big enough to handle easily but small enough to fit into many different projects.


    Assembly of these stockings is very easy.  I glued one of the White stockings over one of the solid colored ones, then attached the patterned paper pieces into place.  You can see that this gives a nice white cuff, toe, and heel to the stockings.  You can definitely choose to make your own however you’d like – I just liked the classic look of white.  You can also see that I used the patterned hearts here, as well as some solid green trees to fill the cutouts I’d made earlier.  Again, you can use anything you’d like for this – I think a gold glitter card stock would look great, too!


    Now you KNOW I couldn’t just leave that white stocking cuff all alone, so I brought out one of my favorite new sets from Kat – the Holly & Berries Dies set!  This fabulous little set is chock full of five different sized holly leaves and three sizes of berries.  I chose to use the two smallest leaves and the middle-sized berry to create these cute little clusters.  Although they look amazing when layered with foam dots, I kept them flat for these tags.  I love how they look!


    There’s plenty of room on the backside of these tags for a message, some stamping, or a simple To and From like I chose.  Although I do have tiny stamps that say this, I went ahead and used a White gel pen to write it myself.  Easy-peasy!  You can see in the first photo of this blog post that I also added some sparkly red and white yarn to tie these tags onto my packages.  I used some simple slip knots to attach the yarn to the little loops of the stockings.


    My final touch was to add just a bit of glitter, because there is NO WAY I can create a Christmas tag with no sparkle!  The gorgeous White Blizzard Nuvo Crystal Drops added just the right amount of fun to my little berries.  Again, feel free to embellish your own stockings as much as you want!  There are no rules when it comes to gift tags 😀


    And that completes my Gift Tag project!  Making these was a joy, and I plan on making many more with all different colors and patterns – including frosty white/silver/blue tags.  If you’d like these two wonderful die sets, as well as other great items from Kat, please follow the links above or use the shopping link I’ve included below.  Don’t forget to use the discount code “CYNTHIA10” to save 10% off your entire purchase.  Thank you again for joining me today, and have a wonderful, crafty day 🙂

    Kat Scrappiness shop

    My YouTube channel


    Design Team Projects

    Christmas and New Year’s Cards with Kat Scrappiness and Newton’s Nook

    Hey Guys! I’m back again with both some Christmas cards and “Happy New Year” cards for you today. And “Newton” the kitty, from Newton’s Nook, makes a guest appearance in two of them.

    For my first Christmas card, I brought back one of my favorites, the Kat Scrappiness“Build a Stocking”die with my favorite “Buffalo Plaid” patterned paper and “fur” similar to a previous Kat Scrappiness blog post   I did in November.


    I adhered the finished stocking to a black brick-embossed background and added the coal sentiment and the “naughty” die cut to finish the card. Both came from Kat Scrappiness‘s “Naughty Christmas Stamp & Matching Die” combo set.


    For my second Christmas card, “Newton”, the kitty, is misbehaving, shooting Christmas fireworks everywhere!

    First, I used Echo Park ‘s “Fireworks Stencil” for the background with “Candied Apple” and “Mowed Lawn” Distress Oxideinks. I then adhered snow banks from the Kat ScrappinessCrafters Essentials-Winter” die set at the bottom and stamped the sentiment from  Kat’s “Naughty Christmas Stamp & Matching Die” combo set.


    I colored “Newton” from the Newton Nook’s  “New Year’s Stamp and Die Combo Set” with Copic Markers and placed him behind the snow banks. By coloring his champagne bottle to look like a black cannon, this kitty is ready for mischief. LOL! I used  the Kat ScrappinessChristmas Cheer” sequin collection for the fireworks and added a snowflake from Kat‘s “Snowflake Kisses” die set.


    For card #3, I switched gears (and holidays) and created a New Year’s card. I created a shaker card by die cutting a circle, framing it in gold glimmer card stock, and then filling it with two of Kat’s sequin mixes: “Snow Flurries” and “Cheers Gold,” with some added clear bubble sequins from my stash.


    I die cut the Kat ScrappinessHappy New Year Brush Script and Sentiment Die” out of blue glimmer card stock, layered a second one behind it in gold glimmer card stock, and then adhered it to a black glimmer card base. Two champagne glasses from the “Cheers Gold” sequin collection were the finishing touch next to the sentiment.


    My final card wishes all crafters a “Happy New Year.” And what could be more appropriate than scissor sequins shooting out of Newton’s champagne bottle!


    I die cut a large circle in a white panel and placed it over a background that was sponged with “Mermaid Lagoon” Distress Oxidesink. I then sponged silver pigment ink through the Echo Park “Fireworks Stencil.”

    I die cut “Newton” from the Newton Nook’s  “New Year’s Stamp and Die Combo Set“, added a little color to him, and then adhered him to the front of the card. I added the Kat ScrappinessSilver Scissor Sequin Mix” onto the spewing champagne and up into the sky. The “Happy New Year” sentiment is from same stamp set, although I added the “Crafty” from a stamp set in my stash.


    And on that note, “Happy Crafty New Year” to all my fellow crafters. May 2019 bring you joy and even greater creativity!

    The supplies I used are listed and linked below.  Please don’t forget to use my coupon code “Priscilla10” for 10% off your order at the shop.

    PRISCILLA

    SUPPLIES

    Design Team Projects

    Snowman Holiday Card

    Hi Everyone, it’s Tina here. Can you believe Christmas is around the corner?!?!? Do you still have some holiday cards to make? Today I have a fun card to share with you using old and new product from Kat Scrappiness. The Stitched & Layered Snowman die along with the Stitched Winter Swirl Backdrop Die makes it super easy to create those last minute holiday cards. Below are the steps to replicate this simple Snowman Holiday Card.

    Step 1 – Trim White cardstock to 8 1/2” x 5 1/2”, score at 4 1/4” and fold in half for a vertical side fold card. (A2)

    Step 2 – Diecut Winter Swirl Backdrop Die using Blue folded cardstock. Adhere to the front of card using Nuvo Deluxe Adhesive Glue.

    Step 3 – Diecut Stitched & Layered Snowman Die in colors of your choice. Adhere to card using Nuvo Deluxe Adhesive Glue.

    Step 4 – Diecut Merry Christmas Brush Script die using Glitter Cardboard. Adhere to card using Collage Medium.

    Step 5 – Optional – apply Glossy Accents over the sentiment.

    I hope you enjoyed this fun holiday card which takes little time to make. Below is a link to all the products used. To receive 10% off your order at Kat Scrappiness use code: TINA10 at checkout. Thank you for stopping by and have a wonderful day!

    Products Used:


    https://linkdeli.com/widget.js?1543923411530

    Design Team Projects

    Christmas Tags using Cover Plates

    Hi everyone!  I can’t believe Christmas is a little over a week away! Today, I have created some quick and easy tags using cover plate dies from Kat Scrappiness.

    My first set of tags features the Wood Grain Framed Diamond Wire die and the Merry Critters stamp set.  I used the banner die from the Crafters Essentials – Fall die set for the sentiment.

    My second set of tags used the Fancy Floral Coverplate die.  I used spray adhesive on the back of the die cuts and then attached them to the card stock.  I sprayed glitter mist on these tags and attached glitter words to the tags.

    For my third set of tags, I used the Peacock Backdrop die and two word dies – Jolly and Ho Ho Ho.

    – – –– – –– – –– – –– – –– – –– – –– – –– – –– – –– – –– – –– – –– – –– – –– – –– – –– – –– – –– – –– – –– –

    Use code caren10 for a 10% discount in the Kat Scrappiness shop.

    Thanks for stopping by and happy stamping!

    – – – SUPPLIES for today’s project– – – – – – – – – – – – – – – – – – – – – – – – – – – – – – – – – – – – – – –

    Snowman Card

    Gingerbread Man Card

    Christmas Tree Card