—————————————————————
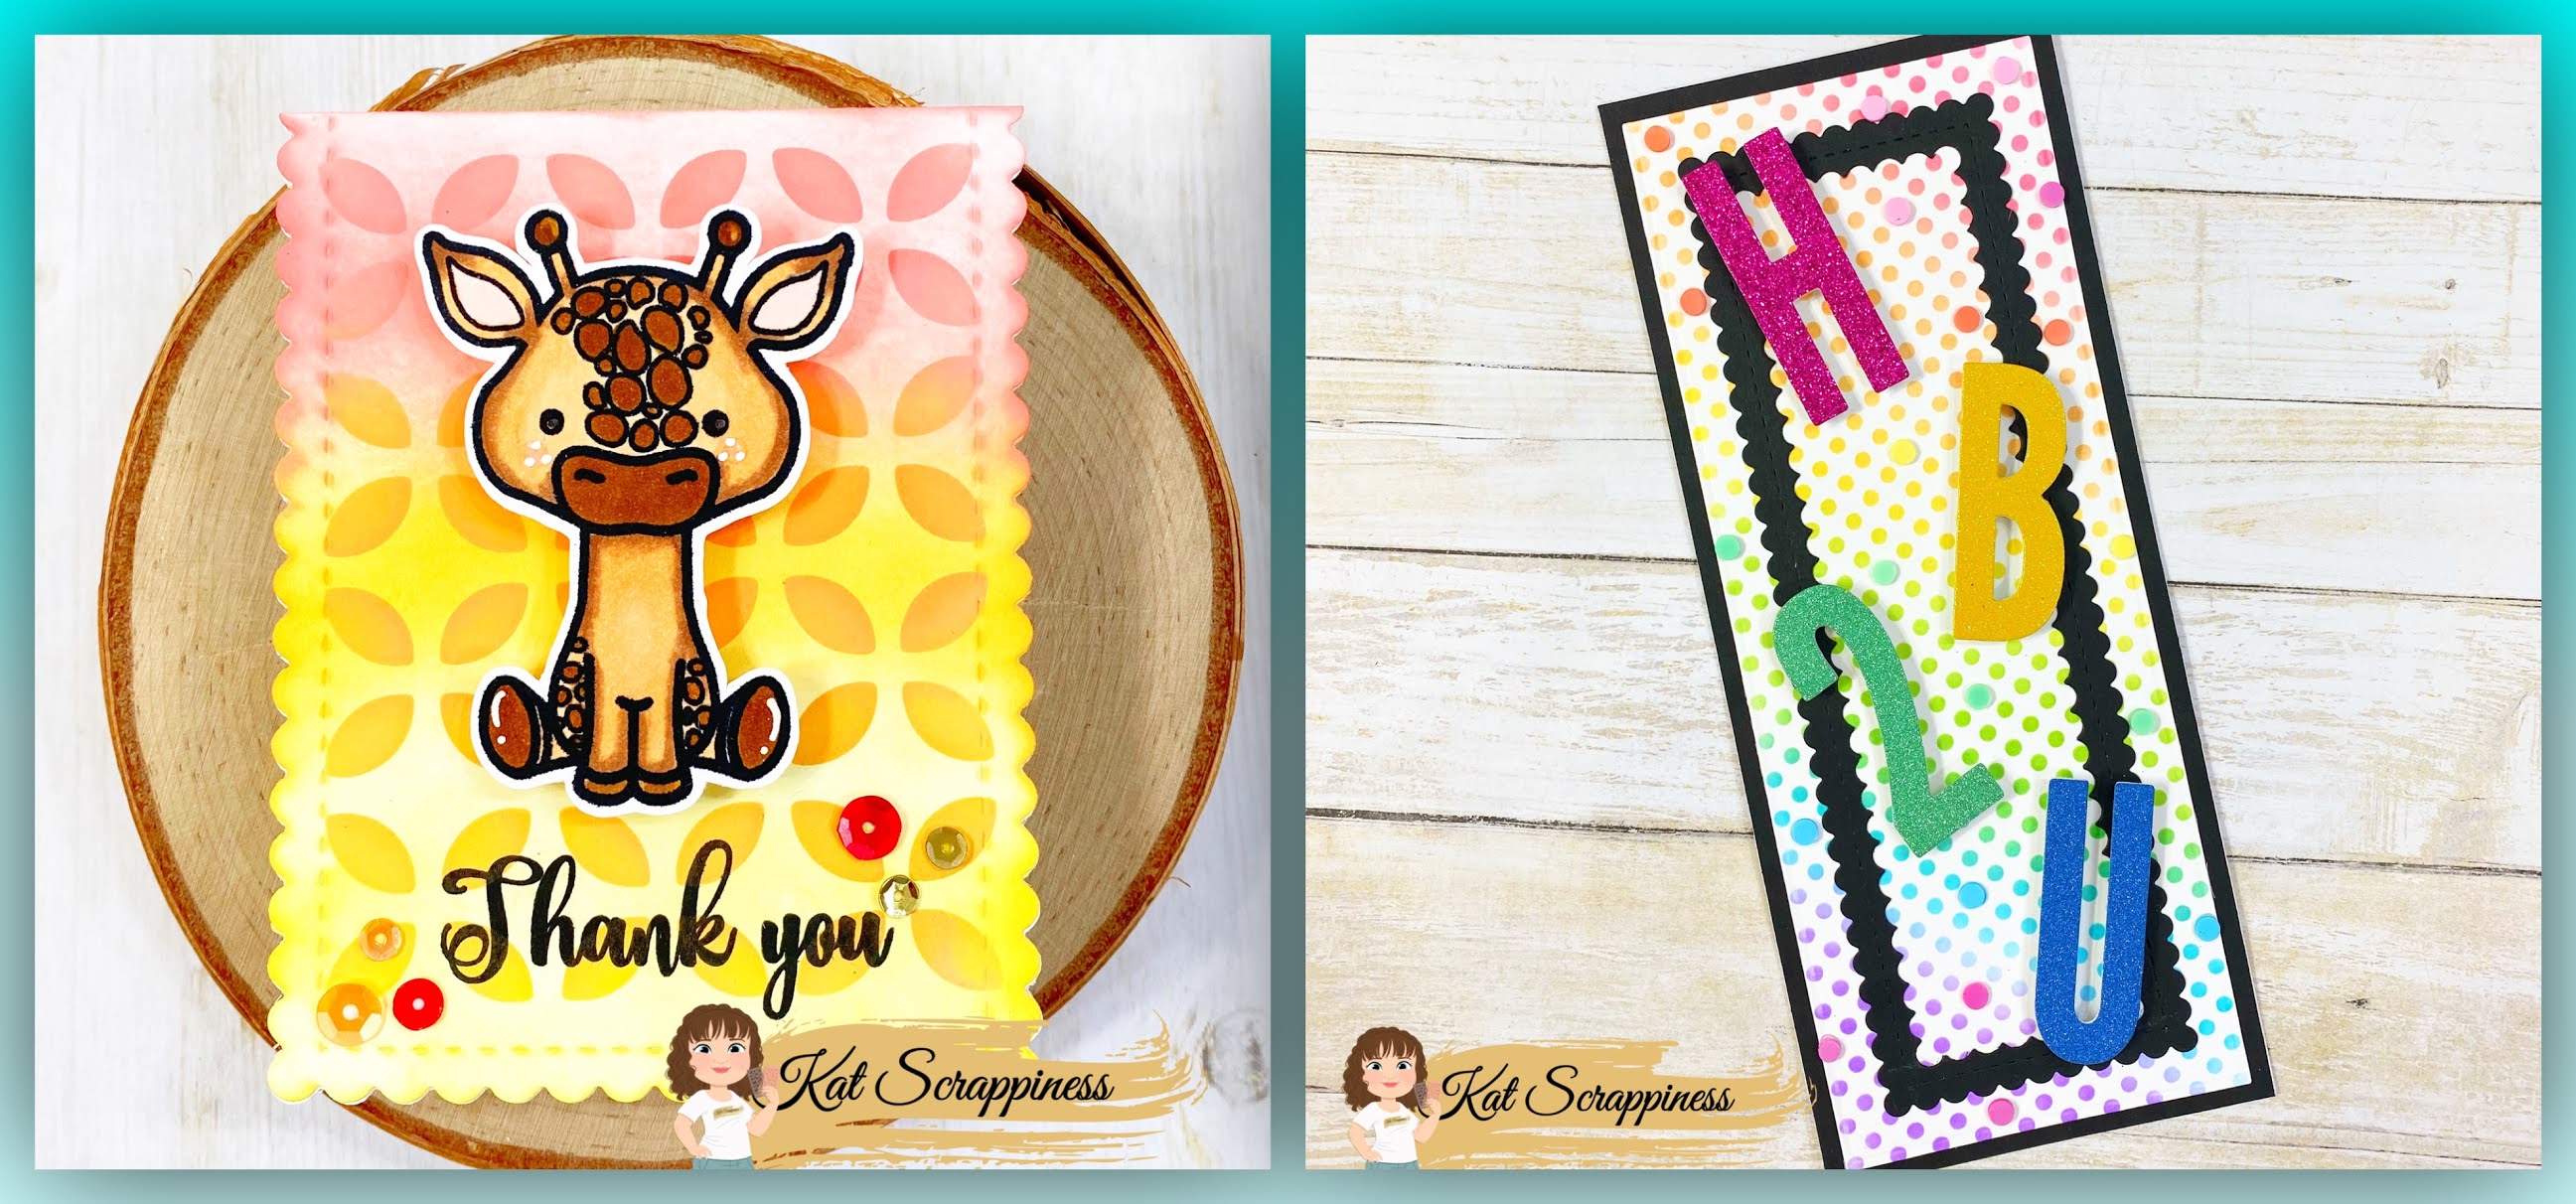
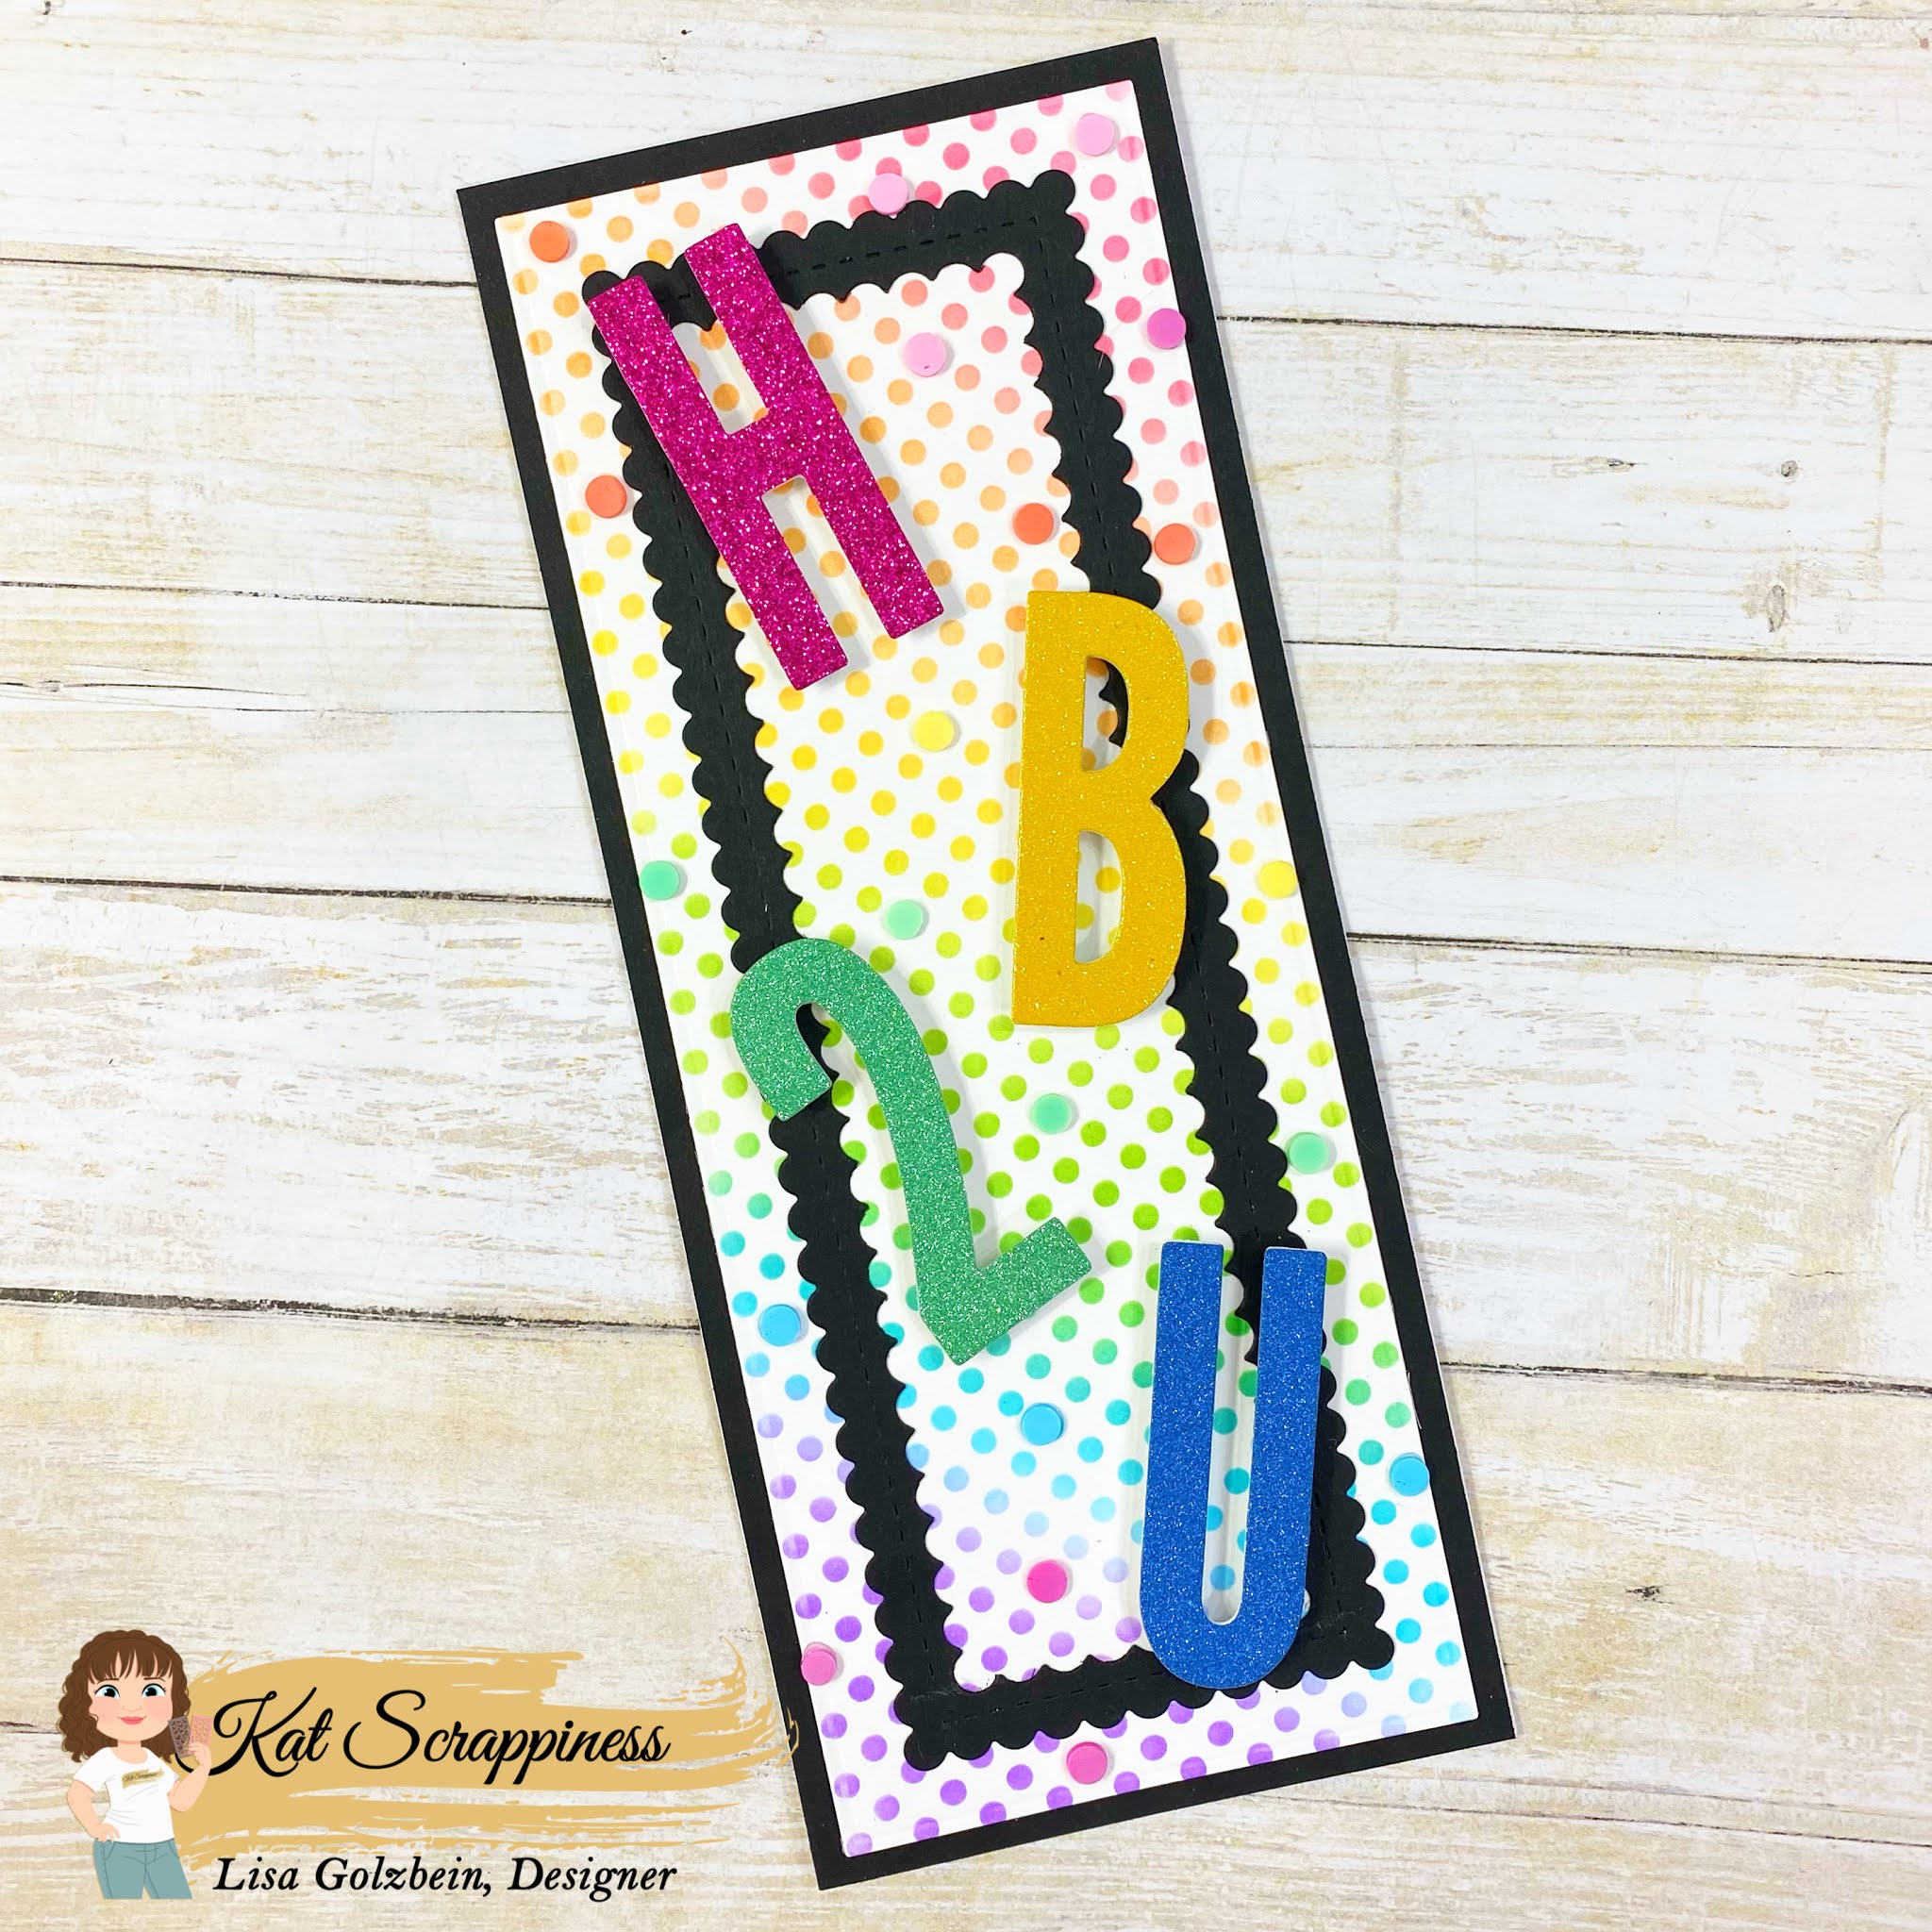
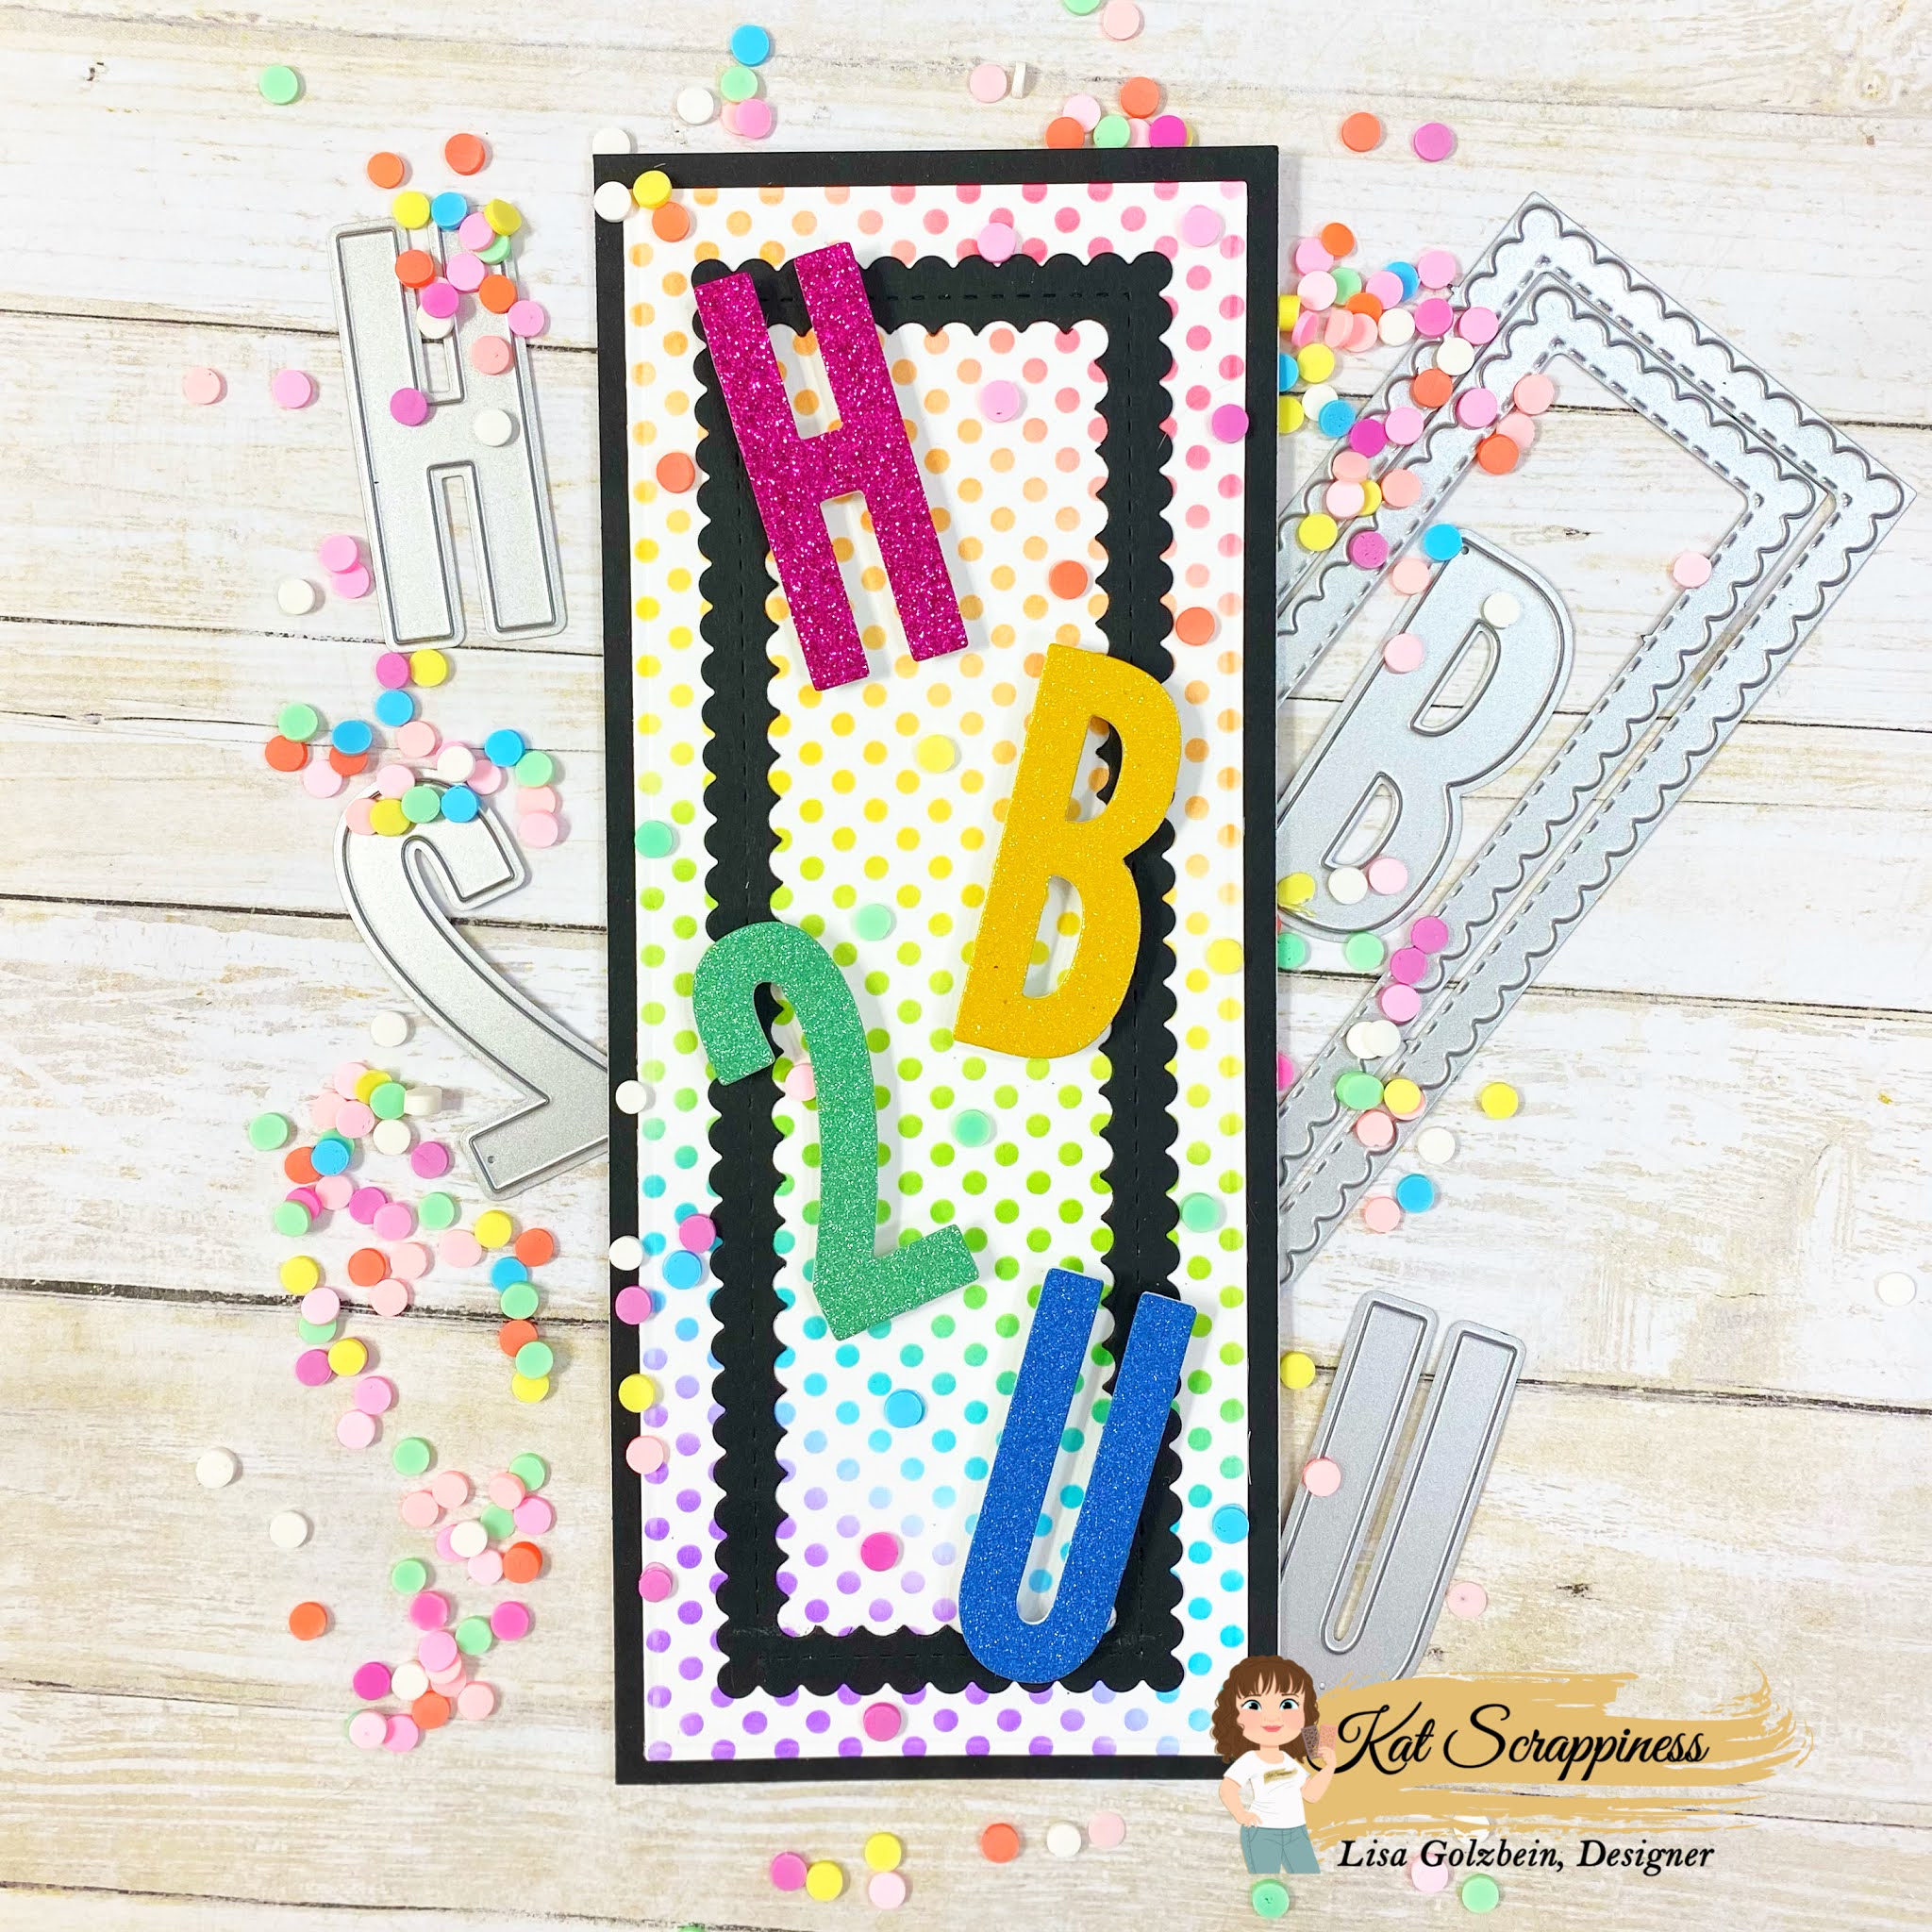
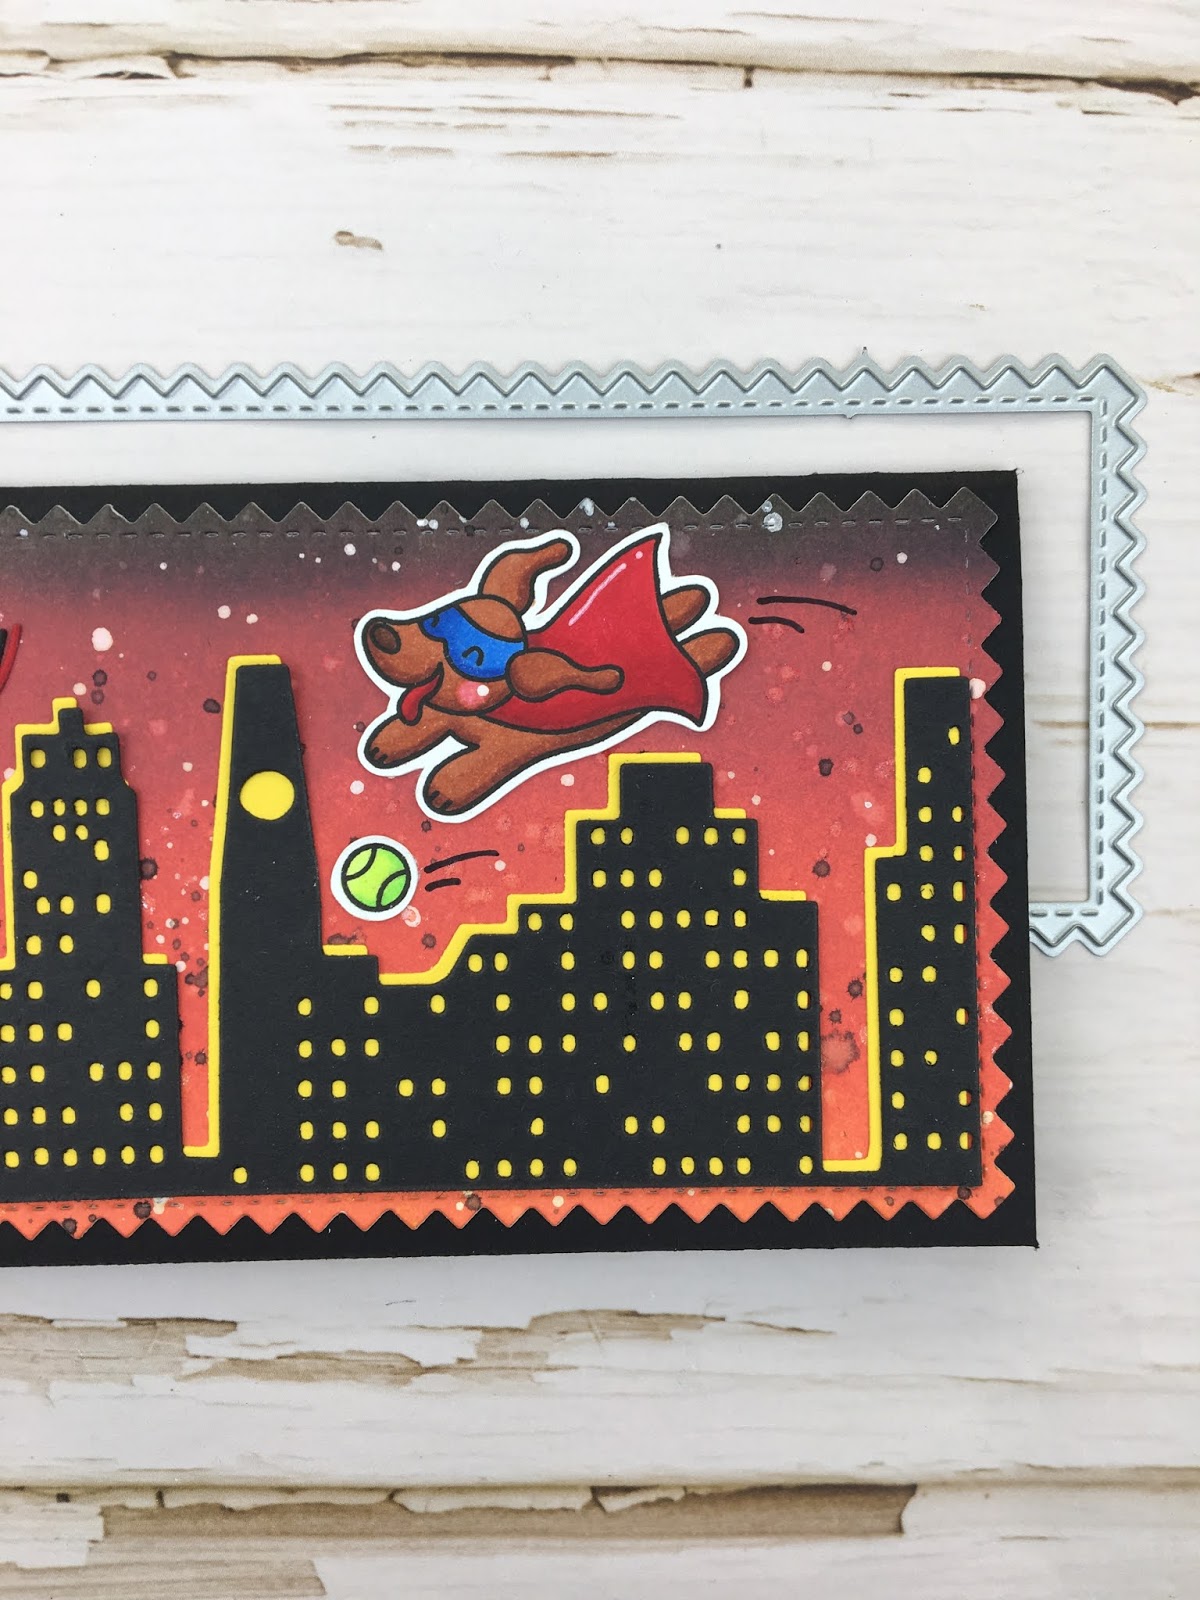
For this card I cut a piece of Bristol Smooth card stock using the largest die from the
The black scalloped inner frame was made using the second and third largest dies from the
Stitched Scalloped Nesting Slimline Dies. I nested them inside each other and sent them through my die cut machine together together at the same time and the result was that cool scalloped black frame that I adhered to the inside of the polka dot panel.
For the sentiment I used the
Condensed Uppercase Alpha Dies and the
Condensed Number Dies to cut out HB2U in glitter paper which is short for “Happy Birthday to You”. I popped the letters and number up on foam tape for some dimension. To finish off the card I added some fun and colorful
I took the entire panel and matted it on to black card stock and then adhered all of that to a side opening slimline card base measuring 8 1/2″ x 3 1/2″.
—————————————————————
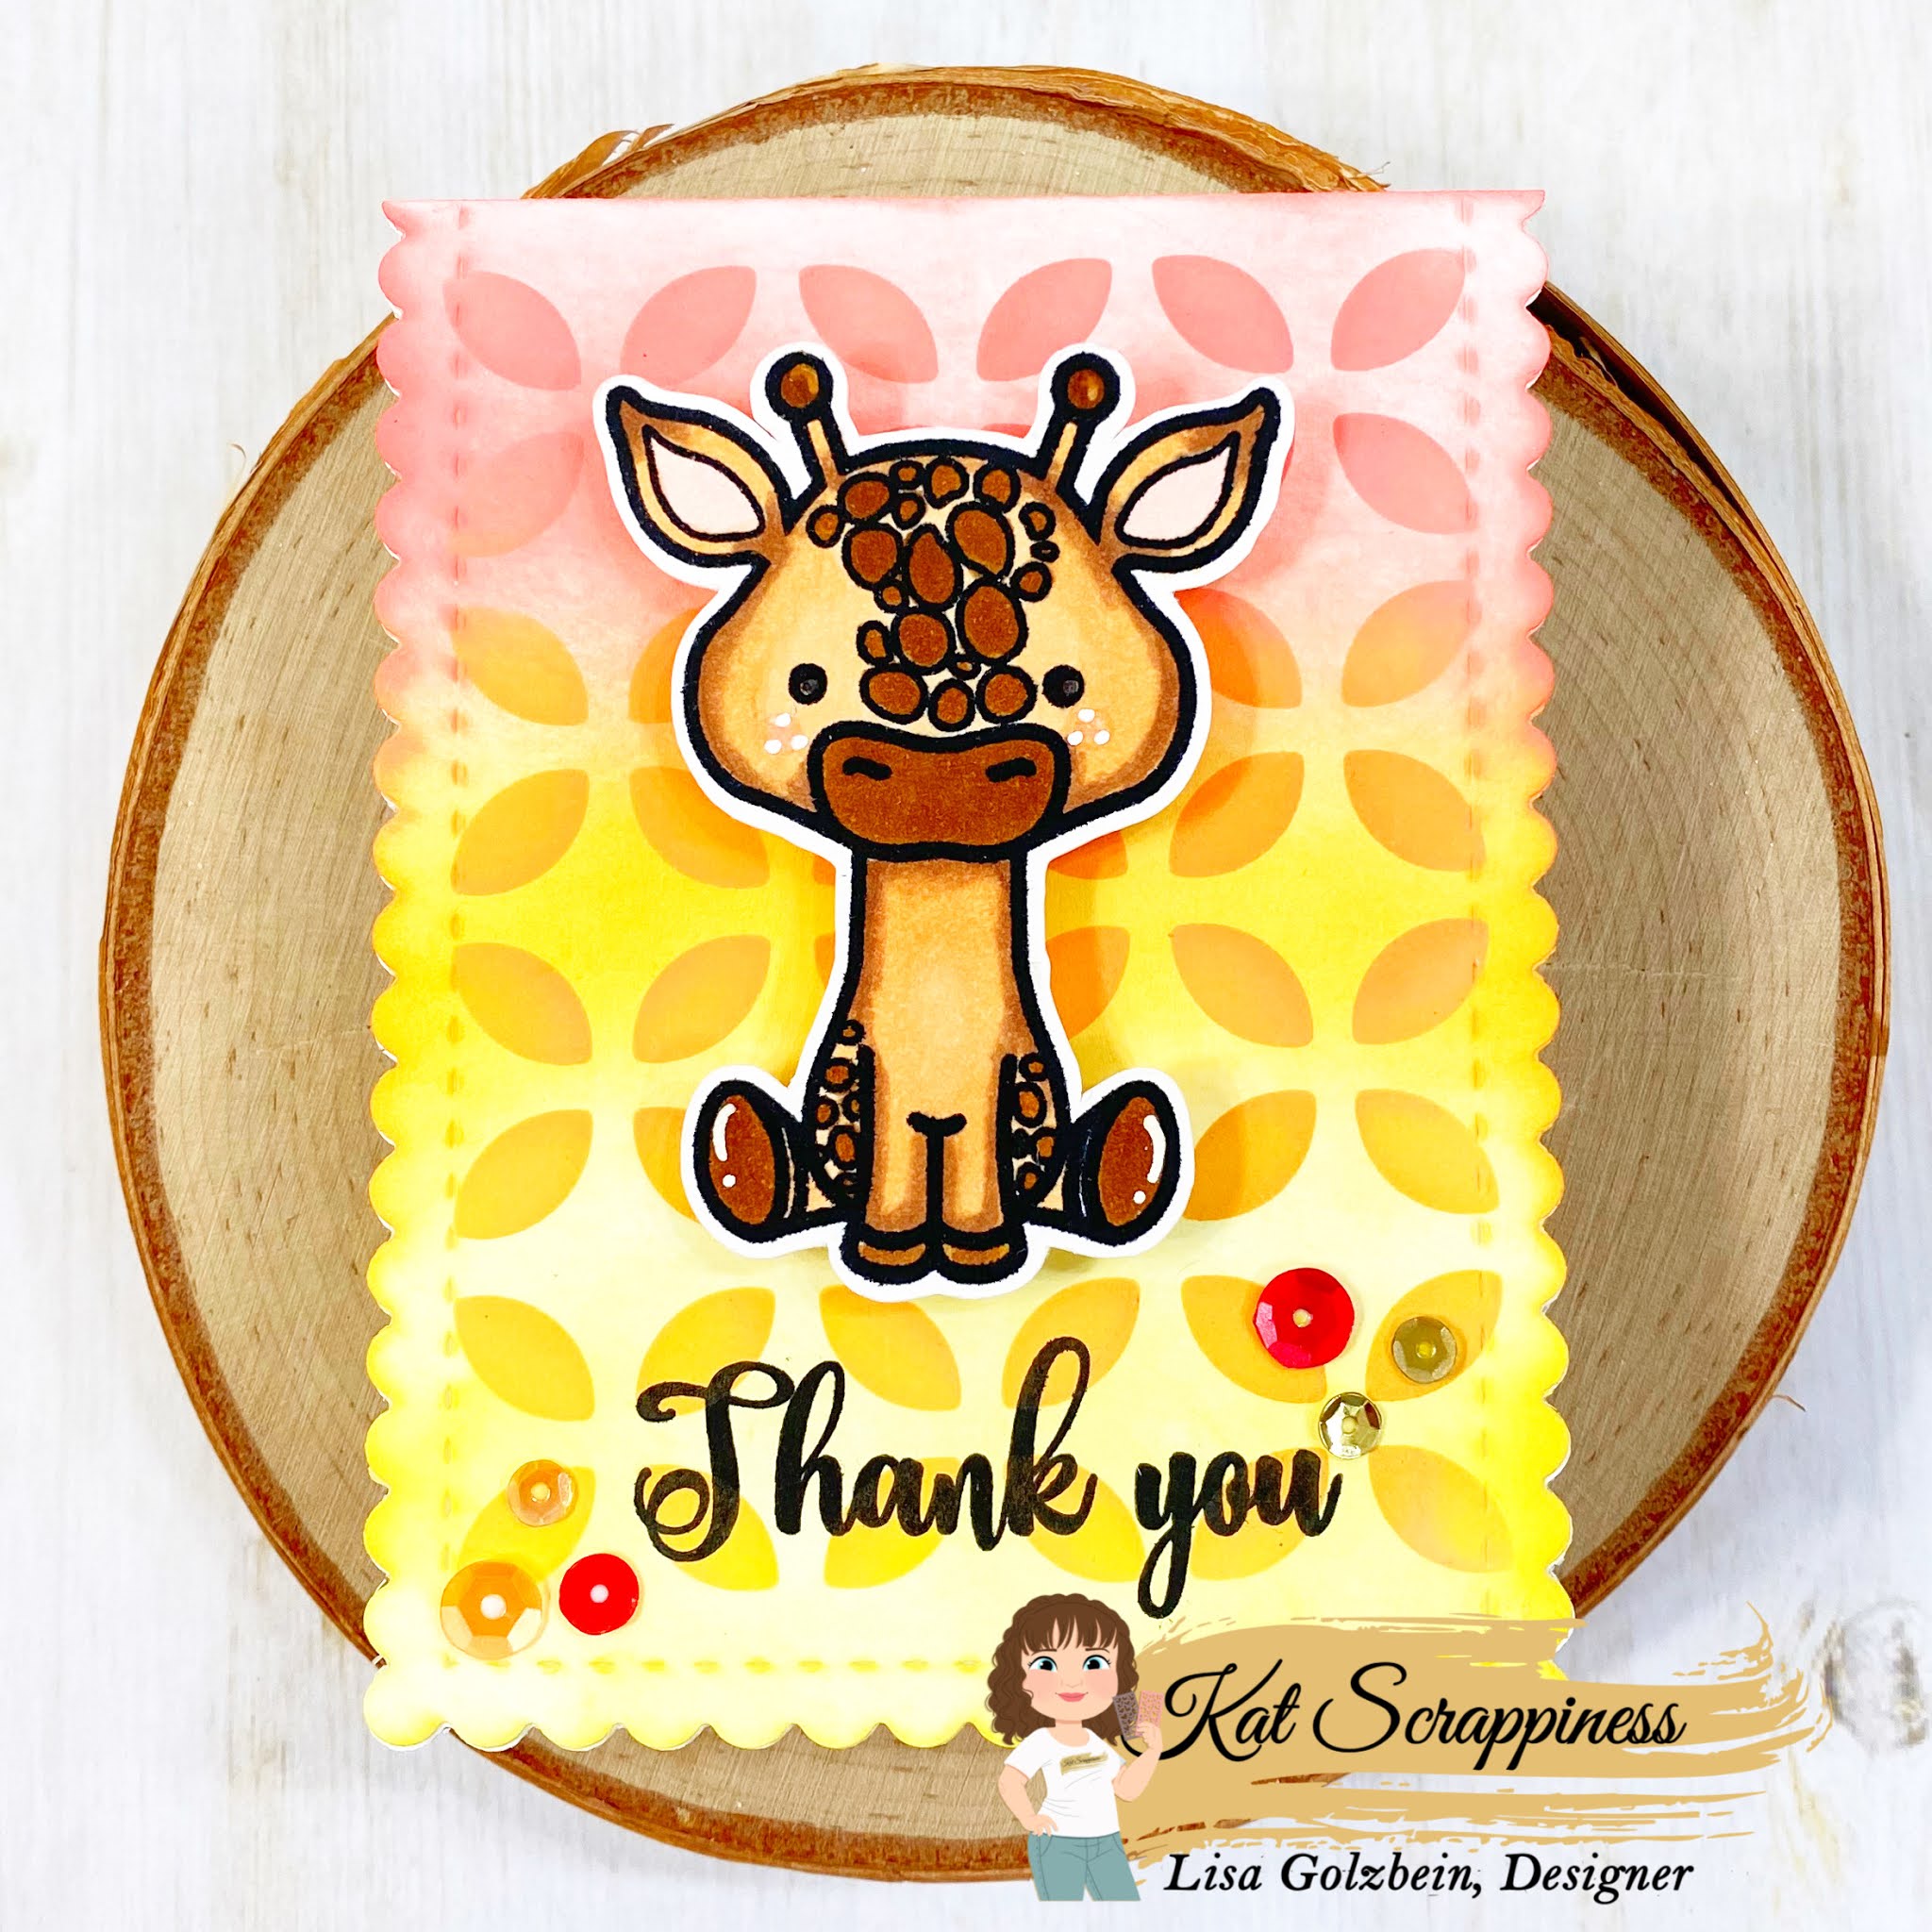
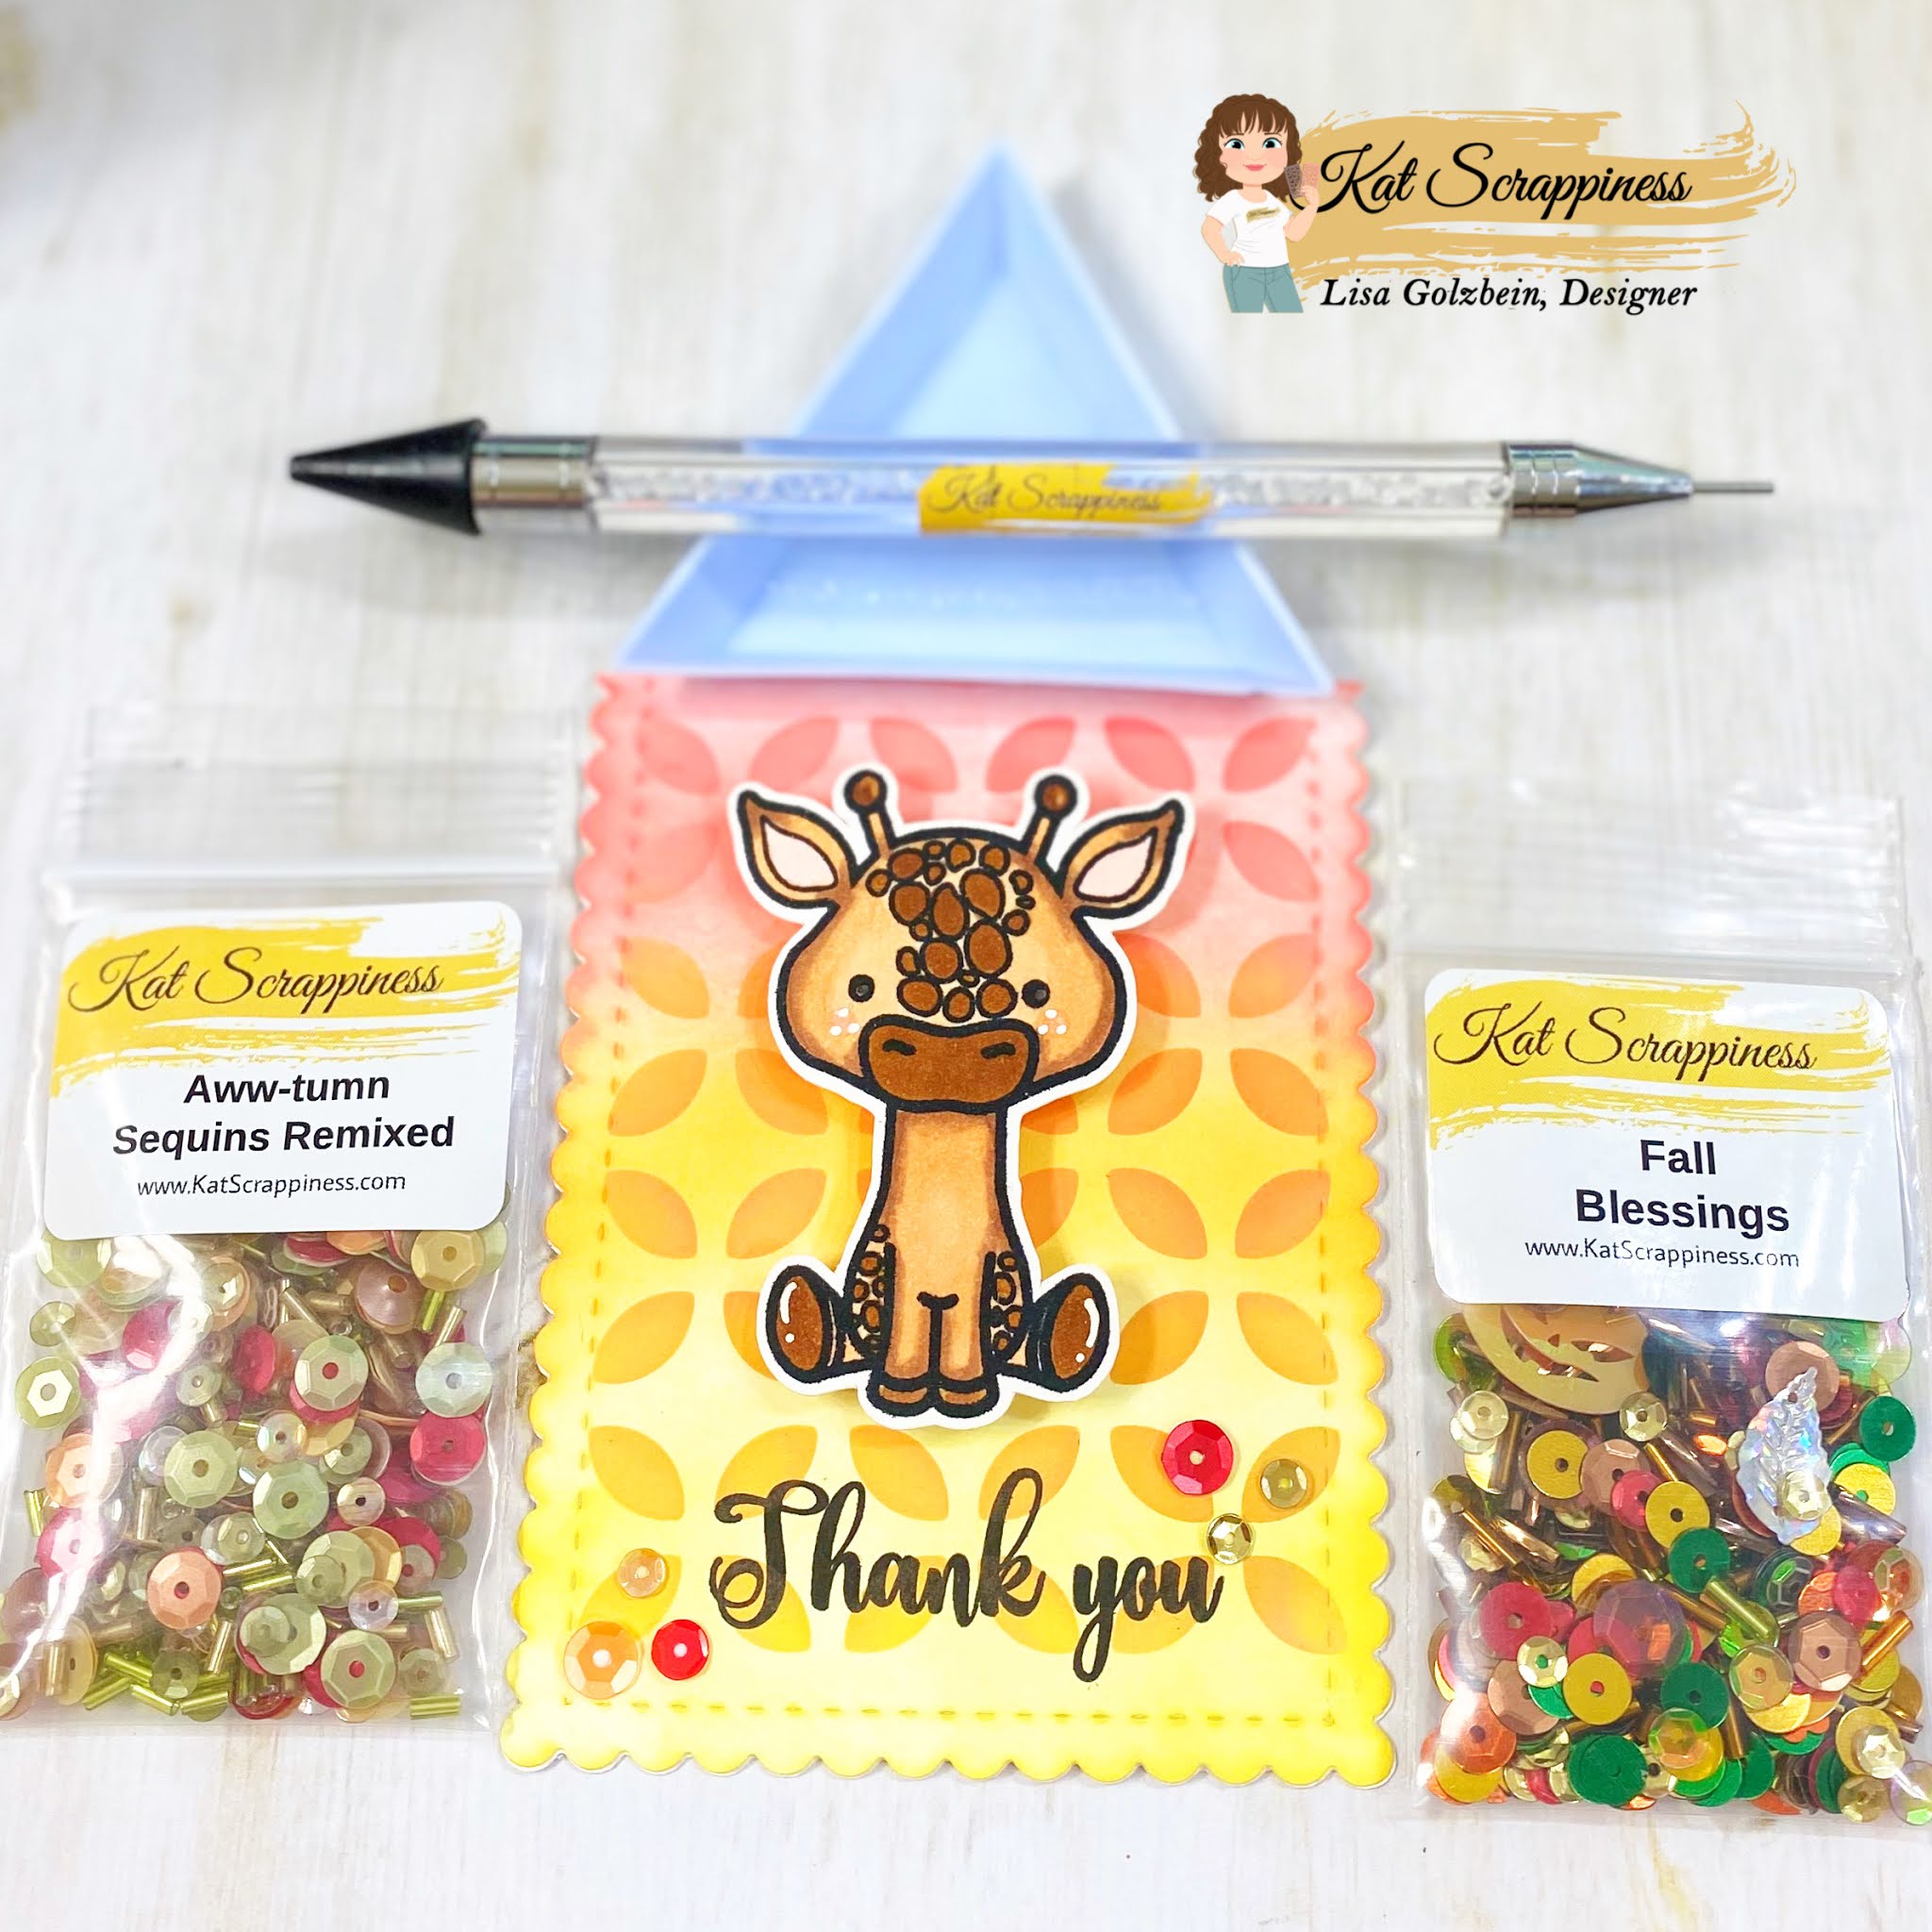
I began by using the largest die and cutting out a piece of Bristol Smooth card stock so I could do some ink blending. After I cut out the paper, instead of using it as a traditional slimline panel, I folded it in half to make a notecard.
These dies are the perfect size when folded to make the cutest little notecards!
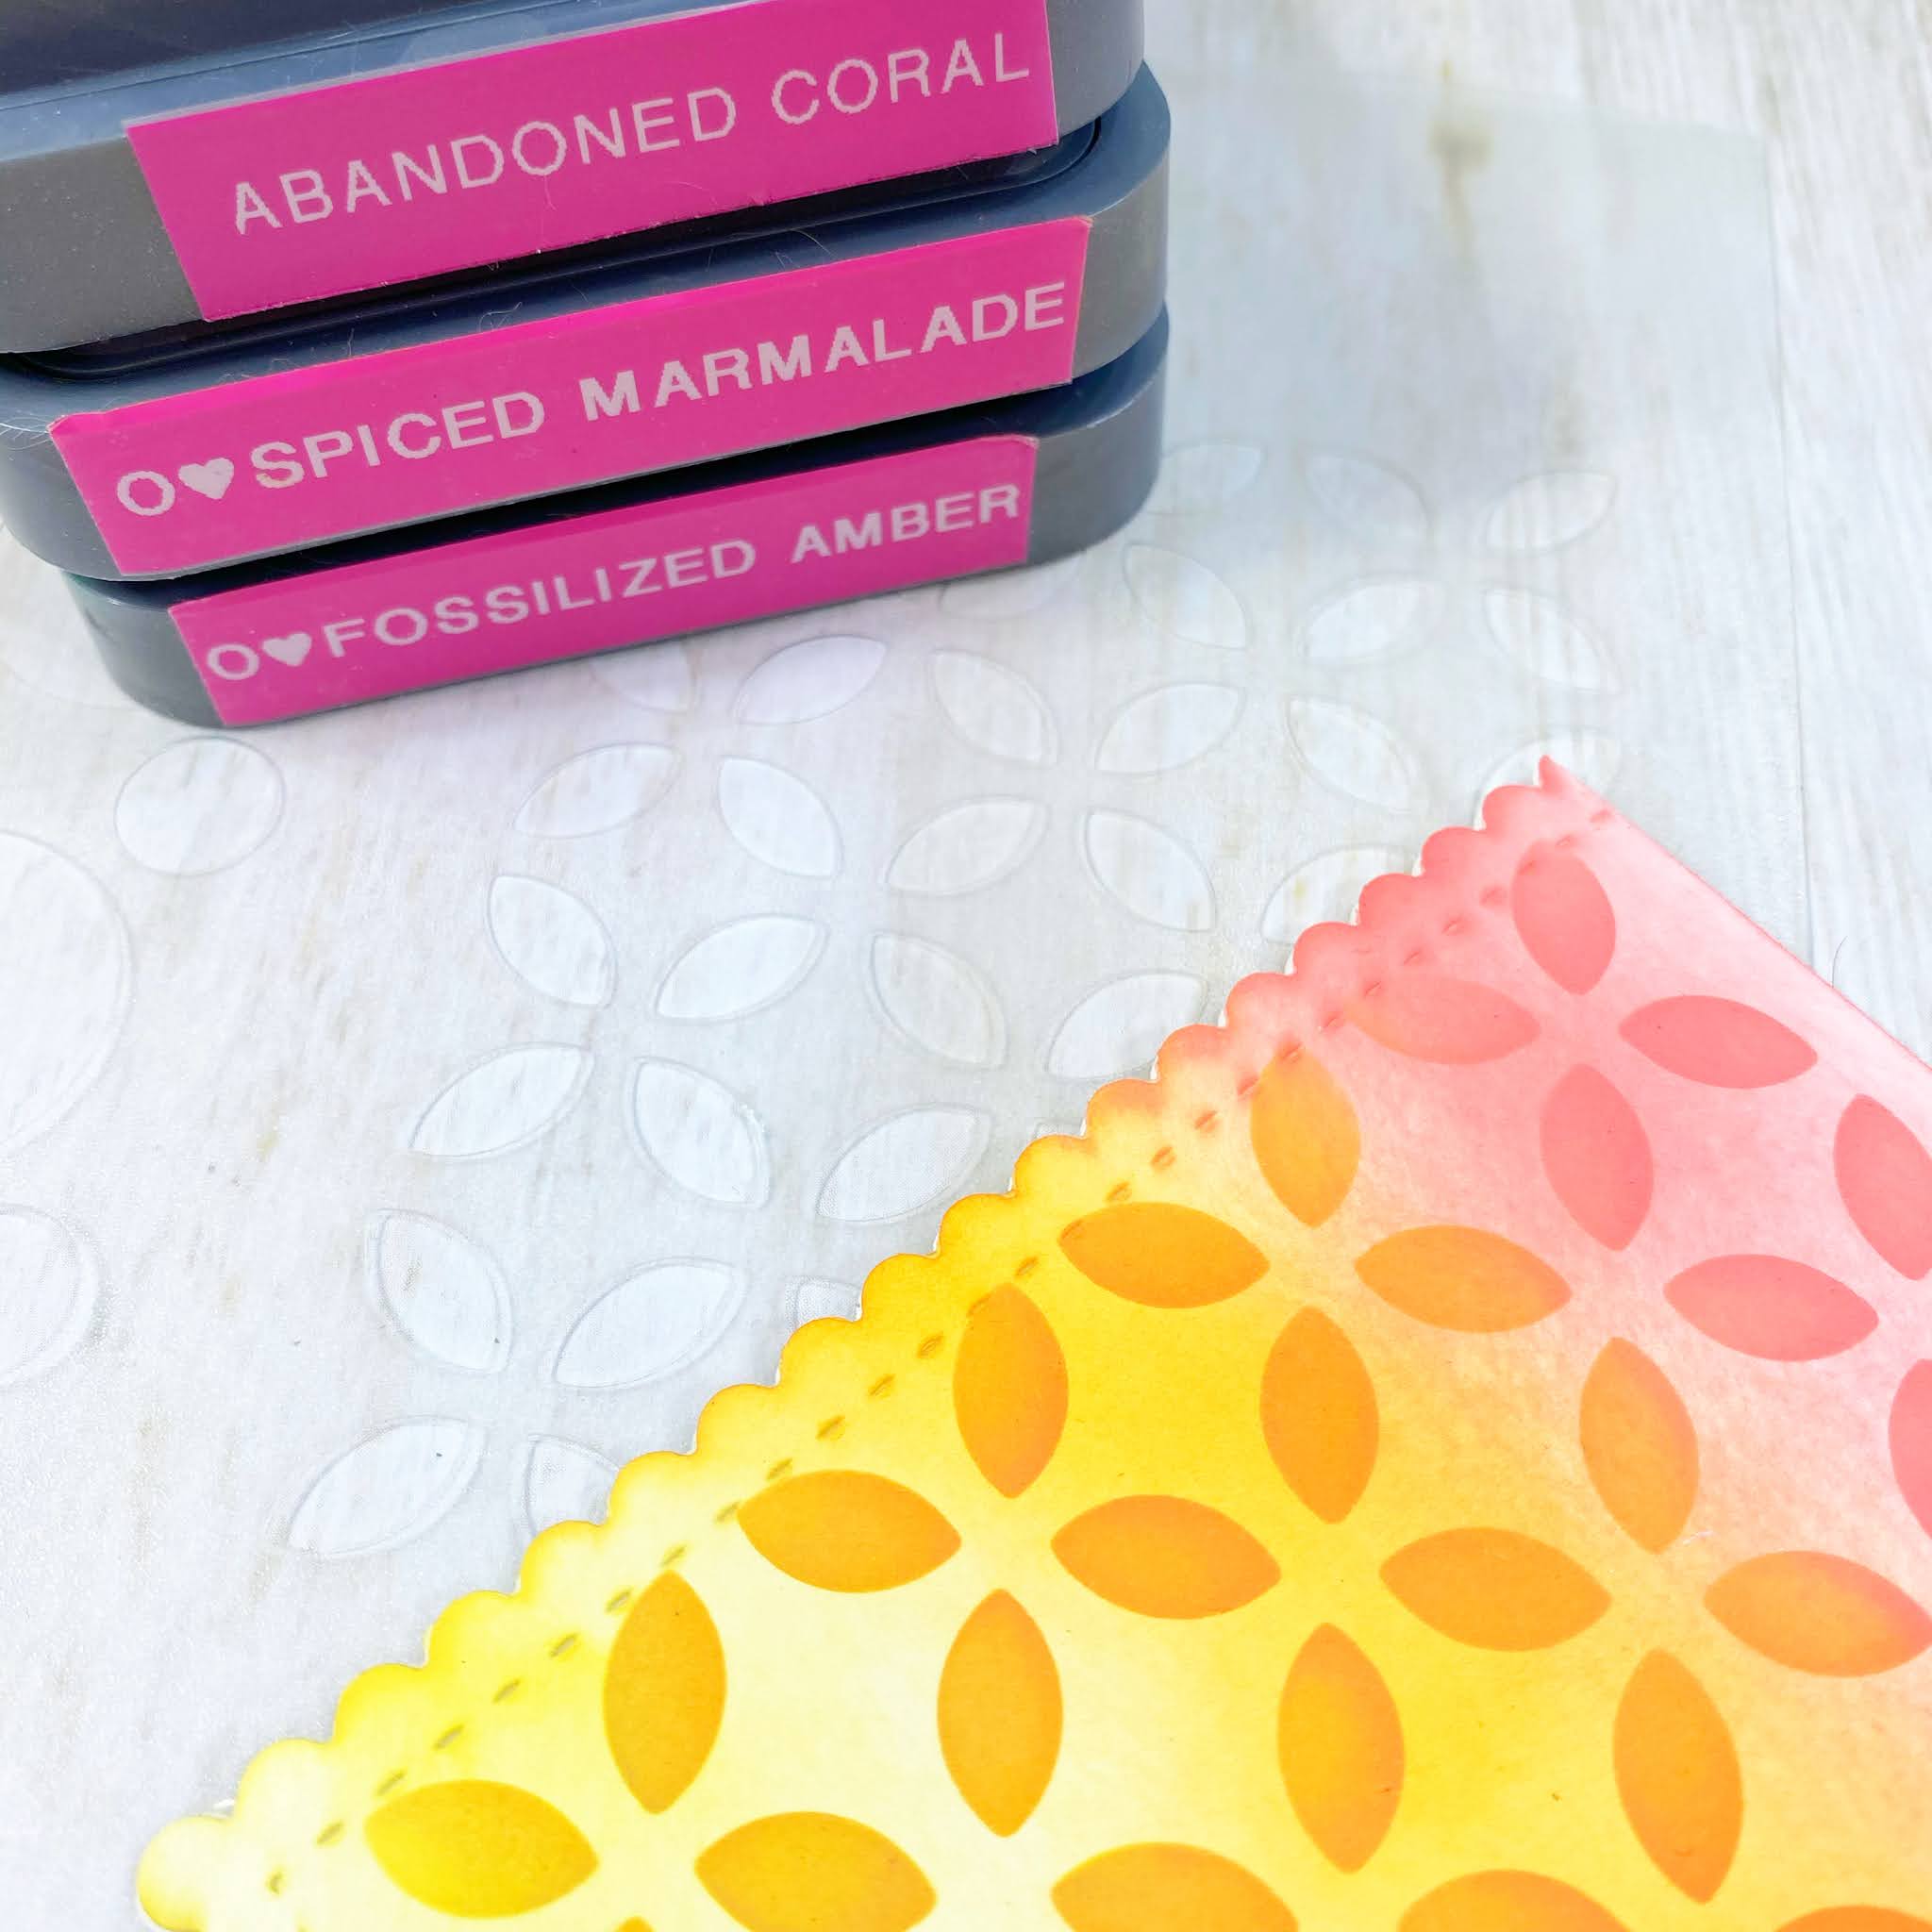
Once it was folded I did some ink blending using Distress Oxide inks and then some stenciling in the same colors.
I just love the way this panel came out. These 3 colors blended together so well!
For the main focal point on my card I stamped and Copic colored the adorable little giraffe from the
Lola the Giraffe Stamp Set. She cut out perfectly on my Scan n Cut but she could be easily hand cut as well. Before I adhered that cute little giraffe down with foam tape I stamped the sentiment in black ink on the bottom of the card. That beautiful “Thank You” is from the
Friendship Greetings Stamp Set and looks lovely on any card! After I had Lola down and the sentiment stamped I added a few random sequins from the
Aww-tumn Sequins Remixed and
Fall Blessings embellishment sequin packs.
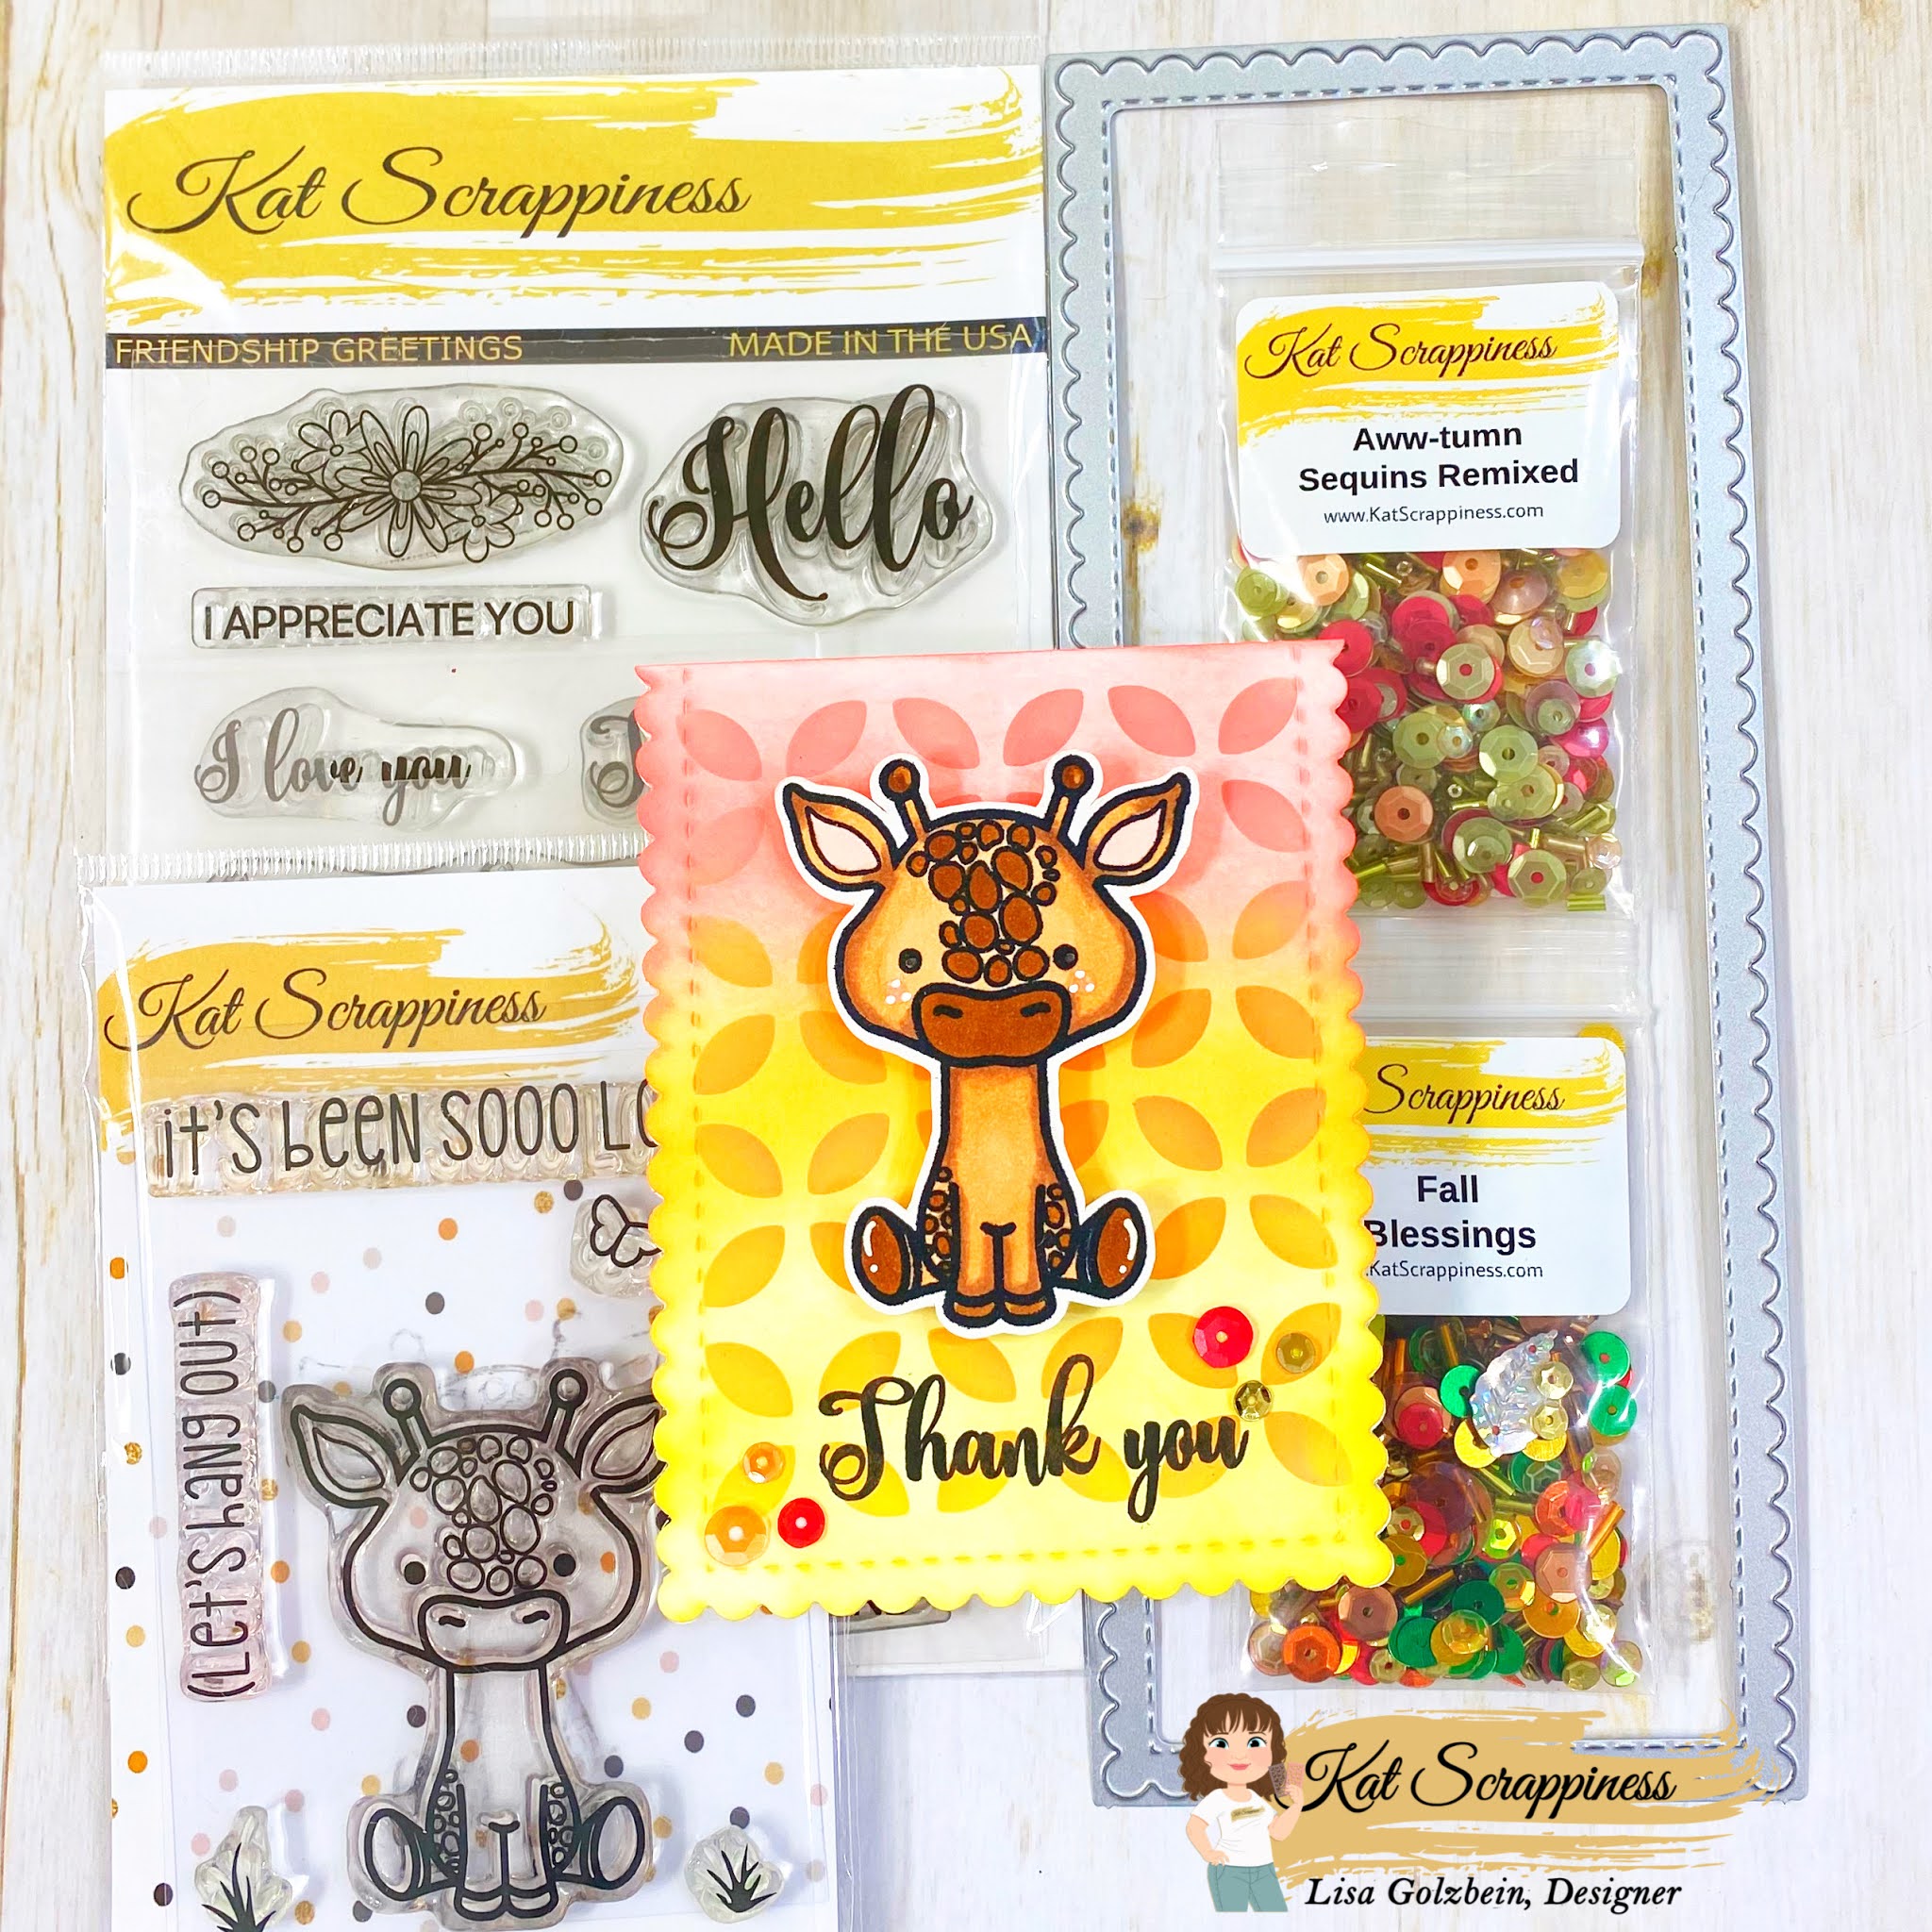
Here is one more look at both cards photographed with all of the supplies I used on them.
Thanks for stopping by today! I hope I gave you some new ideas for using your slimline dies in a not so traditional way. The sky is the limit with your imagination and creativity!
Here is a complete list of
Kat Scrappiness products used on both of my cards including links.
Have a great day, I already am!


 I do love Fall’s beautiful colors and it’s sweater weather! Not to mention it’s time for apple picking, a pumpkin patch visit and watching the leaves change!