Hi everyone, it’s Tina here. I have a clean and simple Halloween Mine Slimline Card to share using the Crafters…


Hi everyone, it’s Tina here. I have a clean and simple Halloween Mine Slimline Card to share using the Crafters…

Hi everyone, it’s Tina here. If you have ever been in a creative slump or looked at your supplies and…
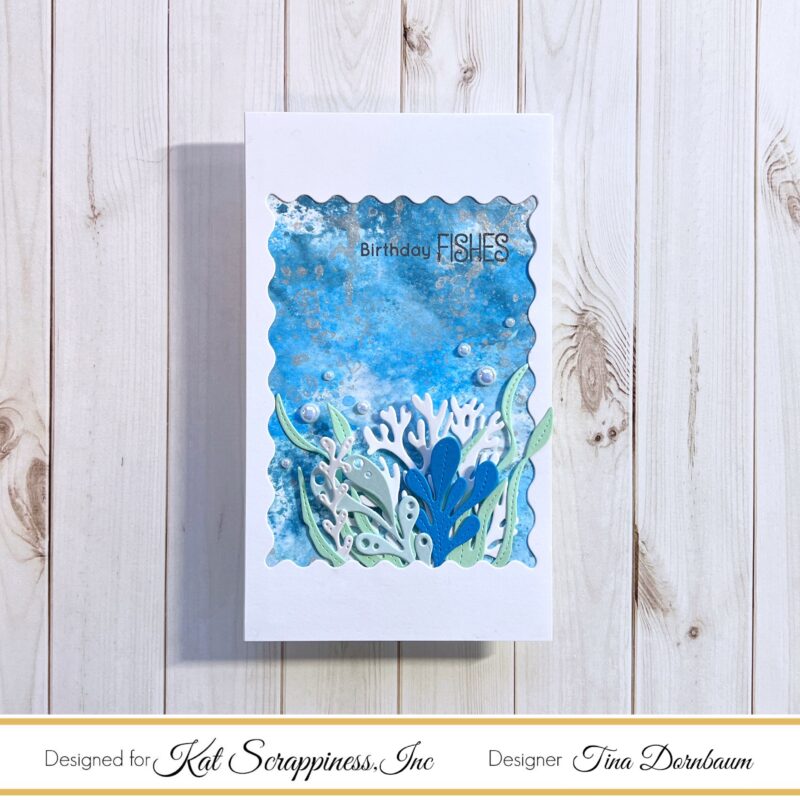
Hi everyone, it’s Tina here. I used the Life Under The Sea and Embossed Edge Wavy Frame Dies to create…

Hi everyone, it’s Tina here. I have a fun card to share using the Layering Bokeh Stencils and Mini Slimline…

Hi everyone, it’s Tina here. Today I am sharing a DIY Background using the Floating Dots Stencil along with the…
Hi everyone, it’s Tina here. Today’s card is using products from the new Summer Vibes release. I just love this…
Hi everyone, it’s Tina here. Kat Scrappiness has released the UkraineStrong Bundle. It has a 6” x 8” stamp and…