Author: Priscilla Joseph

  • Howdy Cowboy! – A One Page Scrapbook Layout

    Howdy Cowboy! – A One Page Scrapbook Layout

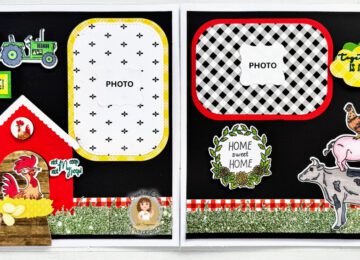
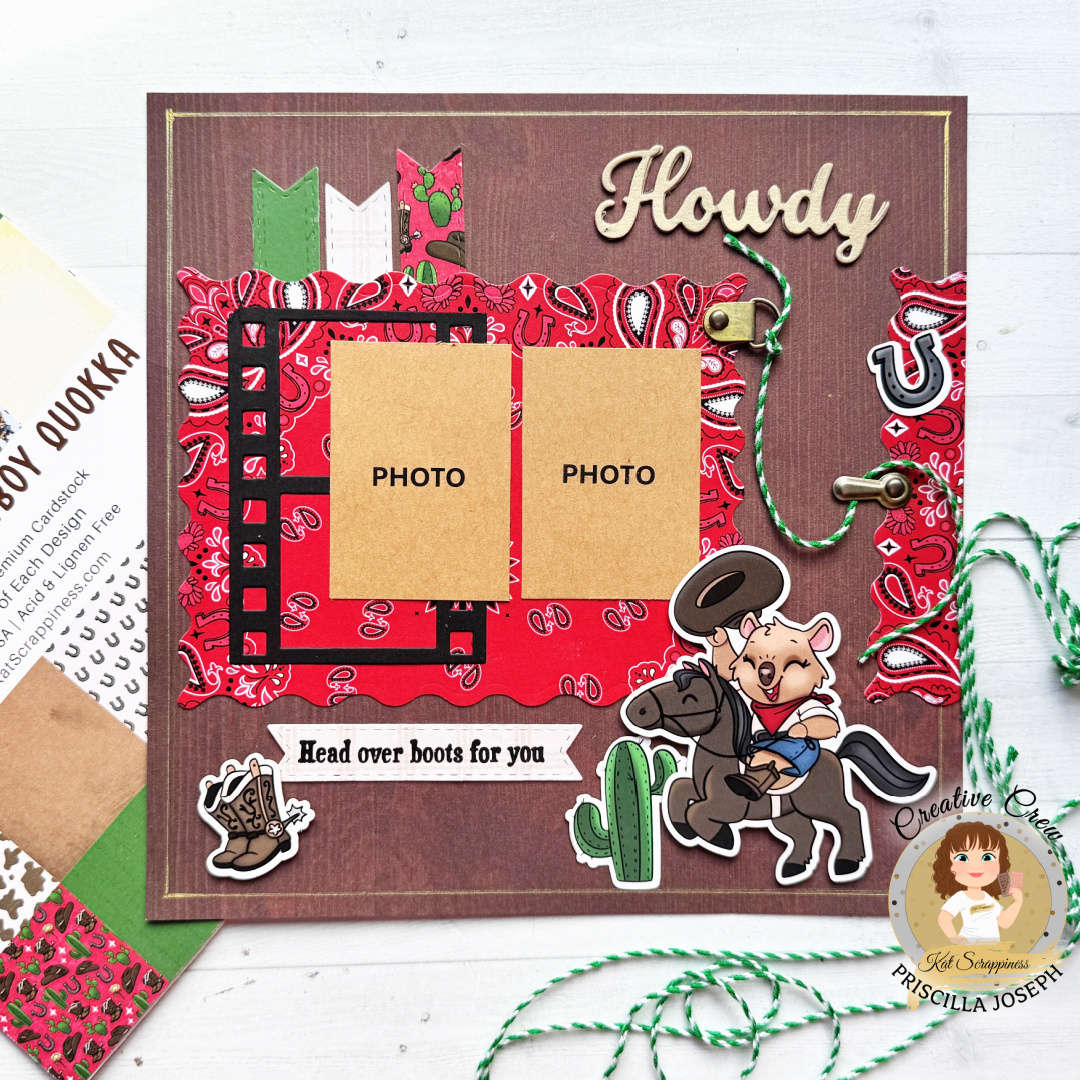
    Hello Crafty Friends! Priscilla here from Nubble Light Designs, sharing a rootin’-tootin’ one-page scrapbook layout featuring the new “Cowboy Quokka” collection from Kat Scrappiness! By using the Cowboy Quokka” Die Cut Ephemera Set,” this 8×8 layout came together quicker than a tumbleweed in the wind! With 35 detailed die-cut pieces that coordinate perfectly with the “Cowboy Quokka” Stamp Set, Dies, Paper Pad, and Stamp Sentiments, it’s never been easier to create a fun, lively Western scene that’s full of charm and quokka-sized cuteness. So, saddle up and get ready to craft something “head over boots” adorable!

    🧰 Kat Scrappiness Products Used:

    • Howdy Shadow Sentiment Die
    • Cowboy Quokka Die Cut Ephemera
    • Cowboy Quokka Paper Pad
    • A2 Filmstrip Die
    • Stitched Fancy Scalloped Rectangle Craft Dies
    • Cowboy Quokka Sentiment Stamps
    • Stitched Fishtail Banner Craft Dies


    📋 Layout Details:

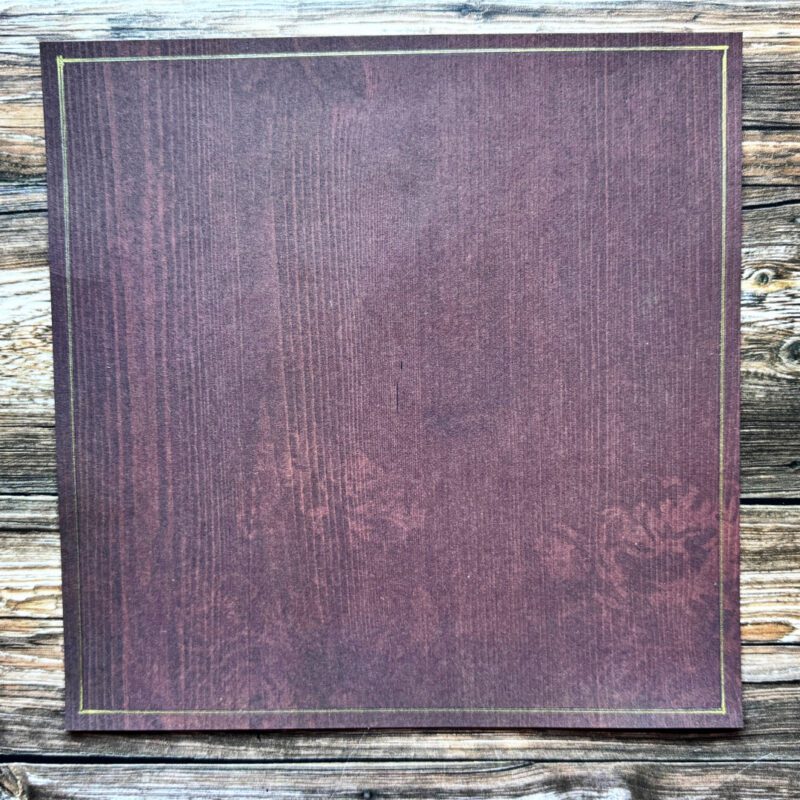
    • Created the one-page background by cutting brown wood patterned paper to 8′ x 8″ and adding a border on all 4 sides with a a gold gel pen.


    • Using one of the Stitched Fancy Scalloped Rectangle Craft Dies, cut a backdrop for the photos using the bandana patterned paper from the Cowboy Quokka Paper Pad.

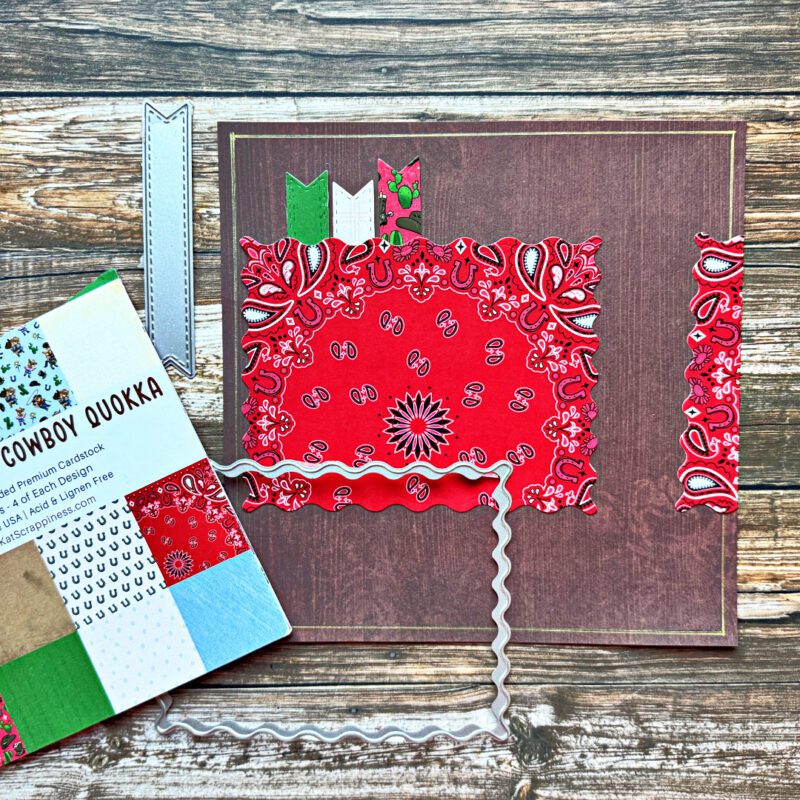
    • Die cut three strips using papers from the Cowboy Quokka Paper Pad and one of the Stitched Fishtail Banner Craft Dies and adhered them to the back of the bandana rectangle.
    • Added a small decorative edge to the right side of the layout using the same rectangle die and paper.


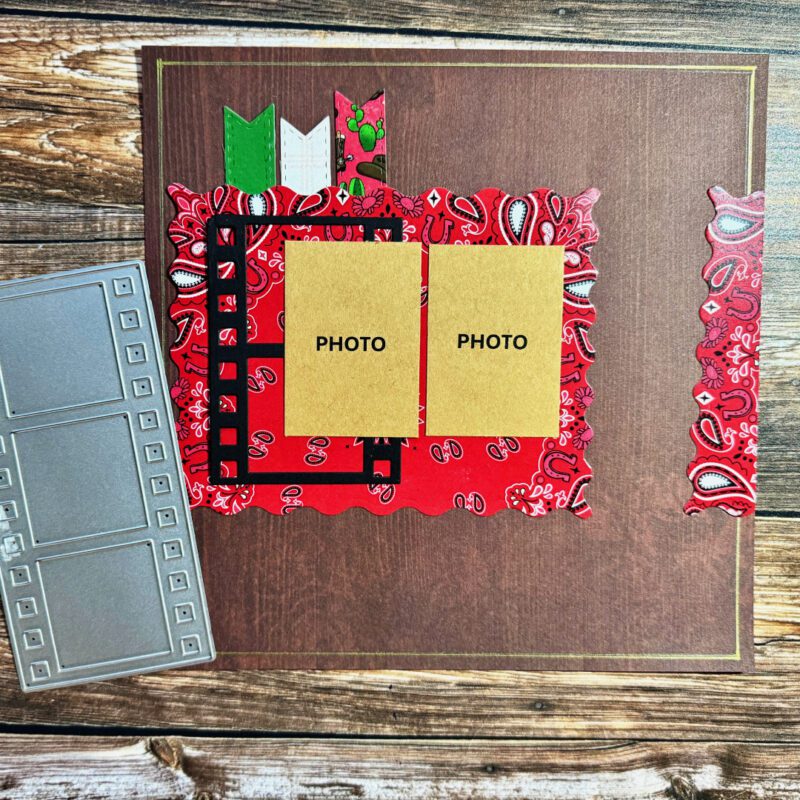
    • Added  a black filmstrip element using the A2 Filmstrip Die to the front of the bandana rectangle to draw attention to the two future photos that will be adhered here.


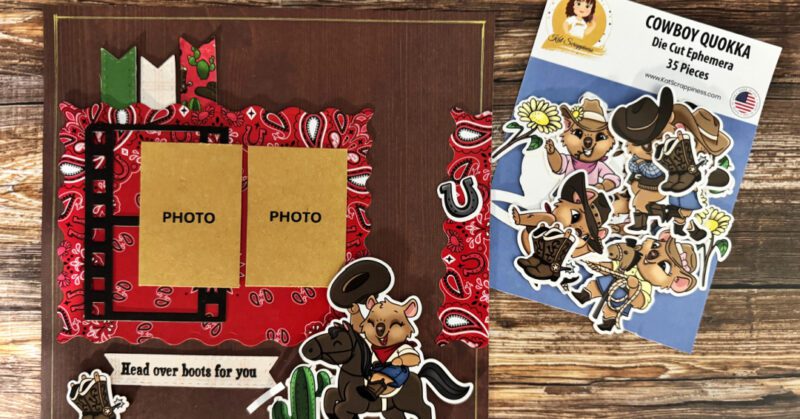
    • Added several of the Cowboy Quokka Die Cut Ephemera images to the layout.
    • Stamped the sentiment, “Head over boots for you,” from the Cowboy Quokka Sentiment Stamp Set onto a Stitched Fishtail Banner die cut and adhered it below the photo area.


    • Die cut the title “Howdy” using the new Howdy Shadow Sentiment Die four times using gold cardstock, layered them on top of one another, and adhered the sentiment to the top of the page.
    • Added some green and white twine and metal hardware for the finishing touch!

    Here is the finished one-page layout:

    Thanks for stopping by!

    Don’t forget to check out what’s NEW in Kat’s Shop, and follow my blog, Instagram, and Facebook for more “Kat Scrappiness Amazingness”!

    Hugs,
    Priscilla 🐴

  • Pandas Just Wanna Have Fun!

    Pandas Just Wanna Have Fun!

    Hello Crafty Friends! Priscilla here from Nubble Light Designs, sharing a playful and pun-filled card featuring the new“Rolly Polly” stamp and die set from Kat Scrappiness! This adorable panda is having the time of his life swinging from a tire on a sturdy branch, surrounded by a hand-colored bamboo background created using the “Bamboo Background Craft Die” as a D.I.Y. stencil. The charming sentiment, “Let’s Hang Out,” ties it all together for a lighthearted design that’s perfect for spreading smiles and a little panda cheer!


    🧰 Kat Scrappiness Products Used

    • Rolly Polly Pandas stamps/dies
    • Bamboo Background Craft Die
    • Love Birds on a Branch dies
    • Lola the Giraffe stamp set (sentiment)

    📋 Card Details:

    • Created a A2 top-folding white card base.
    • Using the Bamboo Background Craft Die, created a D.I.Y. mylar stencil and brushed brown ink over it to make a “bamboo” background.
    • Used a green Copic maker to fill in the openings in the stencil for the leaves.


    • Adhered the finished background to a dark green cardstock layer and adhered that to the card base.

    • Die cut a branch using the branch die from the  Love Birds on a Branch die set
    • Stamped, die cut, and colored the panda on the tire swing from the Rolly Polly Pandas stamps/die set.
    • Adhered the tire swing to the branch and then to the front of the card.


    • Stamped and white heat embossed the sentiment “(Let’s hang out)” from the Lola the Giraffe stamp set and foam mounted it below the tire swing to complete the card.


    Thanks for stopping by!

    Don’t forget to check out what’s NEW in Kat’s Shop, and follow my blog, Instagram, and Facebook for more “Kat Scrappiness Amazingness”!

    Hugs,
    Priscilla 🐼

  • “Thanks for Noticin’ Me”

    “Thanks for Noticin’ Me”

    Hello Crafty Friends! Priscilla here from Nubble Light Designs, sharing a tender and heart-tugging card featuring the new Hundred Acre Quokka stamp, die, and sentiment collection from Kat Scrappiness! This adorable scene captures the spirit of poor Eeyore, sitting glumly under his own little rain cloud but still managing to say, “Thanks for noticin’ me.” The Hundred Acre Bee Hive Background Craft Die adds the perfect touch of nature, while patterned papers from the new Hundred Acre Quokka Paper Pad make the colors pop with warmth and charm — proof that even a cloudy day can have a little sunshine.

    🧰 Kat Scrappiness Products Used

    • Hundred Acre Bee Hive Background Craft Die
    • Hundred Acre Quokka Paper Pad
    • Hundred Acre Quokka stamps/dies
    • Hundred Acre Sentiment stamps

    📋 Card Details:

    • Created a A2 top-folding white card base.
    • Created the background by die cutting with the Hundred Acre Bee Hive Background Craft Die with several of the patterned papers from the new Hundred Acre Quokka Paper Pad.

    • Added shading to the leaves and beehive using Copic Markers.
    • Stamped and die cut the Eeyore image from theHundred Acre Quokka stamps/die collection, colored it with Copic Markers before adhering it to the front of the card.

    • Stamped the sentiment, “Thanks for noticin’ me” from the Hundred Acre Sentiment stamp set and foam mounted it to the right of Eeyore.

    Thanks for stopping by!

    Don’t forget to check out what’s NEW in Kat’s Shop, and follow my blog, Instagram, and Facebook for more “Kat Scrappiness Amazingness”!

    Hugs,
    Priscilla 🐝

  • Snarky Ugly Christmas Sweater Card

    Snarky Ugly Christmas Sweater Card

    Hello Crafty Friends! Priscilla here from Nubble Light Designs, sharing a festive (and slightly snarky!) Christmas card featuring the Kat Scrappiness “Ugly Sweater” Paper Pad paired with the “Christmas Sweater Stencil” for a cozy backdrop. Of course, the star of the show is Kat’s beloved Quokka from the “Dress Up Quokkas Stamps/Dies” collection, all bundled up in her oversized polka-dot sweater  and hilariously wondering if it makes her look fat. (Spoiler alert: ugly sweaters are supposed to!)

    🧰  Kat Scrappiness Products Used

    • Ugly Sweater Paper Pad
    • Christmas Sweater Stencil
    • Dress Up Quokkas Stamps/Dies
    • Stitched Speech Bubbles Craft Dies
    • Santa’s Helpers Stamp Set (“Merry Christmas” sentiment)

    📋 Card Details:

    • Created a A2 top-folding white card base.
    • Using the Christmas Sweater Stencil and red, green, and black ink, created a background and adhered to the top half of the card front.

    • Cut a strip of patterned paper from the Ugly Sweater Paper Pad and adhered to the bottom of the card front.
    • Added red stitched ribbon across the middle.

    • Die cut and colored one of the quokkas from the Dress Up Quokkas Stamps/Dies collection.
    • Using the quokka die cut again with a piece of polka-dot paper from the Ugly Sweater Paper Pad, created a sweater for the quokka to wear.
    • Die cut a circle from black cardstock and ran it through my Big Shot using a sweater pattern embossing folder.

    • Adhered the quokka to the embossed circle and then foam mounted the circle to the front of the card.
    •  Created a custom sentiment on my computer, die cut it out using one of the Stitched Speech Bubbles Craft Dies, and adhered it to the left of the quokka.

    • White heat embossed the “Merry Christmas” sentiment from the Santa’s Helpers Stamp Set on black cardstock, framed it in red, and foam mounted it to the front of the card.

    Thanks for stopping by!

    Don’t forget to check out what’s NEW in Kat’s Shop, and follow my blog, Instagram, and Facebook for more “Kat Scrappiness Amazingness”!

    Hugs,
    Priscilla 🎄

  • Two-Page Halloween Scrapbook Layout

    Two-Page Halloween Scrapbook Layout

    Hello Crafty Friends! Priscilla here from Nubble Light Designs. Today I’m sharing a two-page 8 x 8 scrapbook layout that’s more “fang-tastic” than frightening! Using the brand-new Kat Scrappiness Halloween paper pads, Spooky Cute Purple and Spooky Cute Pink, I created this playful spread that’s perfect for capturing all those trick-or-treating memories. With silly ghosts, bold pops of color, and just the right amount of spook, this layout is ready to hold your favorite Halloween snapshots.


    🖌Kat Scrappiness Products Used:

    • Spooky Cute Purple Paper Pad
    • Spooky Cute Pink Paper Pad
    • Creepy & Kooky Paper Pad
    • Creepy Crawly Craft Dies
    • Spooky Boo Word Die
    • Boo-gy Ghosts Craft Dies
    • Ghostly Trick or Treat Shadow Sentiment Dies
    • Distressed Edge Rectangle Craft Dies


    📋 Layout Details:

    • Created the 2-page background by layering orange cardstock over white cardstock to create a frame.
    • Cut smaller pieces of black cardstock and splattered orange pigment paint over them to create a textured background.

    • Created page borders by cutting strips of paper from the Spooky Cute Purple Paper Pad and adhered them to the top and botton of the page.
    • Die cut two purple spider webs using the Creepy Crawly Craft Dies and adhered them to the top corners of the pages.

    • Created photo spots using a Distressed Edge Rectangle Craft Die and a patterned paper from the Creepy & Kooky Paper Pad to create the frames.
    • Adhered a smaller layer over both frames using patterned paper from the Spooky Cute Pink Paper Pad.

    • Finished the left-hand page, by adding a spider from the Creepy Crawly Craft Dies and a ghost from Boo-gy Ghosts Craft Dies.
    • Added the sentiment using the Spooky Boo Word Die and purple, green, and orange cardstock, backing these letters with a vellum shadow die included with the sentiment die.

    • Finished the right-hand page by adding a spider from the Creepy Crawly Craft Dies.
    • Added the “Trick or Treat” sentiment from the Ghostly Trick or Treat Shadow Sentiment Dies using purple, green, and orange cardstock, backing the words with a vellum shadow die included with the sentiment die.
    • Added to two ghosts from the same Ghostly Trick or Treat Shadow Sentiment Dies.

    Here is the finished two-page layout:

    Thanks for stopping by!

    Don’t forget to check out what’s NEW in Kat’s Shop, and follow my blog, Instagram, and Facebook for more “Kat Scrappiness Amazingness”!

    Hugs,
    Priscilla 🕷

  • Spooky (and Cute) Haunted House Card

    Spooky (and Cute) Haunted House Card

    Hello Crafty Friends! Priscilla here from Nubble Light Designs, sharing a frightfully fun Halloween card featuring the Kat Scrappiness “Haunted House on the Hill Background Die.” This Haunted House die cut instantly sets the scene with its eerie silhouette, while the new “Spooky Cute Pink Paper Pad” adds a playful pop of webs and whimsy. And the cheeky sentiment, “I’m Dying to See You,” completes the look, making this card the perfect blend of spooky and sweet for the season!

    Kat Scrappiness Products Used:

    • Spooky Cute Pink Paper Pad
    • Haunted House on the Hill Background Die
    • Simple Sentiment Stamps/Die – Halloween Edition

    📋 Card Details:

    • Created a A2 top-folding white card base.
    • Did cut a pink patterned spider web paper from the Spooky Cute Pink Paper Pad and adhered to the card base.

    • Die cut the haunted house using purple cardstock and the Haunted House on the Hill Background Die.
    • Adhered silver cardstock behind the doors and windows for a glowy touch.
    • Did cut the moon with the die included in the Haunted House on the Hill Background Die using a pink patterned ghost paper from the Spooky Cute Pink Paper Pad and sponged the edges with gray ink.

    • Adhered the haunted house and moon over the pink spider web paper.
    • Stamped and die cut the sentiment “I’m Dying to See You” from the Simple Sentiment Stamps/Die – Halloween Edition and foam mounted it to the front of the card.
    • Stamped, die cut, and colored a mummy image and added it to the front of the card.

    (Note this Riley & C0 Mummy image is out of stock in Kat’s store, but check out her shop for other Riley & Co stamps for Halloween that are available.)

    Thanks for stopping by!

    Don’t forget to check out what’s NEW in Kat’s Shop, and follow my blog, Instagram, and Facebook for more “Kat Scrappiness Amazingness”!

    Hugs,
    Priscilla 🧛‍♂️

  • Two-Page Farm-Themed Scrapbook Layout

    Two-Page Farm-Themed Scrapbook Layout

    Hello Crafty Friends! Priscilla here from Nubble Light Designs. I’ve got a down-on-the-farm scrapbook layout today featuring the Kat ScrappinessSassy Chickens” collection of stamps and dies and the “Farmhouse” collection of stamps/dies/paper. This 8″x 8″ double-page spread is udderly adorable, featuring cows, pigs, chickens—and yes, a rooster who clearly runs the coop. With photo spots ready for your favorite barnyard memories, this layout is perfect for capturing country moments or just adding a little rural charm to your scrapbook stash. So grab your pitchfork (or glue stick) and let’s dig in!

    Kat Scrappiness Products Used:

    • The Henhouse Craft Dies
    • Sassy Chickens Stamps/Dies
    • Farmhouse Stamps/Dies/Paper Pad
    • Farmhouse Sentiment  Stamp Set
    • XL Christmas Faux Glitter Paper Pad
    • Grass Add-On Craft Dies
    • Lumber Yard Paper Pad
    • Stitched Rounded Rectangle Craft Dies
    • Stitched Puffy Cloud Craft Dies

    📋 Layout Details:

    • Stamped, die cut, and colored the images for both pages using the the Kat Scrappiness Henhouse Craft Dies, Sassy Chickens Stamps/Dies, the Farmhouse Stamps/Dies/Paper Pad, and the Stitched Puffy Cloud Craft Dies.

    • Created bottom page borders using the Farmhouse Paper pad, XL Christmas Faux Glitter Paper Pad, and the Grass Add-On Craft Dies.
    • Created a backdrop for both pages using black cardstock cut to 7.25″ x 7.25″ and adhered over white 8″x 8″ heavy cardstock.
    • To create the left page, I adhered the finished page border to the bottom edge.
    • Created a photo spot using two of the the Farmhouse papers and one of the Stitched Rounded Rectangle Craft Dies.
    • Created the henhouse using red cardstock and theHenhouse Craft Die.
    • Added the ramp using paper from the Lumber Yard Paper Pad and adhered it to the bottom of the henhouse.
    • Stamped, die cut, and colored the hen from the Sassy Chickens Stamps/Dies and placed him in his nest, adding 3 eggs on the outside.
    • Stamped and die cut the sentiment, “not My coop, not My poop” and adhered it to the front of the henhouse.
    • Stamped the sentiment “Hay There!” from the Farmhouse sentiment stamp set onto paper from the coordinating paper pad and framed it with green stock.
    • Adhered the tractor and all other elements to the left page.

    • To created the right page, I adhered the finished page border to the bottom edge.
    • Stamped the sentiment “Together is a Wonderful Place To Be” from the Farmhouse sentiment stamp set onto the Stitched Puffy Cloud die cut.
    • Adhered the photo spot and all other elements to the right page.

    Thanks for stopping by!

    Don’t forget to check out what’s NEW in Kat’s Shop, and follow my blog, Instagram, and Facebook for more “Kat Scrappiness Amazingness”!

    Hugs,
    Priscilla 🐄

  • Coffee Because Adulting is Hard

    Coffee Because Adulting is Hard

    Hello Crafty Friends! Priscilla here from Nubble Light Designs.  Today’s card is for all of us who believe coffee should be its own food group. Inspired by the chaos of adulting (especially pre-caffeine), this project combines sass, sustainability, and a serious love for java. I used the Kat Scrappiness Layered Coffee Cup Craft Dies to brew up this caffeinated creation—and gave new life to a real to-go cup sleeve and a coffee stirrer that narrowly escaped the trash bin. Crafty and eco-conscious? I’ll drink to that!

    The background features the perfectly roasty Brew-tiful Beans 6×6 Stencil, while the stitched panels come courtesy of the new Kat’s Essential Card Builder Dies 3. That hilarious speech bubble? It’s from the Stitched Speech Bubbles Craft Dies, stamped with a sentiment from the Perk Up Stamp Set: “Coffee because adulting is HARD.”


    📋 Card Details:

    • Created a A2 top-folding white card base.

    • Using the new Kat Scrappiness Kat’s Essential Card Builder Dies 3, created a background frame for the card front.

    • Sponged “Ground Expresso” Oxide ink over the new Brew-tiful Beans 6×6 Stencil.

    • Adhered the stenciled cardstock behind the frame onto the card base.

    • Cut out the coffee cup from the Layered Coffee Cup Craft Dies using a real to-go cup from my favorite coffee shop, and then the lid out of white cardstock, and the lid trim out of yellow cardstock.

    • Adhered the coffee cup to the front of the card, inserting a real coffee stirrer behind it.


    • Stamped and die cut the sentiment “Coffee because adulting is HARD” from the Kat Scrappiness Perk Up Stamp Set using one of the new Stitched Speech Bubbles Craft Dies.
    • Foam mounted the die cut sentiment to the front of the card.


    • And for the final touch? A few Coffee Bean Embellishments—because nothing says “I take my crafting seriously” like gluing faux beans to paper.

    Thanks for stopping by!

    Don’t forget to check out what’s NEW in Kat’s Shop, and follow my blog, Instagram, and Facebook for more “Kat Scrappiness Amazingness”!

    Hugs,
    Priscilla ☕

  • A Little Barnyard Sass Using a 3D Pop Out Die

    A Little Barnyard Sass Using a 3D Pop Out Die

    Buckle up, Mother Cluckers! Priscilla here from Nubble Light Designs.  It’s a whole flockin’ vibe today with a card featuring the brand-new Sassy Chickens stamp, dies, and paper pad collection from Kat Scrappiness. Using a “Pop Out Die, I created a bold red starburst that makes this wide-eyed hen literally pop out and greet you with a big ol’ “Rise & Shine Mother Cluckers!” (Because nothing says good morning like a judgmental chicken and a side of snark.)

    Check out the “Christmas in July Sale” in the Kat Scrappiness Store!
    Stock up on all your favorite goodies and get 15% off during the month of July! Use coupon code XMASINJULY15  at checkout.

    🧰 Kat Scrappiness Supplies Used

    • Sassy Chickens Stamp Set & Dies

    • Sassy Chicken Paper Pad

    • Pop Out Craft Die

    • Embossed Edge Circle Craft Dies

    • Hen House Die set
    • Fork and Farm Quokka Stamp Set


     📋 Card Details:

    • Created a A2 top-folding white card base.
    • Adhered a black cardstock layer over it.

    • Adhered red cardstock to the back of a hen patterned paper from the Sassy Chicken Paper Pad.
    • Die cut an opening through both layers using the Kat Scrappiness Pop Out Craft Die.

    • Die cut a circle using one of the Kat Scrappiness Embossed Edge Circle Craft Dies and a piece of red cardstock before embossing it with a a chicken wire embossing folder.
    • Adhered the embossed circle behind the pop up opening and adhered all layers to the card base.
    • Stamped and die cut the rooster using the Sassy Chickens Stamp Set & Dies.
    • Colored the rooster using Spectrum Noir markers.

    • White heat embossed the sentiment, “Rise & Shine Mother Cluckers!” from the Fork and Farm Quokka Stamp Set.
    • Die cut a nest from the Hen House Die set and adhered it to the below the rooster.
    • Foam mounted the sentiment below the pop up opening.


    • Added 3 Egg Sprinkles for the finishing touch!

    Thanks for stopping by!

    Don’t forget to check out what’s NEW in Kat’s Shop, and follow my blog, Instagram, and Facebook for more “Kat Scrappiness Amazingness”!

    Hugs,
    Priscilla 🐔

  • Bring a Classic Holiday Scene to Life – A Christmas in July Card

    Bring a Classic Holiday Scene to Life – A Christmas in July Card

    Hello Crafty Friends! Priscilla here from Nubble Light Designs.  Today I am sharing a magical “Christmas in July” creation using the Kat Scrappiness The Night Before Christmas Window Scene Craft Dies. This card features a warm and festive living room view—complete with a beautifully decorated Christmas tree in the window, adorned with tiny gold baubles and topped with a shimmering star. Outside the window, snowflakes fall softly while Santa and his reindeer soar across a starry navy sky—bringing a classic holiday scene to life. And after all, even in July, Santa’s sleigh is still in flight! 🎅✨

    🧰 Kat Scrappiness Supplies Used

    • The Night Before Christmas Window Scene Craft Dies
    •  Reindeer Games sentiment stamp set
    •  Gold Pearl Mix
    • Snowflakes Acetate Paper

     📋 Card Details:

    • Created a A2 top-folding white card base.
    • Add a slightly smaller layer of dark green cardstock on top.

    • Die cut window using silver cardstock and the The Night Before Christmas Window Scene Craft Dies.
    • Die cut the remaining elements and stamped the sentiment “Flying By to Say . . .” from the Reindeer Games Sentiment stamp set onto the Christmas tree using gold embossing powder.

    • Die cut the window again using a Snowflakes Acetate Paper and then again with navy cardstock to create a nighttime snowy scene outside the window.

    • Adhered all 3 window layers together.
    • Added Santa’s reindeer, snowflakes, and the Christmas tree and star to the front of the card.

    • To tie it all together, added several gold pearls for tree ornaments to match the gold embossed sentiment.

    Thanks for stopping by!

    Don’t forget to check out what’s NEW in Kat’s Shop, and follow my blog, Instagram, and Facebook for more “Kat Scrappiness Amazingness”!

    Hugs,
    Priscilla 🎅