Tag: wonky wavy stitched rectangle dies

  • Hip Hip Hooray

    Hip Hip Hooray

    Hi everyone, happy Hump Day!  I have a fun, clean and simple card for you today.

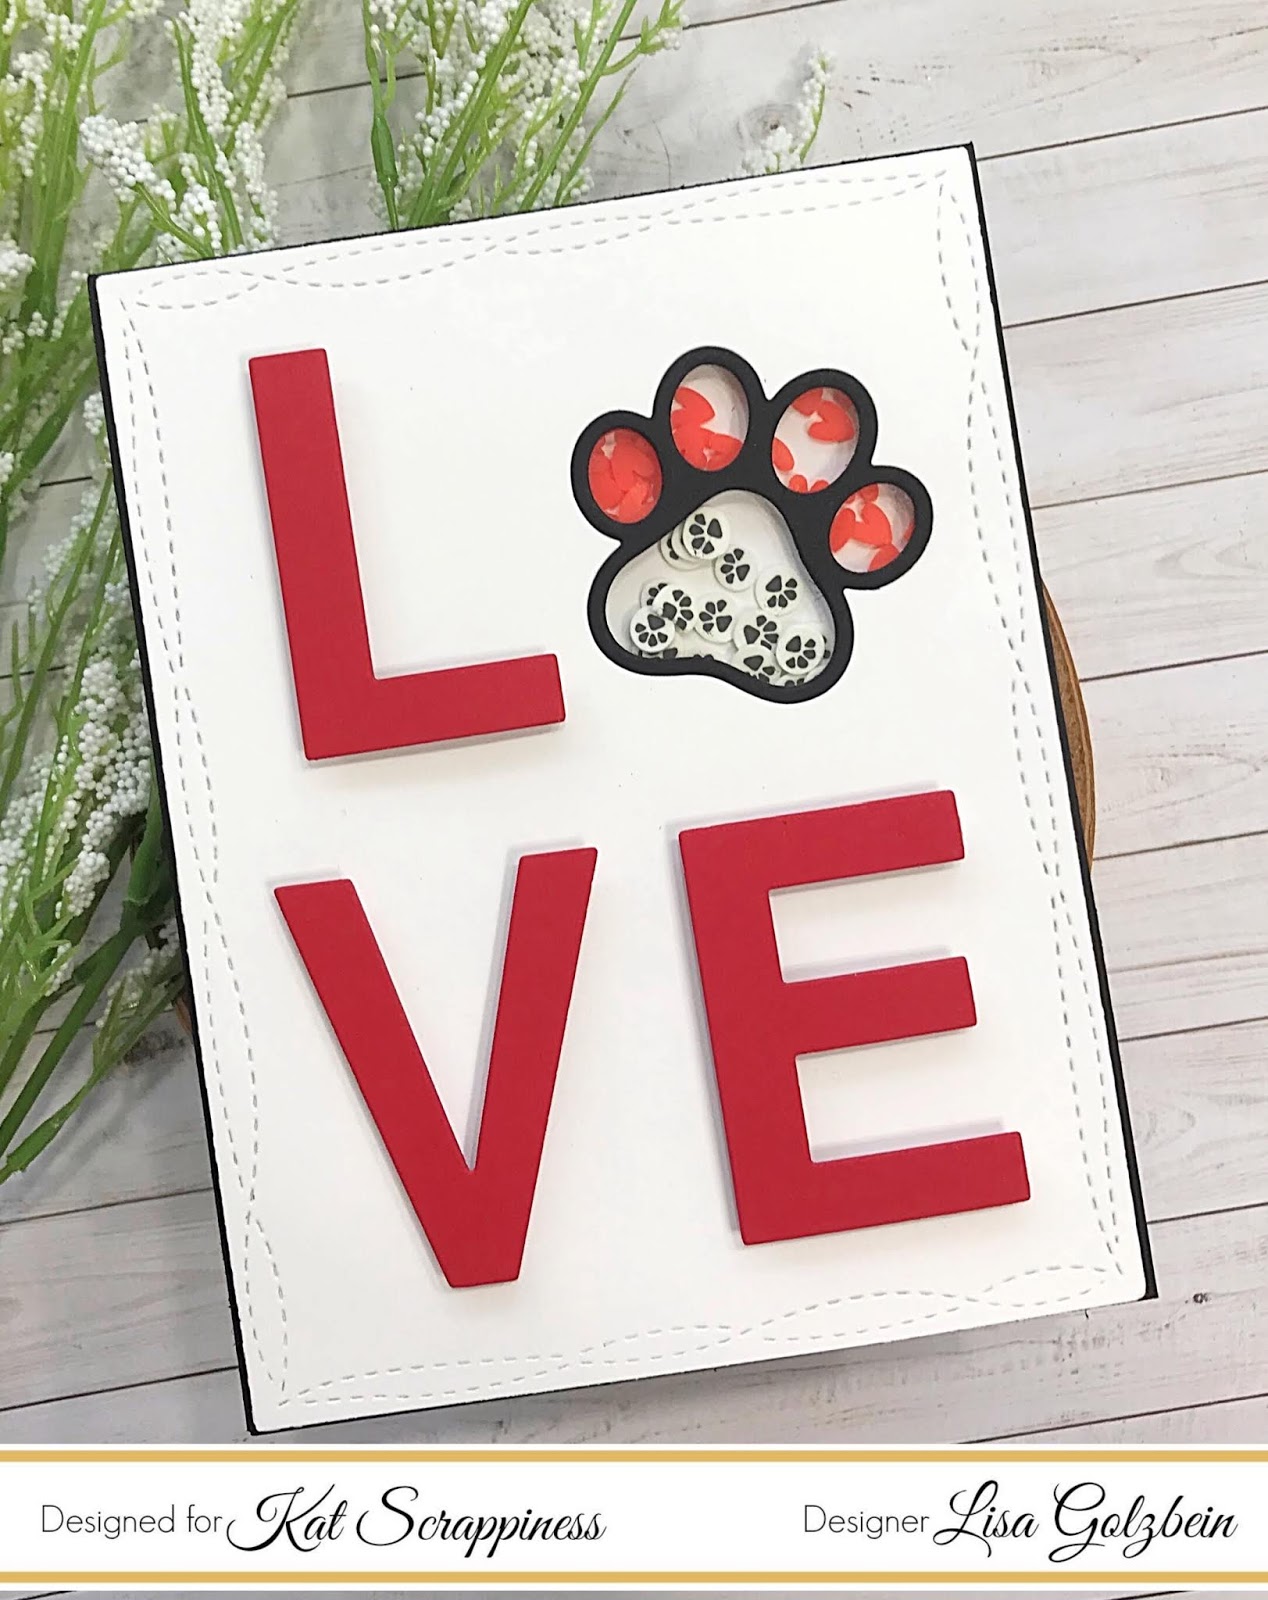
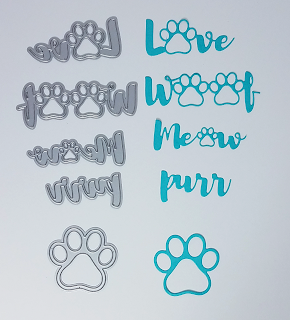
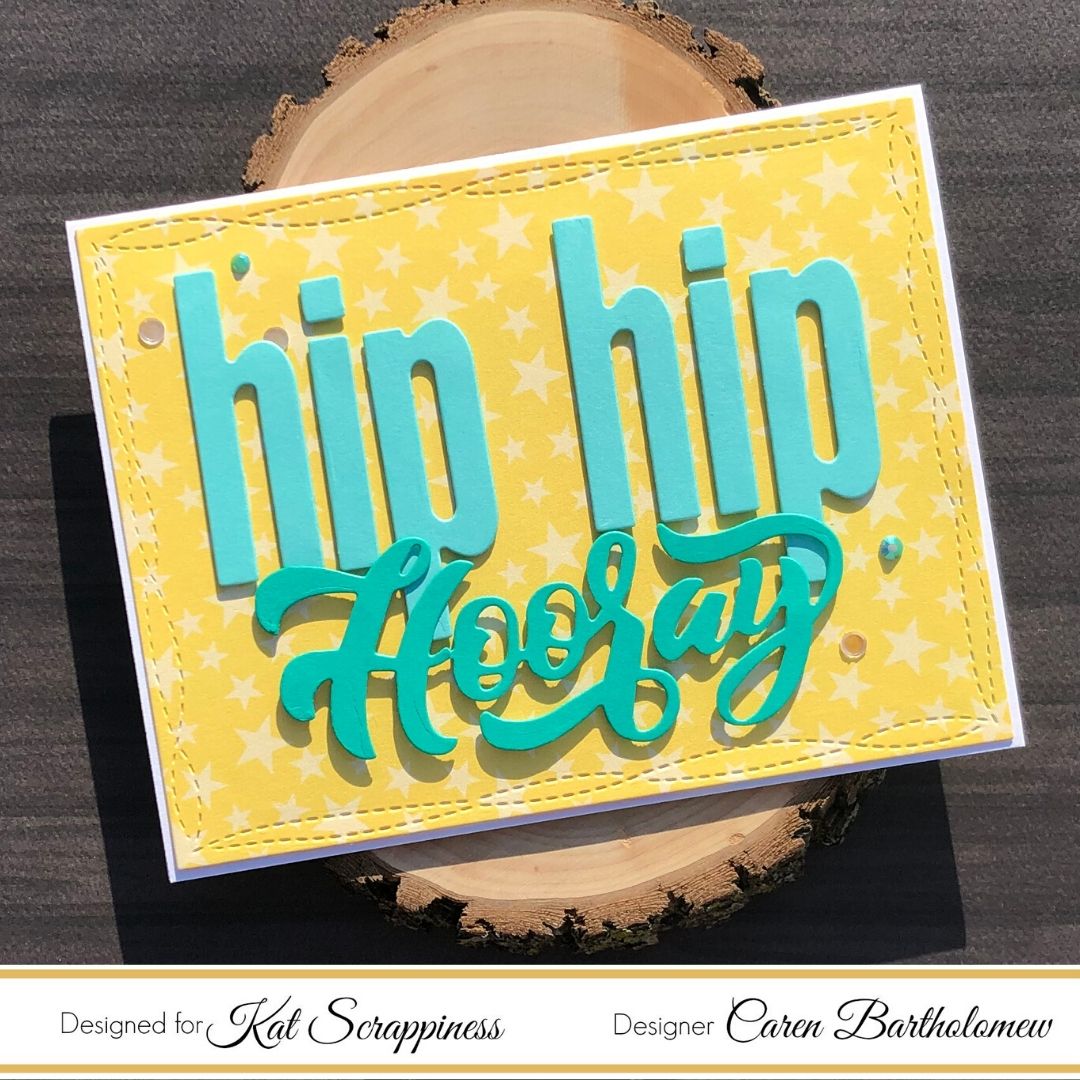
    I used several Kat Scrappiness dies  and a couple of sequin/jewel sets to create this card.  I die cut “hip” twice using the Condensed Lowercase Alphabet dies from light turquoise card stock.  Hooray is from one of the dies released this month – Hooray with Shadow die. I cut this out of a little bit darker turquoise card stock.  My yellow star background panel was die cut using the Wonky Wavy Stitched Rectangle dies.

    I added my letters and words to the star panel using foam adhesive and adhered the panel to a white card base.  To finish the card, I added a few clear sequins and teal jewels.

    I love the way this card turned out.  I can use this card as a birthday or celebration card.  Thanks for stopping by!

    – – –– – –– – –– – –– – –– – –– – –– – –– – –– – –– – –– – –– – –– – –– – –– – –– – –– – –– – –– – –– – –– –

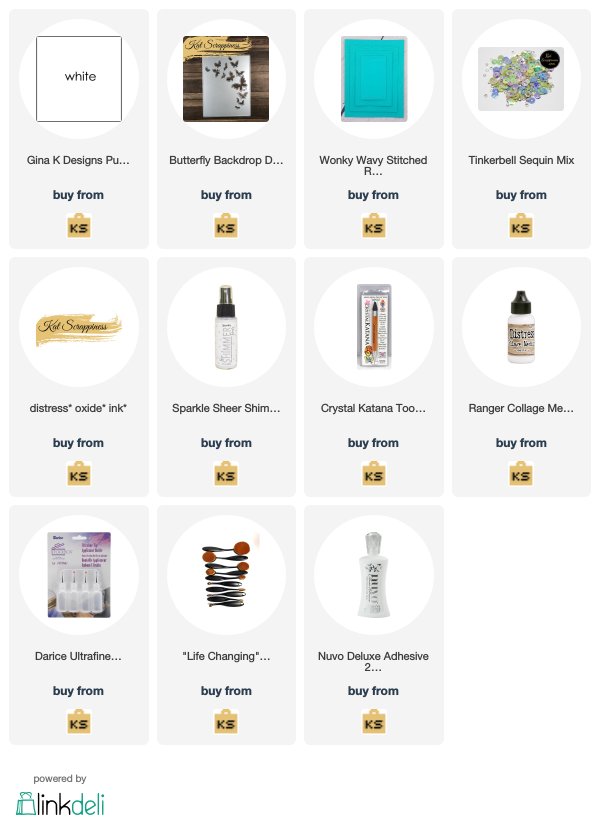
    Here is a link to the Kat Scrappiness shop and direct links for products I used on today’s cards.

    – – – SUPPLIES for today’s project– – – – – – – – – – – – – – – – – – – – – – – – – – – – – – – – – – – – – – –

  • Happy Holidays

    Happy Holidays

    Happy Holidays and Merry Christmas Eve everyone!   This is my last holiday card and blog post this year.  I think I have everything ready for Christmas except the cooking which I plan on doing all day today.


    For my card today, I used the several Kat Scrappiness products.  I the card by die cutting a piece of turquoise card stock using the largest Wonky Wavy Stitched Rectangle die.  I then used a snowflake stencil and distress ink to ink up the background.  I then die cut the Stitched and Layered Snowman die from various card stock and assembled him.  I die cut the Happy Holidays three times one from white glitter card stock and twice from white card stock.  I then glued the layers together to give the sentiment some dimension.

    I adhered my turquoise card stock to a black card base.  I adhered the snowman using dimensional adhesive to the card and glued the sentiment onto the card base.  To finish the card, I added a few white snowflake sprinkles.

    – – –– – –– – –– – –– – –– – –– – –– – –– – –– – –– – –– – –– – –– – –– – –– – –– – –– – –– – –– – –– – –– –

    Thanks for stopping by and happy stamping!  Here is a link to the Kat Scrappiness shop and direct links for products I used on these cards are below.  You still have today and tomorrow to take advantage of the Winter Savings event!

    Winter Sale at Kat Scrappiness

    – – – SUPPLIES for today’s project– – – – – – – – – – – – – – – – – – – – – – – – – – – – – – – – – – – – – – –


  • Give Thanks Wreath Card

    Give Thanks Wreath Card

    Hi Everyone, it’s Tina here. Today’s card I used the new Give Thanks Wreath die with a simple Distress Oxide Background. Below you will find the steps to create your own card.

    Step 1 – Trim White Cardstock to 8 1/2″ x 5 1/2″, score at 4 1/4″ and fold in half for a vertical side fold card.

    Step 2 – Trim White Cardstock to 5 1/2″ x 4 1/4″. Apply Distress Oxide ink using an ink applicator. Starting with the lightest color work it into a circle and build the colors out. I used Wild Honey, Ripe Persimmon, Fired Brick, Dusty Concord.

    Step 3 – Diecut Wonky Wavy Stitched Rectangles using the background created from Step 2. Adhere to card using Nuvo Deluxe Adhesive.

    Step 4 – Diecut Give Thanks Wreath using Black Cardstock. Adhere to front of card using Collage Medium.

    Step 5 – For added interest randomly adhere Sequins using a Crystal Katana and collage medium.

    There are several ways you can use the Give Thanks Wreath Die. You can change it up by diecuting the Give Thanks Wreath a second time using a different color cardstock and just trim out the sentiment. The sentiment or wreath can also be used alone. Below is a link to all the products used. Thanks for stopping by and have a wonderful day.

    Products Used:

    https://linkdeli.com/widget.js?1559654439292

  • Congratulations Card

    Congratulations Card

    Hi Everyone, it’s Tina here. Today I have a Congratulations card using the Hoppy For You Stamp set. This stamp set is perfect for baby showers, new Mommy’s and even Mother’s Day cards. Below you will find the steps to create your own card.

    Step 1 – Trim White Cardstock to 8 1/2″ x 5 1/2″, score at 4 1/4″ and fold in half for a vertical side fold card. (A2)

    Step 2 – Diecut Wonky Wavy Stitched Rectangles die using Patterned Paper of your choice. Adhere to card using Nuvo Deluxe Adhesive.

    Step 3 – Diecut Double Stitched Rectangles die using Patterned Paper of your choice. Matte it with another piece of Patterned Paper (darker). Adhere both to the front of the card.

    Step 4 – Diecut Double Stitched Ovals die using Patterned Paper of your choice. Adhere to card using Foam Tape.

    Step 5 – Stamp Hoppy For You using Gina K Amalgam Ink on White Cardstock. You will need to stamp the baby Roo first but the upper body then mask it and Stamp the Mama Roo. Color in using Alcohol Markers. I used the new Tri-Blends from Spectrum Noir. Pale Pink and Earth Brown. Fussy cut the image or use your cutting machine and adhere to card using Nuvo Deluxe Adhesive.

    Step 6 – Diecut Stitched Fishtail Banner using Patterned Paper. Stamp Hoppy For You sentiment on the diecut using Versafine Onyx Black Ink.

    I hope you enjoyed today’s card. You can receive 10% off your order at Kat Scrappiness by using code: TINA10 at checkout. Below is a link to all the products used. Thank you for stopping by and have a wonderful day.

    Products Used:

    https://linkdeli.com/widget.js?1559654439292

  • Paw Print Sprinkles Shaker Card

    Paw Print Sprinkles Shaker Card

    Good morning Kat Scrappiness fans, It’s Lisa here on the blog with you today and I have a fun shaker card using some new Sprinkles that were just released in the shop!

    All you need is LOVE and a dog (or a cat)……. and maybe some Paw Print sprinkles!!

    Today in the Kat Scrappiness shop there are over 30 new sequins and sprinkles mixes

    that were recently released

    and they are SUPER CUTE and SUPER COLORFUL and SUPER SPARKLY!!!

    You are definitely going to want to check them ALL out!

    For my card today I am featuring my favorite one. It’s called Paw Print Sprinkles.

    HOW STINKIN’ CUTE ARE THOSE TINY LITTLE PAW PRINTS???

    The minute I saw them I knew they needed to be paired with Kat’s Pet Sentiments Die Set!

    They are the perfect addition to the paw print die!

    Here is the Card Recipe:

    • I started with a black A2 card base.
    • Next I took the Wonky Wavy Stitched Rectangle Dies and cut out a white layer with the largest die from the set.
    • Now I cut out 3 letters from the Large Alphabet Dies (L, V and E) in red card stock. I laid them out on my white panel so I could position the paw print from the Pet Sentiments Die Set where the O in love would be.
    • I ran the white panel through my die cut machine and cut out the paw print on a slight angle.
    • Once the paw print was cut I backed it with acetate and built foam tape all around it so I could make it into a shaker element.
    • I made sure to section off the bottom of the paw print separately from the top 4 holes so I could add 2 different shaker mixes inside the paw print.
    • The bottom of the paw got the Paw Print sprinkles and the top 4 holes got the red Heart Sprinkles .
    • I applied the shaker panel to the base of the card and added my 3 Large Alphabet Dies and the outline of the paw print in black to the front of the paw print shape.
    I am super happy with how this card turned out! I just love those sweet little Paw Print
    shaker bits and I love how they look inside the paw print die!
    If you are interested in purchasing any of the Kat Scrappiness products I used
    on my card, don’t forget to use code LISA10 to save 10% on your order at checkout.
    Thanks for stopping by and have a wonderful day!
    I already am!
    ?Lisa ?
  • With Sympathy And Love

    With Sympathy And Love

    Hi Everyone, it’s Tina here. Today I have a card to share using the new Butterfly Backdrop. It creates a beautiful stream of butterlies and I instantly knew it would translate into a sympathy card. Below you will find the steps to create your own card.

    Step 1 – Trim White Cardstock to 8 1/2″ x 5 1/2″, score at 4 1/4″ and fold in half for a vertical side fold card. (A2)

    Step 2 – Trim White Cardstock to 5 1/2″ x 4 1/4″. Apply Distress Oxide Inks with the Life Changing Brushes to the White Cardstock. Working with the darkest to the lightest color leaving a white border at the bottom. Spritz some water and wait 30 seconds then place a scott towel to pick up the excess.

    Step 3 – Diecut Wonky Wavy Stitched Rectangles Die using the Background from Step 2. Adhere to card using Nuvo Deluxe Adhesive.

    Step 4 – Trim White Cardstock to 5 1/2″ x 4 1/4″. Apply Distress Oxide Inks to the center using the lightest shade used from Step 2. Apply Sparkle Sheer Shimmer Spritz. Let dry.

    Step 5 – Diecut Butterfly Backdrop using the background created from Step 4. To place the diecut butterflies in the same order onto your card front use the negative part as a template. Apply Nuvo Deluxe adhesive in the space where the butterflies will go. Now take each diecut butterfly and adhere to card. Once finished remove the negative diecut. You can save the negative diecut for another card.

    Step 6 – Stamp sentiment in ink of your preference.

    Step 7 – Using a crystal katana adhere Tinkerbell sequins with collage medium.

    This card can be used for any occasion by changing the sentiment and colors. You can also dry emboss to create an embossed impression. Below is a link to all the products used. To receive 10% off your order use code: TINA10 at checkout. Thank you for stopping by and have a wonderful day.

    Products Used:

    https://linkdeli.com/widget.js?1552642647875

  • Mini Notecards by Lisa

    Mini Notecards by Lisa

    Good morning Kat Scrappiness fans! 

    It’s Lisa here on the blog today to bring you a sweet mini trio of notecards. I have an easy technique that I think you are going to like. We are going to make mini notecards using the nested dies we all love and reach for all the time for our regular sized cards. The finished size of each card is approximately 4 1/8″ x 2 3/4″. What you need is the largest die from any of your nested die sets.  I’ve used rectangles but squares would work as well.  The 3 nested die sets I’ve used are the Stitched Postage Stamp Edge Rectangles, the Stitched Scalloped Rectangles and the Wonky Wavy Stitched Rectangle Dies.

    For my trio of sweet cards I used patterned paper for the card base for some color and variety but any paper or cardstock would work.

    After I die cut the largest size die from each set, I folded the paper in half to create a mini card. 

    Then comes the fun part! Decorate to your heart’s desire! I added a white piece of cardstock to the front of each mini card and stamped a background with florals and then popped the focal points up on foam tape. I used the Scripty “Hello My Crafty Friend” die as the sentiment on 2 of the cards. I finished each card off with some pretty twine and 3 sparkly sequins from the Barbie Sequin mix. I stuck with the rule of 3 to place my sequins down and it was just the right amount of added sparkle.

    Since the card base is made from dies that have decorative edges, your cards will have 3 fancy edges that are so pretty!

    Making these mini notecards is a cinch and they come together so quickly!  Kat’s nested dies are the perfect size to create these mini cards. It might not be a new technique but it sure is fun! Small notecards are perfect for lunchbox notes, quick thank you cards or for any occasion that calls for a quick small card! For some added fun you can make your envelope out of the same patterned paper to match your card.  The possibilities are endless!

    All supplies used are linked below.

    Thank you so much for joining me today and don’t forget to use code Lisa10 to get 10% off your order at checkout.

    Have a great day everyone!

    I already am!

    ?Lisa?

  • Belated Father’s Day Waffle!

    Belated Father’s Day Waffle!

    Hi Friends! kel here today to share a fun card for a special somebody!! I gave it to the hubs for Father’s Day last week so I can share it now. =o)

    I used a whole bunch of dies on this card, including the brand new Stitched Scallop Circle dies to make my card (I used the 3rd and 4th largest circle dies). I also used the Wonky Wavy Stitched Rectangle dies on my polka-dot layer in the back, and the widest Stitched Fishtail Banner Die to stamp my sentiment on. I was lucky that it worked out that the sentiment fit so perfectly on that die!!

    I used the Waffle Lot Stamp Set by Technique Tuesday for this card for the hubs because our middle child has been on a waffle kick recently… We’ve been eating homemade belgian waffles just about weekly!! And for Father’s day, the boys surprised him by making him a Father’s Day breakfast complete with waffles and his favorite breakfast foods! So I thought that this card would have been perfect!!

    I just love that the Stitched Scallop Circle dies are nested far apart enough that you can still see the stitching on the bottom layer!! And I fussy cut the hearts out… phew. That’s all I can say about this little things! haha! The sentiment is stamped in this beautifully rich walnut ink and the hearts and waffle were stamped with my trusty Memento Tuxedo Black ink and then hand colored. The Stitched Fishtail Banner, waffle, and hearts are all popped up on some 3D dots/strips for a little extra oomph!!

    Thanks for stopping by, see you again soon! Don’t forget to take part in our awesome monthly challenge for your chance to win a $25 Gift Card!!

    lovies, =o) kel

    Supplies Used (use code kel10 for 10% off your order!):

  • Rainbow Polka Dot Flags Card

    Rainbow Polka Dot Flags Card

    Hi Everyone, it’s Tina here today. The new Stitched Flags dies from Kat Scrappiness are so much fun to play with. Once I selected my rainbow colors for my Stitched Flags I created a simple matching rainbow background using the Distress Oxide Inks. My card is also using the Wonky Wavy Stitched Rectangles Die and Everyday Brush Strokes stamp set for the sentiment. Below you will find the easy steps to replicate this card.

    • Step 1 – Trim White Cardstock to 8 1/2″ x 5 1/2″, score at 4 1/4″, fold in half for a horizontal side fold card (A2)
    • Step 2 – Trim White Cardstock to 4 1/4″ x 5 1/2″. Apply Distress Oxide ink directly to cardstock using a mini blending tool. I applied 5 colors to create a rainbow. The colors I used are Squeezed Lemonade, Twisted Citron, Salty Ocean, Picked Raspberry & Wilted Violet. I sprayed some water to create an oxidized effect. Once dry Diecut Wonky Wavy Stitched Rectangles to the background.
    • Step 3 – Apply anti static powder to the bottom left of the Distress Oxide Ink background. Stamp Everyday Brush Stroke sentiment stamp using Versamark Ink. Sprinkle White Embossing Powder, remove the excess then heat set it with a heat tool. Adhere the background to card using Scor-Tape.
    • Step 4 – Diecut Stitched Flags using Polka Dot Patterned Paper in five colors and 3 sizes each color. Adhere the largest Stitched Flag first using Scor-Tape, then middle size and then small size on top. You may want to layer them first before adhering to figure out the placement.

    I hope you enjoyed today’s card. This card can be used for any occasion by changing the colors and/or sentiment. All products used are linked below. Thanks for stopping by and have a wonderful day!

    Kat Scrappiness Products Used:


    https://linkdeli.com/widget.js?1525438185447

  • Masculine Cards with Dad’s Tools

    Masculine Cards with Dad’s Tools

    Hello again Kat Scrappiness fans!

    It’s Lisa here on the blog today to bring you some Father’s Day/Masculine card inspiration.  If you’re anything like me, masculine cards can be difficult.  I know for me, most of my projects involve the color pink and lots of sparkle and shine.  Up until now masculine cards have been a chore because I’m not inspired by the color schemes or the focal points.  This month there is a new stamp set in the Kat Scrappiness store that has breathed new life into the masculine card world.  Step aside feminine layering stamps because Dad’s Tools are making their debut!

    Dad's Tools

    The new Dad’s Tools stamp set at KS gives a fresh new look to dad’s old toolbox.  There are 4 different elements in the stamp set to layer and decorate with.  There is a hammer, a screwdriver, a nail and a screw and so many fun sentiments to play with.

    I found it helpful to swatch some gray and brown colors before I started my card to see what combinations would look best when I started stamping the layers of my tools.  I used the heart stamp from the Swatches  stamp set to make this visual tool and it was quite helpful.

    With layering stamps you want to start out with your lightest color ink and add progressively darker layers as you go.

     For my first card today I decided to  recreate a fun toolbox and fill it up with some of Dad’s Tools.  
      

    I cut down a standard A2 card base into the shape of a toolbox and gave it a front panel which doubled as a pocket so I could fit the hammer, screwdriver and some nails and screws into it. The white embossed sentiment “Happy Birthday” fit perfectly onto one of the Stitched Fishtail Banner Dies which is also one of the new releases this month in the Kat Scrappiness store.

     
     I layered the sentiment onto a second darker fishtail banner and added the 

    “Mr. Fix It” sentiment under the banners.

     For my second card today I went with a more traditional card and I used only the hammer and screwdriver from Dad’s Tools for the focal point under the sentiment.
     I used patterned paper for my first layer and a faux pegboard piece of paper for my second layer.  I cut both of those layers out with two different size dies from the Wonky Wavy Stitched Rectangles dies to give some added interest to the borders.  For the focal point of the card I used another one of the new releases this month called Stitched Flags.  
    Stitched Flag banner dies
     The shape of these new dies is so unique and can be used alone or with a sentiment for a fun element on your cards.  I stamped the sentiment “Happy Father’s Day” from Dad’s Tools in Versamark ink and white heat embossed it onto one of the Stitched Flags.  I mounted the Flag onto some foam tape for some extra added dimension.

    Make sure to check out what the other girls on the design team have done this month with the Stitched Flag dies!  There is so much talent and creativity, you will definitely want to add these dies to your collection!

     Also mark your calendars for National Scrapbooking Day on May 5th! 
    We will be having some fun giveaways and from May 4th – 6th there will be 20% off sitewide if you use coupon code NSD2018.
    National Scrapbooking Day 2018 at Kat Scrappiness
    Thank you so much for joining me today here on the blog!  Don’t forget to use code Lisa10 when checking out for 10% off your order!

    Have a wonderful day, I already am!

    ?Lisa ?