Tag: snowflake sequins

  • Circle Shaker Card with Angeline

    Circle Shaker Card with Angeline

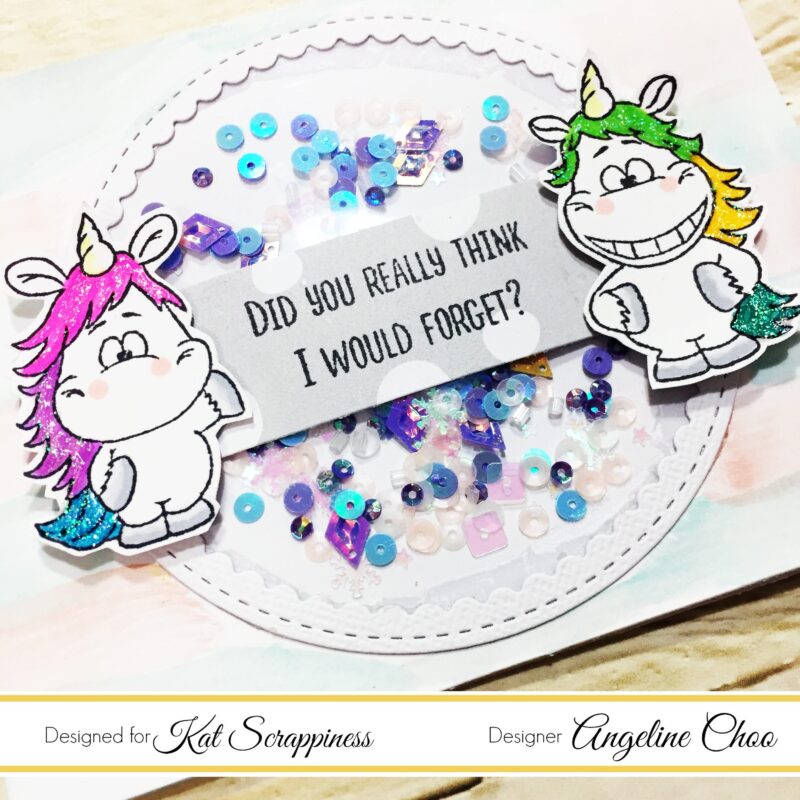
    Hi! Angeline here to share with you a fun circle shaker card with a few magic ingredients: Sequins, Unicorns and Glitter! 🙂

    I first painted the background with some Prima watercolors. Then I put some of Kat Scrappiness Sequins [Lilac Skies and Snowflake Kisses] in the middle of the card, place an acetate over it to seal it in. This way, it doesn’t create much bulk but still you get the fun element of “shaking” the card 🙂 I then covered the acetate using the largest circle I cut from Gina Marie Designs Stitched Scalloped Circle Frame die.

    Then I stamped with Memento Tuxedo Black Dye Ink, colored with Copic markers and fussy cut the Gerda Steiner Moody Unicorns. I decided to add some Nuvo Glitter drop [White Blizzard] to the unicorns’ hair coz seriously — unicorns are just magical! 🙂

    Then it’s all done!

    Hope you enjoyed this fun circle shaker card I made and do try it out yourself! 🙂

    ▬▬▬▬▬★ S U P P L I E S ★▬▬▬▬▬

    Kat Scrappiness Sequins [Lilac Skies and Snowflake Kisses]

    Gerda Steiner Moody Unicorns

    Gina Marie Designs Stitched Scalloped Circle Frame die

    Nuvo Glitter drop [White Blizzard]

    Memento Tuxedo Black Dye Ink

    Acetate
    Copic markers
    White cardstock
    Foam Adhesive
    Glue Tape
    Prima Watercolor Confections [Pastel Dreams]

  • Frosted Fairies Shaker

    Frosted Fairies Shaker

    Hi, guys! Today I am here to share with you how I made this birthday card using a stamp set that is intended for Christmas. I love getting more use out of my Christmas stamps by using them for non-holiday projects. Here’s a look at the card as well as how I made it!

    img_5902

    I started by using the Kat Scrappiness Double Stitched Rectangles to die cut my frame and my background panel. I LOVE these dies because they give you stitching details on both sides of the cut, which makes it perfect for creating finished frames.

    img_5880 img_5881


    After die cutting, I used 2 colors of Distress Ink to blend some color on my pieces. I chose Picked Raspberry and Mustard Seed. These aren’t traditional winter colors but I think they worked well for this card! I tried to achieve a gradient effect so I applied more Picked Raspberry towards the bottom and less color as I moved towards the center of the card. For the Mustard Seed, I applied more color towards the top and less in the middle section. These 2 colors of Distress Ink blended beautifully together to create a vibrant orange.

    img_5882

    Next, I used my Stampoholic Nano to do my stamping of the fairies, the fairy house, and their accessories from Lawn Fawn’s Frosted Fairy Friends. I also stamped the sentiment onto my background and added a snow hill and some clouds. I used SSS Intense Black Ink because I wanted to do some Copic coloring AND watercoloring on these images.

    img_5883 img_5884

    My last steps were to add some foam tape (2 layers) and choose my shaker bits! I decided to use Kat Scrappiness’s Snow Day, Snowflakes, and Snowflake Kisses. By using these 3 mixes I got a variety of colors, sizes, and sparkle! I love the soft pastel colors for winter cards.

    img_5886

    Finally, I assembled the whole card together onto a top folding A2 sized card base. Thank you so much for joining me today! I hope you all have a great Thanksgiving(safe travels!!) I also hope that you found some inspiration to use those Christmas sets for other occasions! Have a great day!!!

    img_5901

    Here are links to all the products I used!

    nano3_medium 1_0cffbe7f-8741-4596-8684-fdcaadc82c54_medium 1_e5b183d1-28aa-4116-9300-96fe33561558_medium  double-rectangle_medium snowflakekisses2_large 017_db803ec4-6a61-4b4c-9325-5dfd362d36a8_large 040_b483b9ef-b949-4937-814a-cd0f7e936df3_medium