Tag: Happy Fall Y’All stamps

  • Give Thanks Die Cut Card by Martha Lucia

    Give Thanks Die Cut Card by Martha Lucia

    Hello crafty friends, Martha Lucia here. Welcome to Kat Scrappiness Blog! Have you seen the most recently addition of die cuts? OMG, I am fascinated and for today I will show you a Give Thanks Die Cut Card created with slimline dies and Decorative dies.

    Give Thanks Die Cut Card by Martha Lucia

    I love to create cards combining different products and this time I made a slimline card and die cut the second layer using textured card stock and one of the dies included on the Distressed Edge Nesting Slimline Dies. I believe these  distressed edge dies are gorgeous to obtain different looks and for my card it is perfect. I pasted the distressed layer directly over a white card base.

    Give Thanks Die Cut Card by Martha Lucia

    In a separate piece of white card stock, I stamped some of the images included on the stamp set Happy Fall Y’all and colored them with Illustrator Markers from Spectrum Noir. Then, I fussy cut all with scissors and arranged them over the decorated card base using crafty foam tape.

    Give Thanks Die Cut Card by Martha Lucia

    To finalize the card, I die cut the Give Thanks Wreath Die onto purple card stock and edited in my way with scissors to use only the sentiment and coordinate the images with my stamped leaves. I loved how it turned out and to give more dimension, I just pasted with crafty foam tape.

    Thank you for stopping by and I hope inspire you with my card! Have a wonderful week!

    Martha Lucia

  • Happy Thanksgiving – Give Thanks Wreath

    Happy Thanksgiving – Give Thanks Wreath

    Did everyone get a chance to celebrate World Card Making Day this weekend?  I was able to make several cards that I will be sharing throughout the month.

    I have a Thanksgiving card today featuring the Give Thanks Wreath die.  I love this die, it is so versatile.  On my card, I just used the wreath portion of the die.

    I used a stencil and some distress inks to create the striped panel and die cut it using the Embossed Edge Rectangle dies.  I stamped/heat embossed the sentiment from the Happy Fall Y’all stamp set onto this panel using Versamark ink and copper embossing powder.  The pumpkins (also from the Happy Fall Y’all set) were heat embossed using copper powder onto white card stock.  I used brushes and distress inks to color the pumpkins and fussy cut them out.

    I die cut the Give Thanks Wreath using glitter copper paper and cut out the give thanks sentiment.  I adhered the wreath and pumpkins to my striped panel.  I adhered a piece of aqua patterned paper to my white card base and attached my striped panel using foam adhesive.  To finish off the card, I added three orange jewels.

    Here are the links to the introduction videos for the new products just released:

    Thanks for stopping by and happy stamping!

    – – – SUPPLIES for today’s project– – – – – – – – – – – – – – – – – – – – – – – – – – – – – – – – – – – – – – –

  • Happy Fall Y’all | Three Fall-Inspired Cards

    Happy Fall Y’all | Three Fall-Inspired Cards

    Hi Everyone, it’s Priscilla here. Today I have three fall-inspired cards using the Kat Scrappiness “Happy Fall Y’all” stamp set. Let’s get started!


    My first card showcases two of the images from the stamp set that I die cut using my Brother Scan N’ Cut machine and then colored with Copic Markers.

    To make the images “pop,” I matted them using one of Kat‘s “Cross Stitched Rectangles” dies and some patterned paper from Sunny Studios’ “Colorful Autumn” paper pad and then “framed” the whole card with the Kat Scrappiness “Wood Grain Framed Die.


    The background for my second card was created using a leaf die from my stash and “inlaying” the leaves in the openings. Once again I used the “Happy Fall Y’all” stamp set and the Sunny Studios‘  “Colorful Autumn” patterned papers.

    For the finishing touch, I sprinkled “Kat‘s “Mystical Leaves Sprinkles” on the card.


    My third card uses the “Happy Fall Y’all” stamp set again, but this time with a night time background that I created by blending two Distress Inks, “Chipped Sapphire” and “Pine Needles.” I gold heat embossed the sentiment and then splattered gold Perfect Pearls Pigment Powder, combined with a little water, across the front of the card.

    Kat‘s “Gold Jewels” finished the card.


    Well, there you have it. Here’s a look at all three cards. Happy Fall, Y’all!


    Thank you so much for stopping by! Don’t forget to check out what’s NEW in Kat’s Shop, and follow my blog and Instagram for more “Kat Scrappiness Amazingness”!

    Priscilla ???

    The supplies I used are listed and linked below.

    SUPPLIES

  • Nothing Says Fall Better Than Apples

    Nothing Says Fall Better Than Apples

    Hi Everyone, it’s Tina here. Summer is coming to an end and although I will miss flip flops and single layered clothing that means Fall will be here soon. Fall is one of my favorite seasons for the beauty and the activities. I still look at the changing color of the leaves with wonder. It is also brings my favorite activity. Apple picking which is what inspired today’s card. This is also a good opportunity to use your Fall Patterned Paper. Below are the steps to create your own card.

    Step 1 – Trim White Cardstock to 8 1/2″ x 5 1/2″, score at 4 1/4″ and fold in half for a horizontal side fold card (A2)

    Step 2 – Trim Pattern Paper to 5 1/2″ x 4 1/4″ and adhere to card using Nuvo Deluxe Adhesive.

    Step 3 – Diecut Scalloped Collage using Pattern Paper. Adhere an acetate sheet to the backside using Double Sided Adhesive Tape. Double your Foam Tape for added dimension and adhere it on top of the Acetate Sheet at the edges. I used Foam Tape to separate each window. Trim a piece of Pattern Paper to use as your background. Add the Apple Sprinkles to the background making sure they are positioned in the right area. Remove the release sheet from the Acetate Panel and adhere to the background. Adhere the whole panel to the card front using Nuvo Deluxe Adhesive.

    Step 4 – Diecut Happy using Red Cardstock (The die is from my stash). I diecut the shadow die using Black Cardstock. Assemble and adhere to card using Nuvo Deluxe Adhesive.

    Step 5 – Stamp Happy Fall Y’All sentiment using Versamark on Red Cardstock. Sprinkle White Embossing Powder and remove the excess. Heat set it with a heat tool. Trim the edges and adhere to card front using Nuvo Deluxe Adhesive and a small piece of Foam Tape underneath on the left side.

    This card can be used for many occasions by changing the patterned paper, sentiments and sprinkles. Below is a link to all the products used. Thanks for stopping by and have a wonderful day!

    Products Used:

    https://linkdeli.com/widget.js?1559654439292

  • Love You More Today Than Yesterday

    Love You More Today Than Yesterday

    Hi Everyone, it’s Tina here. I have a card to share with you using the Star Fusion Coverplate. It is a beautiful die and today I will be using it to emboss my background. Below you will find the steps to create your own embossed star fusion background card.

    Step 1 – Trim White Cardstock to 8 1/2” x 5 1/2”, score at 4 1/4” and fold in half for a vertical side fold card. (A2)

    Step 2 – Create clouds to the front of card base.

    Step 3 – Trim Yellow Cardstock to 4 1/4” x 5 1/2”. Dry emboss Star Fusion Coverplate in your diecutting machine using an embossing pad and sandwich according to your machine’s manual. Using an ink applicator apply Distress Oxide Ink Spiced Marmalade lightly. For a subtle blend.

    Step 4 – Diecut Heart using Background from Step 2. Adhere to card using Nuvo Deluxe Adhesive.

    Step 5 – Stamp sentiment on card front using Versafine Onyx Black Ink.

    Step 6 – Stamp Happy Fall Y’All image using Versafine Onyx Black Ink on White Cardstock. Color image using colored pencils and gamsol. Fussy cut the image out and adhere to card using foam tape.

    Step 7 – Stamp sentiment on scrap piece of cardstock using Versafine Onyx Black Ink. Diecut sentiment using Stitched Sentiment Strips and adhere to card using foam tape at the edges overlapping the flower image.

    Step 8 – For added interest adhere Orange Jewels using a Crystal Katana and collage medium.

    This card can be used for any occasion by changing the shape, colors and sentiment. Below you will find a link to all the products used. Today and tomorrow there is a huge Spring Sale so be sure to use code: CLEAN19 at checkout to receive 20% off your order. After the 7th use code: TINA10 at checkout to receive 10% off your order. Thank you for stopping by and have a wonderful day!

    Products Used:
    https://linkdeli.com/widget.js?1552642647875

  • Golden Autumn Leaves Card

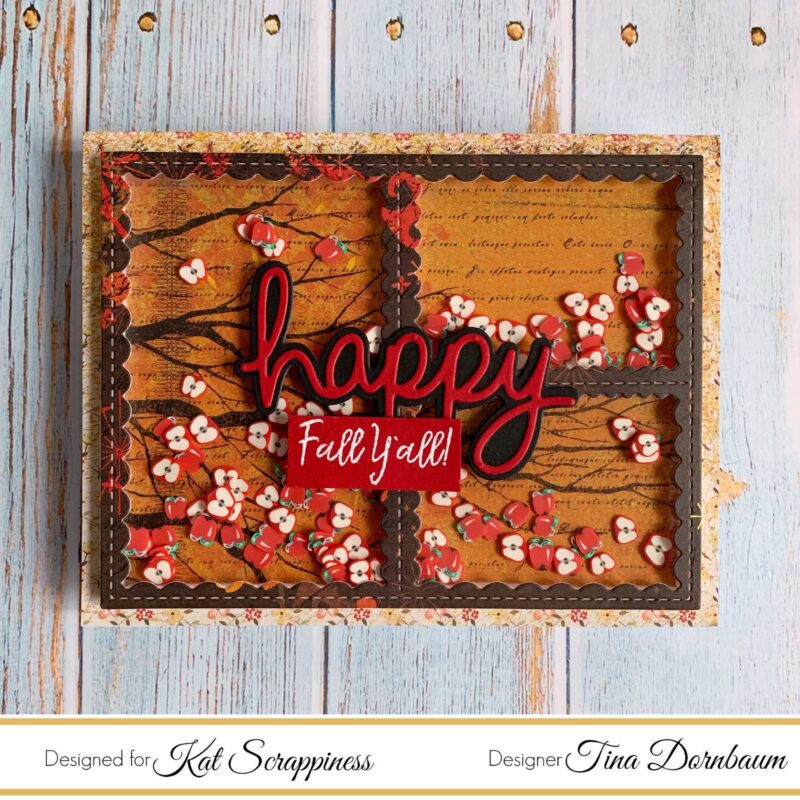
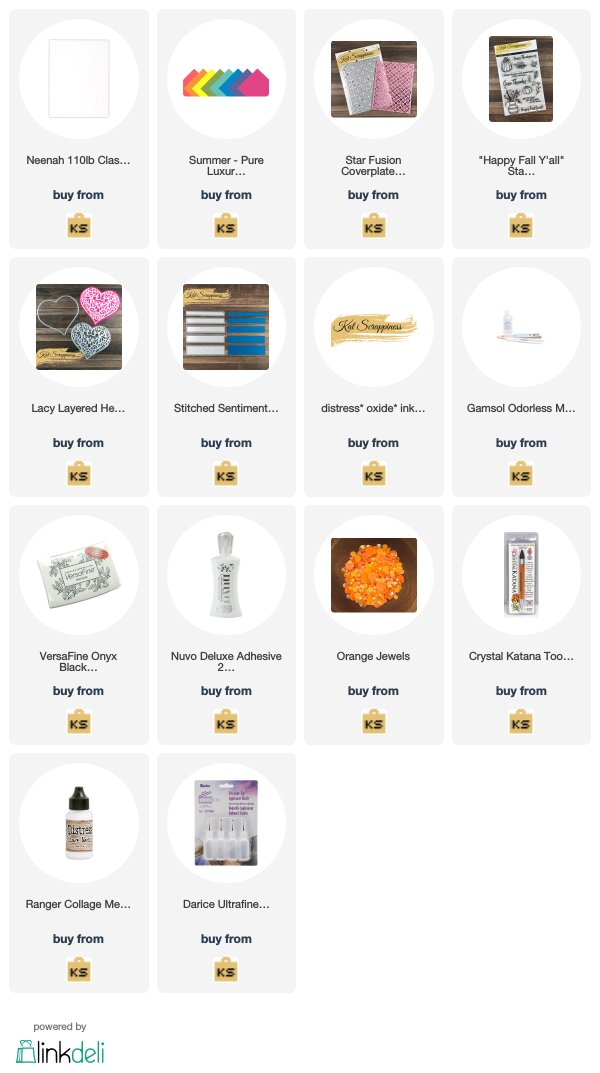
    Good morning, crafters!  This is Cynthia for the Kat Scrappiness Design Team, and I’m bringing you a fun Autumn project today featuring some beautiful new items. I’ve used the Kat Scrappiness Crafters Essentials FALL die set, and the lovely Happy Fall Y’All stamp set to create my card.  Follow along with me and I will walk you through the steps to create this project for yourself.


    My first step was to cut my background panel using this gorgeous cover-plate die featuring a leaf cutout and stitched detailing.  I used a rich red card stock over a kraft card base for warm and toasty colors.  I also sponged the edges of my background with some Memento Rich Cocoa ink to add even more warmth to the design.  If you’ve never sponged your edges, I really encourage you to give it a try – you can use any color you want, and it really makes your layers pop!


    Next, I used the die to cut out some leaves.  I used more kraft card stock, this time covered in a layer of double-sided tape.  I made sure that the tape was on top of my leaves because of the foiling I’m going to do.  These pretty leaves can be cut for many different projects.  I’ve seen one of our designers make a wreath with them and it’s beautiful!


    I carefully removed the release paper from the stick tape, then used some gilding flakes to cover the fronts of my leaves.  This happens to be the Cosmic Shimmer “Red Blaze” flakes that I used, but there are many choices you could make here – including using foil sheets.  I am just in love with these particular flakes and all of their rich colors, so it was a perfect choice for this project.  A word of warning:  these flakes get EVERYWHERE!  Please make sure your window is closed, no fans are blowing, and you don’t breathe directly on the flakes.  I worked carefully on a sheet of typing paper to contain the pieces, and then tapped the excess back into the jar when I was done.


    Once the flakes were burnished (I just rubbed them with my fingertip), I nestled one of them back into the die cut opening and added the other two.  These were popped up slightly on some thin foam squares to add a touch of dimension.  Don’t you just love all the colors?  I could cover the whole dang card with these flakes! Luckily, I restrained myself and left plenty of room for some stamping  🙂


    This lovely quotation stamp is from Kat’s Happy Fall Y’All stamp set, and I thought it was perfect for this card.  I stamped it in VersaMark embossing ink and used a fine detail gold powder I had in my stash.  I also took one of the leaf stamps from the same set and added a couple of them to frame my sentiment.  I think the gold powder stands out beautifully on this dark red card stock, and it looks great with the colorful leaves.


    And here is my finished card.  I am so happy with the way this turned out!  I think it’s simple but elegant, and I hope that you like it, too.  Both the Happy Fall Y’All stamp set and the Crafters Essentials FALL die set are available now in the Kat Scrappiness shop, and I’ve included a shopping link below.  Don’t forget to use your coupon code “CYNTHIA10” to get 10% off your entire order, including these new items.  Have a wonderful week, and I’ll see you all again soon!


    Kat Scrappiness shop