Tag: fancy floral coverplate die

  • How To Foil Using Your Background Dies

    How To Foil Using Your Background Dies

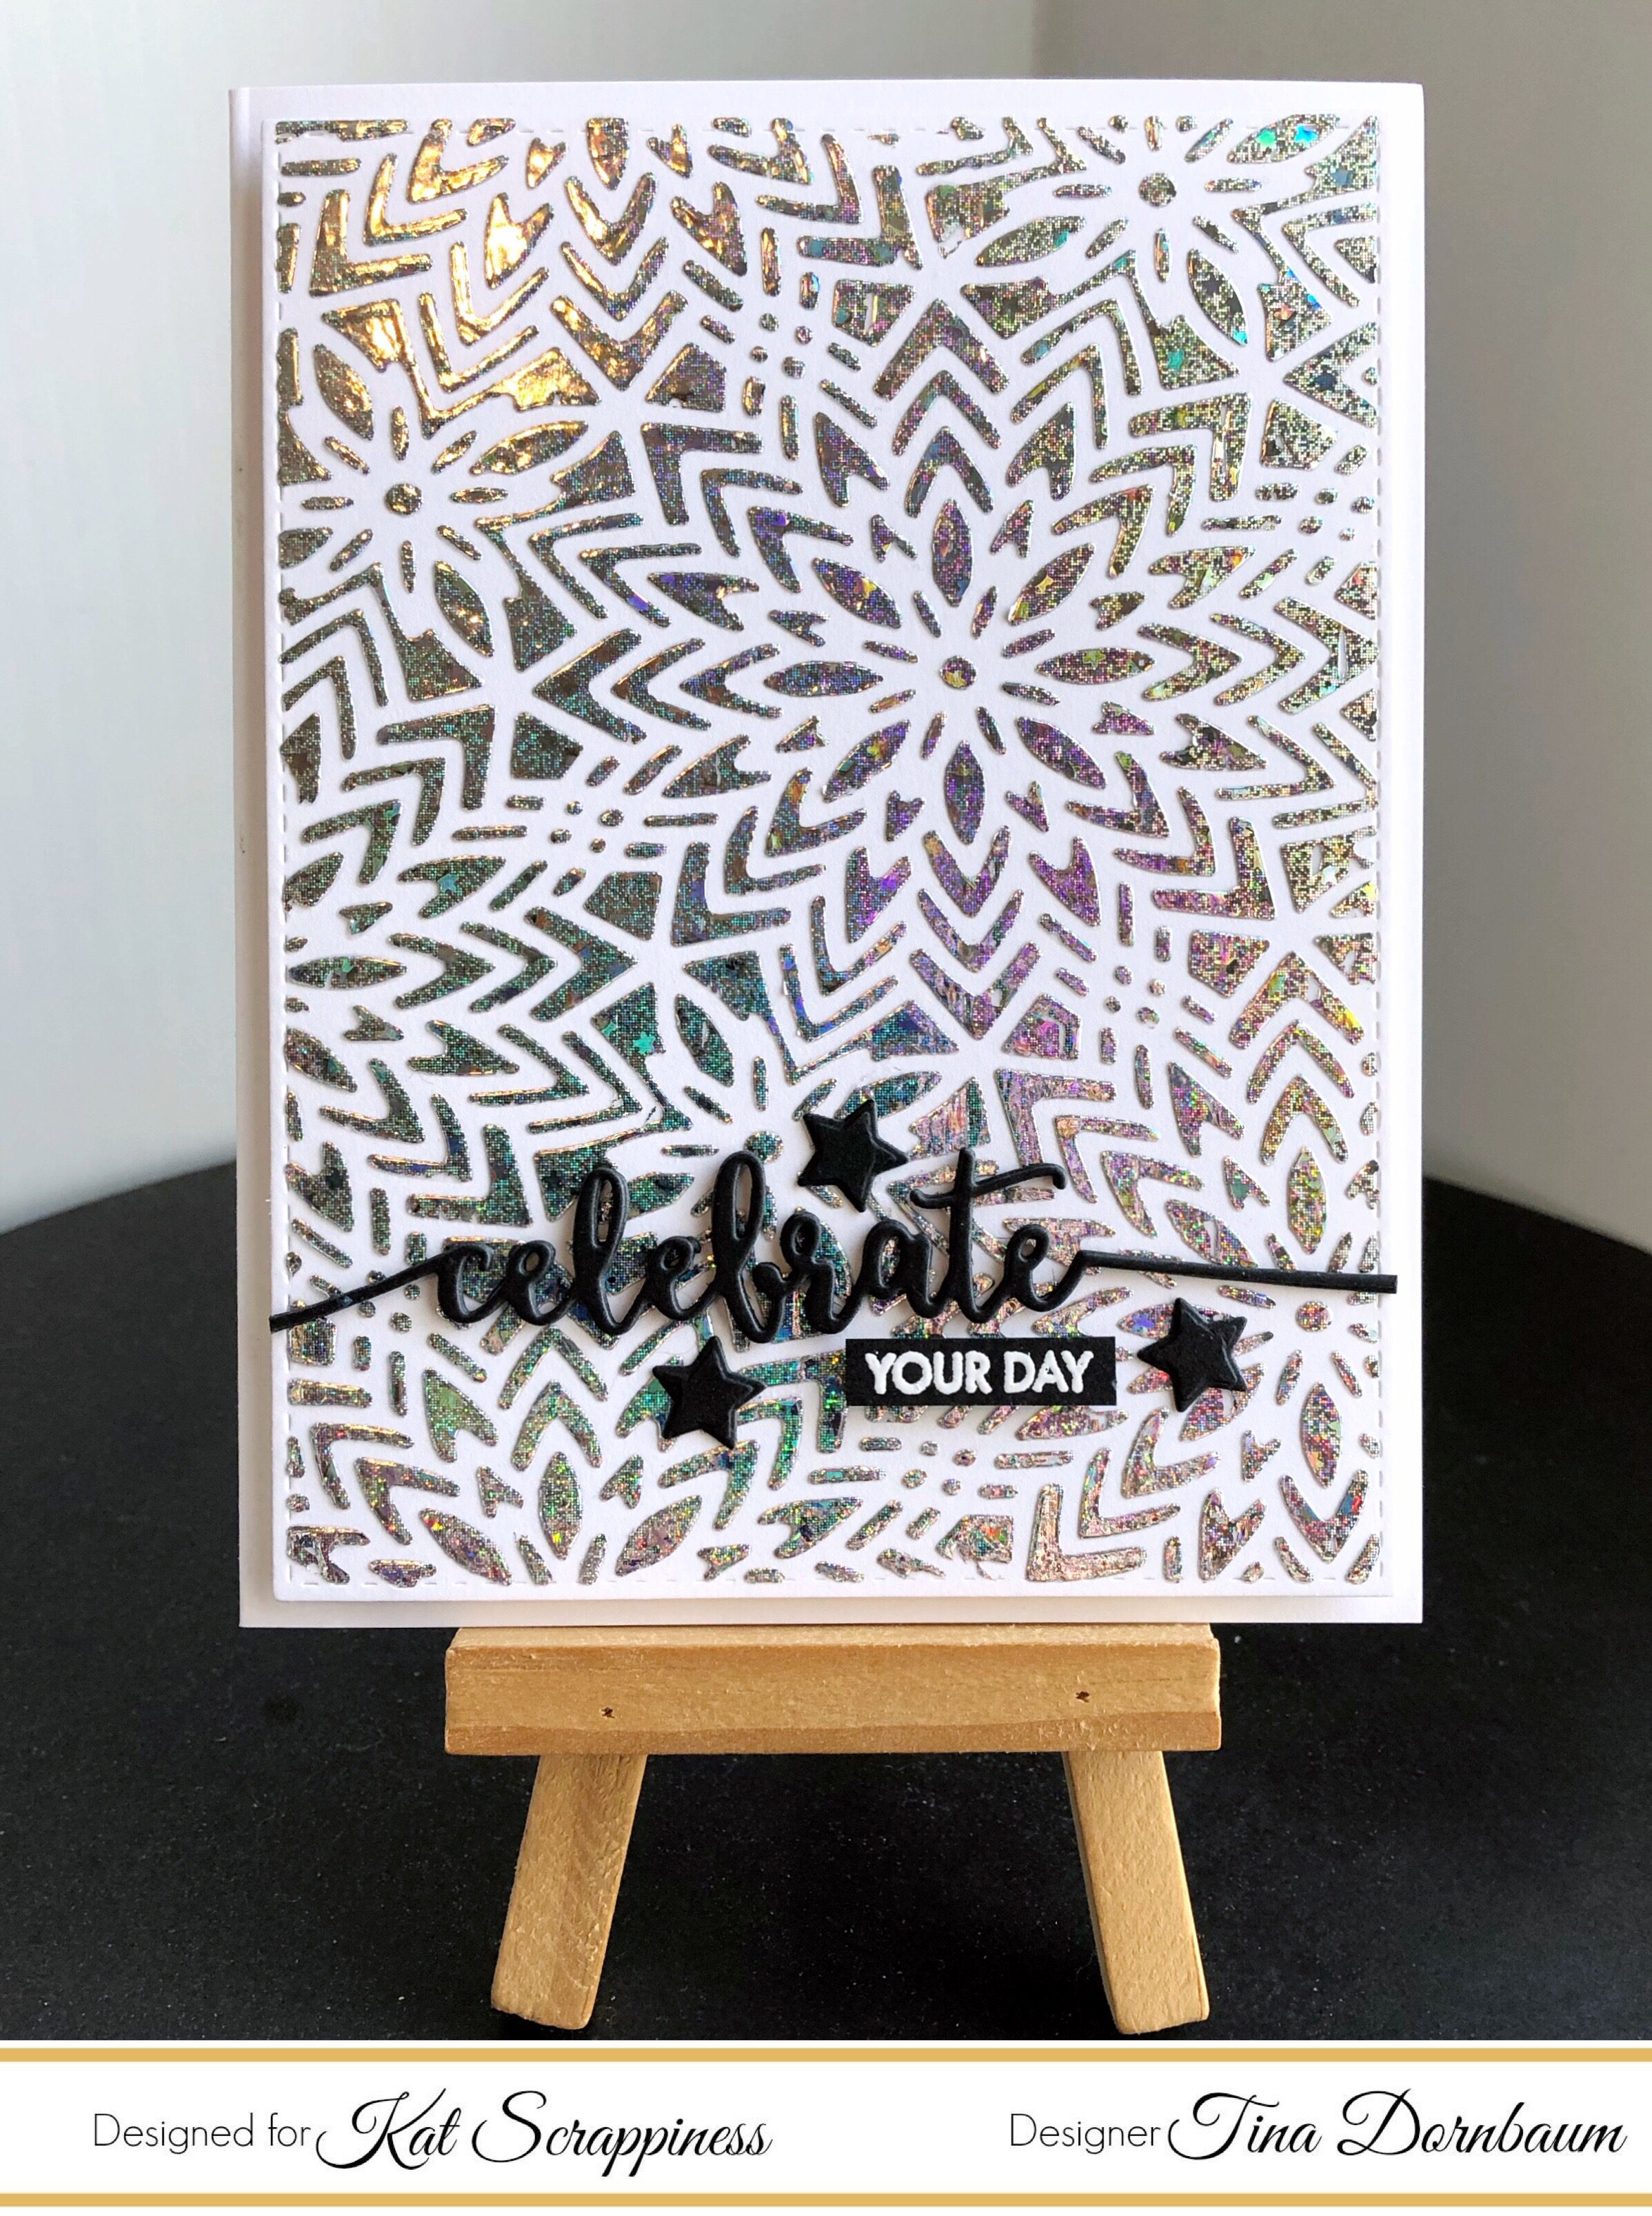
    Happy New Years Everyone, it’s Tina here. I wish you all an awesome year ahead! By now the holidays have passed and life is returning to normal. Today I wanted to share a card with you using your Background Dies to create a foiled background. Below you will find the steps to recreate this fun technique and how I used the Fancy Floral Coverplate Die.

    Step 1 – Trim White Cardstock to 8 1/2” x 5 1/2”, score at 4 1/4” and fold in half for a vertical side fold card (A2)

    Step 2 – Diecut Fancy Floral Coverplate using White Cardstock. Place the diecut on White Cardstock and secure it with Painter’s Tape. Using Deco Foil Transfer Gel apply with a Palette Knife over the stencil created. Once stencil is thoroughly covered gently remove the stencil. Let the background dry for an hour or until the Transfer Gel has turned clear.

    Step 3 – Place Foil Paper over the background and insert it into a folded photocopy paper. Pass it in your laminator. I passed it twice. Remove the Foil Paper and what you have is a beautiful foiled background. See photos below.

    Step 4 – Diecut Double Stitched Rectangles to the background created from Step 3 – Adhere to card using Foam Tape.

    Step 5 – Diecut sentiment 3 times and adhere all layers using Collage Medium and adhere to card.

    Step 6 – Stamp sentiment using Versamark on Black Cardstock. Sprinkle White Embossing Powder and remove the excess. Heat set it with a heat tool. Trim and adhere to card using foam tape.

    Step 7 – Optional – For added interest Diecut Stitched & Layered Christmas Tree (the star) 3 times and adhere to card using Nuvo Deluxe Adhesive.

    I hope you enjoyed another way to use your background dies. This card can be used for any occasion by changing the background, color and sentiment. Below is a link to all the products used. Thanks for stopping by and have a wonderful day!

    Products Used:

    https://linkdeli.com/widget.js?1543923411530


  • Fancy Floral Cards

    Fancy Floral Cards

    Hi Everyone, it’s Tina here. Today I have 2 cards to share with you using the Fancy Floral Coverplate die and word sentiments. Below you will find the steps to replicate this card.

    Step 1 – Trim white cardstock to 8 1/2″ x 5 1/2″, score at 4 1/4″ and fold in half for a vertical side fold card.

    Step 2 – Trim white cardstock to 5 1/2″ x 4 1/4″. Apply Distress Oxide Ink using an ink applicator. For the Awesome card use Seedless Preserves, Tattered Rose and Antique Linen. For the Happy card use Chipped Sapphire, Peacock Feather and Tumbled Glass.

    Step 3 – Diecut Fancy Floral Coverplate (x2) using Silver Glitter Cardstock. Adhere to backgrounds from Step 2 and then adhere the entire panels to the card front using Nuvo Deluxe Adhesive Glue.

    Step 4 – Diecut Stitched Fishtail Banners (x2) using Black Cardstock. Stamp sentiment using versamark. Sprinkle White Embossing Powder, remove the excess and heat set it with a heat tool. Adhere to cards using Nuvo Deluxe Adhesive Glue.

    Step 5 – Diecut Word die (x3) using Black Cardstock. Diecut the shadow word die using White Cardstock. Adhere all the layers using collage medium and then adhere to the card slightly overlapping the sentiment banner.

    I hope you enjoyed today’s cards. These cards can be used for any occasion by changing the colors and sentiments. Below is a link to all the products used. To receive 10% off your order at Kat Scrappiness use code: TINA10 at checkout. Thank you for stopping by and have a wonderful day.

    Products Used:


    https://linkdeli.com/widget.js?1543923411530

  • Christmas Tags using Cover Plates

    Christmas Tags using Cover Plates

    Hi everyone!  I can’t believe Christmas is a little over a week away! Today, I have created some quick and easy tags using cover plate dies from Kat Scrappiness.

    My first set of tags features the Wood Grain Framed Diamond Wire die and the Merry Critters stamp set.  I used the banner die from the Crafters Essentials – Fall die set for the sentiment.

    My second set of tags used the Fancy Floral Coverplate die.  I used spray adhesive on the back of the die cuts and then attached them to the card stock.  I sprayed glitter mist on these tags and attached glitter words to the tags.

    For my third set of tags, I used the Peacock Backdrop die and two word dies – Jolly and Ho Ho Ho.

    – – –– – –– – –– – –– – –– – –– – –– – –– – –– – –– – –– – –– – –– – –– – –– – –– – –– – –– – –– – –– – –– –

    Use code caren10 for a 10% discount in the Kat Scrappiness shop.

    Thanks for stopping by and happy stamping!

    – – – SUPPLIES for today’s project– – – – – – – – – – – – – – – – – – – – – – – – – – – – – – – – – – – – – – –

    Snowman Card

    Gingerbread Man Card

    Christmas Tree Card

  • November Release Christmas Cards by Maria

    November Release Christmas Cards by Maria

    Maria here on the blog with you today!  Have you checked out the new dies and jewels available now from the November release by Kat Scrappiness?  They are to die for!  I can’t even pick a favorite.  Wait til you see the dies next month, hint, hint!  They are fabulous!!  You really need to save up your Christmas money for those.  Or ask Santa to check out your Christmas wish list at the shop then maybe he will be good to you this year!


    Since my design team package got a little delayed getting to me, I am on catch up mode.  I created two projects for you guys because I really wanted to show them off!  For my projects today, I am featuring the Holly Leaves and Berries die set, Fancy Floral Coverplate die, Merry Critters stamp set, Avery Elle Starry Scene stamp set, 6mm Sparkling clear solid confetti, Metallic Silver Solid Star Confetti, Stitched Scalloped Border Dies and a bunch of other products available at the shop.


    For my first card, I stamped the Merry Critters stamp set and the mountains from the Starry Scene stamp set with a Copic friendly ink and colored them in with my Copic markers.  I fussy-cut the images with my scissors.  On another piece of Neenah solar white card stock, I stamped the mountains from the Avery Elle Starry Scene stamp set.  I adhered this piece onto my A2 size card base.  I used the coordinating die to die-cut both pieces to create the window.  I adhered this piece inside my card.  I also adhered the mountains inside the window.


    I used a patterned paper from Lawn Fawn and die-cut a piece with the Stitched Scalloped Border Dies to create my grass hill.  I adhered this piece onto my foreground and added my little critters.


    To finish my design, I die-cut some gold stars and stamped the little snowflakes with some light gray ink.  Here’s a little close-up:


    I really love how this card turned out.  The critters are so cute.  That little bird reminds me of tweety so much.  The little starry background is just the perfect size to create a beautiful scene to your cards.


    For my second project, I die-cut a piece of some heavy weight white card stock using the Fancy Floral Coverplate die.  I know this die is not really meant for Christmas but I always want to share ideas on how to stretch your dies by using it for any occasion.  I covered this piece with some acetate sheet and added foam adhesive to create my well.  I used the 6 mm sparkling clear solid confetti with the metallic silver solid star confetti for my shaker element.   I know you can barely see them in the photo but trust me, this is so pretty in real life!


    To finish my design, I die-cut the Merry Christmas sentiment with red foil card stock.  I also die-cut the holly leaves and berries with some Lawn Fawn patterned paper and red foil card stock.  I adhered the pieces using my Nuvo liquid adhesive.  Here’s a little close-up:


    The holly leaves are so pretty!  As I mentioned earlier, I can’t pick and choose my favorite from the November release.  They are all AMAZING!!!!!


    I hope you like my projects today.  The supplies I used are listed and linked below.  I would be grateful if you can click on the links provided.  By doing so, I will be getting a little commission at no cost to you!  Please don’t forget to use my coupon code “MARIA10” for 10% off your order at the shop.   Happy crafting!


    ———–SUPPLIES————