Hi, everyone! How was your Thanksgiving! I imagine there are still quite a few full tummies out there, Thanksgiving leftovers are my FAVORITE! Today is one of the biggest shopping days of the year, Black Friday! Who here is shopping? I’m a couch shopper myself, I dislike the crowds. Fortunately for us, Kat Scrappiness has a GREAT sale going on!

Make sure you take advantage of this, it’s a fabulous deal! It even applies to the new Chocolate Lovers Card Kit! I have the kit in my hot little hands, and I’ll be sharing projects I make with it shortly. It truly is delicious and amazing! You can also get Kat Scrappiness dies and sequins on sale! These products are already at such a discounted rate, they almost never go on sale. This really is a great sale!
Now that you’re ready to shop, with a discount code, let’s move on to a project you’ll want to add to your list for this Christmas season! This project is really wonderful and so easy to do. You can die cut your items and stitch them together whenever you find you’ve got free time. I made these while watching television with my husband!
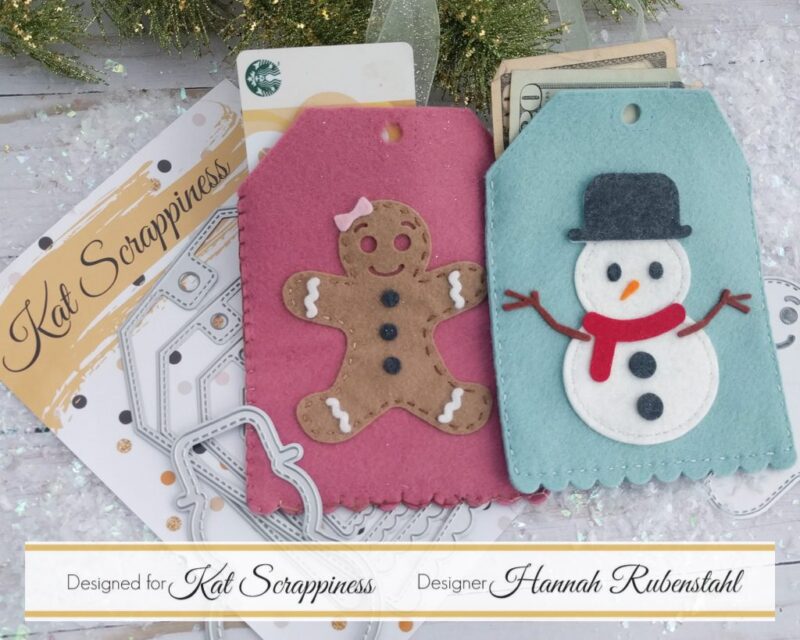
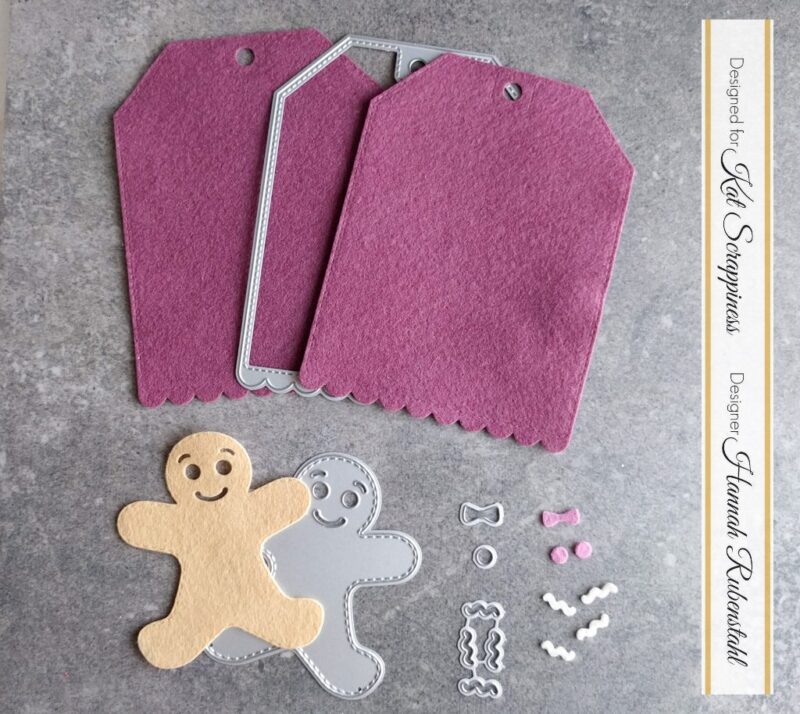
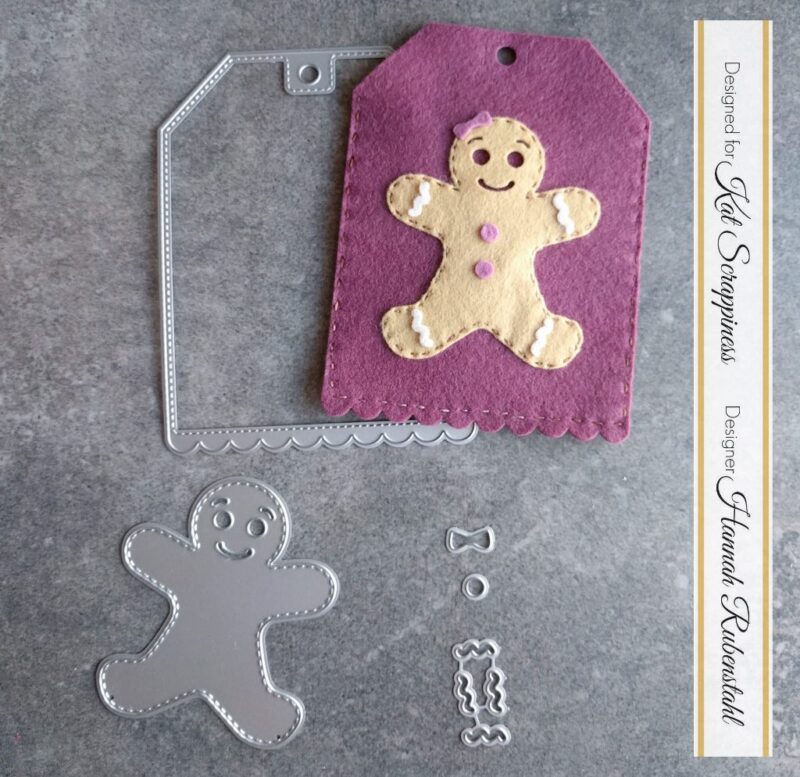
I used the Kat Scrappiness Stitched Scalloped Nesting Tags to create gift card or money holders. The largest of these dies is more than perfect to sew on either her Design a Gingerbread Man or her Stitched and Layered Snowman. These can be accent a gift under the tree or hang as ornaments on the tree!
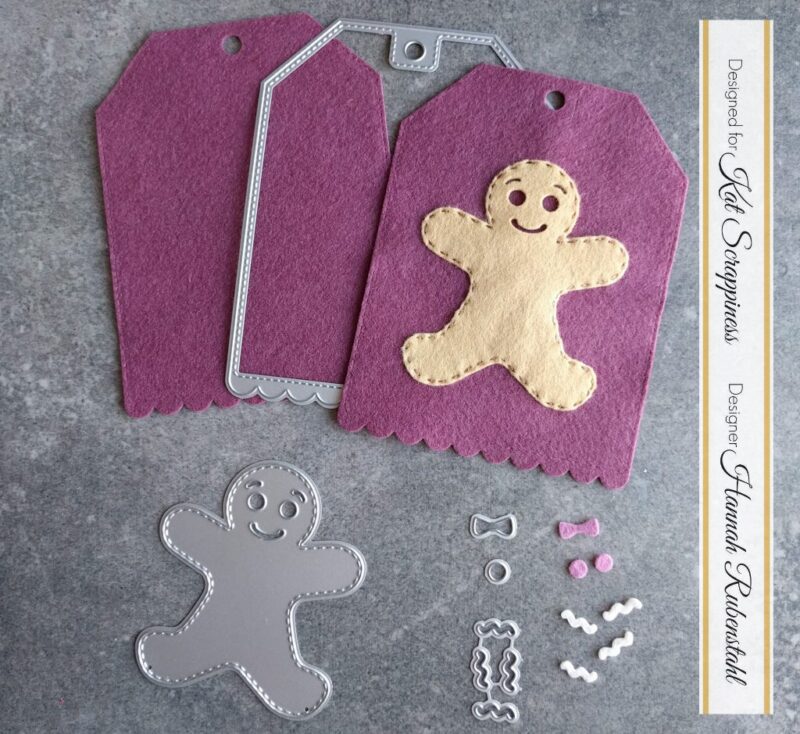
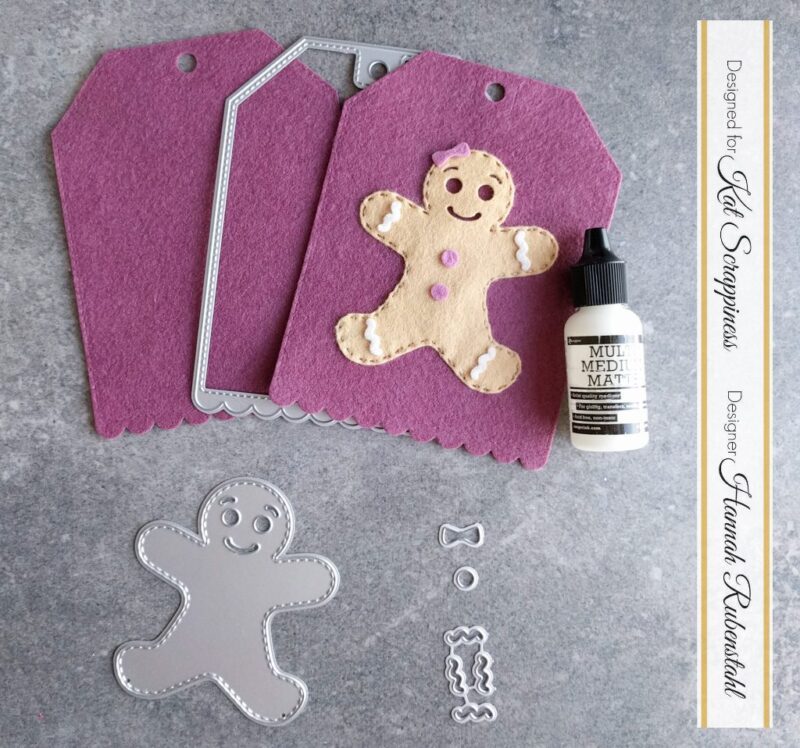
I used 100% wool felt to die cut, the dies cut through the fibers like butter. First, I stitched the larger images on, in one case it was the Gingerbread Man, on the other, it was the Snowman. For the smaller elements, I glued them on with some Ranger Multi Medium Matte. When the glue was dry, and it didn’t take long, I stitched the tag fronts to the backs. I used a blanket stitch for the Gingerbread man, but I wasn’t happy with how the scallops looked. I left them, as is so that you can see my results. For the Snowman, I stitched them together with a running stitch, the result was MUCH nicer. The stitching that the dies left made a nice line for me to work on, ensuring that my stitches looked even and straight!
It probably took me an hour to assemble each tag, it would take a more accomplished seamstress less time, I’m sure. But, like I said, this hour was found just watching television with my husband. I can also find other random hours throughout my day, such as waiting for doctor’s appointments and picking up my kiddo from school.
If you’re looking for the products I used, they can be found below, remember to shop the Kat Scrappiness Black Friday/Cyber Monday sale to save 15% on your supplies!
Stitched Scalloped Nesting Tags by Kat Scrappiness
Stitched and Layered Snowman Die by Kat Scrappiness
Design a Gingerbread Man by Kat Scrappiness
Ranger Multi Medium Matte
100% Wool Felt
Embroidery Floss
Ribbon


2 Comments
Great felt tags! Did you need to use a metal shim with it? jeandonny2000 at hotmail dot com
November 29, 2017 at 6:59 pmI’m so glad you like these! They are SO fun to make! To answer your question, I did not use a metal shim, I ran them through my die cutter twice, and they came out perfectly!
November 29, 2017 at 7:50 pm