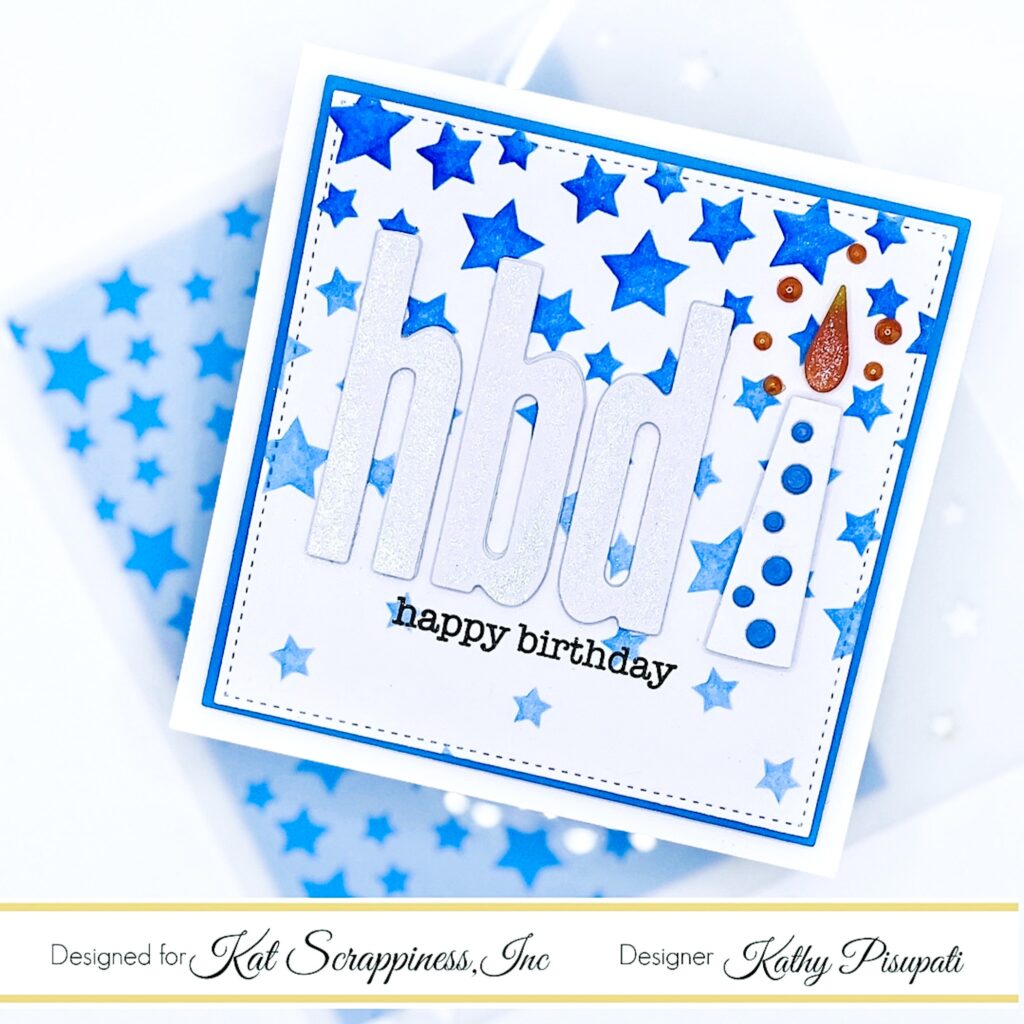
Good Morning! It is time for a new post on the Kat Scrappiness blog with the new Falling Stars Stencil and Birthday Essentials Die Set. It’s Kathy from the design team and I have to say I love this die set paired with the Condensed Alphabet sets from Kat Scrappiness, making cards couldn’t be easier! So let’s make a card!

Card Supplies
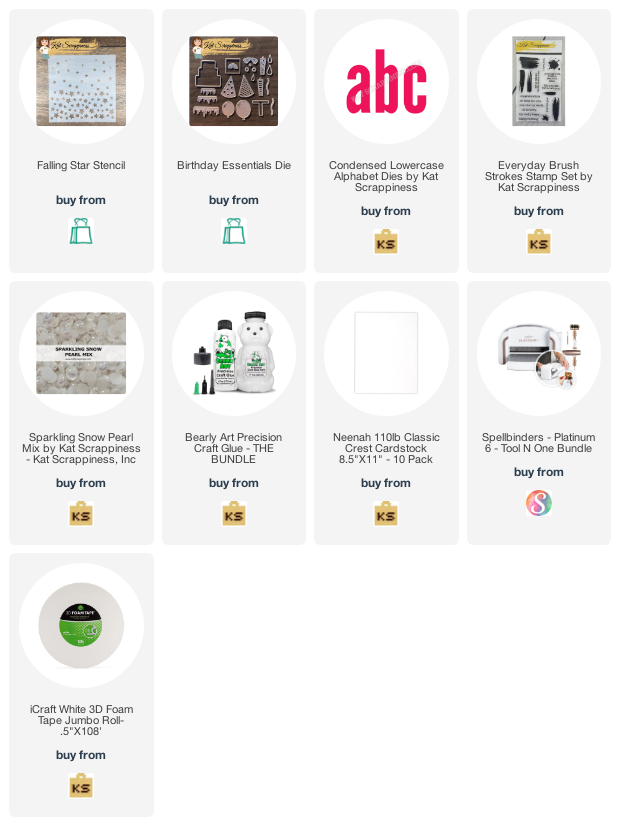
- Falling Stars Stencil
- Birthday Essentials
- Everyday Brushstrokes
- Condensed Alpha Lowercase
- Sparkling Snow Pearl Mix
- Neenah Classic Crest Solar White 110lb
- Colored card stock
- Die-cutting machine
- Liquid glue
- Foam Tape
Card Details
- Cut, score, and fold a card base from Neenah Classic Crest Solar White 110lb card stock. Mine measures 4.25″ x 4.25″.
- Cut your main card panel at 3.75″ x 3.75″, Cut a border panel an 1/8″ larger on both sides.
- Using the Falling stars stencil, choose your color of ink and stencil the background.
- With scraps of 110lb card stock use your Alpha Condensed Upper or Lowercase dies to cut H, B, and D. I cut each letter 4 times as I like the dimension. Glue them together and allow them to dry under an acrylic block or another weighted object.
- From the Birthday Essentials Kit Cut out the candle and the small flame.
- TIP-Color your flame and the inlaid dots on the candle with an alcohol marker. This saves your colored card stock for larger projects. I coordinated the candle with the color of the background.
- Using a sticky mat and a T-Square line up your letters and space them evenly. Once lined up, pick them up with a piece of low-tack tape.
- Using a stamping platform (or an acrylic block), lay down your die-cut letters and candle on the main stenciled panel, position the Happy Birthday sentiment from the Everyday Brushstrokes stamp set, and stamp. I added clear embossing powder and heat embossed the sentiment as well. (optional)
- Add strong liquid glue to your letters, and add them to the card.
- I added a shimmer pen to the letters.
- TIP-Don’t have the exactly right colored pearl gems? Use an alcohol marker and Kat Scrappiness Snow White Pearls to achieve that color. I used the same orange color I used on the flame of the candle.
- Glue stenciled panel to blue card stock.
- Add foam tape to the main panel and adhere to the card base.
- Glue down your pearls and your card is done!
I hope you enjoyed this card. Please take time to head to the Kat Scrappiness shop to see all of the new stencils released and so much more! Please drop a comment below if you have any questions. Have a fabulous day and go make a card!
No Comments