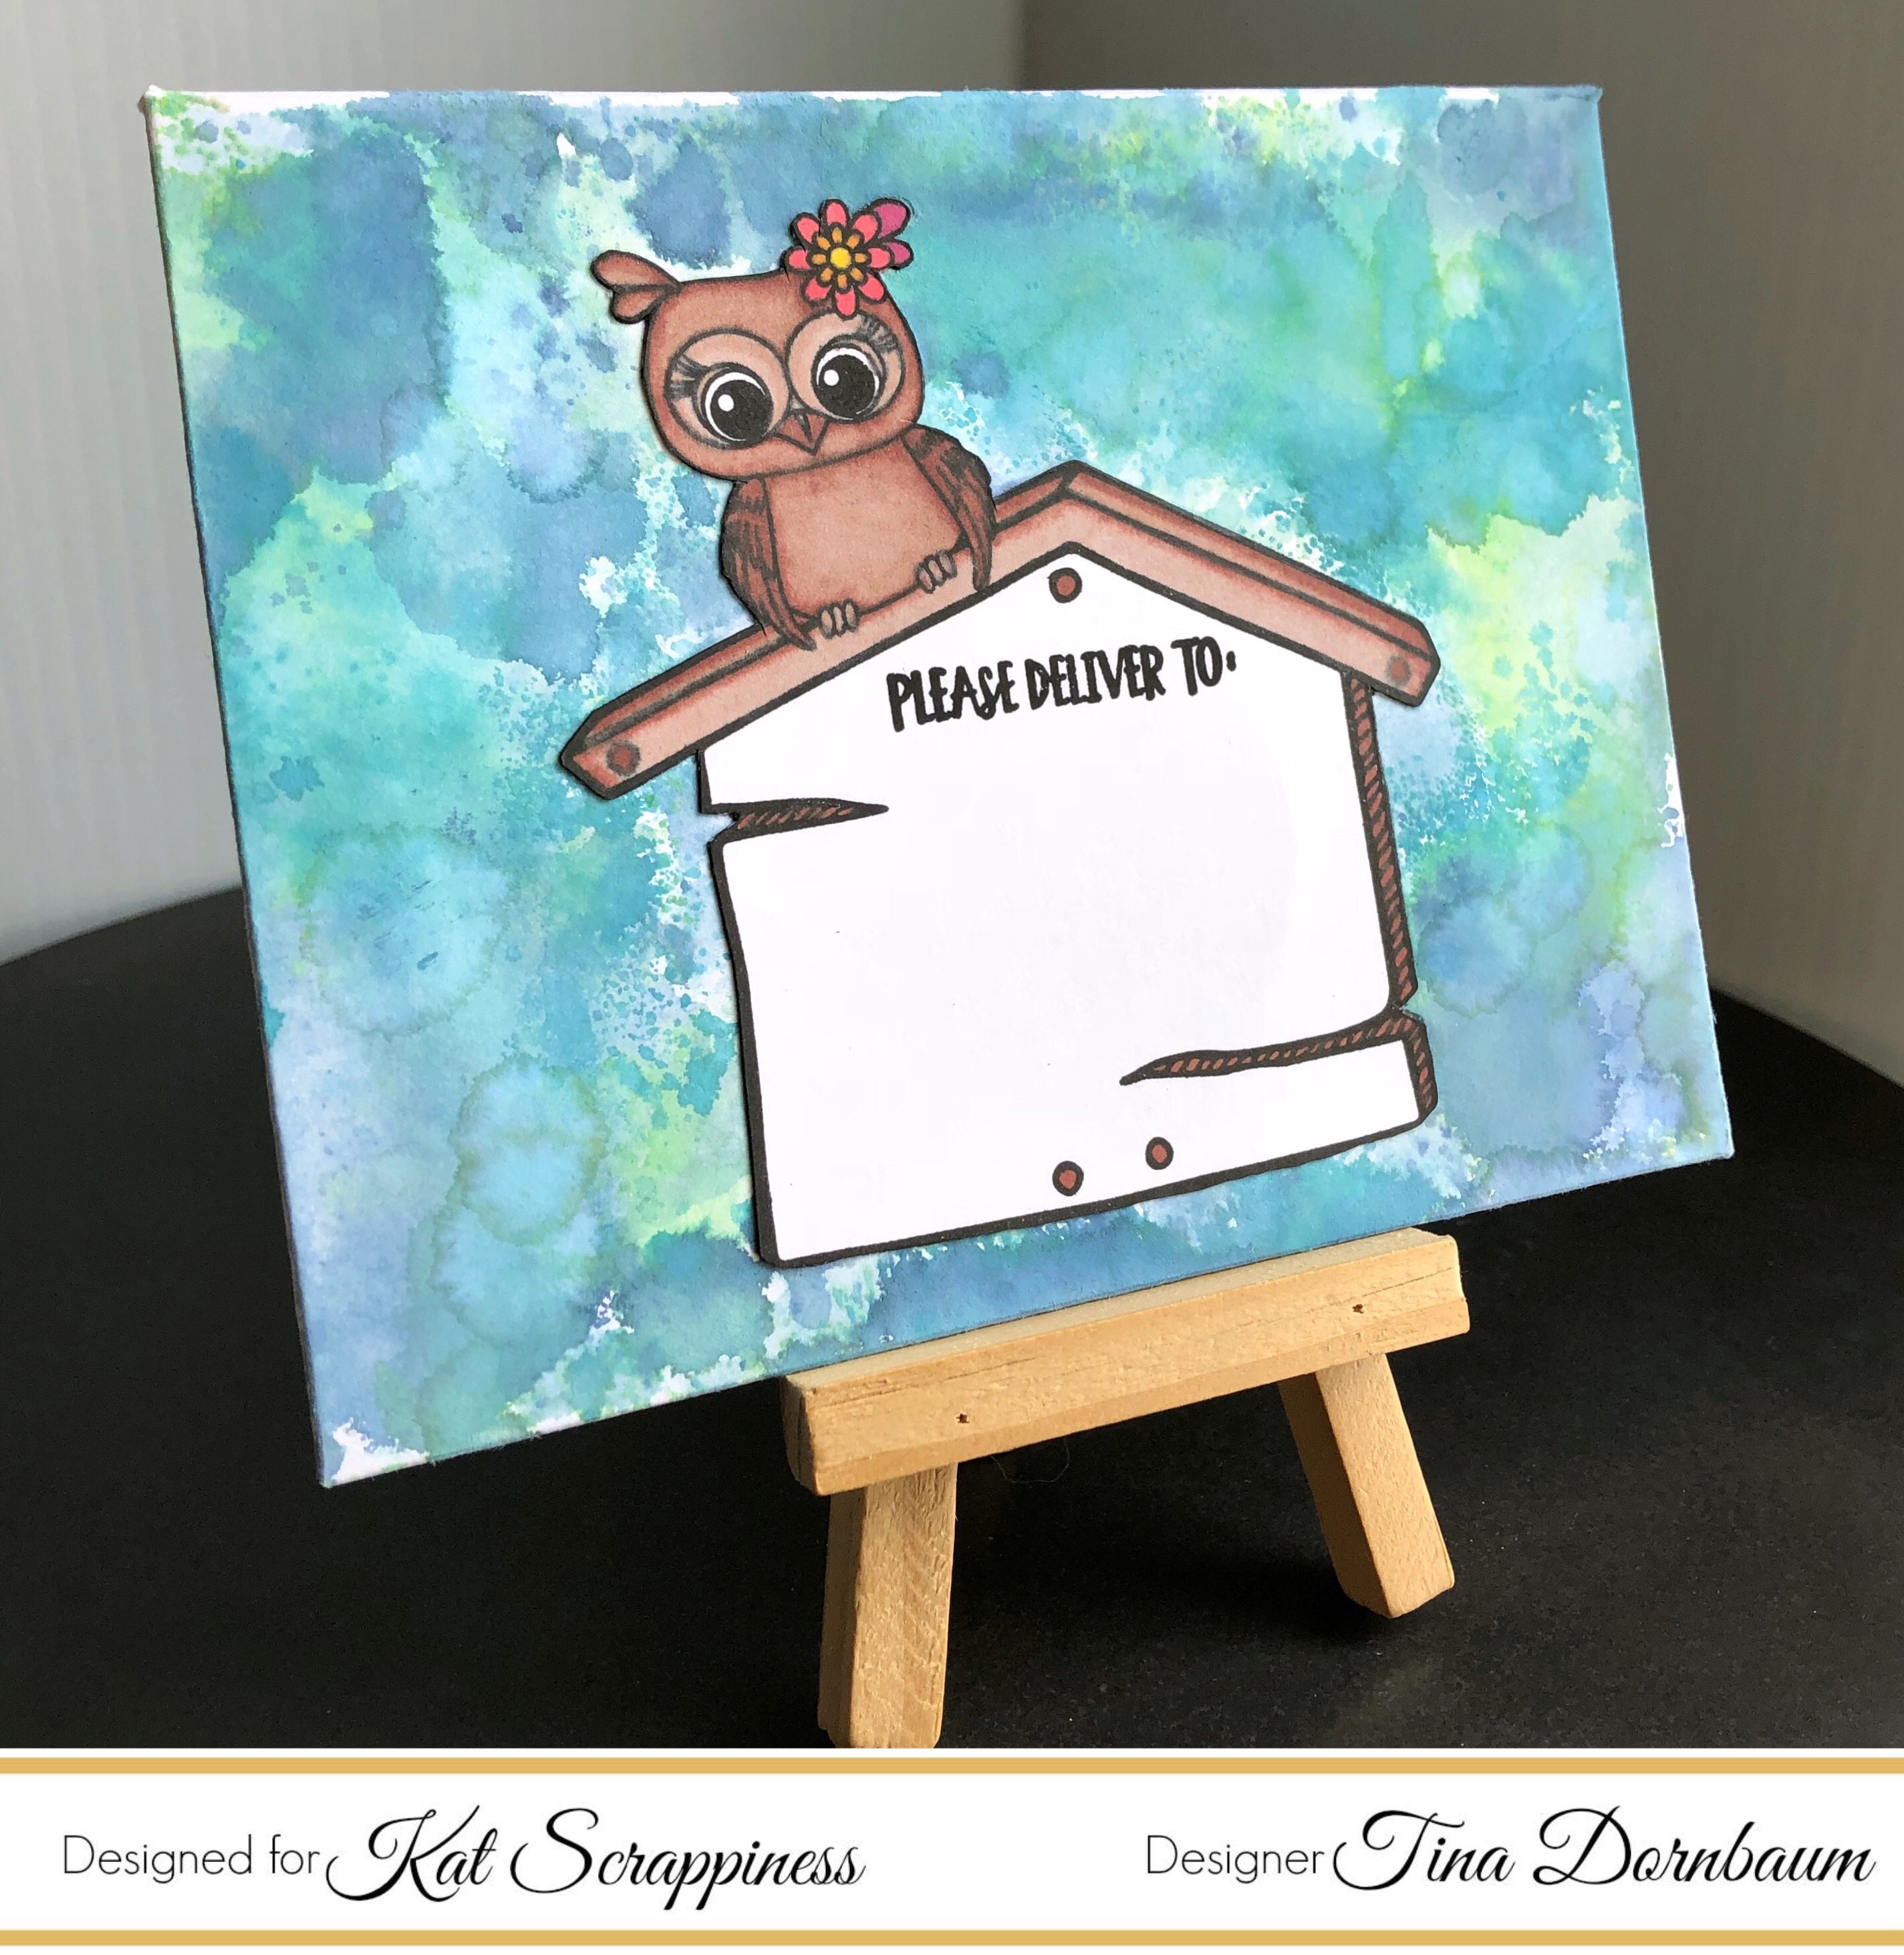
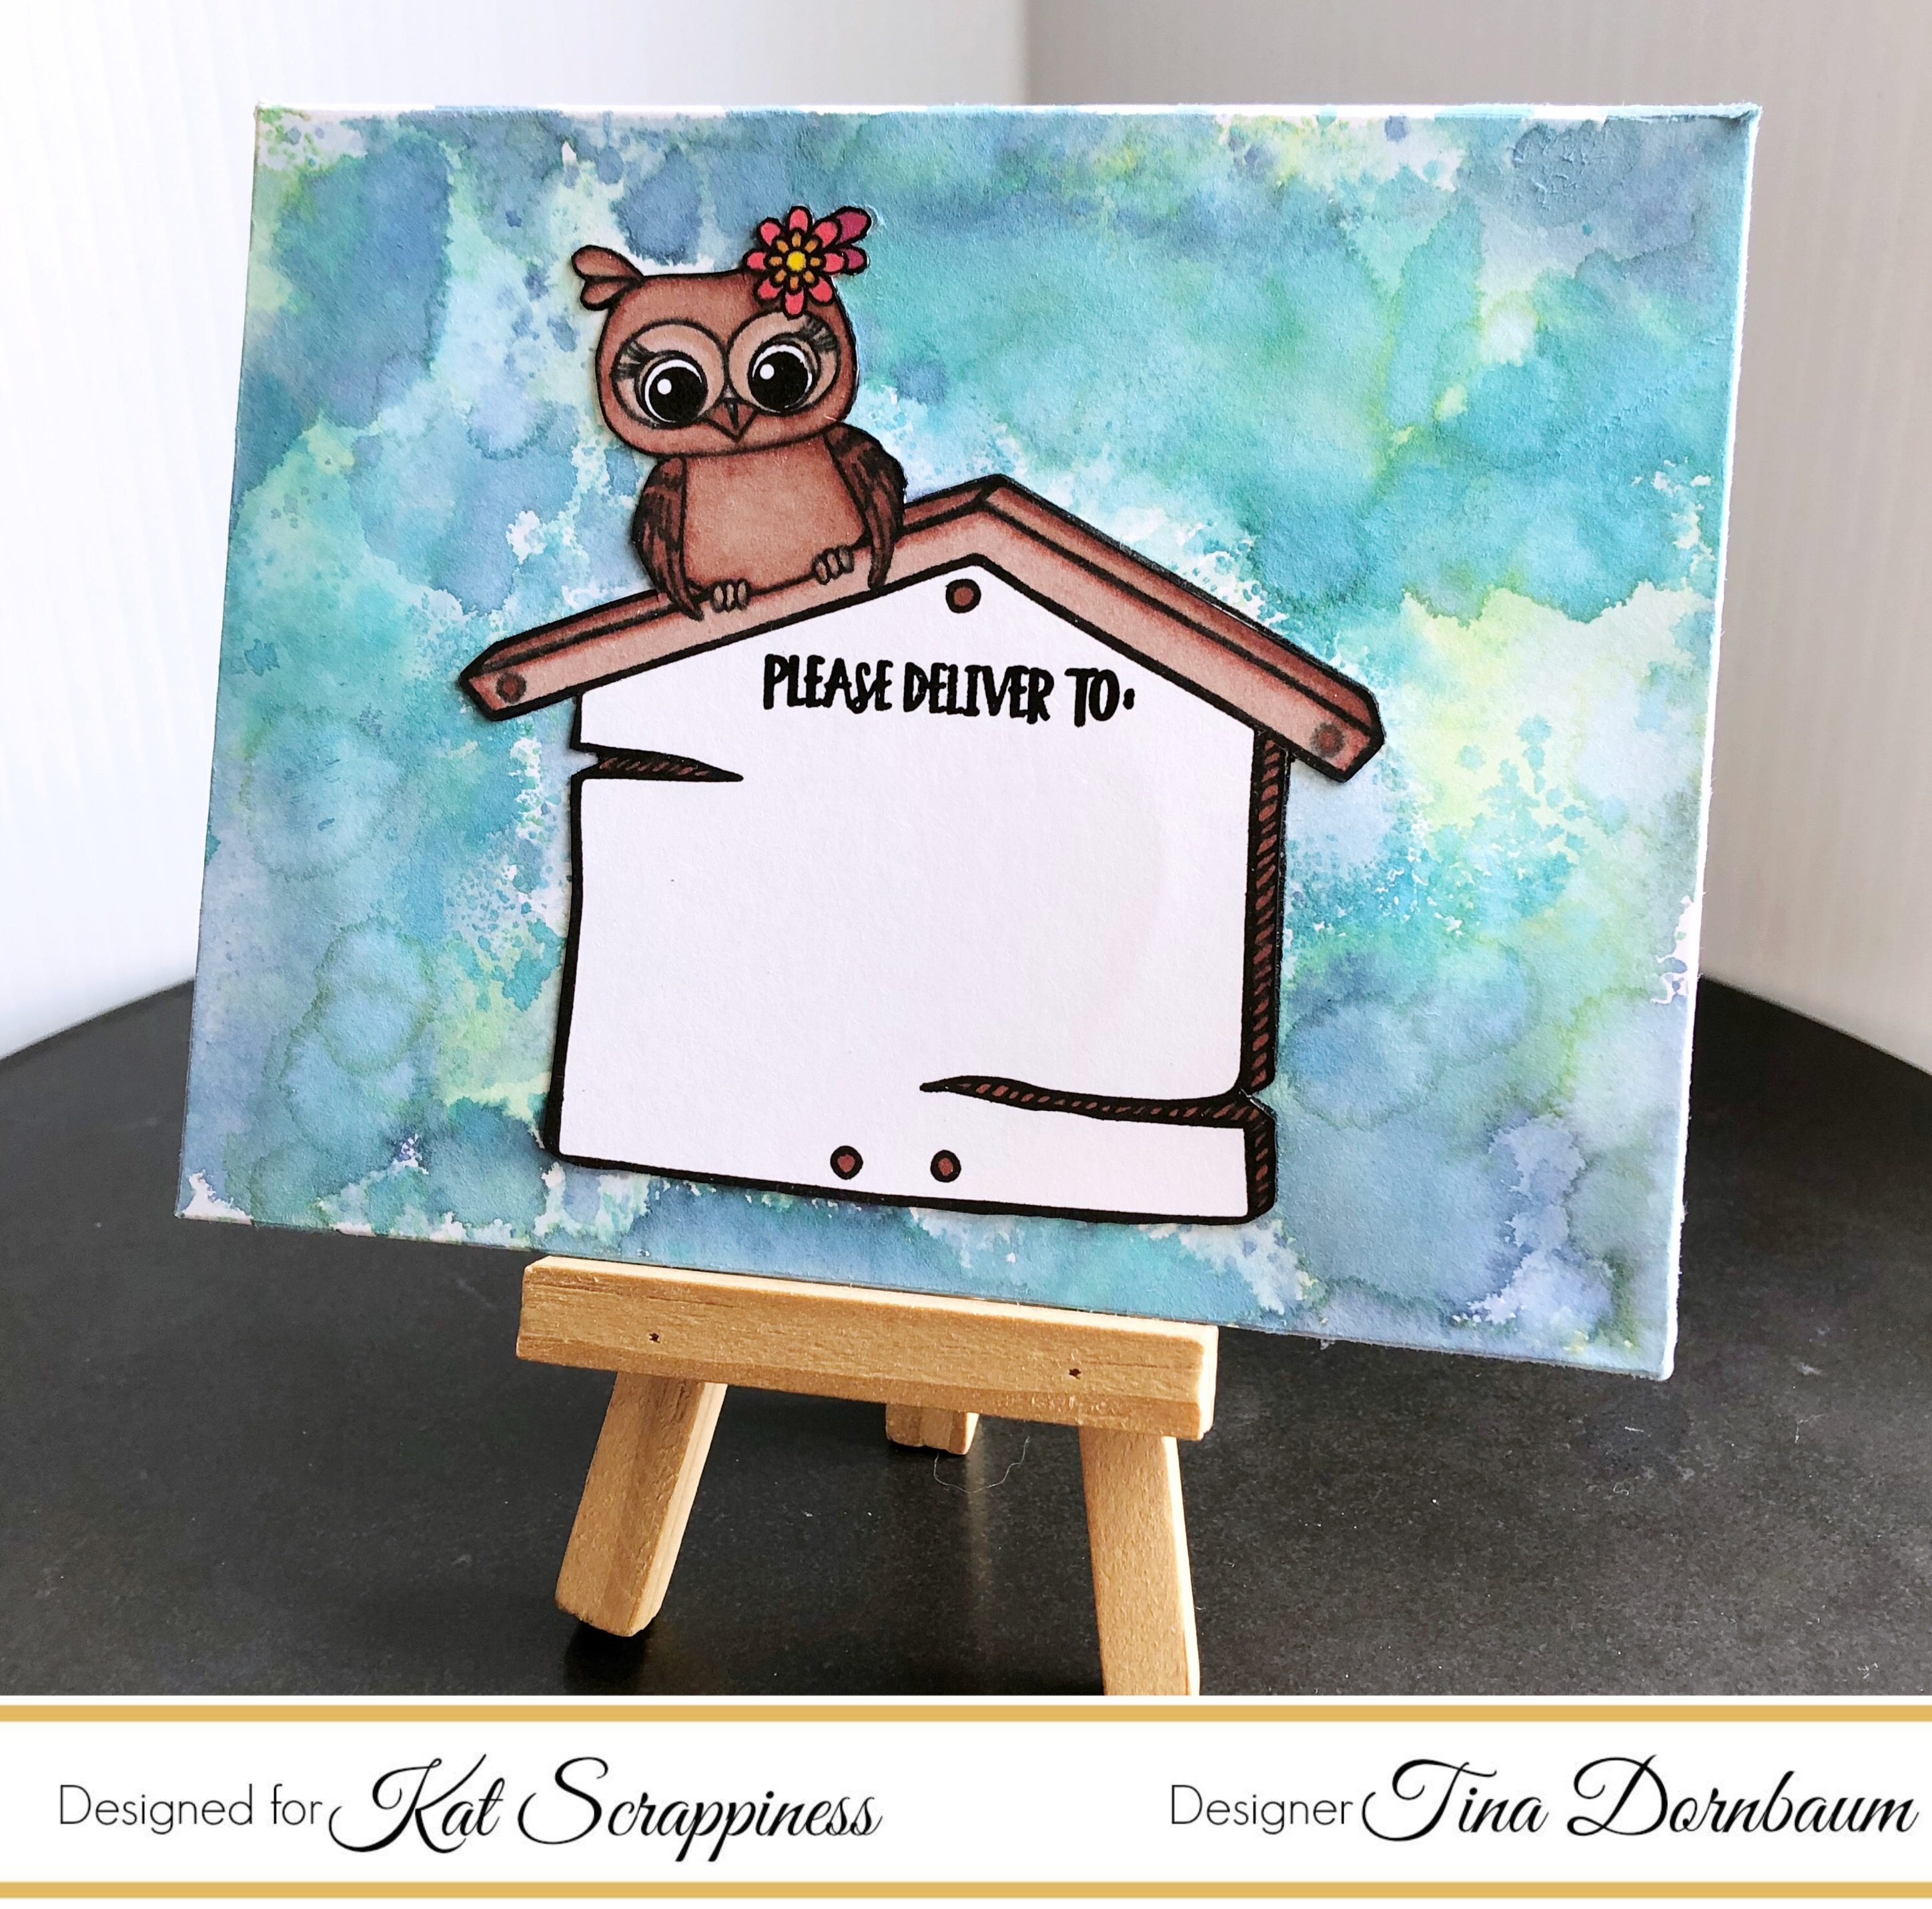
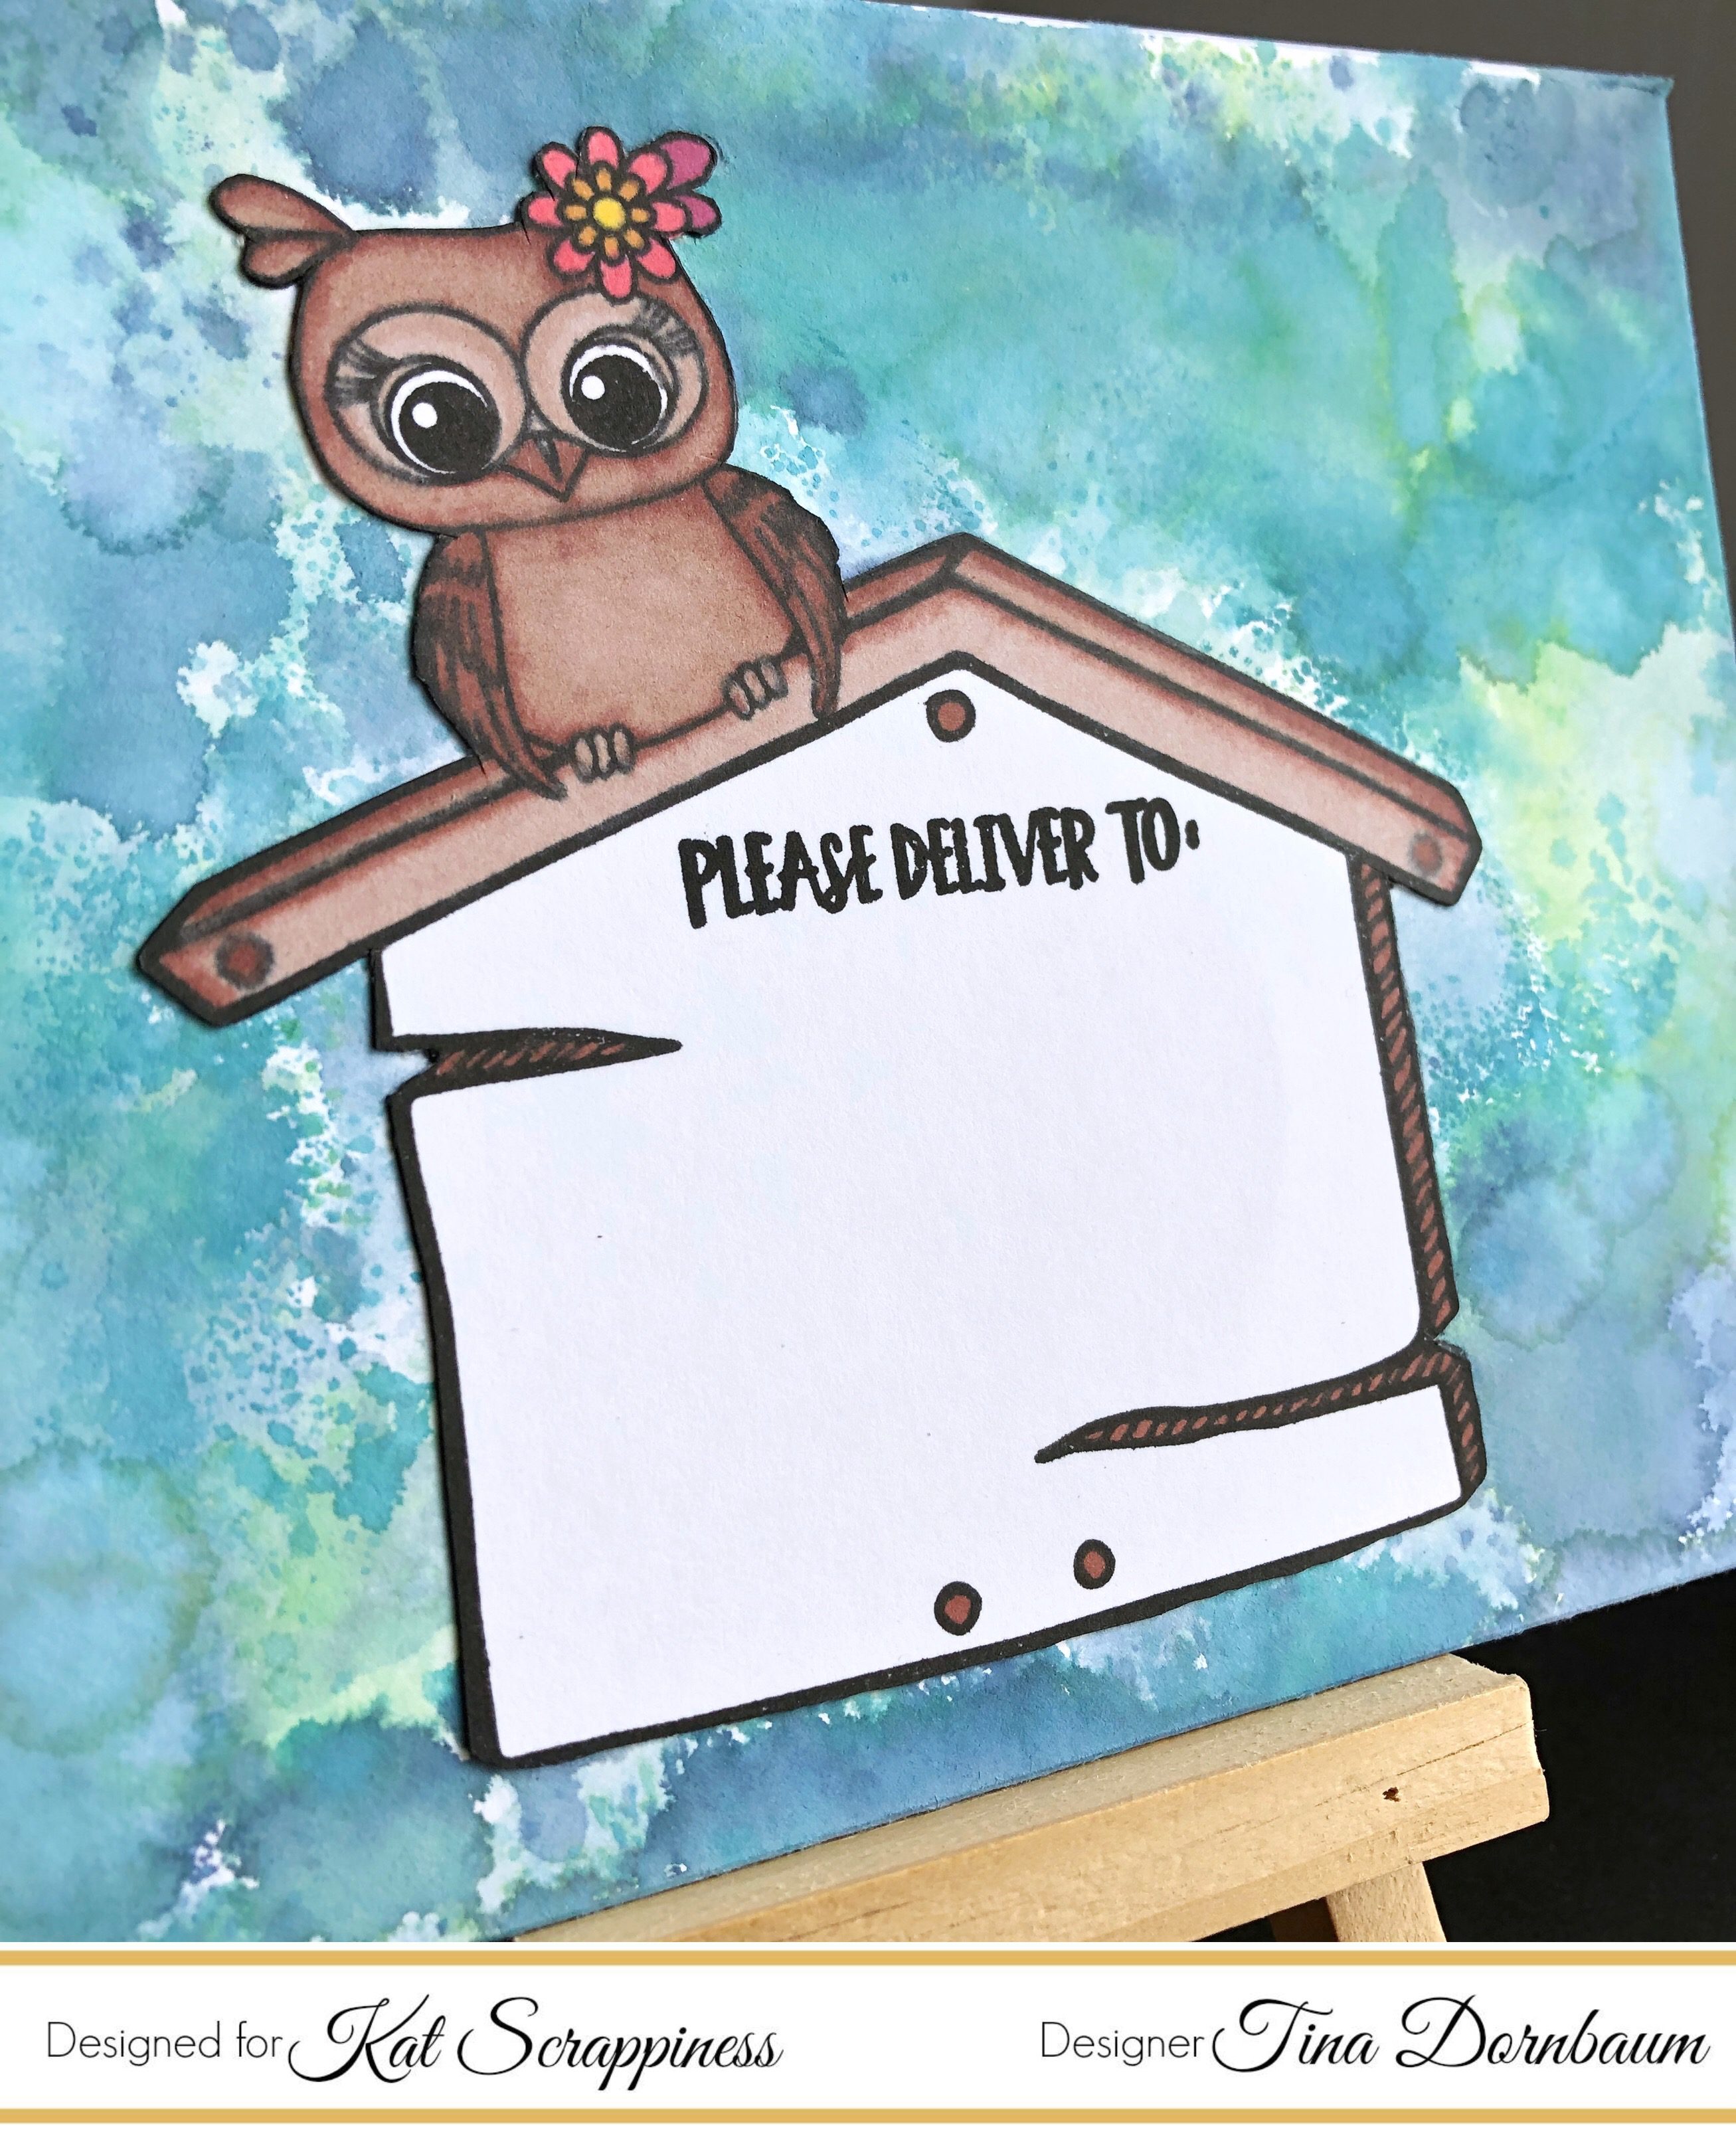
Hi Everyone, it’s Tina here today. I have a super fun Envelope Art to share with you. Kat Scrappiness has made it so simple to decorate our envelopes with the Owl Envelope Art and Giraffe Envelope Art Stamps Set. Below you will find the easy steps to replicate this Envelope Art.
Step 1 – Use a heavy weight envelope or create one yourself using the We R Memory Keepers 1-2-3 Punch Board.
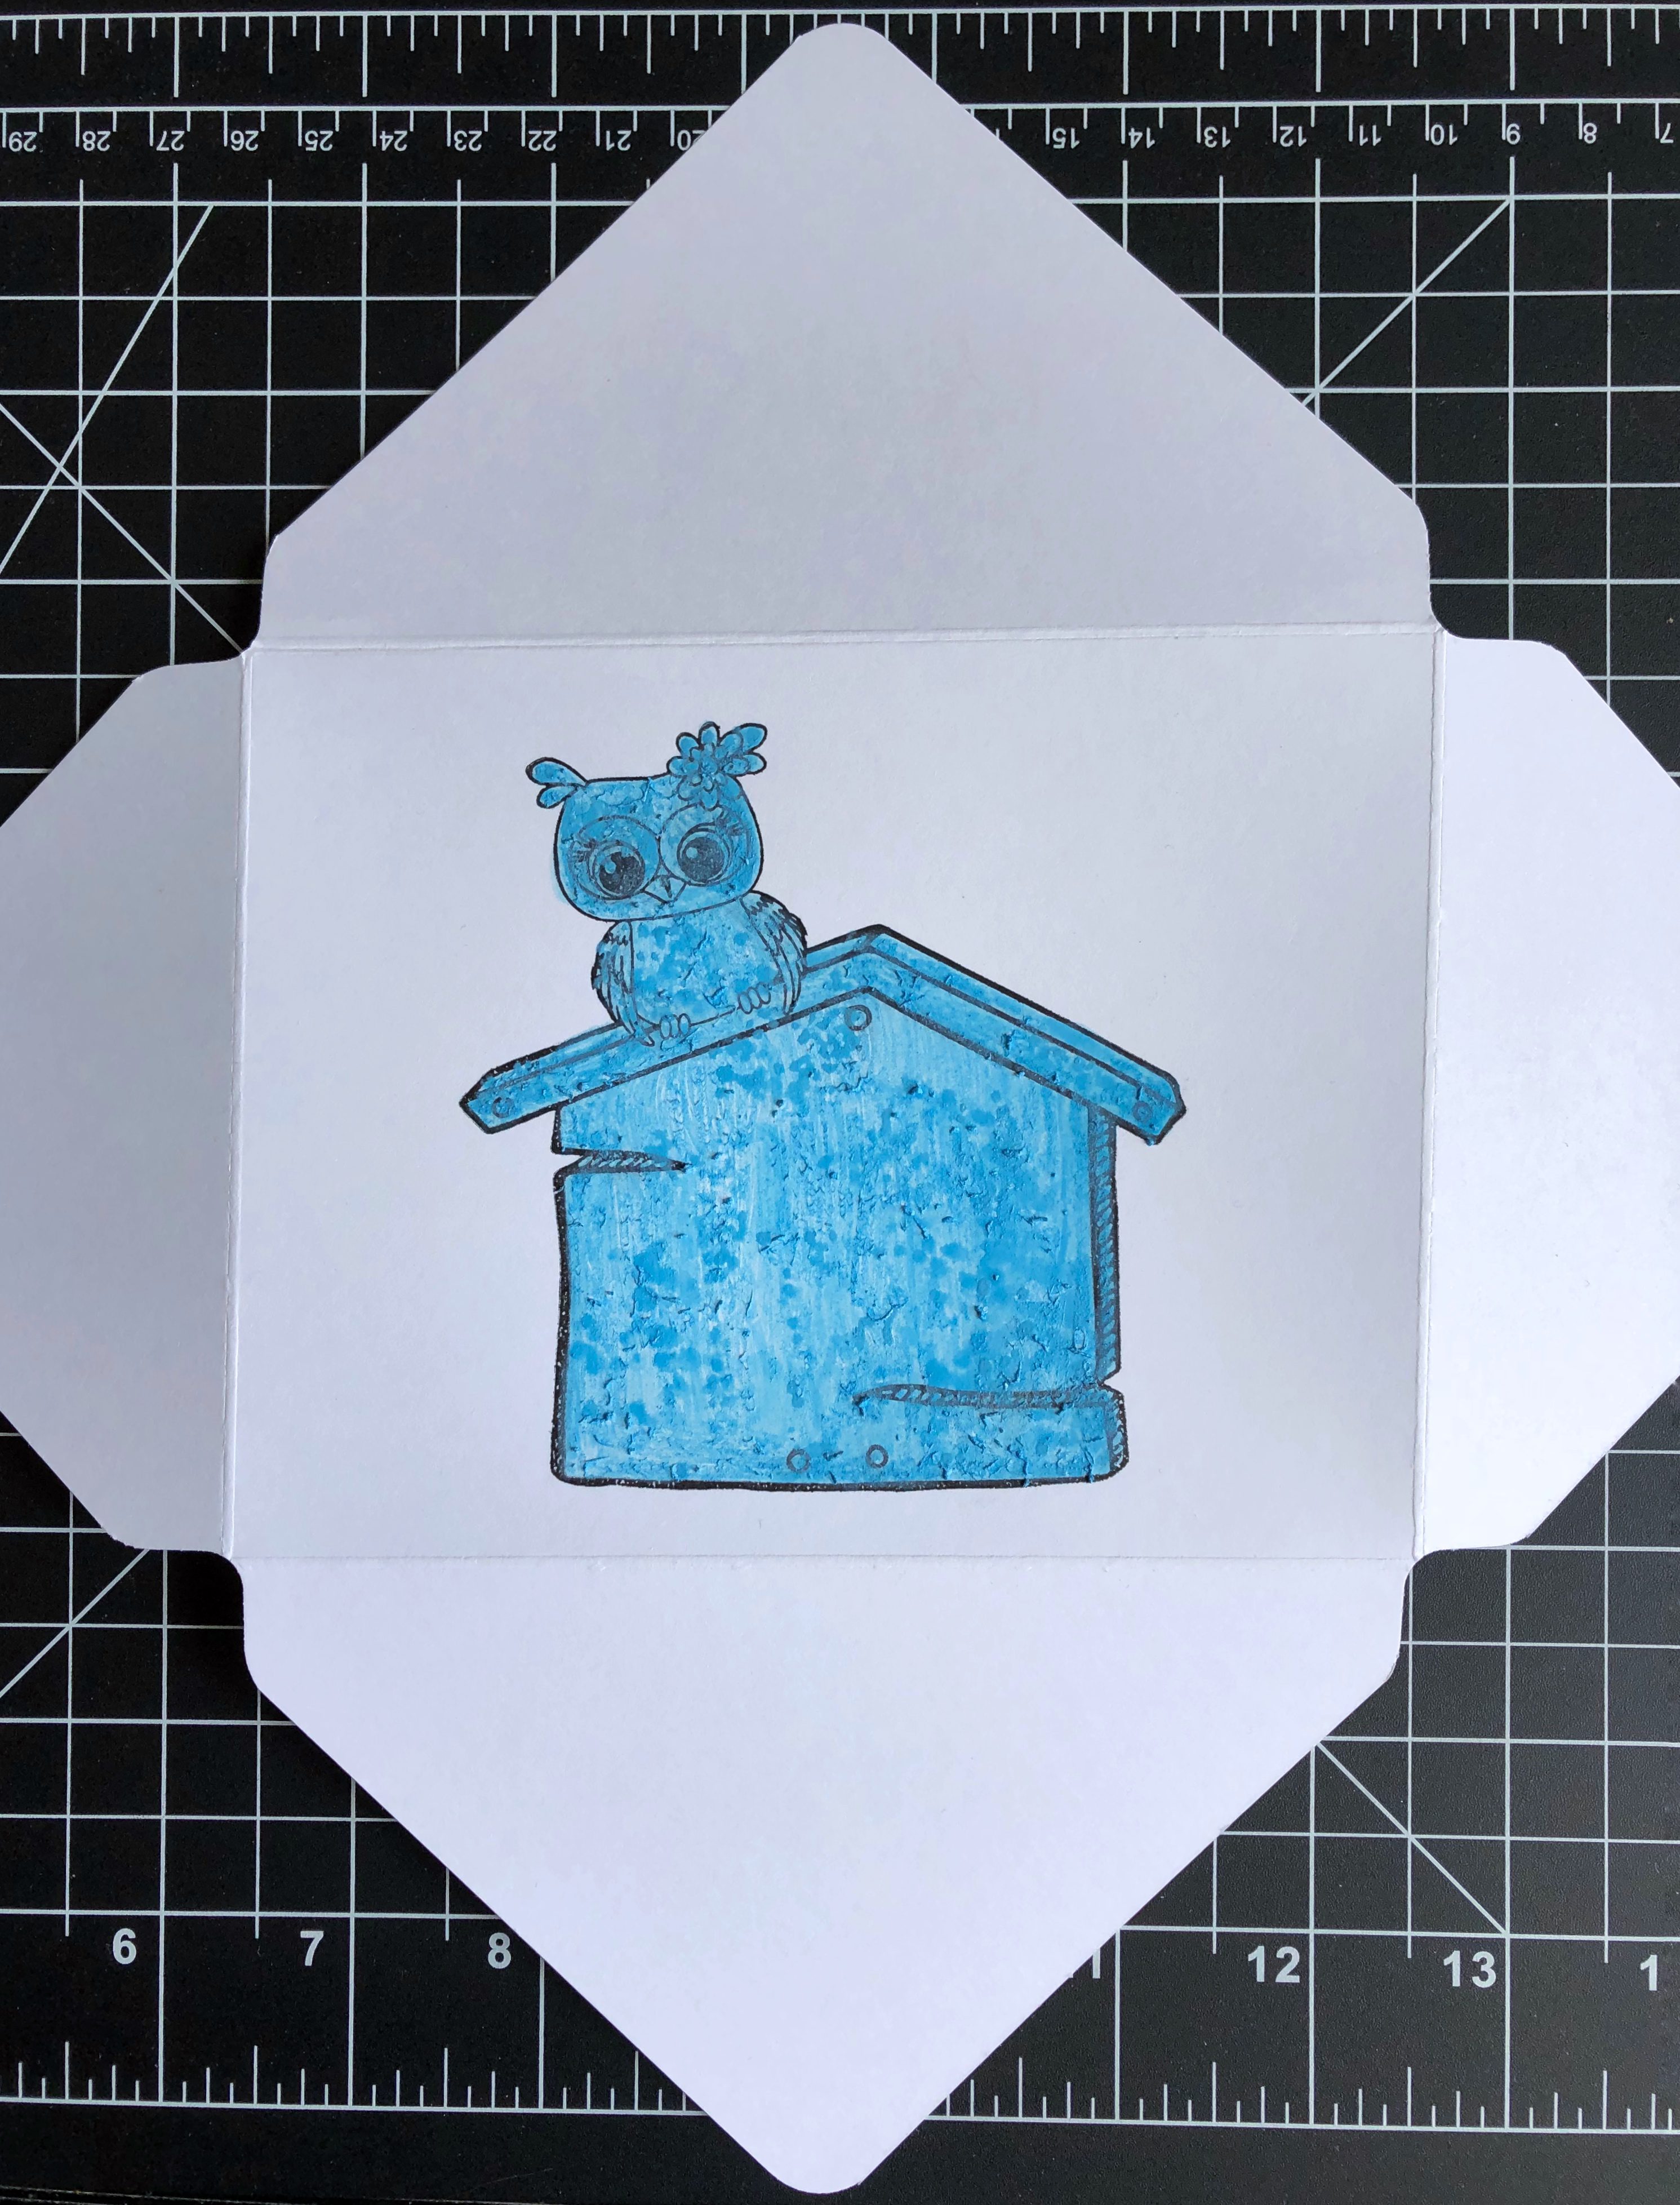
Step 2 – Stamp Owl Envelope Art on the front of envelope using Versafine Ink.
Step 3 – Mask the image either with Masking Liquid (you will need to let this dry before proceeding to the next step) or stamp image on large Post-It, trim it and place over the image on the envelope. I used Masking Liquid.
Step 4 – Carefully create your Distress Oxide background. To create background apply the colors on a kraft mat, spray with water, dip the top part of envelope into the oxidized inks, dry using a heat tool. Repeat the process until you reach your desired effect.
Step 5 – Carefully remove the masking.
Step 6 – Color the image using any color medium of your choice. I used Winsor & Newton Promarkers for easy blending.
Step 7 – Stamp sentiment using Versafine Ink.
A reminder that Kat Scrappiness has a Challenge every month so be sure to check it out here. Every month there is a chance to win a $25.00 gift card. To enter, submit a photo of your project by clicking on the “Add Your Link” button. A winner is randomly picked at the end of each month.
To receive 10% off any order at Kat Scrappiness use code TINA10.
Below is a link for all products used for this project.
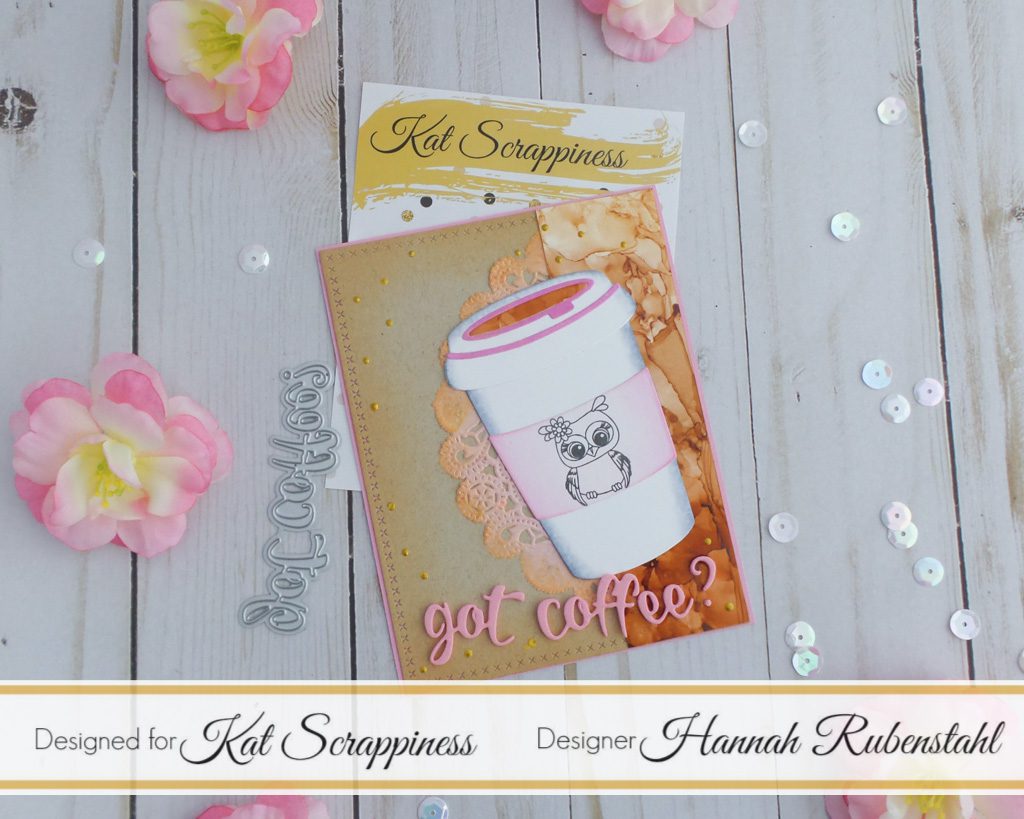
Hi there! Hannah, here, with another Kat Scrappiness project!
Kat seems to have a huge love of coffee. She and her design team participate in several “coffee” themed blog hops throughout the year it seems, and she has a whole section in her shop dedicated to Coffee Themed Products.
Recently she came up with two brand new products in her line that were both coffee related. Her “Got Coffee” die and her new Layered Coffee Cup die are two of the newest Kat Scrappiness brand products in her shop. Today’s card is using both of those, as well as a stamp from another new KS product: Owl Envelope Art stamp set.
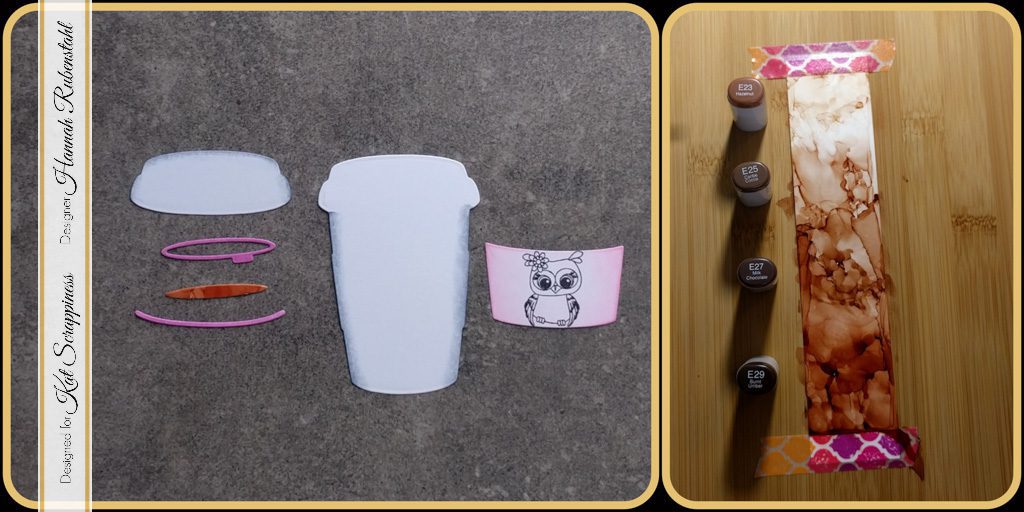
First, I die cut the coffee cup bits out of Neenah Solar White cardstock. For the center portion of the cup, where a logo might go, I lightly dusted it all over with Altenew’s Rose Quartz and the edges with Altenew’s Puffy Heart. In the center of this, I stamped the small owl from the Owl Envelope Art stamp set. I also covered some of the small portions of the lid with the same Altenew inks.
Next, using some light grey Copic markers I created a curved or shadowed effect. Basic Copic coloring rules applied here, sticking with either a W, C, or N and then using alternating colors. I relied heavily on the “0” to ensure a smooth transition to white.
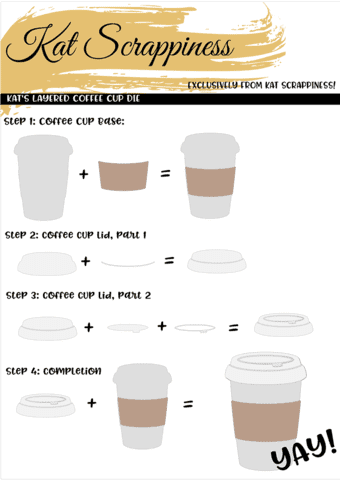
Using a liquid adhesive, Ranger Multi Medium Matte, I layered most of my coffee cut bits and adhered them together. If you are confused as to how to go about building the cup, there is a fabulous guide Kat has put together:
Then came the fun part! Playing with Yupo paper and Copic markers! You can see my video here:
Taking some Neenah Desert Storm paper I cut out the largest rectangle from the Cross Stitched Rectangle dies. Along the edges gently dusted the beautiful Delicata Golden Glitz. Using the same Delicata ink I performed the same technique on a light pink doily I had.
Using pink fun foam I cut out the “got coffee” sentiment. As it turned out the pink in the foam was pretty much the same pink in the doily and a complimentary one to the other pinks in the cup, therefore I left the foam naked and didn’t cover it with adhesive and paper.
I trimmed my Yupo paper down to an A2 length and die cut out the inner portion of my cup. This die cut portion was a total mistake on my part, I didn’t have the plans above when I was crafting the card. However, I like how it tied the cup in with the background, created movement in my card, and looked like coffee!
I layered everything on top of a light pink A2 card front using my favorite dot runner and Ranger Multi Medium Matte, then finished off the look by sparkling gold dots everywhere.
I rather like the final look of this card! If you like it and are in need of any of the following products please feel free to use my discount code HANNAH10 at checkout!
Are you participating in our monthly challenges? Each month we have a new challenge whose theme is picked out from our Design Team members. You create your project, based on the theme, and making sure you use at least one Kat Scrappiness product and you could win a $25 store discount! This month’s link can be found above, at the top of this page, or here!
This has been Hannah Rubenstahl, from Fanciful Spaces, hoping you have an epic crafting day.
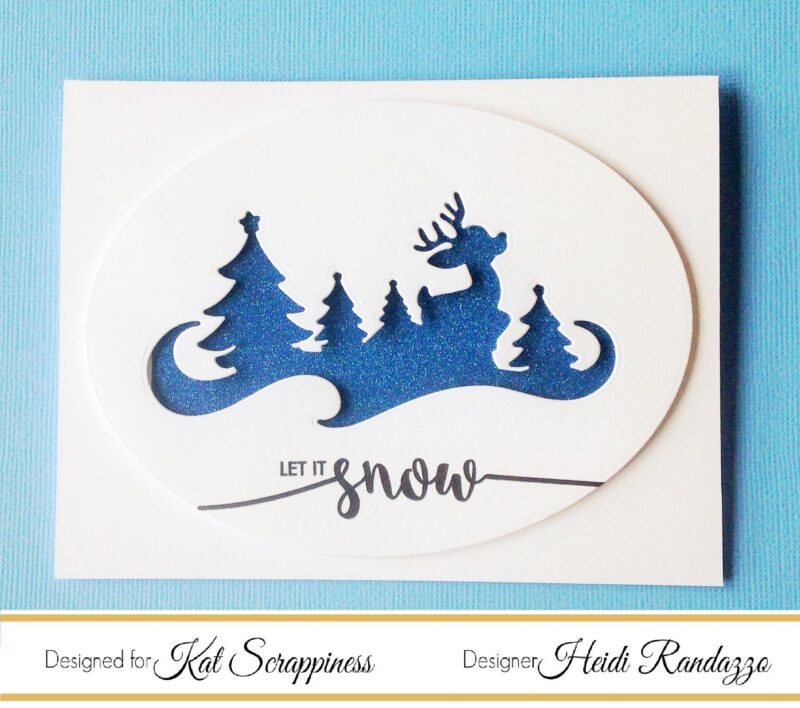
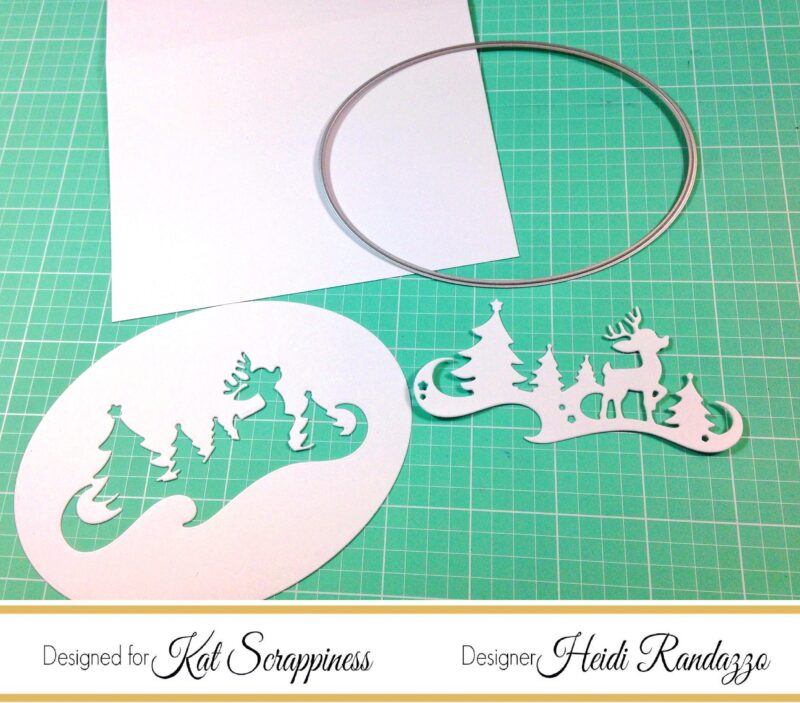
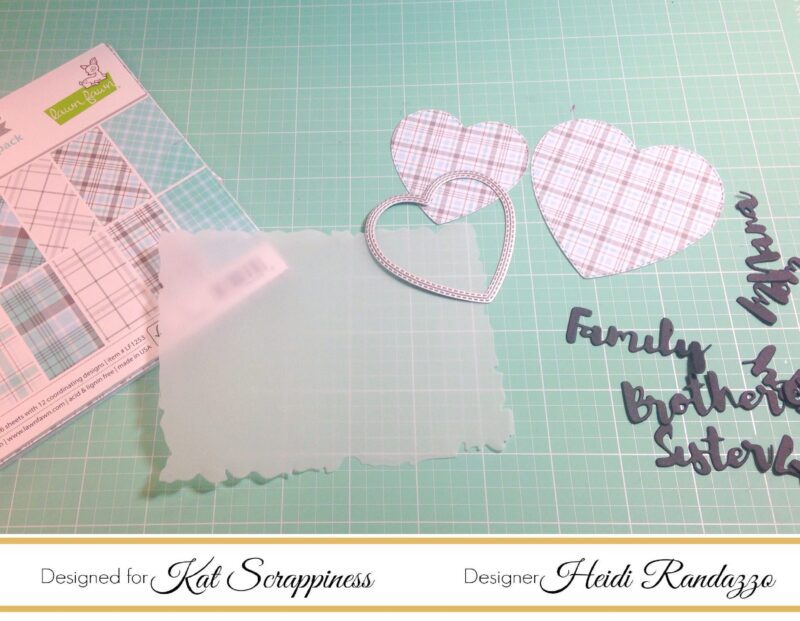
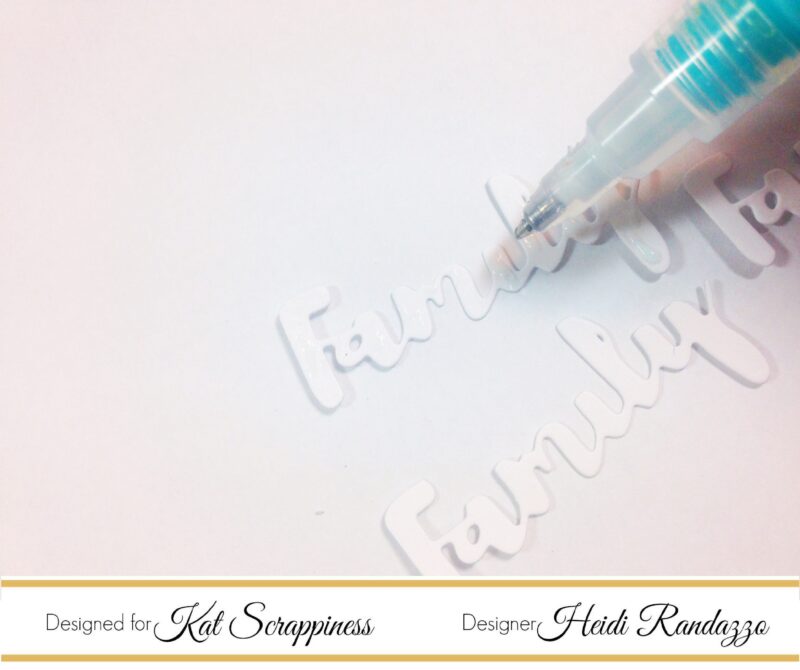
Hi Everyone! It’s Heidi and today is all about die cuts. I’m a clean and simple card maker and I love my die cuts. I think it’s something about the crisp and clean look and the ability to do simple layers. They just make me happy! Today, I have a couple of cards featuring the Kat Scrappiness brand dies.
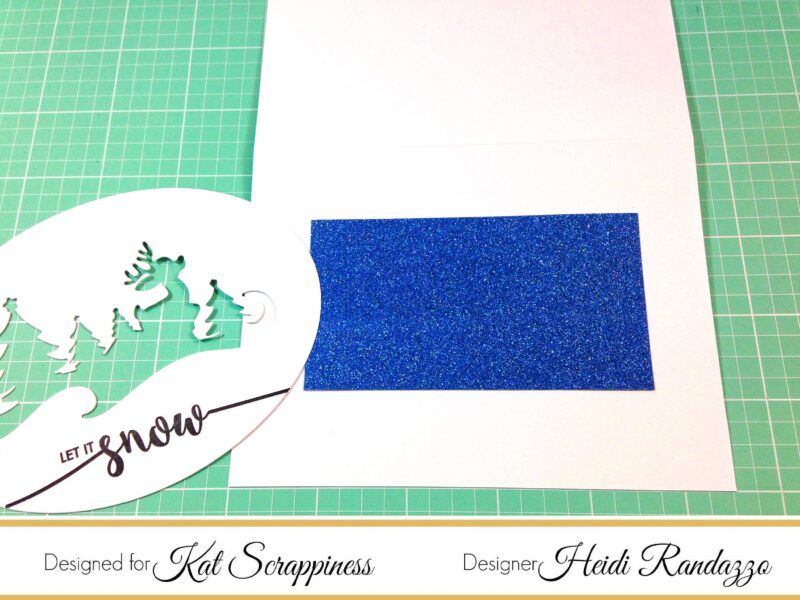
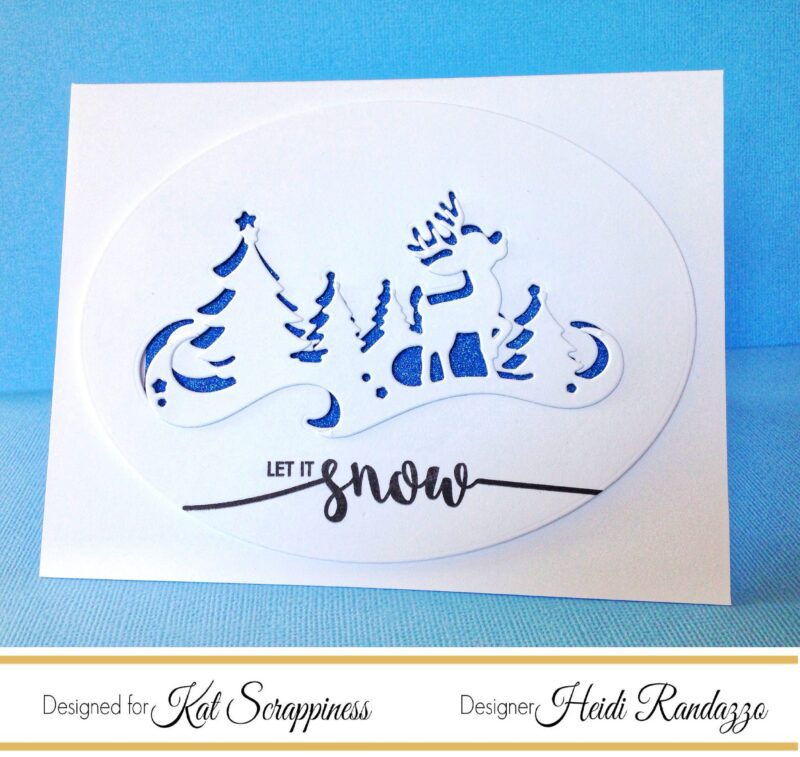
I started off by cutting an oval out of white cardstock then cutting the reindeer die into that. I’m saving the die cut portion for another version of the project.
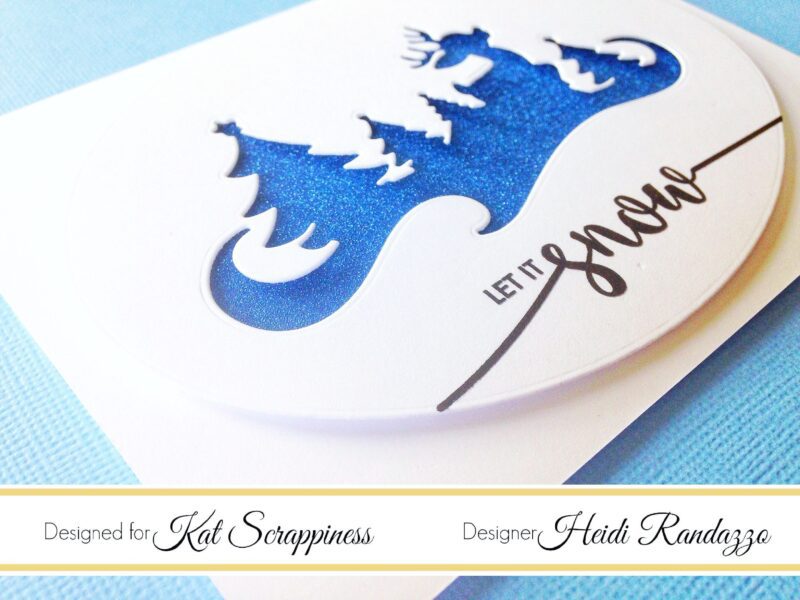
I adhered a rectangle of blue glitter paper to go behind the reindeer oval. I wanted to create a simple silhouette that “pops”. I thought about a shaker, but I thought the crisp blue really highlighted the die.
After stamping a sentiment from Avery Elle’s Snowflakes stamp set, I adhered the oval over the glitter paper with foam tape.
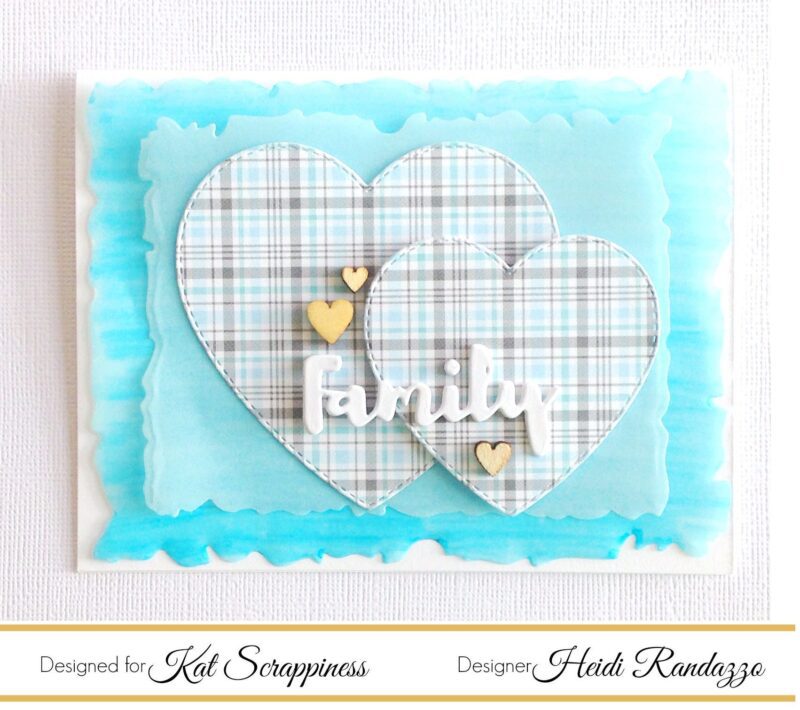
Here is an alternate version of the card where I offset the positive image over the die cut opening with foam tape.
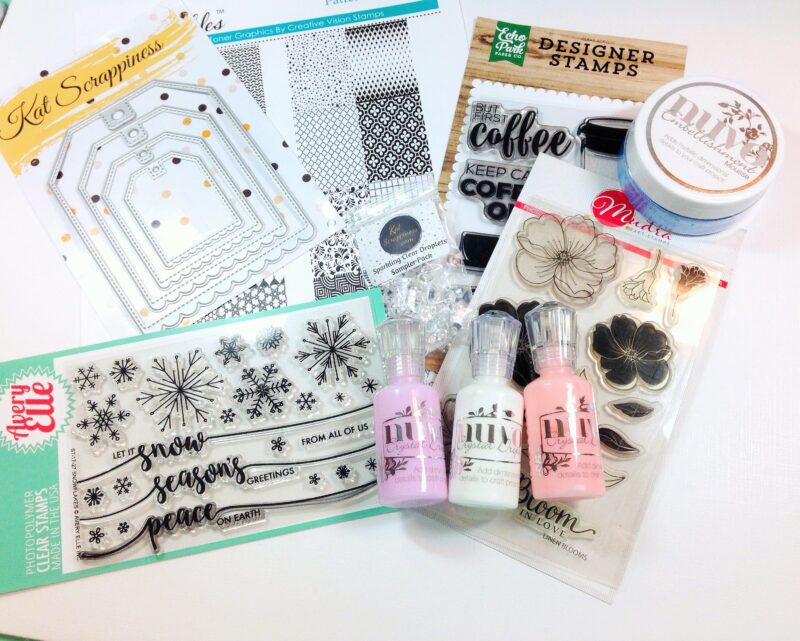
Since September, I have had the pleasure of being part of the Kat Scrappiness design team–I can’t believe how fast the time has gone! I wanted to share with you my top ten favorite items from the Kat Scrappiness shop. I love Kat’s shop, because not only does she have her own brand of awesome stamps, dies and sequins, but she carries other companies products as well. Her “new items” section is regularly updated with all the latest products from Tonic, Hero Arts, Avery Elle, Lawn Fawn and much more. Here are some of my favorites–in no particular order because I love and use them all! Be sure to click on the links if you want to see them in the shop.
Using a Minc machine or laminator, you can create foiled sentiments or backgrounds easily using this printed toner paper. In this post, I show a quick video demonstration of how to create a beautiful background using this product.
My go-to favorite for creating my own “enamel” dots without the little “peaks” you can sometimes get. The variety of colors both soft and bright make me want to collect them all!
I love using floral stamps on a lot of my projects. Mudra has some gorgeous ones and the Linen Blooms is my favorite. I’ve used this stamp set on two projects already. Here and here. I like that the set includes both solid and open flowers for colored inks or Copic coloring. Plus, with a sentiment included it’s a perfect “starter set” for someone just getting into stamping.
I’m a huge fan of enamel dots. I like these clear dots that come in various sizes for when you don’t want the color, but you just want a little texture to highlight a sentiment or focal point. Especially flowers!
Another great stamp set that offers variety. Different sizes of intricate snowflakes along with some nice sentiments will get you through an entire winter season.
It’s fun to make these types of cards and Kat actually has a section dedicated to coffee. Tons of cute stamps as well as coordinating sequins. My favorite is But First Coffee from Echo Park–lots of great sentiments.
Three sizes offer so many options. I love the scalloped and stitched detail along the bottom of these tags as well as the largest one that is perfect for the front of a gift bag.
A few other things to note:
There is a clearance sale going on now, through the 15th on all Christmas-themed products in the Kat Scrappiness shop. Use the coupon code 2017CLEARANCE to receive 30% off on these products.
Also, Kat Scrappiness is looking for a few talented designers to join the team for 1 year starting in March. You can find all the details here on how to apply. The deadline is January 31, 2018 PST at Midnight.
Finally, please join us for this month’s January challenge. The theme this month is CLEAN AND SIMPLE–my favorite! Find all the info here on how to join in the fun. A $25 gift certificate to the Kat Scrappiness shop is the prize. We can’t wait to see your projects!
Thanks so much for joining me today! All of the products listed above are available for purchase over at the Kat Scrappiness shop.